|
|
| (11 intermediate revisions by 8 users not shown) |
| Line 1: |
Line 1: |
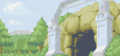
| {{Infobox location | | {{Infobox location |
| |image=Victory Road PE.png | | |image=Victory Road PE.png |
| |image_size=256
| |
| |type=cave | | |type=cave |
| |mapdesc=A tunnel situated on <sc>Route</sc> 23. It earned its name because it must be traveled by all <sc>Trainers</sc> aiming for the top.{{sup/3|FRLG}}<br/>A road that tests Trainers aiming at the Pokémon League.{{sup/4|HGSS}}<br>A cave that tests Trainers aiming to reach the Pokémon League at the summit.{{sup/7|PE}} | | |mapdesc=A tunnel situated on <sc>Route</sc> 23. It earned its name because it must be traveled by all <sc>Trainers</sc> aiming for the top.{{sup/3|FRLG}}<br/>A road that tests Trainers aiming at the Pokémon League.{{sup/4|HGSS}}<br>A cave that tests Trainers aiming to reach the Pokémon League at the summit.{{sup/7|PE}} |
| Line 14: |
Line 13: |
| '''Victory Road''' (Japanese: '''チャンピオンロード''' ''Champion Road'') is a tunnel situated on {{rt|23|Kanto}}. It earned its name because it must be traveled by all {{pkmn|Trainer}}s aiming for the top. Its other end opens up in [[Indigo Plateau]] and the [[Pokémon League]]. Only Trainers with the eight [[Kanto]] or [[Johto]] [[Badge]]s are allowed to enter it. | | '''Victory Road''' (Japanese: '''チャンピオンロード''' ''Champion Road'') is a tunnel situated on {{rt|23|Kanto}}. It earned its name because it must be traveled by all {{pkmn|Trainer}}s aiming for the top. Its other end opens up in [[Indigo Plateau]] and the [[Pokémon League]]. Only Trainers with the eight [[Kanto]] or [[Johto]] [[Badge]]s are allowed to enter it. |
|
| |
|
| ==In the games== | | ==Role== |
| Victory Road has three floors. To reach the other end of the tunnel in [[Generation I|Generations I]], {{gen|III}}, {{gen|IV}}, and {{gen|VII}}, a series of puzzles which involve using {{m|Strength}}{{sup/1}}{{sup/3|FRLG}}{{sup/4|HGSS}} or [[Secret Technique|Strong Push]]{{sup/7|PE}} to move [[Movable boulder|boulders]] need to be solved. | | Victory Road has three floors. To reach the other end of the tunnel in [[Generation I|Generations I]], {{gen|III}}, {{gen|IV}}, and {{gen|VII}}, a series of puzzles which involve using {{m|Strength}}{{sup/1}}{{sup/3|FRLG}}{{sup/4|HGSS}} or [[Secret Technique|Strong Push]]{{sup/7|PE}} to move [[Movable boulder|boulders]] need to be solved. |
|
| |
|
| In Generation I and [[Pokémon: Let's Go, Pikachu! and Let's Go, Eevee!]], Victory Road is where the [[Legendary Pokémon]] {{p|Moltres}} can be found. In {{game|FireRed and LeafGreen|s}}, it is instead found at [[One Island]]'s [[Mt. Ember]] and is subsequently found in [[Mt. Silver]] in {{game|HeartGold and SoulSilver|s}}. | | In Generation I and [[Pokémon: Let's Go, Pikachu! and Let's Go, Eevee!]], Victory Road is where the [[Legendary Pokémon]] {{p|Moltres}} can be found. In {{game|FireRed and LeafGreen|s}}, it is instead found at [[One Island]]'s [[Mt. Ember]] and is found in [[Mt. Silver Cave]] in {{game|HeartGold and SoulSilver|s}}. |
|
| |
|
| A [[Move Tutor]] at the very end of Victory Road in Pokémon FireRed and LeafGreen offers to teach a Pokémon the [[move]] {{m|Double-Edge}}. | | A [[Move Tutor]] at the very end of Victory Road in Pokémon FireRed and LeafGreen offers to teach a Pokémon the [[move]] {{m|Double-Edge}}. |
| Line 29: |
Line 28: |
| In Pokémon HeartGold and SoulSilver, after entering the [[Hall of Fame]] and boarding the [[S.S. Aqua]], the {{pkmn|battle}} music in Victory Road (as well as in the [[Tohjo Falls]], {{rt|26|Kanto|Routes 26}}, {{rtn|27|Kanto}}, and {{rtn|28|Kanto}}) changes from the Johto style to the Kanto style. This change was not present in Generation II. | | In Pokémon HeartGold and SoulSilver, after entering the [[Hall of Fame]] and boarding the [[S.S. Aqua]], the {{pkmn|battle}} music in Victory Road (as well as in the [[Tohjo Falls]], {{rt|26|Kanto|Routes 26}}, {{rtn|27|Kanto}}, and {{rtn|28|Kanto}}) changes from the Johto style to the Kanto style. This change was not present in Generation II. |
|
| |
|
| ===Items===
| | ==Items== |
| =====1F=====
| | ====1F==== |
| {{Itlisth|cave}} | | {{Itlisth|cave}} |
| {{Itemlist|Ultra Ball|On a rock near the center of the floor ''(hidden)''|FR=yes|LG=yes}} | | {{Itemlist|Ultra Ball|On a rock near the center of the floor ''(hidden)''|FR=yes|LG=yes}} |
| Line 55: |
Line 54: |
| {{Itlistfoot|cave}} | | {{Itlistfoot|cave}} |
|
| |
|
| =====2F=====
| | ====2F==== |
| {{Itlisth|cave}} | | {{Itlisth|cave}} |
| {{Itemlist|TM Normal|Southwest of the {{tc|Black Belt}}|R=yes|B=yes|Y=yes|display={{TM|05|Mega Kick}}}} | | {{Itemlist|TM Normal|Southwest of the {{tc|Black Belt}}|R=yes|B=yes|Y=yes|display={{TM|05|Mega Kick}}}} |
| Line 63: |
Line 62: |
| {{Itemlist|TM Fighting|In the northeast area of the floor|R=yes|B=yes|Y=yes|display={{TM|17|Submission}}}} | | {{Itemlist|TM Fighting|In the northeast area of the floor|R=yes|B=yes|Y=yes|display={{TM|17|Submission}}}} |
| {{Itemlist|TM Ice|In the northeast area of the floor|FR=yes|LG=yes|display={{TM|07|Hail}}}} | | {{Itemlist|TM Ice|In the northeast area of the floor|FR=yes|LG=yes|display={{TM|07|Hail}}}} |
| | {{Itemlist|Full Restore|Southwest of {{tc|Tamer}} Vincent|LP=yes|LE=yes}} |
| {{Itemlist|TM Fighting VI|In the northeast area of the floor|LP=yes|LE=yes|display={{TM|49|Superpower}}}} | | {{Itemlist|TM Fighting VI|In the northeast area of the floor|LP=yes|LE=yes|display={{TM|49|Superpower}}}} |
| {{Itemlist|Guard Spec.|In the northwest area of the floor|R=yes|B=yes|Y=yes|FR=yes|LG=yes}} | | {{Itemlist|Guard Spec.|In the northwest area of the floor|R=yes|B=yes|Y=yes|FR=yes|LG=yes}} |
| Line 83: |
Line 83: |
| {{Itlistfoot|cave}} | | {{Itlistfoot|cave}} |
|
| |
|
| =====3F=====
| | ====3F==== |
| {{Itlisth|cave}} | | {{Itlisth|cave}} |
| {{Itemlist|Max Revive|In the northeast area of the floor|R=yes|B=yes|Y=yes|FR=yes|LG=yes}} | | {{Itemlist|Max Revive|In the northeast area of the floor|R=yes|B=yes|Y=yes|FR=yes|LG=yes|LP=yes|LE=yes}} |
| {{Itemlist|TM Normal|In the northwest area of the floor|R=yes|B=yes|Y=yes|display={{TM|47|Explosion}}}} | | {{Itemlist|TM Normal|In the northwest area of the floor|R=yes|B=yes|Y=yes|display={{TM|47|Explosion}}}} |
| {{Itemlist|TM Fire|In the northwest area of the floor|FR=yes|LG=yes|display={{TM|50|Overheat}}}} | | {{Itemlist|TM Fire|In the northwest area of the floor|FR=yes|LG=yes|display={{TM|50|Overheat}}}} |
| Line 102: |
Line 102: |
| {{Itlistfoot|cave}} | | {{Itlistfoot|cave}} |
|
| |
|
| =====Rock=====
| | ====Rock==== |
| {{Itlisth|cave}} | | {{Itlisth|cave}} |
| {{Itemlist/3|Tiny Mushroom|Big Mushroom|Fire Stone| | | {{Itemlist/3|Tiny Mushroom|Big Mushroom|Fire Stone| |
| Line 109: |
Line 109: |
| {{Itlistfoot|cave}} | | {{Itlistfoot|cave}} |
|
| |
|
| =====Rock Smash=====
| | ====Rock Smash==== |
| If the rock contains an item, the game will pick one of the following: | | If the rock contains an item, the game will pick one of the following: |
| {{Itlisth|cave}} | | {{Itlisth|cave}} |
| Line 118: |
Line 118: |
| {{Itlistfoot|cave}} | | {{Itlistfoot|cave}} |
|
| |
|
| ===Pokémon===
| | ==Pokémon== |
| ====Generation I====
| | ===Generation I=== |
| =====1F=====
| | ====1F==== |
| {{catch/header|cave|no}} | | {{catch/header|cave|no}} |
| {{catch/entry1|041|Zubat|yes|yes|no|Cave|22|15%|type1=Poison|type2=Flying}} | | {{catch/entry1|041|Zubat|yes|yes|no|Cave|22|15%|type1=Poison|type2=Flying}} |
| Line 136: |
Line 136: |
| {{catch/footer|cave}} | | {{catch/footer|cave}} |
|
| |
|
| =====2F=====
| | ====2F==== |
| {{catch/header|cave|no}} | | {{catch/header|cave|no}} |
| {{catch/entry1|041|Zubat|yes|yes|no|Cave|26|15%|type1=Poison|type2=Flying}} | | {{catch/entry1|041|Zubat|yes|yes|no|Cave|26|15%|type1=Poison|type2=Flying}} |
| Line 152: |
Line 152: |
| {{catch/entry1|095|Onix|no|no|yes|Cave|45, 47|10%|type1=Rock|type2=Ground}} | | {{catch/entry1|095|Onix|no|no|yes|Cave|45, 47|10%|type1=Rock|type2=Ground}} |
| {{catch/entry1|105|Marowak|yes|yes|no|Cave|40|4%|type1=Ground}} | | {{catch/entry1|105|Marowak|yes|yes|no|Cave|40|4%|type1=Ground}} |
| {{catch/div|cave|Special}}
| |
| {{catch/entry1|146|Moltres|yes|yes|yes|Special|50|One|type1=Fire|type2=Flying}}
| |
| {{catch/footer|cave}} | | {{catch/footer|cave}} |
|
| |
|
| =====3F=====
| | ====3F==== |
| {{catch/header|cave|no}} | | {{catch/header|cave|no}} |
| {{catch/entry1|041|Zubat|yes|yes|no|Cave|22|15%|type1=Poison|type2=Flying}} | | {{catch/entry1|041|Zubat|yes|yes|no|Cave|22|15%|type1=Poison|type2=Flying}} |
| Line 173: |
Line 171: |
| {{catch/footer|cave}} | | {{catch/footer|cave}} |
|
| |
|
| ====Generation II====
| | ===Generation II=== |
| ''In the Japanese and Korean games, {{p|Ursaring}} appears only in Silver, while {{p|Donphan}} appears only in Gold.'' | | ''In the Japanese and Korean games, {{p|Ursaring}} appears only in Silver, while {{p|Donphan}} appears only in Gold.'' |
| {{catch/header|cave|yes}} | | {{catch/header|cave|yes}} |
| Line 192: |
Line 190: |
| {{catch/footer|cave}} | | {{catch/footer|cave}} |
|
| |
|
| ====Generation III====
| | ===Generation III=== |
| =====1F and 3F=====
| | ====1F and 3F==== |
| {{catch/header|cave|no}} | | {{catch/header|cave|no}} |
| {{catch/entryfl|024|Arbok|yes|no|Cave|44|5%|type1=Poison}} | | {{catch/entryfl|024|Arbok|yes|no|Cave|44|5%|type1=Poison}} |
| Line 206: |
Line 204: |
| {{catch/footer|cave}} | | {{catch/footer|cave}} |
|
| |
|
| =====2F=====
| | ====2F==== |
| {{catch/header|cave|no}} | | {{catch/header|cave|no}} |
| {{catch/entryfl|024|Arbok|yes|no|Cave|46|5%|type1=Poison}} | | {{catch/entryfl|024|Arbok|yes|no|Cave|46|5%|type1=Poison}} |
| Line 220: |
Line 218: |
| {{catch/footer|cave}} | | {{catch/footer|cave}} |
|
| |
|
| ====Generation IV====
| | ===Generation IV=== |
| {{catch/header|cave|4}} | | {{catch/header|cave|4}} |
| {{catch/entryhs|042|Golbat|yes|yes|Cave|32|all=30%|type1=Poison|type2=Flying}} | | {{catch/entryhs|042|Golbat|yes|yes|Cave|32|all=30%|type1=Poison|type2=Flying}} |
| Line 226: |
Line 224: |
| {{catch/entryhs|232|Donphan|yes|no|Cave|33|all=20%|type1=Ground}} | | {{catch/entryhs|232|Donphan|yes|no|Cave|33|all=20%|type1=Ground}} |
| {{catch/entryhs|217|Ursaring|no|yes|Cave|33|all=20%|type1=Normal}} | | {{catch/entryhs|217|Ursaring|no|yes|Cave|33|all=20%|type1=Normal}} |
| {{catch/entryhs|095|Onix|yes|yes|Cave|34-36|all=15%|type1=Rock|type2=Ground}} | | {{catch/entryhs|095|Onix|yes|yes|Cave|34, 36|all=15%|type1=Rock|type2=Ground}} |
| {{catch/entryhs|111|Rhyhorn|yes|yes|Cave|35|all=5%|type1=Ground|type2=Rock}} | | {{catch/entryhs|111|Rhyhorn|yes|yes|Cave|35|all=5%|type1=Ground|type2=Rock}} |
| {{catch/div|cave|Rock Smash}} | | {{catch/div|cave|Rock Smash}} |
| {{catch/entryhs|074|Geodude|yes|yes|Rock Smash|24-32|all=90%|type1=Rock|type2=Ground}} | | {{catch/entryhs|074|Geodude|yes|yes|Rock Smash|24-32|all=80%|type1=Rock|type2=Ground}} |
| {{catch/entryhs|075|Graveler|yes|yes|Rock Smash|30-33|all=10%|type1=Rock|type2=Ground}} | | {{catch/entryhs|075|Graveler|yes|yes|Rock Smash|30-33|all=20%|type1=Rock|type2=Ground}} |
| {{catch/div|cave|Special}} | | {{catch/div|cave|Special}} |
| {{catch/entryhs|296|Makuhita|yes|yes|Hoenn|33|all=20%|type1=Fighting}} | | {{catch/entryhs|296|Makuhita|yes|yes|Hoenn|33|all=20%|type1=Fighting}} |
| Line 238: |
Line 236: |
| {{catch/footer|cave}} | | {{catch/footer|cave}} |
|
| |
|
| ====Generation VII====
| | ===Generation VII=== |
| =====1F=====
| | ====1F==== |
| {{catch/header|cave|no}} | | {{catch/header|cave|no}} |
| {{catch/entrype|041|Zubat|yes|yes|Cave|41-46|10%|type1=Poison|type2=Flying}} | | {{catch/entrype|041|Zubat|yes|yes|Cave|41-46|10%|type1=Poison|type2=Flying}} |
| Line 254: |
Line 252: |
| {{catch/footer|cave}} | | {{catch/footer|cave}} |
|
| |
|
| =====2F=====
| | ====2F==== |
| {{catch/header|cave|no}} | | {{catch/header|cave|no}} |
| {{catch/entrype|041|Zubat|yes|yes|Cave|41-46|10%|type1=Poison|type2=Flying}} | | {{catch/entrype|041|Zubat|yes|yes|Cave|41-46|10%|type1=Poison|type2=Flying}} |
| Line 267: |
Line 265: |
| {{catch/div|cave|Rare Spawns}} | | {{catch/div|cave|Rare Spawns}} |
| {{Catch/entrype|106|Hitmonlee|yes|yes|Cave|41-46|-|type1=Fighting}} | | {{Catch/entrype|106|Hitmonlee|yes|yes|Cave|41-46|-|type1=Fighting}} |
| {{catch/div|cave|Special Pokémon<br><small>Fought in a {{color2|000|Pokémon battle}}}}
| |
| {{catch/entrype|146|Moltres|yes|yes|Special|50|One|type1=Fire|type2=Flying}}
| |
| {{catch/footer|cave}} | | {{catch/footer|cave}} |
|
| |
|
| =====3F=====
| | ====3F==== |
| {{catch/header|cave|no}} | | {{catch/header|cave|no}} |
| {{catch/entrype|041|Zubat|yes|yes|Cave|41-46|10%|type1=Poison|type2=Flying}} | | {{catch/entrype|041|Zubat|yes|yes|Cave|41-46|10%|type1=Poison|type2=Flying}} |
| Line 286: |
Line 282: |
| {{catch/footer|cave}} | | {{catch/footer|cave}} |
|
| |
|
| ===Trainers=== | | ==Special encounters== |
| ====Generation I==== | | ===Generation I=== |
| | A {{p|Moltres}} appears on 2F on the first visit. |
| | {| |
| | |- style="vertical-align:top" |
| | |{{Pokémon/1 |
| | |game=Blue |
| | |ndex=146 |
| | |pokemon=Moltres |
| | |type1=Fire |
| | |type2=Flying |
| | |level=50 |
| | |move1=Peck|move1type=Flying |
| | |move2=Fire Spin|move2type=Fire}} |
| | |} |
| | |
| | ===Generation VII=== |
| | A {{p|Moltres}} appears on 2F on the first visit. If run from, it respawns after entering the [[Hall of Fame]]. |
| | {| |
| | |- style="vertical-align:top" |
| | |{{Pokémon/7/LG |
| | |ndex=146 |
| | |pokemon=Moltres |
| | |type1=Fire |
| | |type2=Flying |
| | |level=50 |
| | |move1=Air Slash|move1type=Flying|move1cat=Special |
| | |move2=Flamethrower|move2type=Fire|move2cat=Special |
| | |move3=Agility|move3type=Psychic|move3cat=Status |
| | |move4=Heat Wave|move4type=Fire|move4cat=Special}} |
| | |} |
| | |
| | ==Trainers== |
| | ===Generation I=== |
| {{Trainerheader|cave}} | | {{Trainerheader|cave}} |
| {{Trainerentry|Spr RG Cooltrainer F.png|game=1|Cooltrainer||1540|2|053|Persian||44||038|Ninetales||44|||}} | | {{Trainerentry|Spr RG Cooltrainer F.png|game=1|Cooltrainer||1540|2|053|Persian||44||038|Ninetales||44|||}} |
| Line 312: |
Line 340: |
| {{trainerfooter|cave|I}} | | {{trainerfooter|cave|I}} |
|
| |
|
| ====Generation II====
| | ===Generation II=== |
| {{MSP/3|152|Chikorita}} If the {{player}} chose {{p|Chikorita}}: | | {{MSP/3|152|Chikorita}} If the {{player}} chose {{p|Chikorita}}: |
| {{Party/Single | | {{Party/Single |
| Line 550: |
Line 578: |
| {{Party/Footer}} | | {{Party/Footer}} |
|
| |
|
| ====Generation III====
| | ===Generation III=== |
| {{trainerheader|cave}} | | {{trainerheader|cave}} |
| {{Trainerentry|Spr FRLG Cooltrainer F.png|Cooltrainer|Naomi|1512|5|053|Persian|♀|42|None|077|Ponyta|♀|42|None|078|Rapidash|♀|42|None|037|Vulpix|♀|42|None|038|Ninetales|♀|42|None|36=カナコ|37=Kanako}} | | {{Trainerentry|Spr FRLG Cooltrainer F.png|Cooltrainer|Naomi|1512|5|053|Persian|♀|42|None|077|Ponyta|♀|42|None|078|Rapidash|♀|42|None|037|Vulpix|♀|42|None|038|Ninetales|♀|42|None|36=カナコ|37=Kanako}} |
| Line 577: |
Line 605: |
| {{trainerfooter|cave}} | | {{trainerfooter|cave}} |
|
| |
|
| ====Generation IV====
| | ===Generation IV=== |
| {{MSP/3|152|Chikorita}} If the {{player}} chose {{p|Chikorita}}: | | {{MSP/3|152|Chikorita}} If the {{player}} chose {{p|Chikorita}}: |
| {{Party/Single | | {{Party/Single |
| Line 737: |
Line 765: |
| {{Party/Footer}} | | {{Party/Footer}} |
|
| |
|
| ====Generation VII====
| | ===Generation VII=== |
| {{trainerheader|cave}} | | {{trainerheader|cave}} |
| {{Trainerentry|VSCoach Trainer M PE.png{{!}}90px|game=PE|Coach Trainer|Alemana|4,900|1|132|Ditto||49|None|36=タノタノ|37=Tanotano}} | | {{Trainerentry|VSCoach Trainer M PE.png{{!}}90px|game=PE|Coach Trainer|Alemana|4,900|1|132|Ditto||49|None|36=タノタノ|37=Tanotano}} |
| Line 770: |
Line 798: |
| {{trainerfooter|cave|PE}} | | {{trainerfooter|cave|PE}} |
|
| |
|
| ===Layout=== | | ==Layout== |
| | ===Interior=== |
| {| class="roundy" style="margin:auto; background: #000; border: 3px solid #{{locationcolor/dark|cave}}" | | {| class="roundy" style="margin:auto; background: #000; border: 3px solid #{{locationcolor/dark|cave}}" |
| |- style="background:#{{locationcolor/light|cave}}" | | |- style="background:#{{locationcolor/light|cave}}" |
| Line 779: |
Line 808: |
| |- style="background:#000" | | |- style="background:#000" |
| ! style="background:#{{red color}}" | {{color2|000|Pokémon Red and Blue Versions|Red}} | | ! style="background:#{{red color}}" | {{color2|000|Pokémon Red and Blue Versions|Red}} |
| | rowspan="3" | [[File:Victory Road 1F RBY.png|180px]] | | | rowspan="3" | [[File:Victory Road 1F RBY.png|180px]] |
| | rowspan="3" | [[File:Victory Road 2F RBY.png|180px]] | | | rowspan="3" | [[File:Victory Road 2F RBY.png|180px]] |
| | rowspan="3" | [[File:Victory Road 3F RBY.png|180px]] | | | rowspan="3" | [[File:Victory Road 3F RBY.png|180px]] |
| |- | | |- |
| ! style="background:#{{blue color}}" | {{color2|FFF|Pokémon Red and Blue Versions|Blue}} | | ! style="background:#{{blue color}}" | {{color2|FFF|Pokémon Red and Blue Versions|Blue}} |
| Line 789: |
Line 818: |
| ! style="background:#{{gold color}}" | {{color2|000|Pokémon Gold and Silver Versions|Gold}} | | ! style="background:#{{gold color}}" | {{color2|000|Pokémon Gold and Silver Versions|Gold}} |
| | rowspan="3" | [[File:Victory Road 1F GSC.png|180px]] | | | rowspan="3" | [[File:Victory Road 1F GSC.png|180px]] |
| | rowspan="3" | [[File:Victory Road 2F GSC.png|180px]] | | | rowspan="3" | [[File:Victory Road 2F GSC.png|180px]] |
| | rowspan="3" | [[File:Victory Road 3F GSC.png|180px]] | | | rowspan="3" | [[File:Victory Road 3F GSC.png|180px]] |
| |- | | |- |
| ! style="background:#{{silver color}}" | {{color2|000|Pokémon Gold and Silver Versions|Silver}} | | ! style="background:#{{silver color}}" | {{color2|000|Pokémon Gold and Silver Versions|Silver}} |
| Line 809: |
Line 838: |
| |- | | |- |
| ! style="background:#{{soulsilver color}}" | {{color2|000|Pokémon HeartGold and SoulSilver Versions|SoulSilver}} | | ! style="background:#{{soulsilver color}}" | {{color2|000|Pokémon HeartGold and SoulSilver Versions|SoulSilver}} |
| | |- |
| | ! style="background:#{{Let's Go Pikachu color}}" | {{color2|000|Pokémon Let's Go, Pikachu! and Let's Go, Eevee!|Let's Go, Pikachu!}} |
| | | rowspan="2" | [[File:Victory Road 1F LGPE.png|180px]] |
| | | rowspan="2" | [[File:Victory Road 2F LGPE.png|180px]] |
| | | rowspan="2" | [[File:Victory Road 3F LGPE.png|180px]] |
| | |- |
| | ! style="background:#{{Let's Go Eevee color}}" | {{color2|000|Pokémon Let's Go, Pikachu! and Let's Go, Eevee!|Let's Go, Eevee!}} |
| |- | | |- |
| | colspan="4" style="background:#{{locationcolor/light|cave}}; {{roundybottom|5px}}" | | | | colspan="4" style="background:#{{locationcolor/light|cave}}; {{roundybottom|5px}}" | |
| |} | | |} |
|
| |
|
| ===[[Location preview|Preview]]=== | | ===Exterior=== |
| | {| class="roundy" style="margin:auto; background: #000; border: 3px solid #{{locationcolor/dark|cave}}" |
| | |- |
| | ! style="background:#{{locationcolor/light|cave}}; {{roundytl|5px}}" | Version |
| | ! style="background:#{{locationcolor/light|cave}}" | Reception Gate side |
| | ! style="background:#{{locationcolor/light|cave}}" | Indigo Plateau side |
| | |- |
| | ! style="background:#{{Let's Go Pikachu color}}" | {{color2|000|Pokémon Let's Go, Pikachu! and Let's Go, Eevee!|Let's Go, Pikachu!}} |
| | | rowspan="2" | [[File:Victory Road Exterior Reception Gate Side LGPE.png|250px]] |
| | | rowspan="2" | [[File:Victory Road Exterior Indigo Plateau Side LGPE.png|250px]] |
| | |- |
| | ! style="background:#{{Let's Go Eevee color}}" | {{color2|000|Pokémon Let's Go, Pikachu! and Let's Go, Eevee!|Let's Go, Eevee!}} |
| | |- |
| | | colspan="5" style="background:#{{locationcolor/light|cave}}; {{roundybottom|5px}}" | |
| | |} |
| | |
| | ==[[Location preview|Preview]]== |
| <gallery> | | <gallery> |
| File:FL Victory Road.png|FRLG | | File:FL Victory Road.png|FRLG |
| Line 823: |
Line 875: |
| ==In the spin-off games== | | ==In the spin-off games== |
| ===[[Pokémon Masters EX]]=== | | ===[[Pokémon Masters EX]]=== |
| Artwork of various depictions of the Victory Road is seen in [[Sygna Suit]] {{mas|Leaf}} and {{mas|Silver}}'s mindscapes. | | Artwork of various depictions of the Victory Road is seen in [[Sygna suit|Sygna Suit]] {{mas|Leaf}} and {{mas|Silver}}'s mindscapes. |
| {| style="background: #7B30B2; {{roundy}}; border: #7B30B2;" | | {| style="background: #7B30B2; {{roundy}}; border: #7B30B2;" |
| | | | | |
| Line 853: |
Line 905: |
|
| |
|
| ==Trivia== | | ==Trivia== |
| * In [[Generation II|Generations II]] and {{gen|IV}}, Kanto Victory Road has the fewest Trainers of all Victory Roads, the only Trainer battle being against {{ga|Silver}}. | | * In [[Generation II|Generations II]] and {{gen|IV}}, Kanto Victory Road has the fewest Trainers of all Victory Roads, the only Trainer battle being against {{ga|Silver}}. In {{game|HeartGold and SoulSilver|s}}, this is implied to be because Silver beat every other Trainer here. |
| * In [[Generation I]], if the player falls through the hole from 3F to 2F while riding their [[Bicycle|bike]], they will be forced off the bike in the transition, but the bike theme will keep playing. | | * In [[Generation I]], if the player falls through the hole from 3F to 2F while riding their [[Bicycle|bike]], they will be forced off the bike in the transition, but the bike theme will keep playing. |
| ** In [[Generation III]], the bike theme does not override the usual background music. | | ** In [[Generation III]], the bike theme does not override the usual background music. |