Great Ball: Difference between revisions
mNo edit summary |
Thespeon196 (talk | contribs) m (→In animation) |
||
| (98 intermediate revisions by 38 users not shown) | |||
| Line 1: | Line 1: | ||
{{search|modern incarnation of the Great Ball|the Great Ball from {{pkmn|Legends: Arceus}}|Great Ball (Hisui)}} | |||
---- | |||
{{ItemInfobox/head | {{ItemInfobox/head | ||
|name=Great Ball | |name=Great Ball | ||
| Line 14: | Line 16: | ||
{{ItemInfobox/BagRow|VI|Items|colorscheme=Poké Balls}} | {{ItemInfobox/BagRow|VI|Items|colorscheme=Poké Balls}} | ||
{{ItemInfobox/BagRow|VII|Items|colorscheme=Poké Balls|group=Catching Pocket{{sup/7|PE}}}} | {{ItemInfobox/BagRow|VII|Items|colorscheme=Poké Balls|group=Catching Pocket{{sup/7|PE}}}} | ||
{{ItemInfobox/BagRowBottom| | {{ItemInfobox/BagRow|VIII|Poké Balls}} | ||
{{ItemInfobox/BagRowBottom|IX|Poké Balls}} | |||
|} | |} | ||
| Line 21: | Line 24: | ||
==In the core series games== | ==In the core series games== | ||
===Price=== | ===Price=== | ||
{{ItemPrice/ | {{ItemPrice/head|Poké Balls}} | ||
{{ItemPrice|{{gameabbrev1|RGBY}}/{{gameabbrev1|RBY}}<br>{{gameabbrev2|GSC}}<br>{{gameabbrev3|RSEFRLG}}<br>{{gameabbrev4|DPPtHGSS}}<br>{{gameabbrev5|BWB2W2}}<br>{{gameabbrev6|XYORAS}}<br>{{gameabbrev7|SMUSUM}}<br>{{gameabbrev8|SwSh}}|{{PDollar}}600|{{PDollar}}300}} | {{ItemPrice|{{gameabbrev1|RGBY}}/{{gameabbrev1|RBY}}<br>{{gameabbrev2|GSC}}<br>{{gameabbrev3|RSEFRLG}}<br>{{gameabbrev4|DPPtHGSS}}<br>{{gameabbrev5|BWB2W2}}<br>{{gameabbrev6|XYORAS}}<br>{{gameabbrev7|SMUSUM}}<br>{{gameabbrev8|SwSh}}{{gameabbrev8|BDSP}}|{{PDollar}}600|{{PDollar}}300}} | ||
{{ItemPrice|{{gameabbrev7|PE}}|{{PDollar}}300|{{PDollar}}150}} | {{ItemPrice|{{gameabbrev7|PE}}|{{PDollar}}300|{{PDollar}}150}} | ||
{{ItemPrice|{{gameabbrev9|SV}}|{{PDollar}}600|{{PDollar}}150}} | |||
|} | |} | ||
|} | |} | ||
| Line 32: | Line 36: | ||
When used from the [[Bag]] in a {{pkmn2|wild}} encounter, it will attempt to catch the wild Pokémon with a [[catch rate]] modifier of 1.5×. | When used from the [[Bag]] in a {{pkmn2|wild}} encounter, it will attempt to catch the wild Pokémon with a [[catch rate]] modifier of 1.5×. | ||
If used on an [[Ultra Beast]], the catch rate modifier is instead always set to 0.1×. | If used on an [[Ultra Beast]], the catch rate modifier is instead always set to 410/4096× (~0.1×). | ||
The Great Ball cannot be used in situations in which Poké Balls cannot be used, such as in wild battles with two or more opponents currently present or against a [[Island challenge|trial]] Pokémon. If used in a Trainer battle (except if used as a [[Snag Ball]] on a [[Shadow Pokémon]]), the opposing Trainer will deflect it, wasting the ball. If used on the [[Marowak (ghost)|ghost Marowak]], it will dodge it, wasting the ball. | The Great Ball cannot be used in situations in which Poké Balls cannot be used, such as in wild battles with two or more opponents currently present or against a [[Island challenge|trial]] Pokémon. If used in a Trainer battle (except if used as a [[Snag Ball]] on a [[Shadow Pokémon]]), the opposing Trainer will deflect it, wasting the ball (in [[Generation III]] and earlier) or only the player's turn (from [[Generation IV]] onward). If used on the [[Marowak (ghost)|ghost Marowak]], it will dodge it, wasting the ball. | ||
====Held item==== | ====Held item==== | ||
| Line 43: | Line 47: | ||
{{movedescentry|{{gameabbrevss|Stad}}|A <sc>Ball</sc> for catching wild Pokémon. More effective than a <sc>Pok</sc>é <sc>Ball</sc>.}} | {{movedescentry|{{gameabbrevss|Stad}}|A <sc>Ball</sc> for catching wild Pokémon. More effective than a <sc>Pok</sc>é <sc>Ball</sc>.}} | ||
{{movedescentry|{{gameabbrev2|GSC}}|A <sc>Ball</sc> with a decent success rate.}} | {{movedescentry|{{gameabbrev2|GSC}}|A <sc>Ball</sc> with a decent success rate.}} | ||
{{movedescentry|{{gameabbrev3|RSE}}|A good <sc>Ball</sc> with a higher catch rate than a <sc>Pok</sc>é <sc>Ball</sc>.}} | {{movedescentry|{{gameabbrev3|RSE}}{{gameabbrevss|Colo}}{{gameabbrevss|XD}}|A good <sc>Ball</sc> with a higher catch rate than a <sc>Pok</sc>é <sc>Ball</sc>.}} | ||
{{movedescentry|{{gameabbrev3|FRLG}}|A good, quality <sc>Ball</sc> that offers a higher | {{movedescentry|{{gameabbrev3|FRLG}}|A good, quality <sc>Ball</sc> that offers a higher {{ScPkmn}} catch rate than a standard <sc>Pok</sc>é <sc>Ball</sc>.}} | ||
{{movedescentry|{{gameabbrev4|DPPtHGSS}}<br>{{gameabbrev5|BWB2W2}}|A good, high-performance Ball that provides a higher Pokémon catch rate than a standard Poké Ball.}} | {{movedescentry|{{gameabbrev4|DPPtHGSS}}<br>{{gameabbrev5|BWB2W2}}|A good, high-performance Ball that provides a higher Pokémon catch rate than a standard Poké Ball.}} | ||
{{movedescentry|{{gameabbrev6|XYORAS}}|A good, high-performance Poké Ball that provides a higher Pokémon catch rate than a standard Poké Ball can.}} | {{movedescentry|{{gameabbrev6|XYORAS}}|A good, high-performance Poké Ball that provides a higher Pokémon catch rate than a standard Poké Ball can.}} | ||
{{movedescentry|{{gameabbrev7|SMUSUM}}|A good, high-performance Poké Ball that provides a higher Pokémon catch rate than a standard Poké Ball.}} | {{movedescentry|{{gameabbrev7|SMUSUM}}|A good, high-performance Poké Ball that provides a higher Pokémon catch rate than a standard Poké Ball.}} | ||
{{movedescentry|{{gameabbrev7|PE}}<br>{{gameabbrev8| | {{movedescentry|{{gameabbrev7|PE}}<br>{{gameabbrev8|SwShBDSPLA}}<br>{{gameabbrev9|SV}}|A good, high-performance Poké Ball that provides a higher success rate for catching Pokémon than a standard Poké Ball.}} | ||
|} | |} | ||
|} | |} | ||
| Line 61: | Line 64: | ||
|- | |- | ||
| {{gameabbrev2|GSC}} | | {{gameabbrev2|GSC}} | ||
| {{rt|32|Johto}}, [[Union Cave]] | | {{rt|32|Johto}}, [[Union Cave]], [[Olivine Lighthouse]]{{sup/2|GS}} | ||
| {{ci|Ecruteak}}, {{ci|Olivine}}, {{to|Mahogany}}, {{ci|Blackthorn}}, [[Indigo Plateau]], {{ci|Pewter}}, {{ci|Cerulean}}, {{to|Lavender}}, {{ci|Saffron}}, and {{ci|Fuchsia}} [[Poké Mart]]s, [[Goldenrod Department Store]], [[Celadon Department Store]], {{DL|Mahogany Town|Just a Souvenir Shop}} (after defeating [[Team Rocket]])<br>{{rt|44|Johto}} (random gift from {{tc|Fisherman|Fisher}} Wilton){{sup/2|C}}<br>Purchased by the {{player}}'s {{jo|Mom}} | | {{ci|Ecruteak}}, {{ci|Olivine}}, {{to|Mahogany}}, {{ci|Blackthorn}}, [[Indigo Plateau]], {{ci|Pewter}}, {{ci|Cerulean}}, {{to|Lavender}}, {{ci|Saffron}}, and {{ci|Fuchsia}} [[Poké Mart]]s, [[Goldenrod Department Store]], [[Celadon Department Store]], {{DL|Mahogany Town|Just a Souvenir Shop}} (after defeating [[Team Rocket]])<br>[[Goldenrod Department Store]] [[Goldenrod Department Store#Rooftop|rooftop sale]] (before becoming {{pkmn|Champion}}){{sup/2|C}}<br>{{rt|44|Johto}} (random gift from {{tc|Fisherman|Fisher}} Wilton){{sup/2|C}}<br>Purchased by the {{player}}'s {{jo|Mom}}<br>[[Pokémon Pikachu 2 GS]] (300 {{Watt}}) | ||
|- | |- | ||
| {{gameabbrev3|RSE}} | | {{gameabbrev3|RSE}} | ||
| [[Route]]s {{rtn|109|Hoenn}}, {{rtn|110|Hoenn}}, {{rtn|117|Hoenn}}, and {{rtn|115|Hoenn}}, [[Petalburg Woods]] (×2), [[Rustboro City]], [[Jagged Pass]] | | [[Route]]s {{rtn|109|Hoenn}}, {{rtn|110|Hoenn}}, {{rtn|117|Hoenn}}, and {{rtn|115|Hoenn}}, [[Petalburg Woods]] (×2), [[Rustboro City]], [[Jagged Pass]] | ||
| {{ci|Petalburg}} (after earning 4 [[Badge]]s), {{ci|Slateport}}, {{ci|Mauville}}, {{to|Verdanturf}}, {{to|Fallarbor}}, {{to|Lavaridge}}, and {{ci|Fortree}} [[Poké Mart]]s, [[Lilycove Department Store]]<br>{{a|Pickup}} ( | | {{ci|Petalburg}} (after earning 4 [[Badge]]s), {{ci|Slateport}}, {{ci|Mauville}}, {{to|Verdanturf}}, {{to|Fallarbor}}, {{to|Lavaridge}}, and {{ci|Fortree}} [[Poké Mart]]s, [[Lilycove Department Store]]<br>{{a|Pickup}} ([[Level|Lv.]] 1-40{{sup/3|E}})<br>[[Trainer Hill]] consolation prize{{sup/3|E}} | ||
|- | |- | ||
| {{gameabbrev3|FRLG}} | | {{gameabbrev3|FRLG}} | ||
| Line 77: | Line 80: | ||
|- | |- | ||
| {{gameabbrevss|XD}} | | {{gameabbrevss|XD}} | ||
| [[Cipher Lab]]<br>[[Realgam Tower]] ([[Battle CD]] [[Battle CDs 01-10#Battle CD 03|03]] and [[Battle CDs 01-10#Battle CD 07|07]] completion prizes) | | [[Cipher Lab]], [[Pyrite Town]]<br>[[Realgam Tower]] ([[Battle CD]] [[Battle CDs 01-10#Battle CD 03|03]] and [[Battle CDs 01-10#Battle CD 07|07]] completion prizes) | ||
| [[Gateon Port|Gateon]], [[Agate Village|Agate]], {{to|Pyrite}}, and {{ci|Phenac}} [[Poké Mart]]s, [[Outskirt Stand]]<br>{{a|Pickup}} ( | | [[Gateon Port|Gateon]], [[Agate Village|Agate]], {{to|Pyrite}}, and {{ci|Phenac}} [[Poké Mart]]s, [[Outskirt Stand]]<br>{{a|Pickup}} ([[Level|Lv.]] 1-40) | ||
|- | |- | ||
| {{gameabbrev4|DPPt}} | | {{gameabbrev4|DPPt}} | ||
| [[Route]]s {{rtn|207|Sinnoh}}{{sup/4|Pt}}, {{rtn|208 | | [[Route]]s {{rtn|207|Sinnoh}}{{sup/4|Pt}}, {{rtn|208|Sinnoh}}{{sup/4|Pt}}, {{rtn|209|Sinnoh}}{{sup/4|Pt}}, {{rtn|211|Sinnoh}}{{sup/4|Pt}}, {{rtn|212|Sinnoh}}{{sup/4|DP}}, and {{rtn|213|Sinnoh}}{{sup/4|DP}}, [[Oreburgh City]], [[Eterna Forest]]{{sup/4|DP}}, [[Wayward Cave]]{{sup/4|Pt}}, [[Lost Tower]], {{si|Pokémon Mansion}}{{sup/4|DP}}, [[Great Marsh]] | ||
| All [[Poké Mart]]s (after earning 3 [[Badge]]s), [[Veilstone Department Store]]<br>[[Pokémon News Press]]<br>{{a|Pickup}} ( | | All [[Poké Mart]]s (after earning 3 [[Badge]]s), [[Celestic Town]] {{DL|Celestic Town|shop}}, [[Veilstone Department Store]]<br>[[Celestic Town]] (daily)<br>[[Pokémon News Press]]<br>{{a|Pickup}} ([[Level|Lv.]] 1-40) | ||
|- | |- | ||
| {{gameabbrev4|HGSS}} | | {{gameabbrev4|HGSS}} | ||
| {{rt|32|Johto}}, [[Ruins of Alph]], [[Union Cave]], [[Slowpoke Well]] | | {{rt|32|Johto}}, [[Ruins of Alph]], [[Union Cave]], [[Slowpoke Well]] | ||
| All [[Poké Mart]]s (after earning 3 [[Badge]]s), [[Goldenrod Department Store]], [[Celadon Department Store]], {{DL|Mahogany Town|Just a Souvenir Shop}} (after defeating [[Team Rocket]])<br>{{a|Pickup}} ( | | All [[Poké Mart]]s (after earning 3 [[Badge]]s), [[Goldenrod Department Store]], [[Celadon Department Store]], {{DL|Mahogany Town|Just a Souvenir Shop}} (after defeating [[Team Rocket]])<br>{{a|Pickup}} ([[Level|Lv.]] 1-40) | ||
|- | |- | ||
| {{gameabbrevss|PW}} | | {{gameabbrevss|PW}} | ||
| Line 93: | Line 96: | ||
|- | |- | ||
| {{gameabbrev5|BW}} | | {{gameabbrev5|BW}} | ||
| [[Route]]s {{rtn|2|Unova}}, {{rtn|3|Unova}}, {{rtn|4|Unova}}, and {{rtn|5|Unova}}, [[Striaton City]], [[Pinwheel Forest]] | | [[Route]]s {{rtn|2|Unova}}, {{rtn|3|Unova}}, {{rtn|4|Unova}}, and {{rtn|5|Unova}}, [[Striaton City]], [[Pinwheel Forest]]<br>[[Passerby Analytics HQ]] (complete "Which version is more popular?" survey) | ||
| All [[Poké Mart]]s (after earning 1 [[Badge]])<br>{{a|Pickup}} ( | | All [[Poké Mart]]s (after earning 1 [[Badge]])<br>{{a|Pickup}} ([[Level|Lv.]] 1-40)<br>[[White Forest]]{{sup/5|W}} (Robbie) | ||
|- | |- | ||
| {{gameabbrev5|B2W2}} | | {{gameabbrev5|B2W2}} | ||
| {{rt|20|Unova}}, [[Virbank City]], [[ | | {{rt|20|Unova}}, [[Virbank City]], [[Striaton City]]<br>[[Passerby Analytics HQ]] (complete "Which version is more popular?" survey) | ||
| All [[Poké Mart]]s (after earning 1 [[Badge]] | | All [[Poké Mart]]s (after earning 1 [[Badge]])<br/>[[Join Avenue]] ({{DL|Join Avenue|Antique Shop}}, {{DL|Join Avenue|Souvenirs|souvenir}})<br>{{a|Pickup}} ([[Level|Lv.]] 1-40)<br/>[[Hidden Grotto]] (5% chance)<br/>[[Virbank Complex]] (exchange for a {{i|Poké Ball}}, daily) | ||
|- | |||
| {{gameabbrevss|DW}}{{tt|*|No longer in service}} | |||
| | |||
| {{dwa|Pleasant Forest}} | |||
|- | |- | ||
| {{gameabbrev6|XY}} | | {{gameabbrev6|XY}} | ||
| [[Route]]s {{rtn|4|Kalos}} and {{rtn|5|Kalos}}, [[Santalune City]] | | [[Route]]s {{rtn|4|Kalos}} and {{rtn|5|Kalos}}, [[Santalune City]] | ||
| All [[Poké Mart]]s (after earning 1 [[Badge]]), [[Santalune City]], {{rt|5|Kalos}}, {{rt|4|Kalos}}<br>{{a|Pickup}} ( | | All [[Poké Mart]]s (after earning 1 [[Badge]]), [[Santalune City]], {{rt|5|Kalos}}, {{rt|4|Kalos}}<br>{{a|Pickup}} ([[Level|Lv.]] 1-40) | ||
|- | |- | ||
| {{gameabbrev6|ORAS}} | | {{gameabbrev6|ORAS}} | ||
| [[Route]]s {{rtn|109|Hoenn}}, {{rtn|110|Hoenn}}, {{rtn|117|Hoenn}}, and {{rtn|115|Hoenn}}, [[Rustboro City]], [[Petalburg Woods]], [[Jagged Pass]], [[Meteor Falls]] | | [[Route]]s {{rtn|109|Hoenn}}, {{rtn|110|Hoenn}}, {{rtn|117|Hoenn}}, and {{rtn|115|Hoenn}}, [[Rustboro City]], [[Petalburg Woods]], [[Jagged Pass]], [[Meteor Falls]] | ||
| All [[Poké Mart]]s (after earning 1 [[Badge]]), [[Lilycove Department Store]]<br>{{a|Pickup}} ( | | All [[Poké Mart]]s (after earning 1 [[Badge]]), [[Lilycove Department Store]]<br>{{a|Pickup}} ([[Level|Lv.]] 1-40) | ||
|- | |- | ||
| {{gameabbrevss|PMC}} | | {{gameabbrevss|PMC}}{{tt|*|No longer in service}} | ||
| | | | ||
| {{DL|PokéMileage Club|Mine Cart Adventure}} (all levels) | | {{DL|PokéMileage Club|Mine Cart Adventure}} (all levels) | ||
| Line 114: | Line 121: | ||
| {{gameabbrev7|SMUSUM}} | | {{gameabbrev7|SMUSUM}} | ||
| {{rt|4|Alola}}, {{al|Trainers' School}}, [[Hau'oli City]], [[Hau'oli Cemetery]], [[Verdant Cavern]], [[Melemele Meadow]], [[Ten Carat Hill]] | | {{rt|4|Alola}}, {{al|Trainers' School}}, [[Hau'oli City]], [[Hau'oli Cemetery]], [[Verdant Cavern]], [[Melemele Meadow]], [[Ten Carat Hill]] | ||
| All [[Poké Mart]]s (after clearing | | All [[Poké Mart]]s (after clearing 1 [[Island challenge|trial]]), {{DL|Royal Avenue|Thrifty Megamart}}<br>[[Festival Plaza]] ([[Festival Plaza#Goody shops|Ball Shop]], [[Festival Plaza#Goody shops|General Store]])<br/>{{rt|1|Alola}} (sometimes received from {{al|Mom}} after healing at home){{sup/7|USUM}}<br>{{a|Pickup}} ([[Level|Lv.]] 1-40) | ||
|- | |- | ||
| {{gameabbrev7|PE}} | | {{gameabbrev7|PE}} | ||
| Line 121: | Line 128: | ||
|- | |- | ||
| {{gameabbrev8|SwSh}} | | {{gameabbrev8|SwSh}} | ||
| {{rt|2|Galar}} | | {{rt|2|Galar}}, [[Motostoke]], [[Galar Mine]], [[Motostoke Outskirts]] | ||
| All [[Poké Mart]]s (after earning 1 [[Badge]]) | | All [[Poké Mart]]s (after earning 1 [[Badge]])<br>Hidden [[recurring item]] ([[Giant's Seat]], [[North Lake Miloch]], [[Motostoke Riverbank]], [[Bridge Field]], [[Stony Wilderness]], [[Dusty Bowl]], [[Giant's Mirror]], [[Hammerlocke Hills]], [[Giant's Cap]])<br/>Reward from Ball Guy for clearing [[Champion Cup]] tournament during post-game (×5, 5% chance) | ||
|- | |||
| {{gameabbrev8|SwSh}}{{gameabbrev8|IA}} | |||
| | |||
| {{DL|Fields of Honor|Armor Station}} [[Poké Mart]] (after earning 1 [[Badge]]), [[Fields of Honor]] [[Watt Trader]]<br>Hidden [[recurring item]] ([[Fields of Honor]], [[Brawlers' Cave]], [[Courageous Cavern]])<br>[[Cram-o-matic]] | |||
|- | |||
| {{gameabbrev8|SwSh}}{{gameabbrev8|CT}} | |||
| | |||
| {{DL|Slippery Slope|Crown Tundra Station}} [[Poké Mart]] (after earning 1 [[Badge]]), [[Freezington]] Peddler<br>Hidden [[recurring item]] ([[Frostpoint Field]], [[Giant's Bed]], [[Snowslide Slope]], [[Tunnel to the Top]], [[Roaring-Sea Caves]], [[Frigid Sea]], [[Ballimere Lake]])<br/>Reward from Ball Guy for clearing [[Galarian Star Tournament]] during post-game (×5, 5% chance) | |||
|- | |||
| {{gameabbrev8|BDSP}} | |||
| [[Route]]s {{rtn|212|Sinnoh}} and {{rtn|213|Sinnoh}}, [[Oreburgh City]], [[Eterna Forest]], [[Lost Tower]], {{si|Pokémon Mansion}}, [[Great Marsh]] | |||
| All [[Poké Mart]]s (after earning 3 [[Badge]]s), [[Celestic Town]] {{DL|Celestic Town|shop}}, [[Veilstone Department Store]]<br>[[Celestic Town]] (daily)<br>[[Pokémon News Press]] | |||
|- | |||
| {{gameabbrev9|SV}} | |||
| [[Cabo Poco]], [[Levincia]], [[Alfornada Cavern]], [[Casseroya Lake]], [[Poco Path]], [[East Province (Area One)]], [[East Province (Area Two)]], [[East Province (Area Three)]], [[North Province (Area Three)]], [[South Province (Area One)]], [[South Province (Area Two)]], [[South Province (Area Three)]], [[South Province (Area Four)]], [[South Province (Area Five)]], [[West Province (Area One)]]<br>Reward for registering 20 Pokémon in the [[List of Pokémon by Paldea Pokédex number|Paldea Pokédex]] (×10) | |||
| All [[Poké Mart]]s (after earning 1 [[Badge|Gym Badge]]), [[Porto Marinada Market|Porto Marinada auction]]<br>Sparkling overworld item ([[Alfornada Cavern]], [[Dalizapa Passage]], [[Glaseado Mountain]], [[Tagtree Thicket]], [[East Province (Area One)]], [[East Province (Area Two)]], [[North Province (Area One)]], [[North Province (Area Three)]], [[South Province (Area Five)]], [[West Province (Area One)]], [[West Province (Area Three)]]) | |||
|- | |||
| {{gameabbrev9|SV}}{{gameabbrev9|TM}} | |||
| [[Apple Hills]], [[Fellhorn Gorge]], [[Infernal Pass]], [[Kitakami Road]], [[Mossfell Confluence]], [[Oni Mountain]], [[Paradise Barrens]], [[Reveler's Road]], [[Wistful Fields]] | |||
| {{DL|Mossui Town|Peachy's}} (after earning 1 [[Badge|Gym Badge]])<br>Sparkling overworld item ([[Crystal Pool]], [[Fellhorn Gorge]], [[Infernal Pass]], [[Kitakami Road]], [[Mossfell Confluence]], [[Oni Mountain]], [[Oni's Maw]], [[Paradise Barrens]], [[Reveler's Road]], [[Wistful Fields]]) | |||
|- | |||
| {{gameabbrev9|SV}}{{gameabbrev9|ID}} | |||
| [[Canyon Biome]], [[Central Plaza]], [[Coastal Biome]], [[Polar Biome]], [[Savanna Biome]] | |||
| [[Vending machine]]s ([[Terarium]])<br>[[Item Printer]] (Poké Ball Lotto) | |||
|} | |} | ||
|} | |} | ||
=== | ====Distribution==== | ||
==== | {| class="roundy" style="background: #{{Poké Balls color light}}; border: 5px solid #{{Poké Balls color}}" | ||
|- | |||
| | |||
{| border=1 style="background:#FFF; border:1px solid #{{Poké Balls color light}}; border-collapse:collapse" | |||
|- | |||
! style="background:#FFF; {{roundytl|5px}}" | Games | |||
! style="background:#FFF" | Event | |||
! style="background:#FFF" | Language/Region | |||
! style="background:#FFF; {{roundytr|5px}}" | Distribution period | |||
|- style="background:#FFF;" | |||
| {{gameabbrev9|SV}} | |||
| {{DL|List of other event distributions in Generation IX|Japanese 7-11 Onigiri Balls}} | |||
| Japan | |||
| November 18, 2022 to January 10, 2023 | |||
|} | |||
|} | |||
===NPC usage=== | |||
====Pokémon Sun, Moon, Ultra Sun, and Ultra Moon==== | ====Pokémon Sun, Moon, Ultra Sun, and Ultra Moon==== | ||
The following {{DL|Pokémon Trainer|Trainer class}}es keep their Pokémon in Great Balls: | |||
* {{tc|Youth Athlete}} | * {{tc|Youth Athlete}} | ||
| Line 137: | Line 183: | ||
* {{tc|Dancer}} | * {{tc|Dancer}} | ||
* {{tc|Golfer}} | * {{tc|Golfer}} | ||
* {{tc|Aether Foundation Employee}} | * {{tc|Aether Foundation Employee}} (excluding masked ones) | ||
* {{tc|Team Rainbow Rocket Grunt | * {{tc|Team Rainbow Rocket Grunt}} | ||
====Pokémon Sword and Shield==== | ====Pokémon Sword and Shield==== | ||
[[Bede]] keeps his Pokémon in Great Balls. | |||
The following Trainer classes keep their Pokémon in Great Balls: | |||
* {{tc|Artist}} | * {{tc|Artist}} | ||
| Line 150: | Line 198: | ||
* {{tc|Gym Trainer}} ([[Stow-on-Side Stadium|Stow-on-Side]]{{sup/8|Sw}}, [[Circhester Stadium|Circhester]]) | * {{tc|Gym Trainer}} ([[Stow-on-Side Stadium|Stow-on-Side]]{{sup/8|Sw}}, [[Circhester Stadium|Circhester]]) | ||
==In the side series games== | |||
===Pokémon Stadium 2=== | |||
In [[Pokémon Stadium 2]], Great Balls appear in the mini-game {{p|Furret}}'s Frolic. They are worth two points each. | |||
==In the spin-off games== | |||
===Pokémon Shuffle=== | |||
[[File:Shuffle Great Ball.png|thumb|200px|Using a Great Ball on {{p|Pancham}} in Pokémon Shuffle]] | |||
In {{g|Shuffle}}, whenever the player defeats an uncaught Pokémon that is not a [[Trainer]]'s [[Mega Evolve]]d Pokémon, they get a chance to [[Caught Pokémon|catch that Pokémon]] with a regular [[Poké Ball]] provided automatically. If the Pokémon escapes that Poké Ball, the player is prompted to purchase a Great Ball. Great Balls cost 2500 Coins in the 3DS version of the game and 3500 Coins in Pokémon Shuffle Mobile. This Great Ball is immediately used against the Pokémon. If a Great Ball fails, the player can purchase another, unless they have already used four Great Balls on the current catch attempt. If the fourth Great Ball fails, or if the player chooses not to purchase a Great Ball at any point, the Pokémon runs away and the stage concludes. The Pokémon also has a chance to flee each time it escapes a Great Ball. | |||
Using a Great Ball doubles the Pokémon's current [[Caught Pokémon|catchability]], increasing the chance of a capture succeeding. This is not repeated when the player purchases further Great Balls. On rare occasions, [[Pokémon Shuffle#Catching Pokémon|Super Catch Power]] will activate after the catchability doubling but before the prompt for the Great Ball. Super Catch Power boosts the player's odds of catching the Pokémon to 50% or more. This can only be taken advantage of by using a Great Ball, since the player is past the point they are allowed to throw a Poké Ball. | |||
Catchability maxes out at 100%, which is displayed as "MAX". Therefore, the Great Ball will not fully double the catchability if the catchability is already at 51% or higher. | |||
{{-}} | |||
===Pokémon GO=== | |||
[[File:GO Great Ball.png|thumb|150px|A Great Ball in Pokémon GO]] | |||
Great Balls can be used during wild Pokémon encounters to attempt to capture a wild Pokémon with a {{OBP|catch rate|GO}} modifier of 1.5×. | |||
====Description==== | |||
{{movedesc|Poké Balls}} | |||
{{movedescentry|{{gameabbrevss|GO}}|A high-performance ball with a higher catch rate than a standard Poké Ball.}} | |||
|} | |||
|} | |||
====Acquisition==== | |||
The player is awarded Great Balls when they [[Trainer level|level up]] to any level from 12 to 19. | |||
Great Balls can also be repeatably obtained by | |||
* Spinning the Photo Disc of [[PokéStop]]s or {{OBP|Gym|GO}}s (Lv. 12+) | |||
* [[Field Research]] | |||
* Opening a [[Gift]] (Lv. 12+) | |||
===Pokémon Pinball series=== | |||
In [[Pokémon Pinball]] and [[Pokémon Pinball: Ruby & Sapphire]], the Great Ball multiplies bonus points by ×2. | |||
====Gallery==== | |||
{| style="margin:auto; text-align:center; {{roundy|10px}} border: 2px solid #{{Poké Balls color dark}}; background: #{{Poké Balls color}}" | |||
| style="{{roundy|10px}} border: 2px solid #{{Poké Balls color dark}}; background: #{{Poké Balls color light}}; width:80px; height:20px" | [[File:Pinball Great Ball.png]] | |||
| style="{{roundy|10px}} border: 2px solid #{{Poké Balls color dark}}; background: #{{Poké Balls color light}}; width:80px; height:20px" | [[File:Pinball RS Great Ball.png]] | |||
|- style="font-size:80%" | |||
| Sprite from<br/>{{color2|000|Pokémon Pinball|Pinball}} | |||
| Sprite from<br/>{{color2|000|Pokémon Pinball: Ruby & Sapphire|Pinball: Ruby & Sapphire}} | |||
|} | |||
===Pokémon Frienda=== | |||
{{incomplete|section|needs=Image}} | |||
In [[Pokémon Frienda]], after a set number of [[move]]s have been used and at least one opposing Pokémon has fainted, the player can insert ¥100 for a chance to catch all of the opposing Pokémon. A spinning wheel determines what Poké Balls are used on the Pokémon, with one of the options being a Great Ball. | |||
== | ==Gallery== | ||
===Artwork=== | ===Artwork=== | ||
{| style="margin:auto; text-align:center; {{roundy|20px}} border: 2px solid #{{Poké Balls color dark}}; background: #{{Poké Balls color}}; font-size: 80%" | {| style="margin:auto; text-align:center; {{roundy|20px}} border: 2px solid #{{Poké Balls color dark}}; background: #{{Poké Balls color}}; font-size: 80%" | ||
| Line 158: | Line 252: | ||
|style="{{roundy|80px}} border: 2px solid #{{Poké Balls color dark}}; background: #{{Poké Balls color light}}"| [[File:RG super ball.png|100px]] | |style="{{roundy|80px}} border: 2px solid #{{Poké Balls color dark}}; background: #{{Poké Balls color light}}"| [[File:RG super ball.png|100px]] | ||
|style="{{roundy|80px}} border: 2px solid #{{Poké Balls color dark}}; background: #{{Poké Balls color light}}"| [[File:SugimoriGreatBall.png|100px]] | |style="{{roundy|80px}} border: 2px solid #{{Poké Balls color dark}}; background: #{{Poké Balls color light}}"| [[File:SugimoriGreatBall.png|100px]] | ||
|style="{{roundy|80px}} border: 2px solid #{{Poké Balls color dark}}; background: #{{Poké Balls color light}}"| [[File:Bag Great Ball SV Sprite.png|100px]] | |||
|- | |- | ||
| Artwork from<br>{{color2|000|Generation I}} | | Artwork from<br>{{color2|000|Generation I}} | ||
| Artwork by<br>{{color2|000|Ken Sugimori}} | | Artwork by<br>{{color2|000|Ken Sugimori}} | ||
| Artwork from<br>{{color2|000|Pokémon Scarlet and Violet|Scarlet and Violet}} | |||
|} | |} | ||
| Line 170: | Line 266: | ||
|style="{{roundy|80px}} border: 2px solid #{{Poké Balls color dark}}; background: #{{Poké Balls color light}}"| [[File:Great Ball III.png]] | |style="{{roundy|80px}} border: 2px solid #{{Poké Balls color dark}}; background: #{{Poké Balls color light}}"| [[File:Great Ball III.png]] | ||
|style="{{roundy|80px}} border: 2px solid #{{Poké Balls color dark}}; background: #{{Poké Balls color light}}"| [[File:Great Ball summary Colo.png]] | |style="{{roundy|80px}} border: 2px solid #{{Poké Balls color dark}}; background: #{{Poké Balls color light}}"| [[File:Great Ball summary Colo.png]] | ||
|style="{{roundy|80px}} border: 2px solid #{{Poké Balls color dark}}; background: #{{Poké Balls color light}}"| [[File:Great Ball summary XD.png]] | |||
|- | |- | ||
| In-battle sprite in<br>{{color2|000|Generation II}} | | In-battle sprite in<br>{{color2|000|Generation II}} | ||
| Line 175: | Line 272: | ||
| In-battle and<br>Summary sprite from<br>{{color2|000|Generation III}} | | In-battle and<br>Summary sprite from<br>{{color2|000|Generation III}} | ||
| Summary sprite from<br>{{color2|000|Pokémon Colosseum|Colosseum}} | | Summary sprite from<br>{{color2|000|Pokémon Colosseum|Colosseum}} | ||
| Summary sprite from<br>{{color2|000|Pokémon XD: Gale of Darkness|XD: Gale of Darkness}} | |||
|- | |- | ||
|style="{{roundy|80px}} border: 2px solid #{{Poké Balls color dark}}; background: #{{Poké Balls color light}}"| [[File:Great Ball summary IV.png]] | |style="{{roundy|80px}} border: 2px solid #{{Poké Balls color dark}}; background: #{{Poké Balls color light}}"| [[File:Great Ball summary IV.png]] | ||
|style="{{roundy|80px}} border: 2px solid #{{Poké Balls color dark}}; background: #{{Poké Balls color light}}"| [[File:Great Ball battle IV.png]] | |style="{{roundy|80px}} border: 2px solid #{{Poké Balls color dark}}; background: #{{Poké Balls color light}}"| [[File:Great Ball battle IV.png]] | ||
|style="{{roundy|80px}} border: 2px solid #{{Poké Balls color dark}}; background: #{{Poké Balls color light}}"| [[File:Great Ball summary PBR.png]] | |||
|style="{{roundy|80px}} border: 2px solid #{{Poké Balls color dark}}; background: #{{Poké Balls color light}}"| [[File:Great Ball battle V.png]] | |style="{{roundy|80px}} border: 2px solid #{{Poké Balls color dark}}; background: #{{Poké Balls color light}}"| [[File:Great Ball battle V.png]] | ||
|- | |- | ||
| Summary sprite from<br>{{color2|000|Generation IV|Generations IV}} and {{color2|000|Generation V|V}} | | Summary sprite from<br>{{color2|000|Generation IV|Generations IV}} and {{color2|000|Generation V|V}} | ||
| In-battle sprite in<br>{{color2|000|Generation IV}} | | In-battle sprite in<br>{{color2|000|Generation IV}} | ||
| Summary sprite from<BR>{{color2|000|Pokémon Battle Revolution|Battle Revolution}} | |||
| In-battle sprite in<br>{{color2|000|Generation V}} | | In-battle sprite in<br>{{color2|000|Generation V}} | ||
|} | |} | ||
| Line 201: | Line 299: | ||
|} | |} | ||
== | ==In animation== | ||
[[File: | [[File:Great Quick Ball anime.png|thumb|250px|A Great Ball in {{aniseries|JN}}]] | ||
===''Pokémon the Series''=== | |||
===={{aniseries|DP}}==== | |||
A Great Ball appeared in [[Which One ~ Is It?]], a Japanese ending theme from {{aniseries|DP}}. | |||
{ | |||
=== | |||
= | |||
A Great Ball appeared in [[Which One ~ Is It?]], a Japanese ending theme from | |||
===={{aniseries|XY}}==== | |||
In ''[[XY079|A Frenzied Factory Fiasco!]]'', multiple Great Balls were seen at the [[Poké Ball Factory]]. | In ''[[XY079|A Frenzied Factory Fiasco!]]'', multiple Great Balls were seen at the [[Poké Ball Factory]]. | ||
===={{aniseries|SM}}==== | |||
A pair of Great Balls appeared in {{TRT}}'s [[boss fantasy]] in ''[[SM056|Let Sleeping Pokémon Lie!]]''. | A pair of Great Balls appeared in {{TRT}}'s [[boss fantasy]] in ''[[SM056|Let Sleeping Pokémon Lie!]]''. | ||
In ''[[SM062|Acting True to Form!]]'', a Great Ball appeared as a part of [[James]]'s Poké Ball collection. | In ''[[SM062|Acting True to Form!]]'', a Great Ball appeared as a part of [[James]]'s Poké Ball collection. | ||
===={{aniseries|JN}}==== | |||
In ''[[JN081|Mad About Blue!]]'', [[Bluto]] was shown to keep his {{p|Seismitoad}} in a Great Ball. | |||
[[File:Great Ball PO.png|thumb|left|250px|A Great Ball in [[Pokémon Origins]]]] | [[File:Great Ball PO.png|thumb|left|250px|A Great Ball in [[Pokémon Origins]]]] | ||
=== | ===Pokémon Origins=== | ||
In ''[[PO04|File 4: Charizard]]'', {{OBP|Red|Origins}} {{pkmn2|caught}} an {{p|Arbok}} using a Great Ball. | In ''[[PO04|File 4: Charizard]]'', {{OBP|Red|Origins}} {{pkmn2|caught}} an {{p|Arbok}} using a Great Ball. | ||
{{-}} | {{-}} | ||
==In the manga== | ==In the manga== | ||
[[File:Gold Dragonite.png|thumb|230px|A Great Ball in Pokémon Adventures]] | [[File:Great Ball PM.png|left|thumb|200px|Great Balls in [[Pokémon Pocket Monsters]]]] | ||
===In the Pokémon Adventures manga=== | [[File:Gold Dragonite.png|thumb|230px|A Great Ball in [[Pokémon Adventures]]]] | ||
===Pokémon Adventures=== | |||
In the Pokémon Adventures manga, [[Gym Leader]]s outside of [[Galar]] keep their Pokémon in Great Balls provided for them by the [[Pokémon Association]]. | |||
===={{MangaArc|Red, Green & Blue}}==== | |||
In ''[[PS001|A Glimpse of the Glow]]'', a {{tc|Team Rocket Grunt}} was shown carrying Great Balls on his belt. | In ''[[PS001|A Glimpse of the Glow]]'', a {{tc|Team Rocket Grunt}} was shown carrying Great Balls on his belt. | ||
{{-}} | {{-}} | ||
==In the TCG== | ==In the TCG== | ||
[[File:GreatBallEXFireRedLeafGreen92.jpg|thumb|200px|Great Ball]] | [[File:GreatBallEXFireRedLeafGreen92.jpg|thumb|200px|The EX FireRed & LeafGreen printing of {{TCG ID|EX FireRed & LeafGreen|Great Ball|92}}]] | ||
{{main|Great Ball (EX FireRed & LeafGreen 92)}} | {{main|Great Ball (EX FireRed & LeafGreen 92)}} | ||
The {{TCG | The '''Great Ball''' was introduced as a {{TCG|Trainer card}} in the [[Pokémon Trading Card Game]] during the English EX Series (the Japanese PCG Era). It was first released in the Japanese {{TCG|Flight of Legends}} expansion and the English {{TCG|EX FireRed & LeafGreen}} expansion, with artwork by [[Nakaoka]]. It originally allowed the player to search their deck for any {{TCG|Basic Pokémon}} (excluding {{TCG|Pokémon-ex}}), and put it onto their Bench. Then, they shuffle their deck. During the English Black & White Series (the Japanese BW Era) the card was reclassified as an {{TCG|Item card}}, and the card received [[errata]] to change the effect. Now, it lets the player search the top seven cards of the deck for any one Pokémon card, put it in their hand, and then shuffle the other cards back into their deck. Great Ball has been reprinted many times since. | ||
{{TCG ID|Double Crisis|Team Magma's Great Ball|31}} and {{TCG ID|Double Crisis|Team Aqua's Great Ball|27}} are [[Team Magma]] and [[Team Aqua]] versions of Great Balls. They are Item cards, and were printed in the English {{TCG|Double Crisis}} expansion and Japanese {{TCG|Magma Gang VS Aqua Gang: Double Crisis}} expansion. Team Magma's Great Ball lets the player search their deck for a for a Basic Team Magma Pokémon and a [[Basic Fighting Energy (TCG)|Basic]] {{e|Fighting}} [[Basic Fighting Energy (TCG)|Energy]] and put them in their hand. Team Aqua's Great Ball lets the player search their deck for a for a Basic Team Aqua Pokémon and a [[Basic Water Energy (TCG)|Basic]] {{e|Water}} [[Basic Water Energy (TCG)|Energy]] and put them in their hand. For both cards, the deck is shuffled afterward. | |||
{{-}} | {{-}} | ||
==Trivia== | |||
* In [[Generation I]] only, the Great Ball has a higher catch rate than the [[Ultra Ball]] in certain situations. | |||
==In other languages== | ==In other languages== | ||
| Line 270: | Line 347: | ||
|zh_yue=超級球 ''{{tt|Chīukāp Kàuh|Super Ball}}'' | |zh_yue=超級球 ''{{tt|Chīukāp Kàuh|Super Ball}}'' | ||
|zh_cmn=超級球 / 超级球 ''{{tt|Chāojí Qiú|Super Ball}}'' | |zh_cmn=超級球 / 超级球 ''{{tt|Chāojí Qiú|Super Ball}}'' | ||
|cs=Superbal | |||
|fi=Tehopallo | |fi=Tehopallo | ||
|fr=Super Ball | |fr=Super Ball | ||
|de=Superball | |de=Superball | ||
|id=Bola Great | |||
|it=Mega Ball | |it=Mega Ball | ||
|ko=수퍼볼 ''Super Ball'' | |ko=수퍼볼 ''Super Ball'' | ||
| Line 278: | Line 357: | ||
|pt_br=Grande Bola | |pt_br=Grande Bola | ||
|pt_eu=Bola Grande | |pt_eu=Bola Grande | ||
|ru=Мега-Болл ''Mega-Boll'' | |ru=Мега-Болл ''Mega-Boll''<br>Большой шар ''Bolshoi shar'' | ||
|es_la= | |es_la=Superbola | ||
|es_eu=Súper Ball {{tt|*|Generations I and II}}<br/>Superball {{tt|*|Generation III onwards}} | |es_eu=Súper Ball {{tt|*|Generations I and II}}<br/>Superball {{tt|*|Generation III onwards}} | ||
|sv=Stor boll | |sv=Stor boll | ||
|th=ซูเปอร์บอล ''Super Ball''<br>เกรทบอล ''Great Ball'' {{tt|*|Medallion}} | |||
|vi=Bóng Super | |vi=Bóng Super | ||
}} | }} | ||
| Line 294: | Line 374: | ||
[[es:Super Ball]] | [[es:Super Ball]] | ||
[[fr:Super Ball]] | [[fr:Super Ball]] | ||
[[it: | [[it:Mega Ball]] | ||
[[ja:スーパーボール]] | [[ja:スーパーボール]] | ||
[[zh:超级球(道具)]] | [[zh:超级球(道具)]] | ||
Latest revision as of 19:57, 26 October 2024
- This article is about the modern incarnation of the Great Ball. For the Great Ball from Legends: Arceus, see Great Ball (Hisui).
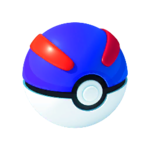
The Great Ball (Japanese: スーパーボール Super Ball) is a type of Poké Ball introduced in Generation I. It is an improved variant of the regular Poké Ball that can be used to catch wild Pokémon.
| |||||||||||||||||||||
| |||||||||||||||||||||
| |||||||||||||||||||||
In the core series games
Price
|
In Pokémon Crystal, a Great Ball costs $500 during the Goldenrod Department Store rooftop sale.
Effect
Manual activation
When used from the Bag in a wild encounter, it will attempt to catch the wild Pokémon with a catch rate modifier of 1.5×.
If used on an Ultra Beast, the catch rate modifier is instead always set to 410/4096× (~0.1×).
The Great Ball cannot be used in situations in which Poké Balls cannot be used, such as in wild battles with two or more opponents currently present or against a trial Pokémon. If used in a Trainer battle (except if used as a Snag Ball on a Shadow Pokémon), the opposing Trainer will deflect it, wasting the ball (in Generation III and earlier) or only the player's turn (from Generation IV onward). If used on the ghost Marowak, it will dodge it, wasting the ball.
Held item
Fling fails if the user is holding a Great Ball.
Description
|
Acquisition
Distribution
|
NPC usage
Pokémon Sun, Moon, Ultra Sun, and Ultra Moon
The following Trainer classes keep their Pokémon in Great Balls:
- Youth Athlete
- Rising Star
- Dancer
- Golfer
- Aether Foundation Employee (excluding masked ones)
- Team Rainbow Rocket Grunt
Pokémon Sword and Shield
Bede keeps his Pokémon in Great Balls.
The following Trainer classes keep their Pokémon in Great Balls:
In the side series games
Pokémon Stadium 2
In Pokémon Stadium 2, Great Balls appear in the mini-game Furret's Frolic. They are worth two points each.
In the spin-off games
Pokémon Shuffle
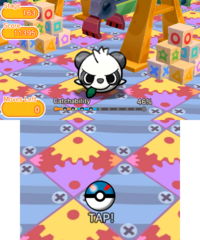
In Pokémon Shuffle, whenever the player defeats an uncaught Pokémon that is not a Trainer's Mega Evolved Pokémon, they get a chance to catch that Pokémon with a regular Poké Ball provided automatically. If the Pokémon escapes that Poké Ball, the player is prompted to purchase a Great Ball. Great Balls cost 2500 Coins in the 3DS version of the game and 3500 Coins in Pokémon Shuffle Mobile. This Great Ball is immediately used against the Pokémon. If a Great Ball fails, the player can purchase another, unless they have already used four Great Balls on the current catch attempt. If the fourth Great Ball fails, or if the player chooses not to purchase a Great Ball at any point, the Pokémon runs away and the stage concludes. The Pokémon also has a chance to flee each time it escapes a Great Ball.
Using a Great Ball doubles the Pokémon's current catchability, increasing the chance of a capture succeeding. This is not repeated when the player purchases further Great Balls. On rare occasions, Super Catch Power will activate after the catchability doubling but before the prompt for the Great Ball. Super Catch Power boosts the player's odds of catching the Pokémon to 50% or more. This can only be taken advantage of by using a Great Ball, since the player is past the point they are allowed to throw a Poké Ball.
Catchability maxes out at 100%, which is displayed as "MAX". Therefore, the Great Ball will not fully double the catchability if the catchability is already at 51% or higher.
Pokémon GO
Great Balls can be used during wild Pokémon encounters to attempt to capture a wild Pokémon with a catch rate modifier of 1.5×.
Description
|
Acquisition
The player is awarded Great Balls when they level up to any level from 12 to 19.
Great Balls can also be repeatably obtained by
- Spinning the Photo Disc of PokéStops or Gyms (Lv. 12+)
- Field Research
- Opening a Gift (Lv. 12+)
Pokémon Pinball series
In Pokémon Pinball and Pokémon Pinball: Ruby & Sapphire, the Great Ball multiplies bonus points by ×2.
Gallery
| Sprite from Pinball |
Sprite from Pinball: Ruby & Sapphire |
Pokémon Frienda

|
This section is incomplete. Please feel free to edit this section to add missing information and complete it. Reason: Image |
In Pokémon Frienda, after a set number of moves have been used and at least one opposing Pokémon has fainted, the player can insert ¥100 for a chance to catch all of the opposing Pokémon. A spinning wheel determines what Poké Balls are used on the Pokémon, with one of the options being a Great Ball.
Gallery
Artwork
|
|
|
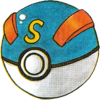
| Artwork from Generation I |
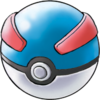
Artwork by Ken Sugimori |
Artwork from Scarlet and Violet |
Sprites
| In-battle sprite in Generation II |
Sprite from Furret Frolic's instruction screen in Stadium 2 |
In-battle and Summary sprite from Generation III |
Summary sprite from Colosseum |
Summary sprite from XD: Gale of Darkness |
| Summary sprite from Generations IV and V |
In-battle sprite in Generation IV |
Summary sprite from Battle Revolution |
In-battle sprite in Generation V |
Models

|

|

|

|
| Model from Furret Frolic in Stadium 2 |
In-battle model X, Y, Omega Ruby, Alpha Sapphire, Sun, Moon, Ultra Sun, and Ultra Moon |
Model from Let's Go, Pikachu! and Let's Go, Eevee! |
Model from Generation VIII |
In animation

Pokémon the Series
Pokémon the Series: Diamond and Pearl
A Great Ball appeared in Which One ~ Is It?, a Japanese ending theme from Pokémon the Series: Diamond and Pearl.
Pokémon the Series: XY
In A Frenzied Factory Fiasco!, multiple Great Balls were seen at the Poké Ball Factory.
Pokémon the Series: Sun & Moon
A pair of Great Balls appeared in Team Rocket's boss fantasy in Let Sleeping Pokémon Lie!.
In Acting True to Form!, a Great Ball appeared as a part of James's Poké Ball collection.
Pokémon Journeys: The Series
In Mad About Blue!, Bluto was shown to keep his Seismitoad in a Great Ball.

Pokémon Origins
In File 4: Charizard, Red caught an Arbok using a Great Ball.
In the manga
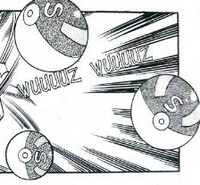

Pokémon Adventures
In the Pokémon Adventures manga, Gym Leaders outside of Galar keep their Pokémon in Great Balls provided for them by the Pokémon Association.
Red, Green & Blue arc
In A Glimpse of the Glow, a Team Rocket Grunt was shown carrying Great Balls on his belt.
In the TCG
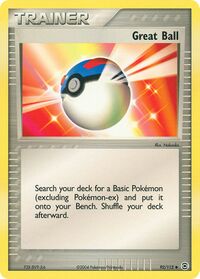
- Main article: Great Ball (EX FireRed & LeafGreen 92)
The Great Ball was introduced as a Trainer card in the Pokémon Trading Card Game during the English EX Series (the Japanese PCG Era). It was first released in the Japanese Flight of Legends expansion and the English EX FireRed & LeafGreen expansion, with artwork by Nakaoka. It originally allowed the player to search their deck for any Basic Pokémon (excluding Pokémon-ex), and put it onto their Bench. Then, they shuffle their deck. During the English Black & White Series (the Japanese BW Era) the card was reclassified as an Item card, and the card received errata to change the effect. Now, it lets the player search the top seven cards of the deck for any one Pokémon card, put it in their hand, and then shuffle the other cards back into their deck. Great Ball has been reprinted many times since.
Team Magma's Great Ball and Team Aqua's Great Ball are Team Magma and Team Aqua versions of Great Balls. They are Item cards, and were printed in the English Double Crisis expansion and Japanese Magma Gang VS Aqua Gang: Double Crisis expansion. Team Magma's Great Ball lets the player search their deck for a for a Basic Team Magma Pokémon and a Basic ![]() Energy and put them in their hand. Team Aqua's Great Ball lets the player search their deck for a for a Basic Team Aqua Pokémon and a Basic
Energy and put them in their hand. Team Aqua's Great Ball lets the player search their deck for a for a Basic Team Aqua Pokémon and a Basic ![]() Energy and put them in their hand. For both cards, the deck is shuffled afterward.
Energy and put them in their hand. For both cards, the deck is shuffled afterward.
Trivia
- In Generation I only, the Great Ball has a higher catch rate than the Ultra Ball in certain situations.
In other languages
| |||||||||||||||||||||||||||||||||||||||||||||||||||||||||

|
This item article is part of Project ItemDex, a Bulbapedia project that aims to write comprehensive articles on all items. |
