Nest Ball: Difference between revisions
mNo edit summary |
|||
| (74 intermediate revisions by 28 users not shown) | |||
| Line 11: | Line 11: | ||
{{ItemInfobox/BagRow|VI|Items|colorscheme=Poké Balls}} | {{ItemInfobox/BagRow|VI|Items|colorscheme=Poké Balls}} | ||
{{ItemInfobox/BagRow|VII|Items|colorscheme=Poké Balls}} | {{ItemInfobox/BagRow|VII|Items|colorscheme=Poké Balls}} | ||
{{ItemInfobox/BagRowBottom| | {{ItemInfobox/BagRow|VIII|Poké Balls}} | ||
{{ItemInfobox/BagRowBottom|IX|Poké Balls}} | |||
|} | |} | ||
The '''Nest Ball''' (Japanese: '''ネストボール''' ''Nest Ball'') is a type of [[Poké Ball]] introduced in [[Generation III]]. It can be used to catch a [[wild Pokémon]], being more likely to succeed against lower [[level]] Pokémon. | The '''Nest Ball''' (Japanese: '''ネストボール''' ''Nest Ball'') is a type of [[Poké Ball]] introduced in [[Generation III]]. It can be used to catch a [[wild Pokémon]], being more likely to succeed against lower-[[level]] Pokémon. | ||
==In the core series games== | ==In the core series games== | ||
===Price=== | ===Price=== | ||
{{ItemPrice/ | {{ItemPrice/head|Poké Balls}} | ||
{{ItemPrice|{{gameabbrev3|RSEFRLG}}<br>{{gameabbrev4|DPPtHGSS}}<br>{{gameabbrev5|BWB2W2}}<br>{{gameabbrev6|XYORAS}}<br>{{gameabbrev7|SMUSUM}}<br>{{gameabbrev8| | {{ItemPrice|{{gameabbrev3|RSEFRLG}}<br>{{gameabbrev4|DPPtHGSS}}<br>{{gameabbrev5|BWB2W2}}<br>{{gameabbrev6|XYORAS}}<br>{{gameabbrev7|SMUSUM}}<br>{{gameabbrev8|SwShBDSP}} | ||
|{{PDollar}} | |{{PDollar}}1,000|{{PDollar}}500}} | ||
{{ItemPrice|{{gameabbrev9|SV}}|{{PDollar}}1,000|{{PDollar}}250}} | |||
|} | |} | ||
|} | |} | ||
| Line 27: | Line 29: | ||
====Manual activation==== | ====Manual activation==== | ||
When used from the [[Bag]] in a {{pkmn2|wild}} encounter, it attempts to catch the wild Pokémon. If used against a low [[level]] Pokémon, it has an increased [[catch rate]] modifier, calculated as follows: | When used from the [[Bag]] in a {{pkmn2|wild}} encounter, it attempts to catch the wild Pokémon. If used against a low [[level]] Pokémon, it has an increased [[catch rate]] modifier, calculated as follows: | ||
{ | * From Generation III to IV, <math display=inline>\tfrac{40 - Level}{10}</math>×, minimum 1× | ||
* In Generation V, <math display=inline>\dfrac{\left\lfloor \tfrac{\left(41 - Level\right) \times 4096}{10} \right\rfloor}{4096}</math>×, minimum 1× | |||
{| class=" | * From Generation VI onward, <math display=inline>\dfrac{\left\lfloor \tfrac{\left(41 - Level\right) \times 4096}{10} \right\rfloor}{4096}</math>× if Pokémon's level is between 1 and 29, 1× otherwise | ||
{| class="roundtable mw-collapsible mw-collapsed" style="background:#{{Poké Balls color light}}; border:5px solid #{{Poké Balls color}}" | |||
! rowspan=2 | Level | ! rowspan=2 | Level | ||
! colspan=3 | Catch rate modifier | ! colspan=3 | Catch rate modifier | ||
| Line 44: | Line 44: | ||
|1 || 3.9 || 4 || 4 | |1 || 3.9 || 4 || 4 | ||
|- | |- | ||
|2 || 3.8 || 3.9 || 3.9 | |2 || 3.8 || 15974/4096 (~3.9) || 15974/4096 (~3.9) | ||
|- | |- | ||
|3 || 3.7 || 3.8 || 3.8 | |3 || 3.7 || 15564/4096 (~3.8) || 15564/4096 (~3.8) | ||
|- | |- | ||
|4 || 3.6 || 3.7 || 3.7 | |4 || 3.6 || 15155/4096 (~3.7) || 15155/4096 (~3.7) | ||
|- | |- | ||
|5 || 3.5 || 3.6 || 3.6 | |5 || 3.5 || 15475/4096 (~3.6) || 15475/4096 (~3.6) | ||
|- | |- | ||
|6 || 3.4 || 3.5 || 3.5 | |6 || 3.4 || 3.5 || 3.5 | ||
|- | |- | ||
|7 || 3.3 || 3.4 || 3.4 | |7 || 3.3 || 13926/4096 (~3.4) || 13926/4096 (~3.4) | ||
|- | |- | ||
|8 || 3.2 || 3.3 || 3.3 | |8 || 3.2 || 13516/4096 (~3.3) || 13516/4096 (~3.3) | ||
|- | |- | ||
|9 || 3.1 || 3.2 || 3.2 | |9 || 3.1 || 13107/4096 (~3.2) || 13107/4096 (~3.2) | ||
|- | |- | ||
|10 || 3 || 3.1 || 3.1 | |10 || 3 || 12697/4096 (~3.1) || 12697/4096 (~3.1) | ||
|- | |- | ||
|11 || 2.9 || 3 || 3 | |11 || 2.9 || 3 || 3 | ||
|- | |- | ||
|12 || 2.8 || 2.9 || 2.9 | |12 || 2.8 || 11878/4096 (~2.9) || 11878/4096 (~2.9) | ||
|- | |- | ||
|13 || 2.7 || 2.8 || 2.8 | |13 || 2.7 || 11468/4096 (~2.8) || 11468/4096 (~2.8) | ||
|- | |- | ||
|14 || 2.6 || 2.7 || 2.7 | |14 || 2.6 || 11059/4096 (~2.7) || 11059/4096 (~2.7) | ||
|- | |- | ||
|15 || 2.5 || 2.6 || 2.6 | |15 || 2.5 || 10649/4096 (~2.6) || 10649/4096 (~2.6) | ||
|- | |- | ||
|16 || 2.4 || 2.5 || 2.5 | |16 || 2.4 || 2.5 || 2.5 | ||
|- | |- | ||
|17 || 2.3 || 2.4 || 2.4 | |17 || 2.3 || 9830/4096 (~2.4) || 9830/4096 (~2.4) | ||
|- | |- | ||
|18 || 2.2 || 2.3 || 2.3 | |18 || 2.2 || 9420/4096 (~2.3) || 9420/4096 (~2.3) | ||
|- | |- | ||
|19 || 2.1 || 2.2 || 2.2 | |19 || 2.1 || 9011/4096 (~2.2) || 9011/4096 (~2.2) | ||
|- | |- | ||
|20 || 2 || 2.1 || 2.1 | |20 || 2 || 8601/4096 (~2.1) || 8601/4096 (~2.1) | ||
|- | |- | ||
|21 || 1.9 || 2 || 2 | |21 || 1.9 || 2 || 2 | ||
|- | |- | ||
|22 || 1.8 || 1.9 || 1.9 | |22 || 1.8 || 7782/4096 (~1.9) || 7782/4096 (~1.9) | ||
|- | |- | ||
|23 || 1.7 || 1.8 || 1.8 | |23 || 1.7 || 7372/4096 (~1.8) || 7372/4096 (~1.8) | ||
|- | |- | ||
|24 || 1.6 || 1.7 || 1.7 | |24 || 1.6 || 6963/4096 (~1.7) || 6963/4096 (~1.7) | ||
|- | |- | ||
|25 || 1.5 || 1.6 || 1.6 | |25 || 1.5 || 6553/4096 (~1.6) || 6553/4096 (~1.6) | ||
|- | |- | ||
|26 || 1.4 || 1.5 || 1.5 | |26 || 1.4 || 1.5 || 1.5 | ||
|- | |- | ||
|27 || 1.3 || 1.4 || 1.4 | |27 || 1.3 || 5734/4096 (~1.4) || 5734/4096 (~1.4) | ||
|- | |- | ||
|28 || 1.2 || 1.3 || 1.3 | |28 || 1.2 || 5324/4096 (~1.3) || 5324/4096 (~1.3) | ||
|- | |- | ||
|29 || 1.1 || 1.2 || 1.2 | |29 || 1.1 || 4915/4096 (~1.2) || 4915/4096 (~1.2) | ||
|- | |- | ||
|30 || 1 || 1.1 || 1 | |30 || 1 || 4505/4096 (~1.1) || 1 | ||
|- | |- | ||
|31+ || 1 || 1 || 1 | |31+ || 1 || 1 || 1 | ||
|} | |} | ||
If used on an [[Ultra Beast]], the catch rate modifier is instead always set to 0.1×. | If used on an [[Ultra Beast]], the catch rate modifier is instead always set to 410/4096× (0.1×). | ||
The Nest Ball cannot be used in situations in which Poké Balls cannot be used, such as in wild battles with two or more opponents currently present or against a [[Island challenge|trial]] Pokémon. If used in a Trainer battle (except if used as a [[Snag Ball]] on a [[Shadow Pokémon]]), the opposing Trainer will deflect the ball, wasting the item. If used on the [[Marowak (ghost)|ghost Marowak]], it will dodge the ball, wasting it. | The Nest Ball cannot be used in situations in which Poké Balls cannot be used, such as in wild battles with two or more opponents currently present or against a [[Island challenge|trial]] Pokémon. If used in a Trainer battle (except if used as a [[Snag Ball]] on a [[Shadow Pokémon]]), the opposing Trainer will deflect the ball, wasting the item. If used on the [[Marowak (ghost)|ghost Marowak]], it will dodge the ball, wasting it. | ||
| Line 115: | Line 114: | ||
===Description=== | ===Description=== | ||
{{movedesc|Poké Balls}} | {{movedesc|Poké Balls}} | ||
{{movedescentry|{{gameabbrev3|RSE}}<br>{{gameabbrevss|Colo}}{{gameabbrevss|XD}}|A <sc>Ball</sc> that works better on weaker | {{movedescentry|{{gameabbrev3|RSE}}<br>{{gameabbrevss|Colo}}{{gameabbrevss|XD}}|A <sc>Ball</sc> that works better on weaker {{ScPkmn}}}} | ||
{{movedescentry|{{gameabbrev3|FRLG}}|A somewhat different <sc>Ball</sc> that works especially well on weaker | {{movedescentry|{{gameabbrev3|FRLG}}|A somewhat different <sc>Ball</sc> that works especially well on weaker {{ScPkmn}}.}} | ||
{{movedescentry|{{gameabbrev4|DPPtHGSS}}<br>{{gameabbrev5|BWB2W2}}|A somewhat different Poké Ball that works especially well on weaker Pokémon in the wild.}} | {{movedescentry|{{gameabbrev4|DPPtHGSS}}<br>{{gameabbrev5|BWB2W2}}|A somewhat different Poké Ball that works especially well on weaker Pokémon in the wild.}} | ||
{{movedescentry|{{gameabbrev6|XYORAS}}<br>{{gameabbrev7|SMUSUMPE}}<br>{{gameabbrev8| | {{movedescentry|{{gameabbrev6|XYORAS}}<br>{{gameabbrev7|SMUSUMPE}}<br>{{gameabbrev8|SwShBDSPLA}}<br>{{gameabbrev9|SV}}|A somewhat different Poké Ball that becomes more effective the lower the level of the wild Pokémon.}} | ||
|} | |} | ||
|} | |} | ||
===Acquisition=== | ===Acquisition=== | ||
{{ItemAvailability/ | {{ItemAvailability/head|Poké Balls}} | ||
|- | |- | ||
| {{gameabbrev3|RSE}} | | {{gameabbrev3|RSE}} | ||
| {{rt|120|Hoenn | | {{rt|120|Hoenn}}, [[Team Magma Hideout|Magma Hideout]]{{sup/3|R}}/[[Team Aqua Hideout|Aqua Hideout]]{{sup/3|S}}{{sup/3|E}} | ||
| {{to|Verdanturf}} [[Poké Mart]] | | {{to|Verdanturf}} [[Poké Mart]]<br>[[Verdanturf Town]] ([[Battle Tent]]){{sup/3|E}} | ||
|- | |- | ||
| {{gameabbrev3|FRLG}} | | {{gameabbrev3|FRLG}} | ||
| [[Team Rocket Hideout|Rocket Hideout | | [[Team Rocket Hideout|Rocket Hideout]], [[Rocket Warehouse]] | ||
| [[Water Path]] (reward for a record-breaking {{p|Heracross}}) | | [[Water Path]] (reward for a record-breaking {{p|Heracross}})<br/>Hidden [[recurring item]] ([[Resort Gorgeous]]) | ||
|- | |- | ||
| {{gameabbrevss|XD}} | | {{gameabbrevss|Colo}}{{gameabbrevss|XD}} | ||
| | | | ||
| [[Outskirt Stand]] | | [[Outskirt Stand]] | ||
| Line 143: | Line 138: | ||
| {{gameabbrev4|DPPt}} | | {{gameabbrev4|DPPt}} | ||
| {{rt|210|Sinnoh}}{{sup/4|Pt}} | | {{rt|210|Sinnoh}}{{sup/4|Pt}} | ||
| {{ci|Eterna}}, {{ci|Hearthome}}, {{ci|Pastoria}}, and {{si|Pokémon League}} [[Poké Mart]]s<br>[[Pokémon News Press]] | | {{ci|Eterna}}, {{ci|Hearthome}}, {{to|Solaceon}}, {{ci|Pastoria}}, and {{si|Pokémon League}} [[Poké Mart]]s<br>[[Pokémon News Press]] | ||
|- | |- | ||
| {{gameabbrev4|HGSS}} | | {{gameabbrev4|HGSS}} | ||
| Line 155: | Line 150: | ||
| {{gameabbrev5|BW}} | | {{gameabbrev5|BW}} | ||
| | | | ||
| {{ci|Castelia}}, {{ci|Driftveil}}, and {{un|Pokémon League}} [[Poké Mart]]s; | | {{ci|Castelia}}, {{ci|Driftveil}}, and {{un|Pokémon League}} [[Poké Mart]]s; [[Shopping Mall Nine]] | ||
|- | |- | ||
| {{gameabbrev5|B2W2}} | | {{gameabbrev5|B2W2}} | ||
| [[Route]]s {{rtn|8|Unova}} and {{rtn|19|Unova}}, [[Pinwheel Forest]] | | [[Route]]s {{rtn|8|Unova}} and {{rtn|19|Unova}}, [[Pinwheel Forest]] | ||
| {{ci|Castelia}}, {{ci|Driftveil}}, {{to|Lentimas}}, {{OBP|Victory Road|Black 2 and White 2}}, and {{to|Accumula}} [[Poké Mart]]s; [[Shopping Mall Nine]] | | {{ci|Castelia}}, {{ci|Driftveil}}, {{to|Lentimas}}, {{OBP|Victory Road|Black 2 and White 2}}, and {{to|Accumula}} [[Poké Mart]]s; [[Shopping Mall Nine]] | ||
|- | |||
| {{gameabbrevss|DW}}{{tt|*|No longer in service}} | |||
| | |||
| {{dwa|Pleasant Forest}} | |||
|- | |- | ||
| {{gameabbrev6|XY}} | | {{gameabbrev6|XY}} | ||
| {{rt|13|Kalos}}, [[Reflection Cave]] | | {{rt|13|Kalos}}, [[Reflection Cave]] | ||
| [[Lumiose City]] (North Boulevard), {{ci|Cyllage}}, and {{ci|Snowbelle}} [[Poké Mart]]s; {{DL| | | [[Lumiose City]] ([[North Boulevard]]), {{ci|Cyllage}}, and {{ci|Snowbelle}} [[Poké Mart]]s; {{DL|Autumnal Avenue|Poké Ball Boutique}} | ||
|- | |- | ||
| {{gameabbrev6|ORAS}} | | {{gameabbrev6|ORAS}} | ||
| {{rt|120|Hoenn}}, [[Team Magma Hideout]]{{sup/6|OR}}/[[Team Aqua Hideout]]{{sup/6|AS}} | | {{rt|120|Hoenn}}, [[Team Magma Hideout]]{{sup/6|OR}}/[[Team Aqua Hideout]]{{sup/6|AS}} | ||
| {{to|Verdanturf}} [[Poké Mart]]<br/>{{rt|116|Hoenn}} (20% chance after a rematch with {{tc|Schoolkid}} Jerry or Schoolkid Karen) | | {{to|Verdanturf}} [[Poké Mart]]<br/>{{rt|116|Hoenn}} (20% chance after a [[rematch]] with {{tc|School Kid|Schoolkid}} Jerry or Schoolkid Karen) | ||
|- | |- | ||
| {{gameabbrevss|PMC}} | | {{gameabbrevss|PMC}}{{tt|*|No longer in service}} | ||
| | | | ||
| {{DL|PokéMileage Club|Mine Cart Adventure}} (all levels) | | {{DL|PokéMileage Club|Mine Cart Adventure}} (all levels) | ||
|- | |- | ||
| {{gameabbrev7|SMUSUM}} | | {{gameabbrev7|SMUSUM}} | ||
| [[Route]]s {{rtn|1|Alola}}, {{rtn|2|Alola}}, and {{rtn|3|Alola}} | | [[Route]]s {{rtn|1|Alola}}, {{rtn|2|Alola}}, and {{rtn|3|Alola}}, [[Lush Jungle]] | ||
| {{rt|2|Alola}} [[Poké Mart]], {{DL|Royal Avenue|Thrifty Megamart}}<br>[[Festival Plaza]] ([[Festival Plaza#Goody shops|Ball Shop]]){{sup/7|MUM}} | | {{rt|2|Alola}} [[Poké Mart]], {{DL|Royal Avenue|Thrifty Megamart}}<br>[[Festival Plaza]] ([[Festival Plaza#Goody shops|Ball Shop]]){{sup/7|MUM}} | ||
|- | |||
| {{gameabbrev8|SwSh}} | |||
| {{rt|4|Galar}} | |||
| Central [[Motostoke]] [[Poké Mart]]<br>All [[Wild Area]] [[Watt Trader]]s (50 {{Watt}})<br>[[Poké Job]] reward (Tiers III-VI)<br/>Reward from Ball Guy for clearing [[Champion Cup]] tournament during post-game (×3, 5% chance) | |||
|- | |||
| {{gameabbrev8|SwSh}}{{gameabbrev8|IA}} | |||
| | |||
| Hidden [[recurring item]] ([[Soothing Wetlands]], [[Brawlers' Cave]])<br>[[Cram-o-matic]] ([[Green Apricorn]]) | |||
|- | |||
| {{gameabbrev8|SwSh}}{{gameabbrev8|CT}} | |||
| | |||
| [[Snowslide Slope]] [[Watt Trader]] (50 {{Watt}})<br>Hidden [[recurring item]] ([[Old Cemetery]], [[Giant's Foot]], [[Ballimere Lake]])<br/>Reward from Ball Guy for clearing [[Galarian Star Tournament]] during post-game (×3, 5% chance) | |||
|- | |||
| {{gameabbrev8|BDSP}} | |||
| | |||
| {{ci|Hearthome}}, {{to|Solaceon}}, {{ci|Pastoria}}, and {{si|Pokémon League}} [[Poké Mart]]s<br>[[Pokémon News Press]] | |||
|- | |||
| {{gameabbrev9|SV}} | |||
| [[Asado Desert]], [[Casseroya Lake]], [[Dalizapa Passage]], [[Tagtree Thicket]], [[East Province (Area One)]], [[North Province (Area Two)]], [[South Province (Area Two)]], [[South Province (Area Three)]], [[South Province (Area Five)]], [[West Province (Area One)]]<br>Reward for registering 90 Pokémon in the [[List of Pokémon by Paldea Pokédex number|Paldea Pokédex]] (×10) | |||
| All [[Poké Mart]]s (after earning 3 [[Badge|Gym Badges]]), [[Porto Marinada Market|Porto Marinada auction]] | |||
|- | |||
| {{gameabbrev9|SV}}{{gameabbrev9|TM}} | |||
| [[Chilling Waterhead]], [[Fellhorn Gorge]], [[Infernal Pass]], [[Kitakami Road]], [[Kitakami Wilds]], [[Mossfell Confluence]] | |||
| {{DL|Mossui Town|Peachy's}} (after earning 3 [[Badge|Gym Badge]]s) | |||
|- | |||
| {{gameabbrev9|SV}}{{gameabbrev9|ID}} | |||
| [[Coastal Biome]], [[Savanna Biome]], [[Torchlit Labyrinth]] | |||
| [[Vending machine]]s ([[Terarium]])<br>[[Item Printer]] (Poké Ball Lotto) | |||
|} | |} | ||
|} | |} | ||
==Artwork== | ===NPC usage=== | ||
====Pokémon Sun, Moon, Ultra Sun, and Ultra Moon==== | |||
{{tc|Team Skull Grunt}}s keep their Pokémon in Nest Balls. | |||
====Pokémon Sword and Shield==== | |||
{{tc|Team Yell Grunt}}s and [[Spikemuth]] {{tc|Gym Trainer}}s keep their Pokémon in Nest Balls. | |||
====Pokémon Scarlet and Violet==== | |||
[[Lacey]] keeps her Pokémon in Nest Balls. | |||
==Gallery== | |||
===Artwork=== | |||
{| style="margin:auto; text-align:center; {{roundy|20px}} border: 2px solid #{{Poké Balls color dark}}; background: #{{Poké Balls color}}; font-size: 80%" | {| style="margin:auto; text-align:center; {{roundy|20px}} border: 2px solid #{{Poké Balls color dark}}; background: #{{Poké Balls color}}; font-size: 80%" | ||
|- | |- | ||
|style="{{roundy|80px}} border: 2px solid #{{Poké Balls color dark}}; background: #{{Poké Balls color light}}"| [[File:SugimoriNestBall.png|100px]] | |style="{{roundy|80px}} border: 2px solid #{{Poké Balls color dark}}; background: #{{Poké Balls color light}}"| [[File:SugimoriNestBall.png|100px]] | ||
|style="{{roundy|80px}} border: 2px solid #{{Poké Balls color dark}}; background: #{{Poké Balls color light}}"| [[File:Bag Nest Ball SV Sprite.png|100px]] | |||
|- | |- | ||
| Artwork by<br>{{color2|000|Ken Sugimori}} | | Artwork by<br>{{color2|000|Ken Sugimori}} | ||
| Artwork from<br>{{color2|000|Pokémon Scarlet and Violet|Scarlet and Violet}} | |||
|} | |} | ||
| Line 193: | Line 233: | ||
|style="{{roundy|80px}} border: 2px solid #{{Poké Balls color dark}}; background: #{{Poké Balls color light}}"| [[File:Nest Ball summary Colo.png]] | |style="{{roundy|80px}} border: 2px solid #{{Poké Balls color dark}}; background: #{{Poké Balls color light}}"| [[File:Nest Ball summary Colo.png]] | ||
|style="{{roundy|80px}} border: 2px solid #{{Poké Balls color dark}}; background: #{{Poké Balls color light}}"| [[File:Nest Ball summary XD.png]] | |style="{{roundy|80px}} border: 2px solid #{{Poké Balls color dark}}; background: #{{Poké Balls color light}}"| [[File:Nest Ball summary XD.png]] | ||
|style="{{roundy|80px}} border: 2px solid #{{Poké Balls color dark}}; background: #{{Poké Balls color light}}"| [[File:Nest Ball summary IV.png]] | |||
|- | |- | ||
| In-battle and<br>Summary sprite from<br>{{color2|000|Generation III}} | | In-battle and<br>Summary sprite from<br>{{color2|000|Generation III}} | ||
| Summary sprite from<br>{{color2|000|Pokémon Colosseum|Colosseum}} | | Summary sprite from<br>{{color2|000|Pokémon Colosseum|Colosseum}} | ||
| Summary sprite from<br>{{color2|000|Pokémon XD: Gale of Darkness|XD: Gale of Darkness}} | | Summary sprite from<br>{{color2|000|Pokémon XD: Gale of Darkness|XD: Gale of Darkness}} | ||
| Summary sprite from<br>{{color2|000|Generation IV|Generations IV}} and {{color2|000|Generation V|V}} | |||
|- | |- | ||
|style="{{roundy|80px}} border: 2px solid #{{Poké Balls color dark}}; background: #{{Poké Balls color light}}"| [[File:Nest Ball battle IV.png]] | |style="{{roundy|80px}} border: 2px solid #{{Poké Balls color dark}}; background: #{{Poké Balls color light}}"| [[File:Nest Ball battle IV.png]] | ||
|style="{{roundy|80px}} border: 2px solid #{{Poké Balls color dark}}; background: #{{Poké Balls color light}}"| [[File:Nest Ball summary PBR.png]] | |||
|style="{{roundy|80px}} border: 2px solid #{{Poké Balls color dark}}; background: #{{Poké Balls color light}}"| [[File:Nest Ball battle V.png]] | |style="{{roundy|80px}} border: 2px solid #{{Poké Balls color dark}}; background: #{{Poké Balls color light}}"| [[File:Nest Ball battle V.png]] | ||
|- | |- | ||
| In-battle sprite in<br>{{color2|000|Generation IV}} | | In-battle sprite in<br>{{color2|000|Generation IV}} | ||
| Summary sprite from<BR>{{color2|000|Pokémon Battle Revolution|Battle Revolution}} | |||
| In-battle sprite in<br>{{color2|000|Generation V}} | | In-battle sprite in<br>{{color2|000|Generation V}} | ||
|} | |} | ||
| Line 217: | Line 259: | ||
|} | |} | ||
=== | ==In animation== | ||
==== | [[File:Various Poké Balls XY079 1.png|thumb|250px|Nest Balls in {{aniseries|XY}}]] | ||
[[File:Trainer catches Bidoof.png|thumb|left|250px|A Nest Ball in ''[[Bidoof's Big Stand]]'']] | |||
===''Pokémon the Series''=== | |||
===={{aniseries|DP}}==== | |||
A Nest Ball appeared in [[Which One ~ Is It?]], a Japanese ending theme from ''[[Pokémon the Series: Diamond and Pearl]]''. | |||
==== | ===={{aniseries|XY}}==== | ||
In [[ | In ''[[XY079|A Frenzied Factory Fiasco!]]'', multiple Nest Balls were seen at the [[Poké Ball Factory]]. | ||
== | ===={{aniseries|JN}}==== | ||
[[ | In ''[[JN026|Splash, Dash, and Smash for the Crown!]]'', a Nest Ball appeared as a part of [[James]]'s Poké Ball collection. | ||
===Bidoof's Big Stand=== | |||
A Nest Ball appeared in ''[[Bidoof's Big Stand]]'', where a {{OBP|Trainer|Bidoof's Big Stand}} used one to catch the titular {{p|Bidoof}}. | |||
{{-}} | {{-}} | ||
==In the manga== | ==In the manga== | ||
[[File:Generation III Poké Balls Adventures.png|thumb|220px|A Nest Ball in Pokémon Adventures]] | [[File:Generation III Poké Balls Adventures.png|thumb|220px|A Nest Ball in [[Pokémon Adventures]]]] | ||
=== | ===Pokémon Adventures=== | ||
===={{MangaArc|Emerald}}==== | |||
A Nest Ball first appeared in ''[[PS314|A Sketchy Smattering of Smeargle]]'' while {{adv|Emerald}} was thinking which of his Poké Balls he should use to {{pkmn2|caught|catch}} {{adv|Jirachi}}. | A Nest Ball first appeared in ''[[PS314|A Sketchy Smattering of Smeargle]]'' while {{adv|Emerald}} was thinking which of his Poké Balls he should use to {{pkmn2|caught|catch}} {{adv|Jirachi}}. | ||
| Line 240: | Line 286: | ||
==In the TCG== | ==In the TCG== | ||
[[File: | [[File:NestBallScarletViolet255.jpg|200px|thumb|Hyper rare {{TCG|Scarlet & Violet}} print of Nest Ball]] | ||
{{main|Nest Ball (Sun & Moon 123)}} | {{main|Nest Ball (Sun & Moon 123)}} | ||
The {{TCG | The '''Nest Ball''' was introduced as an {{TCG|Item card}} in the [[Pokémon Trading Card Game]] during the English Sun & Moon Series (the Japanese Sun & Moon Era). It was first released in the Japanese {{TCG|Sun & Moon|Collection Moon}} expansion and the English {{TCG|Sun & Moon}} expansion, with artwork by [[Toyste Beach]]. A {{TCG|Secret card|Secret}} print of the card with artwork by the same illustrator was released in the same sets. It was reprinted in the Japanese {{TCG|GG End}} subset with artwork by [[Ryo Ueda]]. During the English Scarlet & Violet Series (the Japanese Scarlet & Violet Era), it was reprinted again in the Japanese {{TCG|Scarlet ex}} expansion and the English {{TCG|Scarlet & Violet}} expansion, as both a Regular card and a {{TCG|hyper rare}} featuring artwork by the original illustrator, Toyste Beach. The card allows the player to search their deck for a Basic Pokémon and put it onto their Bench. Afterwards, the player shuffles their deck. | ||
{{-}} | {{-}} | ||
| Line 248: | Line 294: | ||
{{langtable|color={{Poké Balls color light}}|bordercolor={{Poké Balls color}} | {{langtable|color={{Poké Balls color light}}|bordercolor={{Poké Balls color}} | ||
|zh_yue=巢穴球 ''{{tt|Chàauhyuht Kàuh|Nest Ball}}'' | |zh_yue=巢穴球 ''{{tt|Chàauhyuht Kàuh|Nest Ball}}'' | ||
|zh_cmn=巢穴球 ''{{tt|Cháoxué Qiú|Nest Ball}}'' | |zh_cmn=巢穴球 ''{{tt|Cháoxuè Qiú / Cháoxué Qiú|Nest Ball}}'' | ||
|fr=Faiblo Ball | |fr=Faiblo Ball | ||
|de=Nestball | |de=Nestball | ||
|id=Bola Nest | |||
|it=Minor Ball | |it=Minor Ball | ||
|ko=네스트볼 ''Nest Ball'' | |ko=네스트볼 ''Nest Ball'' | ||
| Line 268: | Line 315: | ||
[[es:Nido Ball]] | [[es:Nido Ball]] | ||
[[fr:Faiblo Ball]] | [[fr:Faiblo Ball]] | ||
[[it: | [[it:Minor Ball]] | ||
[[ja:ネストボール]] | [[ja:ネストボール]] | ||
[[zh:巢穴球(道具)]] | [[zh:巢穴球(道具)]] | ||
Latest revision as of 11:30, 28 October 2024
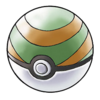
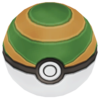
The Nest Ball (Japanese: ネストボール Nest Ball) is a type of Poké Ball introduced in Generation III. It can be used to catch a wild Pokémon, being more likely to succeed against lower-level Pokémon.
In the core series games
Price
|
Effect
Manual activation
When used from the Bag in a wild encounter, it attempts to catch the wild Pokémon. If used against a low level Pokémon, it has an increased catch rate modifier, calculated as follows:
- From Generation III to IV, ×, minimum 1×
- In Generation V, ×, minimum 1×
- From Generation VI onward, × if Pokémon's level is between 1 and 29, 1× otherwise
| Level | Catch rate modifier | ||
|---|---|---|---|
| Gen. 3-4 | Gen. 5 | Gen. 6+ | |
| 1 | 3.9 | 4 | 4 |
| 2 | 3.8 | 15974/4096 (~3.9) | 15974/4096 (~3.9) |
| 3 | 3.7 | 15564/4096 (~3.8) | 15564/4096 (~3.8) |
| 4 | 3.6 | 15155/4096 (~3.7) | 15155/4096 (~3.7) |
| 5 | 3.5 | 15475/4096 (~3.6) | 15475/4096 (~3.6) |
| 6 | 3.4 | 3.5 | 3.5 |
| 7 | 3.3 | 13926/4096 (~3.4) | 13926/4096 (~3.4) |
| 8 | 3.2 | 13516/4096 (~3.3) | 13516/4096 (~3.3) |
| 9 | 3.1 | 13107/4096 (~3.2) | 13107/4096 (~3.2) |
| 10 | 3 | 12697/4096 (~3.1) | 12697/4096 (~3.1) |
| 11 | 2.9 | 3 | 3 |
| 12 | 2.8 | 11878/4096 (~2.9) | 11878/4096 (~2.9) |
| 13 | 2.7 | 11468/4096 (~2.8) | 11468/4096 (~2.8) |
| 14 | 2.6 | 11059/4096 (~2.7) | 11059/4096 (~2.7) |
| 15 | 2.5 | 10649/4096 (~2.6) | 10649/4096 (~2.6) |
| 16 | 2.4 | 2.5 | 2.5 |
| 17 | 2.3 | 9830/4096 (~2.4) | 9830/4096 (~2.4) |
| 18 | 2.2 | 9420/4096 (~2.3) | 9420/4096 (~2.3) |
| 19 | 2.1 | 9011/4096 (~2.2) | 9011/4096 (~2.2) |
| 20 | 2 | 8601/4096 (~2.1) | 8601/4096 (~2.1) |
| 21 | 1.9 | 2 | 2 |
| 22 | 1.8 | 7782/4096 (~1.9) | 7782/4096 (~1.9) |
| 23 | 1.7 | 7372/4096 (~1.8) | 7372/4096 (~1.8) |
| 24 | 1.6 | 6963/4096 (~1.7) | 6963/4096 (~1.7) |
| 25 | 1.5 | 6553/4096 (~1.6) | 6553/4096 (~1.6) |
| 26 | 1.4 | 1.5 | 1.5 |
| 27 | 1.3 | 5734/4096 (~1.4) | 5734/4096 (~1.4) |
| 28 | 1.2 | 5324/4096 (~1.3) | 5324/4096 (~1.3) |
| 29 | 1.1 | 4915/4096 (~1.2) | 4915/4096 (~1.2) |
| 30 | 1 | 4505/4096 (~1.1) | 1 |
| 31+ | 1 | 1 | 1 |
If used on an Ultra Beast, the catch rate modifier is instead always set to 410/4096× (0.1×).
The Nest Ball cannot be used in situations in which Poké Balls cannot be used, such as in wild battles with two or more opponents currently present or against a trial Pokémon. If used in a Trainer battle (except if used as a Snag Ball on a Shadow Pokémon), the opposing Trainer will deflect the ball, wasting the item. If used on the ghost Marowak, it will dodge the ball, wasting it.
Held item
Fling fails if the user is holding a Nest Ball.
Description
|
Acquisition
|
NPC usage
Pokémon Sun, Moon, Ultra Sun, and Ultra Moon
Team Skull Grunts keep their Pokémon in Nest Balls.
Pokémon Sword and Shield
Team Yell Grunts and Spikemuth Gym Trainers keep their Pokémon in Nest Balls.
Pokémon Scarlet and Violet
Lacey keeps her Pokémon in Nest Balls.
Gallery
Artwork
|
|
| Artwork by Ken Sugimori |
Artwork from Scarlet and Violet |
Sprites
| In-battle and Summary sprite from Generation III |
Summary sprite from Colosseum |
Summary sprite from XD: Gale of Darkness |
Summary sprite from Generations IV and V |
| In-battle sprite in Generation IV |
Summary sprite from Battle Revolution |
In-battle sprite in Generation V |
Models

|
|
| In-battle model from X, Y, Omega Ruby, Alpha Sapphire, Sun, Moon, Ultra Sun, and Ultra Moon |
Model from Generation VIII |
In animation


Pokémon the Series
Pokémon the Series: Diamond and Pearl
A Nest Ball appeared in Which One ~ Is It?, a Japanese ending theme from Pokémon the Series: Diamond and Pearl.
Pokémon the Series: XY
In A Frenzied Factory Fiasco!, multiple Nest Balls were seen at the Poké Ball Factory.
Pokémon Journeys: The Series
In Splash, Dash, and Smash for the Crown!, a Nest Ball appeared as a part of James's Poké Ball collection.
Bidoof's Big Stand
A Nest Ball appeared in Bidoof's Big Stand, where a Trainer used one to catch the titular Bidoof.
In the manga
Pokémon Adventures
Emerald arc
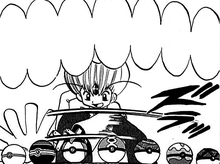
A Nest Ball first appeared in A Sketchy Smattering of Smeargle while Emerald was thinking which of his Poké Balls he should use to catch Jirachi.
More of Emerald's Nest Balls were seen in Sneaky Like Shedinja II, The Final Battle III, and The Final Battle V.
In the TCG
- Main article: Nest Ball (Sun & Moon 123)
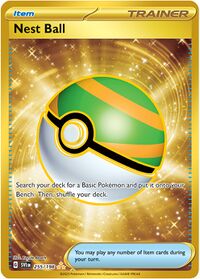
The Nest Ball was introduced as an Item card in the Pokémon Trading Card Game during the English Sun & Moon Series (the Japanese Sun & Moon Era). It was first released in the Japanese Collection Moon expansion and the English Sun & Moon expansion, with artwork by Toyste Beach. A Secret print of the card with artwork by the same illustrator was released in the same sets. It was reprinted in the Japanese GG End subset with artwork by Ryo Ueda. During the English Scarlet & Violet Series (the Japanese Scarlet & Violet Era), it was reprinted again in the Japanese Scarlet ex expansion and the English Scarlet & Violet expansion, as both a Regular card and a hyper rare featuring artwork by the original illustrator, Toyste Beach. The card allows the player to search their deck for a Basic Pokémon and put it onto their Bench. Afterwards, the player shuffles their deck.
In other languages
| ||||||||||||||||||||||||||||||||||||||||

|
This item article is part of Project ItemDex, a Bulbapedia project that aims to write comprehensive articles on all items. |

