Goldenrod Radio Tower: Difference between revisions
m (Text replacement - "Pokédex entries" to "Pokédex entries") |
|||
| (103 intermediate revisions by 40 users not shown) | |||
| Line 1: | Line 1: | ||
{{Infobox location | {{Infobox location | ||
|image=Goldenrod Radio Tower HGSS.png | |image=Goldenrod Radio Tower HGSS.png | ||
| Line 12: | Line 11: | ||
|generation={{Gen|II}}, {{Gen|IV}} | |generation={{Gen|II}}, {{Gen|IV}} | ||
}} | }} | ||
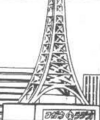
The '''Goldenrod Radio Tower''' (Japanese: '''コガネラジオとう''' ''Kogane Radio Tower'') is a six-story tower located next to the [[Magnet Train]] station in [[Goldenrod City]], the largest city in [[Johto]] | [[File:Goldenrod Radio Tower GSC.png|thumb|right|The Radio Tower in {{3v2|Gold|Silver|Crystal}}]] | ||
The '''Goldenrod Radio Tower''' (Japanese: '''コガネラジオとう''' ''Kogane Radio Tower'') is a six-story tower located next to the [[Magnet Train]] station in [[Goldenrod City]], the largest city in [[Johto]]. | |||
{{sign|DPcity|header|}} | {{sign|DPcity|header|}} | ||
{{sign|DPcity|title|Goldenrod City Radio Tower}} | {{sign|DPcity|title|Goldenrod City Radio Tower}} | ||
| Line 31: | Line 20: | ||
{{sign|DPcity|footer|}} | {{sign|DPcity|footer|}} | ||
==Places of interest== | ==In the games== | ||
===Studios=== | The Radio Tower broadcasts numerous programs daily, the most prominent of such being [[Professor Oak's Pokémon Talk]] and [[Buena's Password]], a new radio show that debuted in {{game|Crystal}}. For a short time in [[Generation II]] and [[Generation IV]], the tower fell victim to the clutches of [[Team Rocket]], during which time all of the normal broadcasts were replaced with a pirate signal officially announcing Team Rocket's return and pleading [[Giovanni]] to return from seclusion. | ||
After the {{player}} obtains their seventh Johto Gym Badge, it is necessary to purge the Radio Tower of Team Rocket in order to continue the storyline, because until the Radio Tower has been returned to normal, either the [[Blackthorn Gym]] will be closed because [[Clair]] is training in the restricted [[Dragon's Den]]{{sup/2|GSC}}, or a man selling [[Rage Candy Bar|RageCandyBars]] will prevent access to {{rt|44|Johto}}, the eastern path out of [[Mahogany Town]]{{sup/4|HGSS}}. After defeating the impostor station manager in the fifth floor office, the player will receive the {{jo|Basement Key}}, which opens up a sealed area of the [[Goldenrod Tunnel]]. Upon finding the real station manager in the second basement of the [[Goldenrod Department Store]], he will give the player a {{jo|Card Key}} to open the door on the third floor that separates the upper floors of the tower in two. With the Card Key in tow, the player can ascend to the fifth floor studio (and the observation deck{{sup/4|HGSS}}) to defeat the final {{tc|Executive|Rocket Executives}}, effectively disbanding the organization. To show his gratitude, the station manager will give the player a [[Rainbow Feather|Rainbow Wing]]{{sup/2|G}}{{sup/4|HG}}, a [[Silver Feather|Silver Wing]]{{sup/2|S}}{{sup/4|SS}}, or a [[Clear Bell]]{{sup/2|C}}. | |||
Before Team Rocket's invasion, a guard will restrict access beyond the second floor to "authorized personnel" only. Thus, the third and subsequent floors of the Radio Tower can only be explored during and after Team Rocket's invasion. | |||
===Places of interest=== | |||
====Studios==== | |||
In {{game|Gold and Silver|s}}, the station had two studios, located on the fourth and fifth floors. A third studio was added in Pokémon Crystal on the second floor, to accommodate [[Buena]]'s new radio show. In every version, the tower has a welcome center, as well as a computer linked to [[Pokémon Storage System|Bill's PC]] and the player's personal computer, on the first floor and a small café on the second floor. The technical operations of the tower are handled by way of a network of computers on the third and fourth floors. The [[Radio Director|Director]]'s office is found on the fifth floor. | In {{game|Gold and Silver|s}}, the station had two studios, located on the fourth and fifth floors. A third studio was added in Pokémon Crystal on the second floor, to accommodate [[Buena]]'s new radio show. In every version, the tower has a welcome center, as well as a computer linked to [[Pokémon Storage System|Bill's PC]] and the player's personal computer, on the first floor and a small café on the second floor. The technical operations of the tower are handled by way of a network of computers on the third and fourth floors. The [[Radio Director|Director]]'s office is found on the fifth floor. | ||
===Programs=== | ====Programs==== | ||
{{main|Radio}} | |||
Many programs are broadcast from the tower, with most being produced in-house. | Many programs are broadcast from the tower, with most being produced in-house. | ||
{| class="roundy" style="background: #{{locationcolor/light|building}}; border: 1px solid #{{locationcolor/light|building}}" colspan=6 cellspacing="2" cellpadding="4" | {| class="roundy" style="background: #{{locationcolor/light|building}}; border: 1px solid #{{locationcolor/light|building}}" colspan=6 cellspacing="2" cellpadding="4" | ||
|- | |- | ||
! width=15% style="background: #{{locationcolor/dark|building}}; {{roundytl|5px}}" | Program | ! width=15% style="background: #{{locationcolor/dark|building}}; {{roundytl|5px}}" | Program | ||
! width=10% style="background: #{{locationcolor/dark|building}};" | Host(s) | ! width=10% style="background: #{{locationcolor/dark|building}};" | Host(s) | ||
| Line 47: | Line 44: | ||
! width=10% style="background: #{{locationcolor/dark|building}}; {{roundytr|5px}}" | Games | ! width=10% style="background: #{{locationcolor/dark|building}}; {{roundytr|5px}}" | Games | ||
|- style="background: #FFF;" | |- style="background: #FFF;" | ||
| | | Buena's Password | ||
| [[Buena]] | | [[Buena]] | ||
| 10.5 | | 10.5 | ||
| Broadcasts one password per night between 6 PM-12 AM; Trainers who come to Buena and recite the password can get points redeemable for prizes. | | Broadcasts one password per night between 6 PM-12 AM; Trainers who come to Buena and recite the password can get points redeemable for prizes. | ||
| 2nd floor studio | | 2nd floor studio | ||
| {{ | | {{gameabbrev2|C}}<br>{{gameabbrev4|HGSS}} | ||
|- style="background: #FFF;" | |- style="background: #FFF;" | ||
| | | Variety Channel | ||
| Unknown | | Unknown | ||
| 10.5 | | 10.5 | ||
| Broadcasts [[Buena's Password]] channel with a couple more new features. Aside from the aforementioned channel, there's a few other new channels that are broadcast in different schedules. | | Broadcasts [[Buena's Password]] channel with a couple more new features. Aside from the aforementioned channel, there's a few other new channels that are broadcast in different schedules. | ||
| Unknown | | Unknown | ||
| {{ | | {{gameabbrev4|HGSS}} | ||
|- style="background: #FFF;" | |- style="background: #FFF;" | ||
| | | Lucky Channel | ||
| {{DL|DJ|Reed}} | | {{DL|DJ|Reed}} | ||
| 8.5 | | 8.5 | ||
| Broadcasts one ID per week; Trainers who come to the welcome center with a Pokémon whose ID is similar will win a prize. | | Broadcasts one ID per week; Trainers who come to the welcome center with a Pokémon whose ID is similar will win a prize. | ||
| Unknown | | Unknown | ||
| {{ | | {{gameabbrev2|GSC}} | ||
|- style="background: #FFF;" | |- style="background: #FFF;" | ||
| | | Pokémon Music | ||
| {{DL|DJ|Ben}} | | {{DL|DJ|Ben}} | ||
| 7.5 | | 7.5 | ||
| Broadcasts different music to different effects depending on the [[days of the week|day of the week]]. | | Broadcasts different music to different effects depending on the [[days of the week|day of the week]]. | ||
| 5th floor studio | | 5th floor studio | ||
| {{ | | {{gameabbrev2|GSC}}<br>{{gameabbrev4|HGSS}} | ||
|- style="background: #FFF;" | |- style="background: #FFF;" | ||
| | | Pokédex Show | ||
| (no DJ) | | (no DJ) | ||
| 4.5<br><small>4 AM-10 AM | | 4.5<br><small>4 AM-10 AM</small> | ||
| A show that broadcasts [[Pokédex]] | | A show that broadcasts [[Pokédex entry|Pokédex entries]] gathered by the player. | ||
| Unknown | | Unknown | ||
| {{ | | {{gameabbrev2|GSC}} | ||
|- style="background: #FFF;" | |- style="background: #FFF;" | ||
| | | Professor Oak's Pokémon Talk | ||
| [[DJ Mary|Mary]] and {{prof|Oak}} | | [[DJ Mary|Mary]] and {{prof|Oak}} | ||
| 4.5<br><small>10 AM-4 AM | | 4.5<br><small>{{gameabbrev2|GSC}}: 10 AM-4 AM<br>{{gameabbrev4|HGSS}}: all day</small> | ||
| Talk show discussing locations where semi-rare Pokémon can be found. Also speaks about [[ | | Talk show discussing locations where semi-rare Pokémon can be found. Also speaks about [[Mass outbreak|swarms]]. | ||
| 4th floor studio | | 4th floor studio | ||
| {{ | | {{gameabbrev2|GSC}}<br>{{gameabbrev4|HGSS}} | ||
|- style="background: #FFF;" | |- style="background: #FFF;" | ||
| Team Rocket's announcement (replaces other broadcasts) | | Team Rocket's announcement (replaces other broadcasts) | ||
| [[Team Rocket]] | | [[Team Rocket]] | ||
| Every radio station | | Every radio station | ||
| Plays on every radio station once Team Rocket has succeeded in taking over the Radio Tower. [[Archer|A Team Rocket Executive]] announces over the airwaves that they have resurfaced, and pleads for their boss, [[Giovanni]], to come out of hiding and rejoin them. Begins playing once the player has obtained seven Badges, and ceases to play when Team Rocket is disbanded. | | Plays on every radio station once Team Rocket has succeeded in taking over the Radio Tower. [[Archer|A Team Rocket Executive]] announces over the airwaves that they have resurfaced, and pleads for their boss, [[Giovanni]], to come out of hiding and rejoin them. Begins playing once the player has obtained seven Badges, and ceases to play when Team Rocket is disbanded. | ||
| 5th floor studio | | 5th floor studio | ||
| {{ | | {{gameabbrev2|GSC}}<br>{{gameabbrev4|HGSS}} | ||
|- | |- | ||
| colspan="6" style="background: #{{locationcolor/dark|building}}; {{roundybottom|5px}}" | | | colspan="6" style="background: #{{locationcolor/dark|building}}; {{roundybottom|5px}}" | | ||
|} | |} | ||
==Items== | ===Items=== | ||
{{Itlisth|building}} | {{Itlisth|building}} | ||
{{Itemlist| | {{Itemlist|None|sprite=Pokégear Icon|1F, prize for clearing the quiz|G=yes|S=yes|C=yes|HG=yes|SS=yes|display=[[Pokégear#Radio|Radio Card]]}} | ||
{{Itemlist| | {{Itemlist|Blue Card|2F, from [[Buena]]|C=yes|HG=yes|SS=yes}} | ||
{{Itemlist|Ultra Ball| | {{Itemlist|TM Fire|3F, from a woman after defeating [[Team Rocket]]|G=yes|S=yes|C=yes|HG=yes|SS=yes|display={{TM|11|Sunny Day}}}} | ||
{{Itemlist| | {{Itemlist|Ultra Ball|4F, near [[Proton]] (requires {{jo|Card Key}})|HG=yes|SS=yes}} | ||
{{Itemlist| | {{Itemlist|None|4F, from [[DJ Mary|Mary]] after defeating Team Rocket|G=yes|S=yes|C=yes|display=[[Pink Bow]]}} | ||
{{Itemlist| | {{Itemlist|BrightPowder|4F, from Mary after defeating Team Rocket|HG=yes|SS=yes|display=[[Bright Powder|BrightPowder]]}} | ||
{{Itemlist| | {{Itemlist|Basement Key IV|5F, from [[Petrel]] after defeating him|G=yes|S=yes|C=yes|HG=yes|SS=yes|display={{jo|Basement Key}}}} | ||
{{Itemlist| | {{Itemlist|Ultra Ball|5F, in the studio (requires {{jo|Card Key}})|C=yes}} | ||
{{Itemlist| | {{Itemlist|Rainbow Wing|From the [[Radio Director|Director]] after defeating Team Rocket|G=yes|HG=yes|display=[[Rainbow Feather|Rainbow Wing]]}} | ||
{{Itemlist|Silver Wing IV|From the Director after defeating Team Rocket|S=yes|SS=yes|display=[[Silver Feather|Silver Wing]]}} | |||
{{Itemlist|Clear Bell|From the Director after defeating Team Rocket|C=yes}} | |||
{{Itlistfoot|building}} | {{Itlistfoot|building}} | ||
===Pokémon Lottery Corner=== | ====Pokémon Lottery Corner==== | ||
{{main|Pokémon Lottery Corner}} | {{main|Loto-ID|Pokémon Lottery Corner}} | ||
In {{3v2|Gold|Silver|Crystal}}, the [[Lucky Channel]] is radio show which broadcasts an [[Trainer ID number|ID number]] that changes once per week. Prizes are awarded for winning numbers, which must match any of the player's Pokémon's ID numbers with either all digits, three digits or two digits. | In {{3v2|Gold|Silver|Crystal}}, the [[Lucky Channel]] is a radio show which broadcasts an [[Trainer ID number|ID number]] that changes once per week. Prizes are awarded for winning numbers, which must match any of the player's Pokémon's ID numbers with either all digits, four/three digits or two digits. | ||
In {{2v2|HeartGold|SoulSilver}}, [[Felicity]] gives out | In {{2v2|HeartGold|SoulSilver}}, [[Felicity]] gives out tickets for the Pokémon Lottery Corner with an ID number that changes daily. Prizes are awarded for winning numbers, which must match any of the player's Pokémon's ID numbers from the last digit to the first digit. | ||
{{Itlisth|building}} | {{Itlisth|building}} | ||
{{Itemlist|Ultra Ball| | {{Itemlist|Ultra Ball|Pokémon ID matched last digit|HG=yes|SS=yes}} | ||
{{Itemlist|PP Up| | {{Itemlist|PP Up|Pokémon ID matched last two digits|G=yes|S=yes|C=yes|HG=yes|SS=yes}} | ||
{{Itemlist|Exp. Share| | {{Itemlist|Exp. Share|Pokémon ID matched last three digits|G=yes|S=yes|C=yes|HG=yes|SS=yes}} | ||
{{Itemlist|Max Revive| | {{Itemlist|Exp. Share|Pokémon ID matched last four digits|G=yes|S=yes|C=yes}} | ||
{{Itemlist|Master Ball| | {{Itemlist|Max Revive|Pokémon ID matched last four digits|HG=yes|SS=yes}} | ||
{{Itemlist|Master Ball|Pokémon ID matched perfectly|G=yes|S=yes|C=yes|HG=yes|SS=yes}} | |||
{{Itlistfoot|building}} | {{Itlistfoot|building}} | ||
==Trainers== | ====Buena's Password==== | ||
{{main|Radio#Buena's Password|Radio → Buena's Password}} | |||
===Generation II=== | The player can collect points for the [[Blue Card]] by listening to the radio show Buena's Password, then visiting Buena on the second floor of the Radio Tower and answering her quiz. If they answer the question correctly, they earn 1 point for their Blue Card. | ||
====1F==== | |||
In Generation II, points must be spent to buy each prize; whereas in Generation IV, prizes are awarded when the player obtains a certain number of points. Players cannot have more than 30p on the Blue Card. If the player has 30p, they can speak to Buena to register her phone number in the [[Pokégear]] (points will not be spent). In Generation II, the player cannot earn points while their Blue Card has 30p (requiring points to be spent); whereas in Generation IV, the player will be issued a new Blue Card once the 30p limit is hit. | |||
{| style="margin:auto" | |||
|- style="vertical-align:top" | |||
| | |||
{| class="roundy" style="margin:auto; background: #A6D4FF; border: 3px solid #1E90FF" | |||
|+ Generation II prizes | |||
! colspan=2 | Item | |||
! Points | |||
|- style="background: #FFF" | |||
| {{bag|Ultra Ball}} | |||
| [[Ultra Ball]] | |||
| 2p | |||
|- style="background: #FFF" | |||
| {{bag|Full Restore}} | |||
| [[Full Restore]] | |||
| 2p | |||
|- style="background: #FFF" | |||
| {{bag|Nugget}} | |||
| [[Nugget]] | |||
| 3p | |||
|- style="background: #FFF" | |||
| {{bag|Rare Candy}} | |||
| [[Rare Candy]] | |||
| 3p | |||
|- style="background: #FFF" | |||
| {{bag|Protein}} | |||
| [[Protein]] | |||
| 5p | |||
|- style="background: #FFF" | |||
| {{bag|Iron}} | |||
| [[Iron]] | |||
| 5p | |||
|- style="background: #FFF" | |||
| {{bag|Carbos}} | |||
| [[Carbos]] | |||
| 5p | |||
|- style="background: #FFF" | |||
| {{bag|Calcium}} | |||
| [[Calcium]] | |||
| 5p | |||
|- | |||
| style="background: #FFF; {{roundybl|5px}}" | {{bag|HP Up}} | |||
| style="background: #FFF" | [[HP Up]] | |||
| style="background: #FFF; {{roundybr|5px}}" | 5p | |||
|} | |||
| | |||
{| class="roundy" style="margin:auto; background: #A6D4FF; border: 3px solid #1E90FF" | |||
|+ Generation IV prizes | |||
! colspan=2 | Item | |||
! Points | |||
|- style="background: #FFF" | |||
| {{bag|Poké Ball}} | |||
| {{i|Poké Ball}} | |||
| 1p | |||
|- style="background: #FFF" | |||
| {{bag|Full Restore}} | |||
| [[Full Restore]] | |||
| 3p | |||
|- style="background: #FFF" | |||
| {{bag|Protein}} | |||
| [[Protein]] | |||
| 5p | |||
|- style="background: #FFF" | |||
| {{bag|Iron}} | |||
| [[Iron]] | |||
| 10p | |||
|- style="background: #FFF" | |||
| {{bag|Carbos}} | |||
| [[Carbos]] | |||
| 15p | |||
|- style="background: #FFF" | |||
| {{bag|Nugget}} | |||
| [[Nugget]] | |||
| 20p | |||
|- style="background: #FFF" | |||
| {{bag|Rare Candy}} | |||
| [[Rare Candy]] | |||
| 25p | |||
|- | |||
| style="background: #FFF; {{roundybl|5px}}" | {{bag|HP Up}} | |||
| style="background: #FFF" | [[HP Up]] | |||
| style="background: #FFF; {{roundybr|5px}}" | 30p | |||
|} | |||
|} | |||
===Trainers=== | |||
'''NOTE:''' These {{pkmn|Trainer}}s appear only during [[Team Rocket]]'s takeover at [[Goldenrod City]]. | |||
====Generation II==== | |||
=====1F===== | |||
{{Trainerheader|building}} | {{Trainerheader|building}} | ||
{{Trainerentry|Spr GS Rocket Grunt M.png|Rocket Grunt||960|2|020|Raticate|♂|24|None|020|Raticate|♂|24|None}} | {{Trainerentry|Spr GS Rocket Grunt M.png|Rocket Grunt||960|2|020|Raticate|♂|24|None|020|Raticate|♂|24|None}} | ||
{{Trainerfooter|building|II}} | {{Trainerfooter|building|II}} | ||
====2F==== | =====2F===== | ||
{{Trainerheader|building}} | {{Trainerheader|building}} | ||
{{Trainerentry|Spr GS Rocket Grunt F.png|Rocket Grunt||1040|1|024|Arbok|♀|26|None}} | {{Trainerentry|Spr GS Rocket Grunt F.png|Rocket Grunt||1040|1|024|Arbok|♀|26|None}} | ||
{{Trainerdiv|building}} | {{Trainerdiv|building}} | ||
{{Trainerentry|Spr GS Rocket Grunt M.png|Rocket Grunt||920|5|019|Rattata|♂|21|None|019|Rattata|♂|21|None|019|Rattata|♂|23|None|019|Rattata|♂|23|None|019|Rattata|♂|23|None}} | {{Trainerentry|Spr GS Rocket Grunt M.png|Rocket Grunt||920|5|019|Rattata|♂|21|None|019|Rattata|♂|21|None|019|Rattata|♂|23|None|019|Rattata|♂|23|None|019|Rattata|♂|23|None}} | ||
{{Trainerdiv|building}} | |||
{{Trainerentry|Spr GS Rocket Grunt M.png|Rocket Grunt||1040|2|041|Zubat|♂|26|None|041|Zubat|♂|26|None}} | |||
{{Trainerdiv|building}} | {{Trainerdiv|building}} | ||
{{Trainerentry|Spr GS Rocket Grunt M.png|Rocket Grunt||1000|3|088|Grimer|♂|23|None|088|Grimer|♂|23|None|089|Muk|♂|25|None}} | {{Trainerentry|Spr GS Rocket Grunt M.png|Rocket Grunt||1000|3|088|Grimer|♂|23|None|088|Grimer|♂|23|None|089|Muk|♂|25|None}} | ||
{{Trainerfooter|building|II}} | {{Trainerfooter|building|II}} | ||
====3F==== | =====3F===== | ||
{{Trainerheader|building}} | {{Trainerheader|building}} | ||
{{Trainerentry|Spr GS Rocket Grunt M.png|Rocket Grunt|| | {{Trainerentry|Spr GS Rocket Grunt M.png|Rocket Grunt||1040|1|110|Weezing|♂|26|None}} | ||
{{Trainerdiv|building}} | {{Trainerdiv|building}} | ||
{{Trainerentry|Spr GS Scientist.png|Scientist|Marc|2700|3|081|Magnemite||27|None|081|Magnemite||27|None|081|Magnemite||27|None|36=カネオ|37=Kaneo}} | {{Trainerentry|Spr GS Scientist.png|Scientist|Marc|2700|3|081|Magnemite||27|None|081|Magnemite||27|None|081|Magnemite||27|None|36=カネオ|37=Kaneo}} | ||
{{Trainerdiv|building}} | {{Trainerdiv|building}} | ||
{{Trainerentry|Spr GS Rocket Grunt M.png|Rocket Grunt|| | {{Trainerentry|Spr GS Rocket Grunt M.png|Rocket Grunt||920|4|109|Koffing|♂|23|None|041|Zubat|♂|23|None|019|Rattata|♂|23|None|088|Grimer|♂|23|None}} | ||
{{Trainerdiv|building}} | {{Trainerdiv|building|Requires Card Key}} | ||
{{Trainerentry|Spr GS Rocket Grunt M.png|Rocket Grunt||1040|2|020|Raticate|♂|24|None|109|Koffing|♂|26|None}} | {{Trainerentry|Spr GS Rocket Grunt M.png|Rocket Grunt||1040|2|020|Raticate|♂|24|None|109|Koffing|♂|26|None}} | ||
{{Trainerfooter|building|II}} | {{Trainerfooter|building|II}} | ||
====4F==== | =====4F===== | ||
{{Trainerheader|building}} | {{Trainerheader|building}} | ||
{{Trainerentry|Spr GS Rocket Grunt M.png|Rocket Grunt||880|3|041|Zubat|♂|22|None|042|Golbat|♂|24|None|088|Grimer|♂|22|None}} | {{Trainerentry|Spr GS Rocket Grunt M.png|Rocket Grunt||880|3|041|Zubat|♂|22|None|042|Golbat|♂|24|None|088|Grimer|♂|22|None}} | ||
{{Trainerdiv|building}} | {{Trainerdiv|building}} | ||
{{Trainerentry|Spr GS Scientist.png|Scientist|Rich|3000|1|137|Porygon||30|None|36=シンタロウ|37=Shintarō}} | {{Trainerentry|Spr GS Scientist.png|Scientist|Rich|3000|1|137|Porygon||30|None|36=シンタロウ|37=Shintarō}} | ||
{{Trainerdiv|building}} | {{Trainerdiv|building|Requires Card Key}} | ||
{{Trainerentry|Spr GS Rocket Grunt F.png|Rocket Grunt||960|4|023|Ekans|♀|21|None|043|Oddish|♀|23|None|023|Ekans|♀|21|None|044|Gloom|♀|24|None}} | {{Trainerentry|Spr GS Rocket Grunt F.png|Rocket Grunt||960|4|023|Ekans|♀|21|None|043|Oddish|♀|23|None|023|Ekans|♀|21|None|044|Gloom|♀|24|None}} | ||
{{Trainerfooter|building|II}} | {{Trainerfooter|building|II}} | ||
{{Party|color=666666|bordercolor=CC0000|headcolor=CCCCCC | ;Requires Card Key | ||
{{Party/Single | |||
|color=666666 | |||
|bordercolor=CC0000 | |||
|headcolor=CCCCCC | |||
|sprite=Spr GS Rocket Executive M.png | |sprite=Spr GS Rocket Executive M.png | ||
|prize={{Pdollar}}2592 | |prize={{Pdollar}}2592 | ||
| Line 173: | Line 267: | ||
|game=GSC | |game=GSC | ||
|location=Goldenrod Radio Tower | |location=Goldenrod Radio Tower | ||
|pokemon=1 | |pokemon=1}} | ||
| | |{{Pokémon/2 | ||
|gender=male|level=36|type1=Poison|type2=Flying | |game=Crystal | ||
|ndex=042 | |||
|pokemon=Golbat | |||
|gender=male | |||
|level=36 | |||
|type1=Poison|type2=Flying | |||
|move1=Wing Attack|move1type=Flying | |move1=Wing Attack|move1type=Flying | ||
|move2=Confuse Ray|move2type=Ghost | |move2=Confuse Ray|move2type=Ghost | ||
|move3=Leech Life|move3type=Bug | |move3=Leech Life|move3type=Bug | ||
|move4=Bite|move4type=Dark}} | |move4=Bite|move4type=Dark}} | ||
}} | {{Party/Footer}} | ||
====5F==== | =====5F===== | ||
{{Party|color=666666|bordercolor=CC0000|headcolor=CCCCCC | {{Party/Single | ||
|color=666666 | |||
|bordercolor=CC0000 | |||
|headcolor=CCCCCC | |||
|sprite=Spr GS Rocket Executive M.png | |sprite=Spr GS Rocket Executive M.png | ||
|prize={{pdollar}}2160 | |prize={{pdollar}}2160 | ||
| Line 190: | Line 292: | ||
|game=GSC | |game=GSC | ||
|location=Goldenrod Radio Tower | |location=Goldenrod Radio Tower | ||
|pokemon=6 | |pokemon=6}} | ||
| | |{{Pokémon/2 | ||
|gender=male|level=30|type1=Poison | |game=Crystal | ||
|ndex=109 | |||
|pokemon=Koffing | |||
|gender=male | |||
|level=30 | |||
|type1=Poison | |||
|move1=SmokeScreen|move1type=Normal | |move1=SmokeScreen|move1type=Normal | ||
|move2=Tackle|move2type=Normal | |move2=Tackle|move2type=Normal | ||
|move3=Sludge|move3type=Poison | |move3=Sludge|move3type=Poison | ||
|move4=Selfdestruct|move4type=Normal}} | |move4=Selfdestruct|move4type=Normal}} | ||
| | {{Party/Div|color=666666}} | ||
|gender=male|level=30|type1=Poison | |{{Pokémon/2 | ||
|game=Crystal | |||
|ndex=109 | |||
|pokemon=Koffing | |||
|gender=male | |||
|level=30 | |||
|type1=Poison | |||
|move1=SmokeScreen|move1type=Normal | |move1=SmokeScreen|move1type=Normal | ||
|move2=Tackle|move2type=Normal | |move2=Tackle|move2type=Normal | ||
|move3=Sludge|move3type=Poison | |move3=Sludge|move3type=Poison | ||
|move4=Selfdestruct|move4type=Normal}} | |move4=Selfdestruct|move4type=Normal}} | ||
| | |{{Pokémon/2 | ||
|gender=male|level=32|type1=Poison | |game=Crystal | ||
|ndex=110 | |||
|pokemon=Weezing | |||
|gender=male | |||
|level=32 | |||
|type1=Poison | |||
|move1=SmokeScreen|move1type=Normal | |move1=SmokeScreen|move1type=Normal | ||
|move2=Tackle|move2type=Normal | |move2=Tackle|move2type=Normal | ||
|move3=Sludge|move3type=Poison | |move3=Sludge|move3type=Poison | ||
|move4=Explosion|move4type=Normal}} | |move4=Explosion|move4type=Normal}} | ||
| | |{{Pokémon/2 | ||
|gender=male|level=30|type1=Poison | |game=Crystal | ||
|ndex=109 | |||
|pokemon=Koffing | |||
|gender=male | |||
|level=30 | |||
|type1=Poison | |||
|move1=SmokeScreen|move1type=Normal | |move1=SmokeScreen|move1type=Normal | ||
|move2=Tackle|move2type=Normal | |move2=Tackle|move2type=Normal | ||
|move3=Sludge|move3type=Poison | |move3=Sludge|move3type=Poison | ||
|move4=Smog|move4type=Poison}} | |move4=Smog|move4type=Poison}} | ||
}} | {{Party/Footer}} | ||
{{Party|color=666666|bordercolor=CC0000|headcolor=CCCCCC | ;Requires Card Key | ||
{{Party/Single | |||
|color=666666 | |||
|bordercolor=CC0000 | |||
|headcolor=CCCCCC | |||
|sprite=Spr GS Rocket Executive F.png | |sprite=Spr GS Rocket Executive F.png | ||
|prize={{PDollar}}2304 | |prize={{PDollar}}2304 | ||
| Line 236: | Line 373: | ||
|game=GSC | |game=GSC | ||
|location=Goldenrod Radio Tower | |location=Goldenrod Radio Tower | ||
|pokemon=3 | |pokemon=3}} | ||
| | |{{Pokémon/2 | ||
|gender=female|level=32|type1=Poison | |game=Crystal | ||
|ndex=024 | |||
|pokemon=Arbok | |||
|gender=female | |||
|level=32 | |||
|type1=Poison | |||
|move1=Glare|move1type=Normal | |move1=Glare|move1type=Normal | ||
|move2=Bite|move2type=Dark | |move2=Bite|move2type=Dark | ||
|move3=Wrap|move3type=Normal | |move3=Wrap|move3type=Normal | ||
|move4=Poison Sting|move4type=Poison}} | |move4=Poison Sting|move4type=Poison}} | ||
| | |{{Pokémon/2 | ||
|gender=female|level=32|type1=Grass|type2=Poison | |game=Crystal | ||
|ndex=045 | |||
|pokemon=Vileplume | |||
|gender=female | |||
|level=32 | |||
|type1=Grass|type2=Poison | |||
|move1=Sweet Scent|move1type=Normal | |move1=Sweet Scent|move1type=Normal | ||
|move2=Absorb|move2type=Grass | |move2=Absorb|move2type=Grass | ||
|move3=Acid|move3type=Poison | |move3=Acid|move3type=Poison | ||
|move4=Sleep Powder|move4type=Grass}} | |move4=Sleep Powder|move4type=Grass}} | ||
| | |{{Pokémon/2 | ||
|gender=female|level=32|type1=Dark|type2=Flying | |game=Crystal | ||
|ndex=198 | |||
|pokemon=Murkrow | |||
|gender=female | |||
|level=32 | |||
|type1=Dark|type2=Flying | |||
|move1=Peck|move1type=Flying | |move1=Peck|move1type=Flying | ||
|move2=Haze|move2type=Ice | |move2=Haze|move2type=Ice | ||
|move3=Pursuit|move3type=Dark | |move3=Pursuit|move3type=Dark | ||
|move4=Night Shade|move4type=Ghost}} | |move4=Night Shade|move4type=Ghost}} | ||
}} | {{Party/Footer}} | ||
{{Party|color=666666|bordercolor=CC0000|headcolor=CCCCCC | {{Party/Single | ||
|color=666666 | |||
|bordercolor=CC0000 | |||
|headcolor=CCCCCC | |||
|sprite=Spr GS Rocket Executive M.png | |sprite=Spr GS Rocket Executive M.png | ||
|prize={{PDollar}}2520 | |prize={{PDollar}}2520 | ||
| Line 264: | Line 419: | ||
|game=GSC | |game=GSC | ||
|location=Goldenrod Radio Tower | |location=Goldenrod Radio Tower | ||
|pokemon=3 | |pokemon=3}} | ||
| | |{{Pokémon/2 | ||
|gender=male|level=33|type1=Dark|type2=Fire | |game=Crystal | ||
|ndex=228 | |||
|pokemon=Houndour | |||
|gender=male | |||
|level=33 | |||
|type1=Dark|type2=Fire | |||
|move1=Faint Attack|move1type=Dark | |move1=Faint Attack|move1type=Dark | ||
|move2=Ember|move2type=Fire | |move2=Ember|move2type=Fire | ||
|move3=Bite|move3type=Dark | |move3=Bite|move3type=Dark | ||
|move4=Roar|move4type=Normal}} | |move4=Roar|move4type=Normal}} | ||
| | |{{Pokémon/2 | ||
|gender=male|level=33|type1=Poison | |game=Crystal | ||
|ndex=109 | |||
|pokemon=Koffing | |||
|gender=male | |||
|level=33 | |||
|type1=Poison | |||
|move1=Sludge|move1type=Poison | |move1=Sludge|move1type=Poison | ||
|move2=SmokeScreen|move2type=Normal | |move2=SmokeScreen|move2type=Normal | ||
|move3=Tackle|move3type=Normal | |move3=Tackle|move3type=Normal | ||
|move4=Haze|move4type=Ice}} | |move4=Haze|move4type=Ice}} | ||
| | |{{Pokémon/2 | ||
|gender=male|level=35|type1=Dark|type2=Fire | |game=Crystal | ||
|ndex=229 | |||
|pokemon=Houndoom | |||
|gender=male | |||
|level=35 | |||
|type1=Dark|type2=Fire | |||
|move1=Faint Attack|move1type=Dark | |move1=Faint Attack|move1type=Dark | ||
|move2=Ember|move2type=Fire | |move2=Ember|move2type=Fire | ||
|move3=Bite|move3type=Dark | |move3=Bite|move3type=Dark | ||
|move4=Smog|move4type=Poison}} | |move4=Smog|move4type=Poison}} | ||
}} | {{Party/Footer}} | ||
===Generation IV=== | ====Generation IV==== | ||
====1F==== | =====1F===== | ||
{{Trainerheader|building}} | {{Trainerheader|building}} | ||
{{Trainerentry|Spr HGSS Rocket Grunt M.png|Team Rocket Grunt||960|2|020|Raticate|♂|24|None|020|Raticate|♂|24|None}} | {{Trainerentry|Spr HGSS Rocket Grunt M.png|Team Rocket Grunt||960|2|020|Raticate|♂|24|None|020|Raticate|♂|24|None}} | ||
{{Trainerfooter|building|II}} | {{Trainerfooter|building|II}} | ||
====2F==== | =====2F===== | ||
{{Trainerheader|building}} | {{Trainerheader|building}} | ||
{{Trainerentry|Spr HGSS Rocket Grunt F.png|Team Rocket Grunt||1040|1|024|Arbok|♀|26|None}} | {{Trainerentry|Spr HGSS Rocket Grunt F.png|Team Rocket Grunt||1040|1|024|Arbok|♀|26|None}} | ||
| Line 302: | Line 472: | ||
{{Trainerfooter|building|II}} | {{Trainerfooter|building|II}} | ||
====3F==== | =====3F===== | ||
{{Trainerheader|building}} | {{Trainerheader|building}} | ||
{{Trainerentry|Spr HGSS Rocket Grunt M.png|Team Rocket Grunt||920|4|109|Koffing|♂|23|None|041|Zubat|♂|23|None|019|Rattata|♂|23|None|088|Grimer|♂|23|None}} | {{Trainerentry|Spr HGSS Rocket Grunt M.png|Team Rocket Grunt||920|4|109|Koffing|♂|23|None|041|Zubat|♂|23|None|019|Rattata|♂|23|None|088|Grimer|♂|23|None}} | ||
| Line 310: | Line 480: | ||
{{Trainerentry|Spr HGSS Rocket Grunt M.png|Team Rocket Grunt||1040|1|110|Weezing|♂|26|None}} | {{Trainerentry|Spr HGSS Rocket Grunt M.png|Team Rocket Grunt||1040|1|110|Weezing|♂|26|None}} | ||
{{trainerdiv|building|Requires Card Key}} | {{trainerdiv|building|Requires Card Key}} | ||
{{Trainerentry|Spr HGSS Rocket Grunt M.png|Team Rocket Grunt||1040|2|020|Raticate|♂|24|None|109|Koffing|♂|26|None}} | {{Trainerentry|Spr HGSS Rocket Grunt M.png|Team Rocket Grunt||1040|2|020|Raticate|♂|24|None|109|Koffing|♂|26|None}} | ||
{{Trainerfooter|building|II}} | {{Trainerfooter|building|II}} | ||
====4F==== | =====4F===== | ||
{{Trainerheader|building}} | {{Trainerheader|building}} | ||
{{Trainerentry|Spr HGSS Rocket Grunt M.png|Team Rocket Grunt||880|3|041|Zubat|♂|22|None|042|Golbat|♂|24|None|088|Grimer|♂|22|None}} | {{Trainerentry|Spr HGSS Rocket Grunt M.png|Team Rocket Grunt||880|3|041|Zubat|♂|22|None|042|Golbat|♂|24|None|088|Grimer|♂|22|None}} | ||
| Line 323: | Line 492: | ||
{{Trainerfooter|building|II}} | {{Trainerfooter|building|II}} | ||
;Requires Card Key | |||
{{Party/Single | |||
{{Party|color=666666|bordercolor=CC0000|headcolor=CCCCCC | |color=666666 | ||
|bordercolor=CC0000 | |||
|headcolor=CCCCCC | |||
|sprite=Spr HGSS Proton.png | |sprite=Spr HGSS Proton.png | ||
|prize={{pdollar}}1320 | |prize={{pdollar}}1320 | ||
|class=Executive | |class=Executive | ||
|name={{color2| | |name={{color2|000|Proton}} | ||
|game=HGSS | |game=HGSS | ||
|location=Goldenrod Radio Tower | |location=Goldenrod Radio Tower | ||
|pokemon=2 | |pokemon=2}} | ||
| | |{{Pokémon/4 | ||
|gender=male|spritegender=male|level=28|ability=Inner Focus|type1=Poison|type2=Flying | |game=HeartGold and SoulSilver | ||
|ndex=042 | |||
|pokemon=Golbat | |||
|gender=male | |||
|spritegender=male | |||
|level=28 | |||
|ability=Inner Focus | |||
|type1=Poison|type2=Flying | |||
|move1=Wing Attack|move1type=Flying|move1cat=Physical | |move1=Wing Attack|move1type=Flying|move1cat=Physical | ||
|move2=Confuse Ray|move2type=Ghost|move2cat=Status | |move2=Confuse Ray|move2type=Ghost|move2cat=Status | ||
|move3=Leech Life|move3type=Bug|move3cat=Physical | |move3=Leech Life|move3type=Bug|move3cat=Physical | ||
|move4=Bite|move4type=Dark|move4cat=Physical}} | |move4=Bite|move4type=Dark|move4cat=Physical}} | ||
| | |{{Pokémon/4 | ||
|gender=male|level=33|ability=Levitate|type1=Poison | |game=HeartGold and SoulSilver | ||
|ndex=110 | |||
|pokemon=Weezing | |||
|gender=male | |||
|level=33 | |||
|ability=Levitate | |||
|type1=Poison | |||
|move1=Sludge|move1type=Poison|move1cat=Special | |move1=Sludge|move1type=Poison|move1cat=Special | ||
|move2=Double Hit|move2type=Normal|move2cat=Physical | |move2=Double Hit|move2type=Normal|move2cat=Physical | ||
|move3=SmokeScreen|move3type=Normal|move3cat=Status | |move3=SmokeScreen|move3type=Normal|move3cat=Status | ||
|move4=Smog|move4type=Poison|move4cat=Special}} | |move4=Smog|move4type=Poison|move4cat=Special}} | ||
}} | {{Party/Footer}} | ||
====5F==== | =====5F===== | ||
{{Party|color=666666|bordercolor=CC0000|headcolor=CCCCCC | {{Party/Single | ||
|color=666666 | |||
|bordercolor=CC0000 | |||
|headcolor=CCCCCC | |||
|sprite=Spr HGSS Petrel.png | |sprite=Spr HGSS Petrel.png | ||
|prize={{PDollar}}1200 | |prize={{PDollar}}1200 | ||
| Line 355: | Line 542: | ||
|game=HGSS | |game=HGSS | ||
|location=Goldenrod Radio Tower | |location=Goldenrod Radio Tower | ||
|pokemon=6 | |pokemon=6}} | ||
| | |{{Pokémon/4 | ||
|game=HeartGold | |game=HeartGold | ||
|ndex=109 | |ndex=109 | ||
| Line 368: | Line 555: | ||
|move3=Selfdestruct|move3type=Normal|move3cat=Physical | |move3=Selfdestruct|move3type=Normal|move3cat=Physical | ||
|move4=Tackle|move4type=Normal|move4cat=Physical}} | |move4=Tackle|move4type=Normal|move4cat=Physical}} | ||
| | |{{Pokémon/4 | ||
|game=HeartGold | |game=HeartGold | ||
|ndex=109 | |ndex=109 | ||
| Line 380: | Line 567: | ||
|move3=Selfdestruct|move3type=Normal|move3cat=Physical | |move3=Selfdestruct|move3type=Normal|move3cat=Physical | ||
|move4=Tackle|move4type=Normal|move4cat=Physical}} | |move4=Tackle|move4type=Normal|move4cat=Physical}} | ||
| | |{{Pokémon/4 | ||
|game=HeartGold | |game=HeartGold | ||
|ndex=109 | |ndex=109 | ||
| Line 392: | Line 579: | ||
|move3=Selfdestruct|move3type=Normal|move3cat=Physical | |move3=Selfdestruct|move3type=Normal|move3cat=Physical | ||
|move4=Tackle|move4type=Normal|move4cat=Physical}} | |move4=Tackle|move4type=Normal|move4cat=Physical}} | ||
| | {{Party/Div|color=666666}} | ||
|{{Pokémon/4 | |||
|game=HeartGold | |game=HeartGold | ||
|ndex=109 | |ndex=109 | ||
| Line 404: | Line 592: | ||
|move3=Selfdestruct|move3type=Normal|move3cat=Physical | |move3=Selfdestruct|move3type=Normal|move3cat=Physical | ||
|move4=Tackle|move4type=Normal|move4cat=Physical}} | |move4=Tackle|move4type=Normal|move4cat=Physical}} | ||
| | |{{Pokémon/4 | ||
|game=HeartGold | |game=HeartGold | ||
|ndex=110 | |ndex=110 | ||
| Line 416: | Line 604: | ||
|move3=SmokeScreen|move3type=Normal|move3cat=Status | |move3=SmokeScreen|move3type=Normal|move3cat=Status | ||
|move4=Explosion|move4type=Normal|move4cat=Physical}} | |move4=Explosion|move4type=Normal|move4cat=Physical}} | ||
| | |{{Pokémon/4 | ||
|game=HeartGold | |game=HeartGold | ||
|ndex=109 | |ndex=109 | ||
| Line 428: | Line 616: | ||
|move3=Selfdestruct|move3type=Normal|move3cat=Physical | |move3=Selfdestruct|move3type=Normal|move3cat=Physical | ||
|move4=Tackle|move4type=Normal|move4cat=Physical}} | |move4=Tackle|move4type=Normal|move4cat=Physical}} | ||
}} | {{Party/Footer}} | ||
{{Party|color=666666|bordercolor=CC0000|headcolor=CCCCCC | ;Requires Card Key | ||
{{Party/Single | |||
|color=666666 | |||
|bordercolor=CC0000 | |||
|headcolor=CCCCCC | |||
|sprite=Spr HGSS Ariana.png | |sprite=Spr HGSS Ariana.png | ||
|prize={{pdollar}}2560 | |prize={{pdollar}}2560 | ||
|class=Executive | |class=Executive | ||
|name={{color2| | |name={{color2|000|Ariana}} | ||
|game=HGSS | |game=HGSS | ||
|location=Goldenrod Radio Tower | |location=Goldenrod Radio Tower | ||
|pokemon=3 | |pokemon=3}} | ||
| | |{{Pokémon/4 | ||
|game=HeartGold and SoulSilver | |game=HeartGold and SoulSilver | ||
|ndex=024 | |ndex=024 | ||
| Line 452: | Line 642: | ||
|move3=Wrap|move3type=Normal|move3cat=Physical | |move3=Wrap|move3type=Normal|move3cat=Physical | ||
|move4=Poison Sting|move4type=Poison|move4cat=Physical}} | |move4=Poison Sting|move4type=Poison|move4cat=Physical}} | ||
| | |{{Pokémon/4 | ||
|game=HeartGold and SoulSilver | |game=HeartGold and SoulSilver | ||
|ndex=045 | |ndex=045 | ||
| Line 464: | Line 654: | ||
|move3=Acid|move3type=Poison|move3cat=Special | |move3=Acid|move3type=Poison|move3cat=Special | ||
|move4=Sleep Powder|move4type=Grass|move4cat=Status}} | |move4=Sleep Powder|move4type=Grass|move4cat=Status}} | ||
| | |{{Pokémon/4 | ||
|game=HeartGold and SoulSilver | |game=HeartGold and SoulSilver | ||
|ndex=198 | |ndex=198 | ||
| Line 476: | Line 666: | ||
|move3=Astonish|move3type=Ghost|move3cat=Physical | |move3=Astonish|move3type=Ghost|move3cat=Physical | ||
|move4=Pursuit|move4type=Dark|move4cat=Physical}} | |move4=Pursuit|move4type=Dark|move4cat=Physical}} | ||
}} | {{Party/Footer}} | ||
====Observation Deck==== | =====Observation Deck===== | ||
{{Party|color=666666|bordercolor=CC0000|headcolor=CCCCCC | [[File:Radio Tower Top Floor.png|thumb|[[Archer]] and the player on the Observation Deck, exclusive to {{2v2|HeartGold|SoulSilver}}]] | ||
{{Party/Single | |||
|color=666666 | |||
|bordercolor=CC0000 | |||
|headcolor=CCCCCC | |||
|sprite=Spr HGSS Archer.png | |sprite=Spr HGSS Archer.png | ||
|prize={{pdollar}}3040 | |prize={{pdollar}}3040 | ||
|class=Executive | |class=Executive | ||
|name={{color2| | |name={{color2|000|Archer}} | ||
|game=HGSS | |game=HGSS | ||
|location=Goldenrod Radio Tower | |location=Goldenrod Radio Tower | ||
|pokemon=3 | |pokemon=3}} | ||
| | |{{Pokémon/4 | ||
|gender=male|level=35|ability=Early Bird|type1=Dark|type2=Fire | |game=HeartGold and SoulSilver | ||
|ndex=228 | |||
|pokemon=Houndour | |||
|gender=male | |||
|level=35 | |||
|ability=Early Bird | |||
|type1=Dark|type2=Fire | |||
|move1=Faint Attack|move1type=Dark|move1cat=Physical | |move1=Faint Attack|move1type=Dark|move1cat=Physical | ||
|move2=Fire Fang|move2type=Fire|move2cat=Physical | |move2=Fire Fang|move2type=Fire|move2cat=Physical | ||
|move3=Crunch|move3type=Dark|move3cat=Physical | |move3=Crunch|move3type=Dark|move3cat=Physical | ||
|move4=Roar|move4type=Normal|move4cat=Status}} | |move4=Roar|move4type=Normal|move4cat=Status}} | ||
| | |{{Pokémon/4 | ||
|gender=male|level=35|ability=Levitate|type1=Poison | |game=HeartGold and SoulSilver | ||
|ndex=109 | |||
|pokemon=Koffing | |||
|gender=male | |||
|level=35 | |||
|ability=Levitate | |||
|type1=Poison | |||
|move1=Sludge|move1type=Poison|move1cat=Special | |move1=Sludge|move1type=Poison|move1cat=Special | ||
|move2=SmokeScreen|move2type=Normal|move2cat=Status | |move2=SmokeScreen|move2type=Normal|move2cat=Status | ||
|move3=Tackle|move3type=Normal|move3cat=Physical | |move3=Tackle|move3type=Normal|move3cat=Physical | ||
|move4=Haze|move4type=Ice|move4cat=Status}} | |move4=Haze|move4type=Ice|move4cat=Status}} | ||
| | |{{Pokémon/4 | ||
|gender=male|spritegender=male|level=38|ability=Early Bird|type1=Dark|type2=Fire | |game=HeartGold and SoulSilver | ||
|ndex=229 | |||
|pokemon=Houndoom | |||
|gender=male | |||
|spritegender=male | |||
|level=38 | |||
|ability=Early Bird | |||
|type1=Dark|type2=Fire | |||
|move1=Faint Attack|move1type=Dark|move1cat=Physical | |move1=Faint Attack|move1type=Dark|move1cat=Physical | ||
|move2=Fire Fang|move2type=Fire|move2cat=Physical | |move2=Fire Fang|move2type=Fire|move2cat=Physical | ||
|move3=Bite|move3type=Dark|move3cat=Physical | |move3=Bite|move3type=Dark|move3cat=Physical | ||
|move4=Smog|move4type=Poison|move4cat=Special}} | |move4=Smog|move4type=Poison|move4cat=Special}} | ||
}} | {{Party/Footer}} | ||
{{-}} | |||
==Layout== | |||
{| class="roundy" style="margin:auto; background: #000; border: 3px solid #{{locationcolor/dark|building}}" | |||
|- | |||
! style="background:#{{locationcolor/light|building}}; {{roundytl|5px}}" | Version | |||
! style="background:#{{locationcolor/light|building}}" | 1F | |||
! style="background:#{{locationcolor/light|building}}" | 2F | |||
! style="background:#{{locationcolor/light|building}}" | 3F | |||
! style="background:#{{locationcolor/light|building}}" | 4F | |||
! style="background:#{{locationcolor/light|building}}" | 5F | |||
! style="background:#{{locationcolor/light|building}}; {{roundytr|5px}}" | Observation Deck | |||
|- | |||
! style="background:#{{gold color}}" | {{color2|000|Pokémon Gold and Silver Versions|Gold}} | |||
| rowspan="2" | [[File:Goldenrod Radio Tower 1F GS.png|150px]] | |||
| rowspan="2" | [[File:Goldenrod Radio Tower 2F GS.png|150px]] | |||
| rowspan="2" | [[File:Goldenrod Radio Tower 3F GS.png|150px]] | |||
| rowspan="2" | [[File:Goldenrod Radio Tower 4F GS.png|150px]] | |||
| rowspan="2" | [[File:Goldenrod Radio Tower 5F GS.png|150px]] | |||
|- | |||
! style="background:#{{silver color}}" | {{color2|000|Pokémon Gold and Silver Versions|Silver}} | |||
|- | |||
! style="background:#{{crystal color}}" | {{color2|000|Pokémon Crystal Version|Crystal}} | |||
| [[File:Goldenrod Radio Tower 1F C.png|150px]] | |||
| [[File:Goldenrod Radio Tower 2F C.png|150px]] | |||
| [[File:Goldenrod Radio Tower 3F C.png|150px]] | |||
| [[File:Goldenrod Radio Tower 4F C.png|150px]] | |||
| [[File:Goldenrod Radio Tower 5F C.png|150px]] | |||
|- | |||
! style="background:#{{heartgold color}}" | {{color2|000|Pokémon HeartGold and SoulSilver Versions|HeartGold}} | |||
| rowspan="2" | [[File:Goldenrod Radio Tower 1F HGSS.png|150px]] | |||
| rowspan="2" | [[File:Goldenrod Radio Tower 2F HGSS.png|150px]] | |||
| rowspan="2" | [[File:Goldenrod Radio Tower 3F HGSS.png|150px]] | |||
| rowspan="2" | [[File:Goldenrod Radio Tower 4F HGSS.png|150px]] | |||
| rowspan="2" | [[File:Goldenrod Radio Tower 5F HGSS.png|150px]] | |||
| rowspan="2" | [[File:Goldenrod Radio Tower Observation Deck HGSS.png|100px]] | |||
|- | |||
! style="background:#{{soulsilver color}}" | {{color2|000|Pokémon HeartGold and SoulSilver Versions|SoulSilver}} | |||
|- | |||
| colspan="7" style="background:#{{locationcolor/light|building}}; {{roundybottom|5px}}" | | |||
|} | |||
==In the spin-off games== | |||
===[[Pokémon Masters EX]]=== | |||
Artwork depicting the Goldenrod Radio Tower is seen in {{mas|Archer}}'s mindscape. | |||
{| style="background: #7B30B2; {{roundy}}; border: #7B30B2;" | |||
| | |||
{| style="background: #AB60E2; {{roundy}}; border: #AB60E2;" | |||
|- style="text-align:center" | |||
| | |||
{| style="background: #{{dark color light}}; {{roundy}}; border: #{{dark color light}}; padding: 0px 5px 5px 5px" | |||
|- | |||
|<big>'''{{color2|000|Archer (Masters)#Houndoom|Archer & Houndoom}}'''</big> | |||
|- | |||
| [[File:Archer Mindscape.png|200px]] | |||
|} | |||
|} | |||
|} | |||
==In animation== | |||
[[File:Radio Tower anime.png|thumb|220px|The Radio Tower in the {{pkmn|anime}}]] | |||
===Pokémon animated series=== | |||
The Goldenrod Radio Tower appeared in ''[[EP160|Air Time]]'', where {{Ash}} was invited to the tower to be interviewed by [[DJ Mary]]. A [[List of Team Rocket's disguises|disguised]] {{TRT}} also infiltrated the Radio Tower, intending to steal anything valuable inside. However, all they discovered were tapes of various radio shows. They were then mistaken for a comedy group called "The [[Dugtrio Trio]]," and were dragged to be interviewed by DJ Mary. | |||
Due to Team Rocket having accidentally destroyed the tape of the day's Radio Drama, Ash, {{an|Misty}}, {{an|Brock}}, and Team Rocket were asked to act the show live. During the show, [[Jessie]] constantly made her own changes to the script, eventually leading to Team Rocket revealing themselves and attempting to steal {{AP|Pikachu}}. Thankfully, Ash managed to recover Pikachu, Team Rocket was defeated, and the Radio Drama was brought to a successful end. | |||
{{-}} | |||
===Pokémon Generations=== | |||
[[File:Goldenrod Radio Tower PG.png|thumb|left|250px|The Radio Tower in [[Pokémon Generations]]]] | |||
[[File:Goldenrod Radio Tower interior PG.png|thumb|250px|The Radio Tower studio in Pokémon Generations]] | |||
The Goldenrod Radio Tower appeared in a flashback in ''[[PG05|The Legacy]]'', where [[Looker]] described [[Team Rocket]]'s takeover of the building to {{ga|Silver}}. He also mentioned how the entire takeover failed due to [[Giovanni]] not showing up despite Team Rocket's broadcast. | |||
{{-}} | |||
==In the manga== | |||
[[File:Goldenrod Radio Tower JBA.png|thumb|200px|The Radio Tower in [[Pocket Monsters HGSS Jō's Big Adventure]]]] | |||
===Pocket Monsters HGSS Jō's Big Adventure=== | |||
The Goldenrod Radio Tower appeared in ''[[JBA4|Clash!! Jō VS Team Rocket]]'', where [[Jō]] confronted and defeated [[Archer]] there, bringing an end to [[Team Rocket]]'s schemes. | |||
===Pokémon Adventures=== | |||
===={{MangaArc|Gold, Silver & Crystal}}==== | |||
The Goldenrod Radio Tower first appeared in ''[[PS105|Smeargle Smudge]]'', where {{adv|Gold}} was invited to visit it by the [[Radio Director]]. Gold was excited to visit the radio station in the hopes of meeting [[DJ Mary]], but when he saw the {{p|Smeargle}} that had attacked him shortly before was actually Mary's Pokémon, he busted into the recording studio right in the middle of a live interview with [[Whitney]]. Despite the Radio Director being furious with Gold's interruption, the listener response to it was very positive. As such, the Director organized a [[Bicycle]] race from Goldenrod to {{rt|37|Johto}} between Gold and Whitney, although Gold insisted on converting his bike into a {{wp|push scooter}} by attaching its handle to his skateboard. While the race was called off [[PS106|later]], Gold considered himself the winner due to having made his way past the {{p|Sudowoodo}} that was blocking Route 37 and defeating a {{p|Rhydon}} that had taken Whitney hostage. After making Mary write him a pile of signatures, Gold headed to the [[Goldenrod Game Corner]] to spend the money he had earned with his appearance in the radio show. | |||
In ''[[PS143|Irked Igglybuff and Curmudgeonly Cleffa]]'' and ''[[PS144|Savvy Swinub]]'', the Radio Tower crew visited [[Pryce]] at the [[Mahogany Gym]], assuming that the [[Legendary Pokémon]] {{DL|Legendary beasts (Adventures)|Suicune}} would be coming to challenge him, as it had done with several other Johto [[Gym Leader]]s recently. | |||
In ''[[PS180|The Last Battle XIV]]'', {{adv|Professor Oak}} arrived at the Radio Tower for a radio show he was hosting. In the middle of the broadcast, he was notified of a boy who had arrived at the studio and was hoping to get himself a [[Pokédex]]. | |||
===={{MangaArc|Emerald}}==== | |||
In ''[[PS331|The Final Battle IV]]'' and ''[[PS332|V]]'', the aforementioned boy was revealed to have been {{adv|Emerald}}. However, Professor Oak had refused to hand him a Pokédex, because [[Earl Dervish]] had told him that Emerald had consistently refused the company of Pokémon at [[Pokémon academy|Earl's Pokémon Academy]]. As such, he had told Emerald to consider what Pokémon meant to him and what his path with them would be, only agreeing to give him a Pokédex once he had found an answer. | |||
===={{MangaArc|HeartGold & SoulSilver}}==== | |||
In ''[[PS444|One Tough Togepi]]'', Professor Oak was revealed to have told Gold that [[Team Rocket]] sightings had been made near the Goldenrod Radio Tower lately. | |||
===Pokémon Gold & Silver: The Golden Boys=== | |||
The Goldenrod Radio Tower appeared in ''[[GB09|Let's Use Fighting Type Pokémon!!]]'' when [[Whitney]] showed {{GnB|Gold}} sights around Goldenrod City. | |||
===Pokémon Pocket Monsters=== | |||
The Goldenrod Radio Tower appeared in ''[[PM081|Showdown at the Radio Tower!!]]'', where {{OBP|Red|Pocket Monsters}} and {{TP|Red|Clefairy}} visited it to meet [[DJ Mary]]. When it turned out that the Radio Director was actually {{OBP|Giovanni|Pocket Monsters}} in disguise, Clefairy battled against his Pokémon and won, saving the Radio Tower. | |||
== | ===Gallery=== | ||
<gallery> | |||
Goldenrod Radio Tower Adventures.png|The Radio Tower in [[Pokémon Adventures]] | |||
The | Goldenrod Radio Tower Golden Boys.png|The Radio Tower in [[Pokémon Gold & Silver: The Golden Boys]] | ||
Goldenrod Radio Tower PM.png|The Radio Tower in [[Pokémon Pocket Monsters]] | |||
</gallery> | |||
==In the TCG== | ==In the TCG== | ||
| Line 518: | Line 830: | ||
{{cardlist/entry|cardname={{TCG ID|Neo Destiny|Radio Tower|95}}|type=Trainer|type2=Stadium|enset=Neo Destiny|enrarity=Rare|ennum=95/105|jpset=Darkness, and to Light...|jprarity=Rare}} | {{cardlist/entry|cardname={{TCG ID|Neo Destiny|Radio Tower|95}}|type=Trainer|type2=Stadium|enset=Neo Destiny|enrarity=Rare|ennum=95/105|jpset=Darkness, and to Light...|jprarity=Rare}} | ||
{{cardlist/footer|Trainer}} | {{cardlist/footer|Trainer}} | ||
==Trivia== | |||
[[File:1997 GS Goldenrod City.png|thumb|The radio tower in Pocket Monsters 2]] | |||
* The Radio Tower's exterior design in {{game|HeartGold and SoulSilver|s}} is closer to the one initially planned for [[Pokémon Gold and Silver beta|Pocket Monsters 2]], rather than to its original final design in {{game|Gold and Silver|s}}. | |||
* In {{game|HeartGold and SoulSilver|s}}, the poster announcing the [[Lucky Channel]] on the ground floor is still present, despite the program itself no longer being available. | |||
* According to the [[Radio Director]], there was once another [[Bell Tower]] that stood in the Radio Tower's current spot and was even visited by the [[Legendary Pokémon]] {{p|Ho-Oh}}, which is evident by the Rainbow Wing that he found there when it was torn down and kept. | |||
==In other languages== | ==In other languages== | ||
{{Langtable|color={{ | {{Langtable|color={{locationcolor/light|building}}|bordercolor={{locationcolor/dark|building}} | ||
|zh_yue=黃金收訊台 ''{{tt|Wòhnggām Sāuseun Tòih|Goldenrod Receiving Station}}'' {{tt|*|Anime}}<br>滿金播音塔 ''{{tt|Múhngām Boyām Taap|Goldenrod Broadcasting Tower}}'' {{tt|*|GS Guidebook}} | |||
|zh_cmn=滿金收訊塔 ''{{tt|Mǎnjīn Shōuxùn Tǎ|Goldenrod Receiving Tower}}'' {{tt|*|Anime}}<br>小金廣播電台 ''{{tt|Xiǎojīn Guǎngbò Diàntái|Goldenrod Radio Station}}'' {{tt|*|Adventures (Taiwan)}}<br>满金广播塔 ''{{tt|Mǎnjīn Guǎngbò Tǎ|Goldenrod Broadcasting Tower}}'' {{tt|*|Adventures (Mainland China)}} | |||
|nl=Radio Toren | |nl=Radio Toren | ||
| | |fr=Tour Radio de Doublonville | ||
|de=Radioturm | |de=Radioturm | ||
|it=Torre Radio | |it=Torre Radio di Fiordoropoli | ||
|ko= | |ko=금빛시티 라디오타워 ''Geumbit City Radio Tower'' | ||
| | |pt_br=Torre Rádio<br>Torre da Rádio (manga)<br>Estação de Rádio de Goldenrod (manga)<br>Estação de Rádio ([[PG05]])<br>Torre de Rádio da Cidade de Goldenrod (PG05 blurb) | ||
|pt_eu=Torre Rádio | |||
|es=Torre Radio | |||
|vi=Tháp Radio | |||
}} | |||
==See | ==See also== | ||
*[[Pokémon Tower#Differences among generations|Lavender Radio Tower]] | * [[Pokémon Tower#Differences among generations|Lavender Radio Tower]] | ||
{{Johto}}<br> | {{Johto}}<br> | ||
{{Project Locations notice}} | {{Project Locations notice}} | ||
| Line 539: | Line 862: | ||
[[Category:HeartGold and SoulSilver locations]] | [[Category:HeartGold and SoulSilver locations]] | ||
[[Category:Towers]] | [[Category:Towers]] | ||
[[Category:Offices]] | |||
[[Category:Pokémon world media]] | [[Category:Pokémon world media]] | ||
[[de:Radioturm]] | [[de:Radioturm]] | ||
[[es:Torre Radio de Ciudad Trigal]] | |||
[[fr:Tour Radio]] | [[fr:Tour Radio de Doublonville]] | ||
[[it:Torre Radio di Fiordoropoli]] | [[it:Torre Radio di Fiordoropoli]] | ||
[[ja:ラジオとう]] | [[ja:ラジオとう]] | ||
[[zh: | [[zh:播音塔]] | ||
Latest revision as of 17:34, 23 September 2024
| ||||
| ||||
| Location: | Goldenrod City | |||
|---|---|---|---|---|
| Region: | Johto | |||
| Generations: | II, IV | |||
 Location of Goldenrod Radio Tower in Johto. | ||||
| Pokémon world locations | ||||

The Goldenrod Radio Tower (Japanese: コガネラジオとう Kogane Radio Tower) is a six-story tower located next to the Magnet Train station in Goldenrod City, the largest city in Johto.

In the games
The Radio Tower broadcasts numerous programs daily, the most prominent of such being Professor Oak's Pokémon Talk and Buena's Password, a new radio show that debuted in Pokémon Crystal. For a short time in Generation II and Generation IV, the tower fell victim to the clutches of Team Rocket, during which time all of the normal broadcasts were replaced with a pirate signal officially announcing Team Rocket's return and pleading Giovanni to return from seclusion.
After the player obtains their seventh Johto Gym Badge, it is necessary to purge the Radio Tower of Team Rocket in order to continue the storyline, because until the Radio Tower has been returned to normal, either the Blackthorn Gym will be closed because Clair is training in the restricted Dragon's DenGSC, or a man selling RageCandyBars will prevent access to Route 44, the eastern path out of Mahogany TownHGSS. After defeating the impostor station manager in the fifth floor office, the player will receive the Basement Key, which opens up a sealed area of the Goldenrod Tunnel. Upon finding the real station manager in the second basement of the Goldenrod Department Store, he will give the player a Card Key to open the door on the third floor that separates the upper floors of the tower in two. With the Card Key in tow, the player can ascend to the fifth floor studio (and the observation deckHGSS) to defeat the final Rocket Executives, effectively disbanding the organization. To show his gratitude, the station manager will give the player a Rainbow WingGHG, a Silver WingSSS, or a Clear BellC.
Before Team Rocket's invasion, a guard will restrict access beyond the second floor to "authorized personnel" only. Thus, the third and subsequent floors of the Radio Tower can only be explored during and after Team Rocket's invasion.
Places of interest
Studios
In Pokémon Gold and Silver, the station had two studios, located on the fourth and fifth floors. A third studio was added in Pokémon Crystal on the second floor, to accommodate Buena's new radio show. In every version, the tower has a welcome center, as well as a computer linked to Bill's PC and the player's personal computer, on the first floor and a small café on the second floor. The technical operations of the tower are handled by way of a network of computers on the third and fourth floors. The Director's office is found on the fifth floor.
Programs
- Main article: Radio
Many programs are broadcast from the tower, with most being produced in-house.
| Program | Host(s) | Channel (PG) | Description | Where produced | Games |
|---|---|---|---|---|---|
| Buena's Password | Buena | 10.5 | Broadcasts one password per night between 6 PM-12 AM; Trainers who come to Buena and recite the password can get points redeemable for prizes. | 2nd floor studio | C HGSS |
| Variety Channel | Unknown | 10.5 | Broadcasts Buena's Password channel with a couple more new features. Aside from the aforementioned channel, there's a few other new channels that are broadcast in different schedules. | Unknown | HGSS |
| Lucky Channel | Reed | 8.5 | Broadcasts one ID per week; Trainers who come to the welcome center with a Pokémon whose ID is similar will win a prize. | Unknown | GSC |
| Pokémon Music | Ben | 7.5 | Broadcasts different music to different effects depending on the day of the week. | 5th floor studio | GSC HGSS |
| Pokédex Show | (no DJ) | 4.5 4 AM-10 AM |
A show that broadcasts Pokédex entries gathered by the player. | Unknown | GSC |
| Professor Oak's Pokémon Talk | Mary and Oak | 4.5 GSC: 10 AM-4 AM HGSS: all day |
Talk show discussing locations where semi-rare Pokémon can be found. Also speaks about swarms. | 4th floor studio | GSC HGSS |
| Team Rocket's announcement (replaces other broadcasts) | Team Rocket | Every radio station | Plays on every radio station once Team Rocket has succeeded in taking over the Radio Tower. A Team Rocket Executive announces over the airwaves that they have resurfaced, and pleads for their boss, Giovanni, to come out of hiding and rejoin them. Begins playing once the player has obtained seven Badges, and ceases to play when Team Rocket is disbanded. | 5th floor studio | GSC HGSS |
Items
| Item | Location | Games | |
|---|---|---|---|
| Radio Card | 1F, prize for clearing the quiz | G S C HG SS | |
| Blue Card | 2F, from Buena | C HG SS | |
| TM11 (Sunny Day) | 3F, from a woman after defeating Team Rocket | G S C HG SS | |
| Ultra Ball | 4F, near Proton (requires Card Key) | HG SS | |
| Pink Bow | 4F, from Mary after defeating Team Rocket | G S C | |
| BrightPowder | 4F, from Mary after defeating Team Rocket | HG SS | |
| Basement Key | 5F, from Petrel after defeating him | G S C HG SS | |
| Ultra Ball | 5F, in the studio (requires Card Key) | C | |
| Rainbow Wing | From the Director after defeating Team Rocket | G HG | |
| Silver Wing | From the Director after defeating Team Rocket | S SS | |
| Clear Bell | From the Director after defeating Team Rocket | C | |
Pokémon Lottery Corner
- Main article: Pokémon Lottery Corner
In Gold, Silver, and Crystal, the Lucky Channel is a radio show which broadcasts an ID number that changes once per week. Prizes are awarded for winning numbers, which must match any of the player's Pokémon's ID numbers with either all digits, four/three digits or two digits.
In HeartGold and SoulSilver, Felicity gives out tickets for the Pokémon Lottery Corner with an ID number that changes daily. Prizes are awarded for winning numbers, which must match any of the player's Pokémon's ID numbers from the last digit to the first digit.
| Item | Location | Games | |
|---|---|---|---|
| Ultra Ball | Pokémon ID matched last digit | HG SS | |
| PP Up | Pokémon ID matched last two digits | G S C HG SS | |
| Exp. Share | Pokémon ID matched last three digits | G S C HG SS | |
| Exp. Share | Pokémon ID matched last four digits | G S C | |
| Max Revive | Pokémon ID matched last four digits | HG SS | |
| Master Ball | Pokémon ID matched perfectly | G S C HG SS | |
Buena's Password
- Main article: Radio → Buena's Password
The player can collect points for the Blue Card by listening to the radio show Buena's Password, then visiting Buena on the second floor of the Radio Tower and answering her quiz. If they answer the question correctly, they earn 1 point for their Blue Card.
In Generation II, points must be spent to buy each prize; whereas in Generation IV, prizes are awarded when the player obtains a certain number of points. Players cannot have more than 30p on the Blue Card. If the player has 30p, they can speak to Buena to register her phone number in the Pokégear (points will not be spent). In Generation II, the player cannot earn points while their Blue Card has 30p (requiring points to be spent); whereas in Generation IV, the player will be issued a new Blue Card once the 30p limit is hit.
|
| |||||||||||||||||||||||||||||||||||||||||||||||||||||||||
Trainers
NOTE: These Trainers appear only during Team Rocket's takeover at Goldenrod City.
Generation II
1F
| Trainer | Pokémon | |||||||||||
|---|---|---|---|---|---|---|---|---|---|---|---|---|
|
| |||||||||||
| ||||||||||||
| Trainers with a telephone symbol by their names will give their Pokégear number to the player, and may call or be called for a rematch with higher-level Pokémon. | ||||||||||||

2F
| Trainer | Pokémon | |||||||||||
|---|---|---|---|---|---|---|---|---|---|---|---|---|
|
| |||||||||||
|
| |||||||||||
| ||||||||||||
| ||||||||||||
| ||||||||||||
| ||||||||||||
|
| |||||||||||
| ||||||||||||
|
| |||||||||||
| ||||||||||||
| ||||||||||||
| Trainers with a telephone symbol by their names will give their Pokégear number to the player, and may call or be called for a rematch with higher-level Pokémon. | ||||||||||||

3F
| Trainer | Pokémon | |||||||||||
|---|---|---|---|---|---|---|---|---|---|---|---|---|
|
| |||||||||||
|
| |||||||||||
| ||||||||||||
| ||||||||||||
|
| |||||||||||
| ||||||||||||
| ||||||||||||
| ||||||||||||
| Requires Card Key | ||||||||||||
|
| |||||||||||
| ||||||||||||
| Trainers with a telephone symbol by their names will give their Pokégear number to the player, and may call or be called for a rematch with higher-level Pokémon. | ||||||||||||

4F
| Trainer | Pokémon | |||||||||||
|---|---|---|---|---|---|---|---|---|---|---|---|---|
|
| |||||||||||
| ||||||||||||
| ||||||||||||
|
| |||||||||||
| Requires Card Key | ||||||||||||
|
| |||||||||||
| ||||||||||||
| ||||||||||||
| ||||||||||||
| Trainers with a telephone symbol by their names will give their Pokégear number to the player, and may call or be called for a rematch with higher-level Pokémon. | ||||||||||||
- Requires Card Key
|
||||||||||||||||||||||||||
| ||||||||||||||||||||||||||


5F
|
|||||||||||||||||||||||||||||||||||||||||||||||||||||||||||||||||||||||||||||||||||||||||||||||||||||||||||||||||||||||||||||||||||||||||||
| |||||||||||||||||||||||||||||||||||||||||||||||||||||||||||||||||||||||||||||||||||||||||||||||||||||||||||||||||||||||||||||||||||||||||||


- Requires Card Key
|
||||||||||||||||||||||||||||||||||||||||||||||||||||||||||||||||||||||||||
| ||||||||||||||||||||||||||||||||||||||||||||||||||||||||||||||||||||||||||


|
||||||||||||||||||||||||||||||||||||||||||||||||||||||||||||||||||||||||||
| ||||||||||||||||||||||||||||||||||||||||||||||||||||||||||||||||||||||||||


Generation IV
1F
| Trainer | Pokémon | |||||||||||
|---|---|---|---|---|---|---|---|---|---|---|---|---|
|
| |||||||||||
| ||||||||||||
| Trainers with a telephone symbol by their names will give their Pokégear number to the player, and may call or be called for a rematch with higher-level Pokémon. | ||||||||||||

2F
| Trainer | Pokémon | |||||||||||
|---|---|---|---|---|---|---|---|---|---|---|---|---|
|
| |||||||||||
|
| |||||||||||
| ||||||||||||
| ||||||||||||
| ||||||||||||
| ||||||||||||
|
| |||||||||||
| ||||||||||||
|
| |||||||||||
| ||||||||||||
| ||||||||||||
| Trainers with a telephone symbol by their names will give their Pokégear number to the player, and may call or be called for a rematch with higher-level Pokémon. | ||||||||||||

3F
| Trainer | Pokémon | |||||||||||
|---|---|---|---|---|---|---|---|---|---|---|---|---|
|
| |||||||||||
| ||||||||||||
| ||||||||||||
| ||||||||||||
|
| |||||||||||
| ||||||||||||
| ||||||||||||
|
| |||||||||||
| Requires Card Key | ||||||||||||
|
| |||||||||||
| ||||||||||||
| Trainers with a telephone symbol by their names will give their Pokégear number to the player, and may call or be called for a rematch with higher-level Pokémon. | ||||||||||||

4F
| Trainer | Pokémon | |||||||||||
|---|---|---|---|---|---|---|---|---|---|---|---|---|
|
| |||||||||||
| ||||||||||||
| ||||||||||||
|
| |||||||||||
|
| |||||||||||
| ||||||||||||
| ||||||||||||
| ||||||||||||
| Trainers with a telephone symbol by their names will give their Pokégear number to the player, and may call or be called for a rematch with higher-level Pokémon. | ||||||||||||
- Requires Card Key
|
|||||||||||||||||||||||||||||||||||||||||||||||||||||||||||||||||||||
| |||||||||||||||||||||||||||||||||||||||||||||||||||||||||||||||||||||


5F


- Requires Card Key
|
||||||||||||||||||||||||||||||||||||||||||||||||||||||||||||||||||||||||||||||||||||||||||||||||||||||||
| ||||||||||||||||||||||||||||||||||||||||||||||||||||||||||||||||||||||||||||||||||||||||||||||||||||||||


Observation Deck

|
||||||||||||||||||||||||||||||||||||||||||||||||||||||||||||||||||||||||||||||||||||||||||||||||||||||||
| ||||||||||||||||||||||||||||||||||||||||||||||||||||||||||||||||||||||||||||||||||||||||||||||||||||||||


Layout
| Version | 1F | 2F | 3F | 4F | 5F | Observation Deck |
|---|---|---|---|---|---|---|
| Gold | 
|

|

|

|

| |
| Silver | ||||||
| Crystal | 
|

|

|

|

| |
| HeartGold | 
|

|

|

|

|

|
| SoulSilver | ||||||
In the spin-off games
Pokémon Masters EX
Artwork depicting the Goldenrod Radio Tower is seen in Archer's mindscape.
|

In animation

Pokémon animated series
The Goldenrod Radio Tower appeared in Air Time, where Ash was invited to the tower to be interviewed by DJ Mary. A disguised Team Rocket also infiltrated the Radio Tower, intending to steal anything valuable inside. However, all they discovered were tapes of various radio shows. They were then mistaken for a comedy group called "The Dugtrio Trio," and were dragged to be interviewed by DJ Mary.
Due to Team Rocket having accidentally destroyed the tape of the day's Radio Drama, Ash, Misty, Brock, and Team Rocket were asked to act the show live. During the show, Jessie constantly made her own changes to the script, eventually leading to Team Rocket revealing themselves and attempting to steal Pikachu. Thankfully, Ash managed to recover Pikachu, Team Rocket was defeated, and the Radio Drama was brought to a successful end.
Pokémon Generations


The Goldenrod Radio Tower appeared in a flashback in The Legacy, where Looker described Team Rocket's takeover of the building to Silver. He also mentioned how the entire takeover failed due to Giovanni not showing up despite Team Rocket's broadcast.
In the manga

Pocket Monsters HGSS Jō's Big Adventure
The Goldenrod Radio Tower appeared in Clash!! Jō VS Team Rocket, where Jō confronted and defeated Archer there, bringing an end to Team Rocket's schemes.
Pokémon Adventures
Gold, Silver & Crystal arc
The Goldenrod Radio Tower first appeared in Smeargle Smudge, where Gold was invited to visit it by the Radio Director. Gold was excited to visit the radio station in the hopes of meeting DJ Mary, but when he saw the Smeargle that had attacked him shortly before was actually Mary's Pokémon, he busted into the recording studio right in the middle of a live interview with Whitney. Despite the Radio Director being furious with Gold's interruption, the listener response to it was very positive. As such, the Director organized a Bicycle race from Goldenrod to Route 37 between Gold and Whitney, although Gold insisted on converting his bike into a push scooter by attaching its handle to his skateboard. While the race was called off later, Gold considered himself the winner due to having made his way past the Sudowoodo that was blocking Route 37 and defeating a Rhydon that had taken Whitney hostage. After making Mary write him a pile of signatures, Gold headed to the Goldenrod Game Corner to spend the money he had earned with his appearance in the radio show.
In Irked Igglybuff and Curmudgeonly Cleffa and Savvy Swinub, the Radio Tower crew visited Pryce at the Mahogany Gym, assuming that the Legendary Pokémon Suicune would be coming to challenge him, as it had done with several other Johto Gym Leaders recently.
In The Last Battle XIV, Professor Oak arrived at the Radio Tower for a radio show he was hosting. In the middle of the broadcast, he was notified of a boy who had arrived at the studio and was hoping to get himself a Pokédex.
Emerald arc
In The Final Battle IV and V, the aforementioned boy was revealed to have been Emerald. However, Professor Oak had refused to hand him a Pokédex, because Earl Dervish had told him that Emerald had consistently refused the company of Pokémon at Earl's Pokémon Academy. As such, he had told Emerald to consider what Pokémon meant to him and what his path with them would be, only agreeing to give him a Pokédex once he had found an answer.
HeartGold & SoulSilver arc
In One Tough Togepi, Professor Oak was revealed to have told Gold that Team Rocket sightings had been made near the Goldenrod Radio Tower lately.
Pokémon Gold & Silver: The Golden Boys
The Goldenrod Radio Tower appeared in Let's Use Fighting Type Pokémon!! when Whitney showed Gold sights around Goldenrod City.
Pokémon Pocket Monsters
The Goldenrod Radio Tower appeared in Showdown at the Radio Tower!!, where Red and Clefairy visited it to meet DJ Mary. When it turned out that the Radio Director was actually Giovanni in disguise, Clefairy battled against his Pokémon and won, saving the Radio Tower.
Gallery
The Radio Tower in Pokémon Adventures
The Radio Tower in Pokémon Gold & Silver: The Golden Boys

The Radio Tower in Pokémon Pocket Monsters


In the TCG
The following is a list of cards named Radio Tower.
| Related cards Cards listed with a blue background are only legal to use in the current Expanded format. Cards listed with a green background are legal to use in both the current Standard and Expanded formats. | |||||||
|---|---|---|---|---|---|---|---|
| Card | Type | English Expansion |
Rarity | # | Japanese Expansion |
Rarity | # |
| Radio Tower | T [St] | Neo Destiny | 95/105 | Darkness, and to Light... | |||
Trivia

- The Radio Tower's exterior design in Pokémon HeartGold and SoulSilver is closer to the one initially planned for Pocket Monsters 2, rather than to its original final design in Pokémon Gold and Silver.
- In Pokémon HeartGold and SoulSilver, the poster announcing the Lucky Channel on the ground floor is still present, despite the program itself no longer being available.
- According to the Radio Director, there was once another Bell Tower that stood in the Radio Tower's current spot and was even visited by the Legendary Pokémon Ho-Oh, which is evident by the Rainbow Wing that he found there when it was torn down and kept.
In other languages
| |||||||||||||||||||||||||||||||||||||
See also
| Johto | ||||||||
|---|---|---|---|---|---|---|---|---|
|
| ||||||||
|
| This article is part of Project Locations, a Bulbapedia project that aims to write comprehensive articles on every location in the Pokémon world. |