Hoenn Safari Zone

|
It has been suggested that this article be moved to Safari Zone (Hoenn). Please discuss whether or not to move it on its talk page. |

|
The picture used in this article is unsatisfactory. Please feel free to replace it so it conforms to Bulbapedia conventions. Reason: Guidebook labels |
| ||||
| ||||
| Map description: | This amusement area provides a rich environment in which to catch many different kinds of Pokémon. | |||
|---|---|---|---|---|
| Location: | North of Route 121 | |||
| Region: | Hoenn | |||
| Generations: | III, VI | |||
 Location of Safari Zone in Hoenn. | ||||
| Pokémon world locations | ||||
The Hoenn Safari Zone (Japanese: サファリゾーン Safari Zone) is a special Pokémon preserve where Trainers can enter to catch wild Pokémon. The entrance is on Hoenn's Route 121.
In Pokémon Ruby, Sapphire, and Emerald, this Safari Zone is only accessible to Trainers participating in the Safari Game. In a Safari Game, players may only use Safari Balls, and rather than weaken wild Pokémon in battle, players must use non-conventional tactics to try and catch them. For $500, the player is granted entry and 30 Safari Balls. In Ruby, Sapphire, and Emerald, the player is limited to 500 steps and the player is only allowed entry if they also have a Pokéblock Case.
In Pokémon Omega Ruby and Alpha Sapphire, the Safari Game has been removed, and players can enter the Safari Zone area without paying a fee. Pokémon found here are now collected through normal battles. Each area also now has both tall and long grass, and while encounters between them are mostly the same, two rare Pokémon in each area can only be found in one type of grass specifically.
Geography
Certain areas of the Safari Zone can only be accessed with the Mach Bike or the Acro Bike. In Pokémon Omega Ruby and Alpha Sapphire, all areas are accessible with either Bike and Surf, but in some areas, only one type of grass will be accessible without using the other Bike. In Pokémon Ruby, Sapphire, and Emerald, there are also breakable rocks that can be used to encounter Pokémon. In Emerald, after the player obtains the National Pokédex, two new areas will open up to the east, featuring many Johto Pokémon not found in Pokémon Ruby and Sapphire or Pokémon FireRed and LeafGreen.
Areas

- Area 1 houses the entrance.
- In Omega Ruby and Alpha Sapphire, the Acro Bike and Surf are required to reach the long grass within this area.
- Area 2 is directly west of Area 1.
- In Omega Ruby and Alpha Sapphire, the Mach Bike is required to reach the long grass within this area.
- Area 3 is directly north of Area 2. This area can only be accessed with a Bike.
- In Ruby, Sapphire, and Emerald, the Mach Bike is required to access this area.
- In Omega Ruby and Alpha Sapphire, the Mach Bike is required to reach the tall grass within this area, while the Acro Bike is required to reach the long grass.
- Area 4 is directly north of Area 1. This area can only be accessed with a Bike.
- In Ruby, Sapphire, and Emerald, the Acro Bike is required to access this area.
- In Omega Ruby and Alpha Sapphire, the Acro Bike is required to reach the tall grass within this area, while the Mach Bike and Surf are required to reach the long grass.
- Area 5 is directly east of Area 1. It is only accessible in Emerald, and only after the player has entered the Hall of Fame.
- Area 6 is directly north of Area 5. It is only accessible in Emerald, and only after the player has entered the Hall of Fame.
Pokéblock feeders
In Pokémon Ruby, Sapphire, and Emerald, there are Pokéblock feeders throughout the Safari Zone. If a Pokéblock is placed in a feeder, 80% of wild Pokémon encountered in grass patches and water tiles up to five steps away from the feeder will be forced to have a Nature such that, if an identically flavored Pokéblock were thrown at it, the Pokémon would be enthralled (i.e. its preferred flavor dominates its disliked flavor in the Pokéblock); the feeder has no effect if no such Nature exists. Only one Pokéblock may occupy a feeder, and the feeder's effect disappears after 100 steps are taken.
Due to an oddity in the programming of Pokéblock feeders, forced natures do not have a uniform distribution. This causes natures with higher ID numbers to be more common than Natures with lower ID numbers. For example, if a green (bitter) Pokéblock is in the feeder and forces an enthralling Nature: Calm has an 8.71% chance to be forced, Gentle has a 15.61% chance to be forced, Sassy has a 27.66% chance to be forced, and Careful has a 48.02% chance to be forced (approximately).
Safari Game
In Pokémon Ruby, Sapphire, and Emerald, the Safari Zone is only accessible to Trainers participating in the Safari Game. In a Safari Game, players may only use Safari Balls; rather than weaken them in battle, players must use non-conventional tactics to try and catch wild Pokémon. There are four options on the battle screen: throw a Safari Ball, throw a Pokéblock, go near, and run away. Throwing Pokéblocks makes a Pokémon less likely to run but harder to catch, while going near makes a Pokémon easier to catch but more likely to run.
When a Pokémon is encountered in the Safari Zone, the game will track catch and escape factors for it. The catch factor is initially set by dividing the Pokémon's catch rate by 12.75 (precisely: multiplied by 100 and divided by 1275) and rounding down. This has the effect of scaling the catch rate to a range of 0 to 20 (with any 0 value further set to 1, though this does not occur in natural gameplay). The escape factor starts with a value of 3.
These factors are then modified when the player takes an action, as described in the following table.
| Action | Catch factor | Escape factor |
|---|---|---|
| Go Near the first time | Increase by 4 | Increase by 4 |
| Go Near the second time | Increase by 3 | Increase by 4 |
| Go Near the third time | Increase by 2 | Increase by 4 |
| Go Near each subsequent time | Increase by 1 | Increase by 4 |
| Throwing a Pokéblock the first time, and the Pokémon is enthralled | No change | Decrease by 5 |
| Throwing a Pokéblock the second time, and the Pokémon is enthralled | No change | Decrease by 3 |
| Throwing a Pokéblock the third time, and the Pokémon is enthralled | No change | Decrease by 2 |
| Throwing a Pokéblock each subsequent time, and the Pokémon is enthralled | No change | Decrease by 1 |
| Throwing a Pokéblock the first time, and the Pokémon is curious | No change | Decrease by 3 |
| Throwing a Pokéblock the second time, and the Pokémon is curious | No change | Decrease by 2 |
| Throwing a Pokéblock each subsequent time, and the Pokémon is curious | No change | Decrease by 1 |
A Pokéblock will only affect the escape factor if the escape factor is greater than 1. Otherwise, if the escape factor would become negative, it is set to 1 instead. Both factors are also limited to a maximum value of 20.
The Pokémon's reaction to a Pokéblock depends on the combination of its disliked or preferred flavors: it is enthralled if its preferred flavor is greater than its disliked flavor, curious if they are equal, and ignores the Pokéblock if its preferred flavor is less than its disliked flavor. If a Pokéblock is ignored, the escape factor is not affected, but it still counts as thrown for the purpose of throwing subsequent Pokéblocks.
If the player tries to catch the Pokémon using a Safari Ball, the scaling of the catch factor is undone by multiplying it by 12.75 (1275/100) and rounding down to obtain a "modified" catch rate. The effect of these mechanics on the chance of ultimately catching the Pokémon is approximately a 2.5% change for every unit change in the capture factor, with an initial capture probability of approximately catch_rate / 510 rounded down to the nearest multiple of 0.025 (2.5%), or 0.025 if it would be less.
Whether a Pokémon will try to escape is determined at the start of each turn. A random value from 0 to 99 (inclusive) is compared to the escape factor times 5: if the random value is less, the Pokémon will flee at the end of the turn (if not captured). These numbers translate to a 5% change in probability of escaping for every unit change in the escape factor, with an initial 15% chance of escape.
Capture odds
The table below shows the chances of capturing a Pokémon if a Safari Ball is immediately thrown.
| Catch rate | Modified catch rate | Capture odds | Pokémon |
|---|---|---|---|
| 255 | 255 | 50.28% | |
| 235 | 229 | 50.28% | |
| 190 | 178 | 40.96% | |
| 120 | 114 | 23.42% | |
| 90 | 89 | 19.75% | |
| 75 | 64 | 12.33% | |
| 60 | 51 | 10.66% | |
| 45 | 38 | 8.09% |
Pokéblock throw bug
In Ruby, Sapphire, and Emerald, instead of the escape factor having a minimum value of 1 (5% chance to flee) like the catch factor, the game is coded to set the escape factor to 1 if it would become negative due to a thrown Pokéblock. This means it is possible for the player to throw Pokéblocks such that a Pokémon's escape factor becomes exactly 0, and the Pokémon will have a 0% chance to escape. Exploiting this can make it very easy to catch Hoenn Safari Zone Pokémon. Though, it is worth noting that if the "escape factor" is ever equal to 1, the game will not reduce it further regardless of which Pokéblocks are thrown by the player.
Due to an oddity in the programming of Pokéblock Feeders, the distribution of wild Pokémon's natures is not even across each of the possibilities. This causes Calm Pokémon to only spawn in 1/10 encounters if a bitter Pokéblock is in the feeder while Careful natured Pokémon will occur in nearly 4/10 encounters. This gives players an opportunity to greatly increase the effectiveness of their Pokéblock manipulation.
The optimal catching strategy for exploiting this is as follows:
Make these three single-flavor Pokéblocks: two green* (bitter) Pokéblocks, and one red* (spicy) Pokéblock. Put the green* Pokéblock into a feeder and start a wild encounter near that feeder.
Note: this can be done with yellow*, pink*, blue*, and green* Pokéblocks in the feeder; green* is just the most effective. With any of these colors make a red* Pokéblock as well. If you would like to use a red* Pokéblock in the feeder pair it with a yellow* (sour) Pokéblock.
When the battle starts...
- If the Pokémon's catch rate is higher than 200, throw Safari Balls.
- Otherwise, throw a spicy Pokéblock.
- 1) If the Pokémon is curious (escape factor = 0), throw Safari Balls.
- 2) If the Pokémon ignores the Pokéblock, throw a Pokéblock with the same color as the one in the feeder (green).
- 2a) If the Pokémon is enthralled (escape factor = 0), throw Safari Balls.
- 2b) If the Pokémon is curious (escape factor = 1), throw Safari Balls.
- 3) If the Pokémon is enthralled (escape factor = 1), throw Safari Balls.
This strategy results in, at minimum, a 75.88% chance to catch any Pokémon that appears.
| |
| This video is not available on Bulbapedia; instead, you can watch the video on YouTube here. | |
Items
Entrance
| Item | Location | Games | |
|---|---|---|---|
| Safari Ball ×30 | From the receptionist, to be used during the Safari Game; cannot be kept | R S E | |
| TM85 (Dream Eater) | From a Street Thug next to the door | OR AS | |
Area 1
| Item | Location | Games | |
|---|---|---|---|
| Calcium | South of Area 1 pond, east of a patch of long grass (requires Acro Bike and Surf) | OR AS | |
| TM53 (Energy Ball) | South of Area 1 pond, on a hill west of a patch of long grass (requires Mach Bike, Acro Bike, and Surf) | OR AS | |
Area 2
| Item | Location | Games | |
|---|---|---|---|
| Protein | Southwest of the area, in the southwest corner of the first hill with a muddy slope (requires Mach Bike) (hidden) | OR AS | |
| Max Revive | Far southwest of the area, beyond the pond (requires Acro BikeORAS and Surf) | R S E OR AS | |
Area 3
| Item | Location | Games | |
|---|---|---|---|
| TM22 (SolarBeam) | North of the Area, on the bank east of the pond (requires Mach Bike and Surf) | R S E | |
| Nugget | Far north of the Area, west of the pond (requires Mach Bike) | OR AS | |
| Big Pearl | On the hill with muddy slopes south of the Area 3 pond (requires Mach Bike) | OR AS | |
| Absolite | In the northeast corner of the cliff south of the long grass patch, accessed via the Acro Bike railway (requires Acro Bike) | OR AS | |
| Rare Candy | In the northwest-most corner of the Safari Zone (requires Acro Bike) (hidden) | OR AS | |
Area 4
| Item | Location | Games | |
|---|---|---|---|
| Calcium | In the far northwest part of the area (requires Acro Bike) | R S E | |
| Revive | Far southeast of the Area, in a section isolated from the rest of the Area accessible only from Area 1 (hidden) | OR AS | |
| Ultra Ball | Far north of the Area, across the Area 3 pond, at the northeast of the Area 4 pond (requires Mach Bike and Surf) (hidden) | OR AS | |
| TM22 (Solar Beam) | North of the Area, on the bank east of the Area 4 pond (requires Mach Bike and Surf) | OR AS | |
| TM93 (Wild Charge) | North of the Area, on the hill east of the Area 4 pond (requires Mach Bike, Acro Bike, and Surf) | OR AS | |
Area 5
| Item | Location | Games | |
|---|---|---|---|
| PP Up | Three squares south of the southernmost Pokéblock stand (hidden) | E | |
| Full Restore | In the northmost bare square among the southeastern-most patch of grass (hidden) | E | |
| Big Pearl | In the northeastern-most patch of grass beyond the top of the waterfall (requires Surf) | E | |
Area 6
| Item | Location | Games | |
|---|---|---|---|
| Rare Candy | In the southeast portion of the area, in a 2×3 patch of light green grass, in the southeastern-most square (hidden) | E | |
| Zinc | In a small nook among the wall in the rocky path to the north (hidden) | E | |
| Nugget | Between two ledges at the end of the rocky path to the west | E | |
Vending Machine
In Pokémon Omega Ruby and Alpha Sapphire, there is a Vending Machine at the entrance to the Safari Zone.
|
| ||||||
|
|||||||
Pokémon
Generation III
Area 1
| Pokémon | Games | Location | Levels | Rate | |||||||||||
|---|---|---|---|---|---|---|---|---|---|---|---|---|---|---|---|
|
R | S | E |
|
25, 27 | 5% | |||||||||
|
R | S | E |
|
25, 27 | 40% | |||||||||
|
R | S | E |
|
25 | 5% | |||||||||
|
R | S | E |
|
25 | 10% | |||||||||
|
R | S | E |
|
25 | 10% | |||||||||
|
R | S | E |
|
25, 27 | 20% | |||||||||
|
R | S | E |
|
27, 29 | 10% | |||||||||
| A colored background means that the Pokémon can be found in this location in the specified game. A white background with a colored letter means that the Pokémon cannot be found here. | |||||||||||||||
Area 2
| Pokémon | Games | Location | Levels | Rate | |||||||||||
|---|---|---|---|---|---|---|---|---|---|---|---|---|---|---|---|
|
R | S | E |
|
25, 27 | 5% | |||||||||
|
R | S | E |
|
25, 27 | 40% | |||||||||
|
R | S | E |
|
25 | 5% | |||||||||
|
R | S | E |
|
27 | 10% | |||||||||
|
R | S | E |
|
25 | 10% | |||||||||
|
R | S | E |
|
25, 27 | 20% | |||||||||
|
R | S | E |
|
27, 29 | 10% | |||||||||
| Surfing | |||||||||||||||
|
R | S | E |
|
20-35 | 100% | |||||||||
| Fishing | |||||||||||||||
|
R | S | E |
|
5-10 | 30% | |||||||||
|
R | S | E |
|
5-10 | 70% | |||||||||
|
R | S | E |
|
10-30 | 40% | |||||||||
|
R | S | E |
|
10-30 | 60% | |||||||||
|
R | S | E |
|
25-35 | 80% | |||||||||
|
R | S | E |
|
25-40 | 20% | |||||||||
| A colored background means that the Pokémon can be found in this location in the specified game. A white background with a colored letter means that the Pokémon cannot be found here. | |||||||||||||||
Area 3
| Pokémon | Games | Location | Levels | Rate | |||||||||||
|---|---|---|---|---|---|---|---|---|---|---|---|---|---|---|---|
|
R | S | E |
|
27, 29 | 30% | |||||||||
|
R | S | E |
|
29, 31 | 15% | |||||||||
|
R | S | E |
|
27, 29 | 15% | |||||||||
|
R | S | E |
|
29, 31 | 5% | |||||||||
|
R | S | E |
|
27, 29 | 30% | |||||||||
|
R | S | E |
|
27, 29 | 5% | |||||||||
| Surfing | |||||||||||||||
|
R | S | E |
|
20-35 | 95% | |||||||||
|
R | S | E |
|
25-40 | 5% | |||||||||
| Fishing | |||||||||||||||
|
R | S | E |
|
5-10 | 30% | |||||||||
|
R | S | E |
|
5-10 | 70% | |||||||||
|
R | S | E |
|
10-30 | 40% | |||||||||
|
R | S | E |
|
10-30 | 60% | |||||||||
|
R | S | E |
|
25-35 | 80% | |||||||||
|
R | S | E |
|
25-40 | 20% | |||||||||
| A colored background means that the Pokémon can be found in this location in the specified game. A white background with a colored letter means that the Pokémon cannot be found here. | |||||||||||||||
Area 4
| Pokémon | Games | Location | Levels | Rate | |||||||||||
|---|---|---|---|---|---|---|---|---|---|---|---|---|---|---|---|
|
R | S | E |
|
27, 29 | 30% | |||||||||
|
R | S | E |
|
29, 31 | 15% | |||||||||
|
R | S | E |
|
27, 29 | 15% | |||||||||
|
R | S | E |
|
29, 31 | 5% | |||||||||
|
R | S | E |
|
27, 29 | 5% | |||||||||
|
R | S | E |
|
27, 29 | 30% | |||||||||
| Rock Smash | |||||||||||||||
|
R | S | E |
|
5-30 | 100% | |||||||||
| A colored background means that the Pokémon can be found in this location in the specified game. A white background with a colored letter means that the Pokémon cannot be found here. | |||||||||||||||
Area 5
| Pokémon | Games | Location | Levels | Rate | |||||||||||
|---|---|---|---|---|---|---|---|---|---|---|---|---|---|---|---|
|
R | S | E |
|
35 | 5% | |||||||||
|
R | S | E |
|
33 | 10% | |||||||||
|
R | S | E |
|
34, 36 | 30% | |||||||||
|
R | S | E |
|
34 | 10% | |||||||||
|
R | S | E |
|
33, 35 | 30% | |||||||||
|
R | S | E |
|
37, 40 | 5% | |||||||||
|
R | S | E |
|
34 | 5% | |||||||||
|
R | S | E |
|
36, 39 | 5% | |||||||||
| Surfing | |||||||||||||||
|
R | S | E |
|
25-35 | 39% | |||||||||
|
R | S | E |
|
25-30 | 60% | |||||||||
|
R | S | E |
|
35-40 | 1% | |||||||||
| Fishing | |||||||||||||||
|
R | S | E |
|
25-30 | 30% | |||||||||
|
R | S | E |
|
25-30 | 70% | |||||||||
|
R | S | E |
|
25-30 | 20% | |||||||||
|
R | S | E |
|
25-30 | 60% | |||||||||
|
R | S | E |
|
30-35 | 20% | |||||||||
|
R | S | E |
|
25-30 | 40% | |||||||||
|
R | S | E |
|
25-35 | 59% | |||||||||
|
R | S | E |
|
35-40 | 1% | |||||||||
| A colored background means that the Pokémon can be found in this location in the specified game. A white background with a colored letter means that the Pokémon cannot be found here. | |||||||||||||||
Area 6
| Pokémon | Games | Location | Levels | Rate | |||||||||||
|---|---|---|---|---|---|---|---|---|---|---|---|---|---|---|---|
|
R | S | E |
|
35 | 5% | |||||||||
|
R | S | E |
|
33 | 10% | |||||||||
|
R | S | E |
|
33, 35 | 30% | |||||||||
|
R | S | E |
|
34 | 10% | |||||||||
|
R | S | E |
|
34 | 5% | |||||||||
|
R | S | E |
|
34, 36 | 30% | |||||||||
|
R | S | E |
|
36, 39 | 5% | |||||||||
|
R | S | E |
|
37, 40 | 5% | |||||||||
| Rock Smash | |||||||||||||||
|
R | S | E |
|
20-40 | 100% | |||||||||
| A colored background means that the Pokémon can be found in this location in the specified game. A white background with a colored letter means that the Pokémon cannot be found here. | |||||||||||||||
Generation VI
Area 1
| Pokémon | Games | Location | Levels | Rate | ||||||||||||
|---|---|---|---|---|---|---|---|---|---|---|---|---|---|---|---|---|
|
OR | AS |
|
28, 30 | 20% | |||||||||||
|
OR | AS |
|
28-30 | 30% | |||||||||||
|
OR | AS |
|
27, 29 | 20% | |||||||||||
|
OR | AS |
|
28-30 | 30% | |||||||||||
| Long grass | ||||||||||||||||
|
OR | AS |
|
28-30 | 30% | |||||||||||
|
OR | AS |
|
27, 29 | 20% | |||||||||||
|
OR | AS |
|
28-30 | 30% | |||||||||||
|
OR | AS |
|
28, 30 | 20% | |||||||||||
| Horde Encounter | ||||||||||||||||
|
OR | AS |
|
15 | 35% | |||||||||||
|
OR | AS |
|
15 | 5% | |||||||||||
|
OR | AS |
|
15 | 60% | |||||||||||
| Exclusively as hidden Pokémon After defeating or catching Groudon/Kyogre | ||||||||||||||||
|
OR | AS |
|
30 | ??% | |||||||||||
|
OR | AS |
|
30 | ??% | |||||||||||
|
OR | AS |
|
30 | ??% | |||||||||||
| Surfing | ||||||||||||||||
|
OR | AS |
|
20, 25, 30 | 100% | |||||||||||
| Fishing | ||||||||||||||||
|
OR | AS |
|
5 | 35% | |||||||||||
|
OR | AS |
|
10, 15 | 65% | |||||||||||
|
OR | AS |
|
25 | 35% | |||||||||||
|
OR | AS |
|
25 | 65% | |||||||||||
|
OR | AS |
|
30, 35, 40 | 100% | |||||||||||
| A colored background means that the Pokémon can be found in this location in the specified game. A white background with a colored letter means that the Pokémon cannot be found here. | ||||||||||||||||
Area 2
| Pokémon | Games | Location | Levels | Rate | ||||||||||||
|---|---|---|---|---|---|---|---|---|---|---|---|---|---|---|---|---|
|
OR | AS |
|
28-30 | 30% | |||||||||||
|
OR | AS |
|
27, 29 | 20% | |||||||||||
|
OR | AS |
|
28-30 | 30% | |||||||||||
|
OR | AS |
|
28, 30 | 20% | |||||||||||
| Long grass | ||||||||||||||||
|
OR | AS |
|
28-30 | 30% | |||||||||||
|
OR | AS |
|
27, 29 | 20% | |||||||||||
|
OR | AS |
|
28-30 | 30% | |||||||||||
|
OR | AS |
|
28, 30 | 20% | |||||||||||
| Horde Encounter | ||||||||||||||||
|
OR | AS |
|
15 | 35% | |||||||||||
|
OR | AS |
|
15 | 5% | |||||||||||
|
OR | AS |
|
15 | 60% | |||||||||||
| Exclusively as hidden Pokémon After defeating or catching Groudon/Kyogre | ||||||||||||||||
|
OR | AS |
|
30 | ??% | |||||||||||
|
OR | AS |
|
30 | ??% | |||||||||||
|
OR | AS |
|
30 | ??% | |||||||||||
| Surfing | ||||||||||||||||
|
OR | AS |
|
20, 25, 30 | 100% | |||||||||||
| Fishing | ||||||||||||||||
|
OR | AS |
|
5 | 35% | |||||||||||
|
OR | AS |
|
10, 15 | 65% | |||||||||||
|
OR | AS |
|
25 | 35% | |||||||||||
|
OR | AS |
|
25 | 65% | |||||||||||
|
OR | AS |
|
30, 35, 40 | 100% | |||||||||||
| A colored background means that the Pokémon can be found in this location in the specified game. A white background with a colored letter means that the Pokémon cannot be found here. | ||||||||||||||||
Area 3
| Pokémon | Games | Location | Levels | Rate | ||||||||||||
|---|---|---|---|---|---|---|---|---|---|---|---|---|---|---|---|---|
|
OR | AS |
|
28-30 | 30% | |||||||||||
|
OR | AS |
|
27, 29 | 20% | |||||||||||
|
OR | AS |
|
28-30 | 30% | |||||||||||
|
OR | AS |
|
28, 30 | 20% | |||||||||||
| Long grass | ||||||||||||||||
|
OR | AS |
|
28-30 | 30% | |||||||||||
|
OR | AS |
|
27, 29 | 20% | |||||||||||
|
OR | AS |
|
28-30 | 30% | |||||||||||
|
OR | AS |
|
28, 30 | 20% | |||||||||||
| Horde Encounter | ||||||||||||||||
|
OR | AS |
|
15 | 35% | |||||||||||
|
OR | AS |
|
15 | 5% | |||||||||||
|
OR | AS |
|
15 | 60% | |||||||||||
| Exclusively as hidden Pokémon After defeating or catching Groudon/Kyogre | ||||||||||||||||
|
OR | AS |
|
30 | ??% | |||||||||||
|
OR | AS |
|
30 | ??% | |||||||||||
|
OR | AS |
|
30 | ??% | |||||||||||
| Surfing | ||||||||||||||||
|
OR | AS |
|
20, 25, 30 | 100% | |||||||||||
| Fishing | ||||||||||||||||
|
OR | AS |
|
5 | 35% | |||||||||||
|
OR | AS |
|
10, 15 | 65% | |||||||||||
|
OR | AS |
|
25 | 35% | |||||||||||
|
OR | AS |
|
25 | 65% | |||||||||||
|
OR | AS |
|
30, 35, 40 | 100% | |||||||||||
| A colored background means that the Pokémon can be found in this location in the specified game. A white background with a colored letter means that the Pokémon cannot be found here. | ||||||||||||||||
Area 4
| Pokémon | Games | Location | Levels | Rate | ||||||||||||
|---|---|---|---|---|---|---|---|---|---|---|---|---|---|---|---|---|
|
OR | AS |
|
28-30 | 30% | |||||||||||
|
OR | AS |
|
27, 29 | 20% | |||||||||||
|
OR | AS |
|
28-30 | 30% | |||||||||||
|
OR | AS |
|
28, 30 | 20% | |||||||||||
| Long grass | ||||||||||||||||
|
OR | AS |
|
28-30 | 30% | |||||||||||
|
OR | AS |
|
27, 29 | 20% | |||||||||||
|
OR | AS |
|
28-30 | 30% | |||||||||||
|
OR | AS |
|
28, 30 | 20% | |||||||||||
| Horde Encounter | ||||||||||||||||
|
OR | AS |
|
15 | 35% | |||||||||||
|
OR | AS |
|
15 | 5% | |||||||||||
|
OR | AS |
|
15 | 60% | |||||||||||
| Exclusively as hidden Pokémon After defeating or catching Groudon/Kyogre | ||||||||||||||||
|
OR | AS |
|
30 | ??% | |||||||||||
|
OR | AS |
|
30 | ??% | |||||||||||
|
OR | AS |
|
30 | ??% | |||||||||||
| Surfing | ||||||||||||||||
|
OR | AS |
|
20, 25, 30 | 100% | |||||||||||
| Fishing | ||||||||||||||||
|
OR | AS |
|
5 | 35% | |||||||||||
|
OR | AS |
|
10, 15 | 65% | |||||||||||
|
OR | AS |
|
25 | 35% | |||||||||||
|
OR | AS |
|
25 | 65% | |||||||||||
|
OR | AS |
|
30, 35, 40 | 100% | |||||||||||
| A colored background means that the Pokémon can be found in this location in the specified game. A white background with a colored letter means that the Pokémon cannot be found here. | ||||||||||||||||
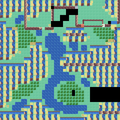
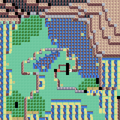
Layout
| Version | Entrance | Original | Expanded |
|---|---|---|---|
| Ruby | 
|

| |
| Sapphire | |||
| Emerald | 
| ||
| Omega Ruby | 
|

| |
| Alpha Sapphire | |||
Music
| Games | Situation | Song name (Japanese) | Song name (English) | Composition | Arrangement |
|---|---|---|---|---|---|
| R S E | Overworld | サファリゾーン | Safari Zone | Go Ichinose | Go Ichinose |
| OR AS | Overworld | サファリゾーン | Safari Zone | Go Ichinose | Shota Kageyama |
Trivia
- No Pokémon introduced in Generation III appear in this Safari Zone.
- In Pokémon Omega Ruby and Alpha Sapphire, the entrance to the Safari Zone has a book titled "The Path of the Safari Zone" written by the founder of the Safari Zone.
- Chapter One: Foundation.
- "A desire to provide the children of the Hoenn region with a chance to encounter many Pokémon welled up inside of me and led to my decision to open here."
- Chapter Two: Opening.
- "From the very day we opened, a long line wound its way from the Safari Zone. It was a huge success. A desire to make more money off of it welled up inside of me and led to my decision to raise the price of admission."
- Chapter Three: Bankruptcy.
- "As a result of the higher admission prices, customers stopped coming to the Safari Zone. A desire to save my own hide welled up inside of me and led to my decision to flee under cover of night."
- Chapter Four: Rebirth.
- "After I had made my escape, the Safari Zone was reborn thanks to the support of some thoughtful people. A desire to pretend that I had never run away welled up inside of me and led to my decision to return to Hoenn."
- Final Chapter: The Future.
- "Having made my return, I began working as a volunteer at the Safari Zone. A desire to express my happiness at having returned welled up inside of me and led to my decision to continue to take good care of Pokémon every day."
- In Pokémon Emerald, the Rare Candy in Area 6 cannot be picked up if the player tries to pick it up while facing it from the north or the west.
- In the Japanese version of Pokémon Emerald, Area 5 has two slight differences compared to the Western version:
- In the Western version of the game, the second northernmost square of tall grass in the southeasternmost patch of grass has been moved one tile to the left.
- In the Japanese version of the game, the hidden Full Restore was mistakenly placed on a tile inside the trees to the east of the patch of grass, making the item impossible to reach. This was fixed in the Western version of the game by placing the Full Restore inside the now bare patch of grass.
- Hoenn Safari Zone Areas 1, 2, and 4 from Pokémon Ruby and Sapphire can be found in the internal data of Pokémon FireRed and LeafGreen. However, the tileset data is missing, so the maps are glitched.
- Both Aipom and Gligar can be found in the Emerald expansion of the Safari Zone, both of which would become version exclusive Pokémon in Pokémon Scarlet and Pokémon Violets DLC: The Teal Mask.
Hoenn Safari Zone Area 1 in FireRed and LeafGreen

Hoenn Safari Zone Area 2 in FireRed and LeafGreen
Hoenn Safari Zone Area 4 in FireRed and LeafGreen

The adjusted patch of tall grass in Emerald


In other languages
| |||||||||||||||||||||||||||||
| Safari Zones | ||
|---|---|---|
| ||
| This article is part of Project Locations, a Bulbapedia project that aims to write comprehensive articles on every location in the Pokémon world. |