Rock Tunnel: Difference between revisions
m (replaced: {{ball|Great}} → Great Ball (7)) |
Woutertje95 (talk | contribs) m (Corrected the Gen III B1F Rock Smash encounter rates (source: AdvanceMap, serebii.net and https://github.com/pret/pokefirered/blob/master/src/data/wild_encounters.json#L2699)) |
||
| (46 intermediate revisions by 17 users not shown) | |||
| Line 2: | Line 2: | ||
---- | ---- | ||
{{Infobox location | {{Infobox location | ||
|image= | |image=Rock Tunnel PE.png | ||
|type=cave | |type=cave | ||
|mapdesc=A naturally formed underground tunnel. Because it has not been developed, it is inky dark inside. A light is needed to get through.{{sup/3|FRLG}}<br/>A dark tunnel that begins in Lavender Town and comes out in Cerulean City.{{sup/4|HGSS}}<br/>A large natural tunnel. It's pitch black, so a light source is required.{{sup/7|PE}} | |mapdesc=A naturally formed underground tunnel. Because it has not been developed, it is inky dark inside. A light is needed to get through.{{sup/3|FRLG}}<br/>A dark tunnel that begins in Lavender Town and comes out in Cerulean City.{{sup/4|HGSS}}<br/>A large natural tunnel. It's pitch black, so a light source is required.{{sup/7|PE}} | ||
| Line 21: | Line 20: | ||
In {{g|FireRed and LeafGreen}}, there is a [[Move Tutor]] who will teach the move {{m|Rock Slide}} to a Pokémon. | In {{g|FireRed and LeafGreen}}, there is a [[Move Tutor]] who will teach the move {{m|Rock Slide}} to a Pokémon. | ||
==Terminology== | |||
The name '''Rock Mountain''' (Japanese: '''イワヤマ''' ''{{tt|Iwayama|Rock Mountain}}'') has been sometimes used to refer to the mountain where the tunnel is located, as well as its surroundings. It appears as one of the areas in [[Pokémon Pinball]] and is used in ''[[Pocket Monsters Encyclopedia]]'' to refer jointly to Route 9 and the northern part of Route 10. In [[Pokémon Adventures]], a three-chapter storyline spanning from ''[[PS053|Can't Catch Caterpie!]]'' to ''[[PS055|The Primeape Directive]]'' is stated to be set in a place called the '''Vast Plains of Rock Mountain''' (Japanese: '''イワヤマの荒野''' ''{{tt|Iwayama|Rock Mountain}} Wasteland'') by the Adventure Map at the end of the volume. | |||
In ''[[Nintendo Power]]'' #125 (page 111), this is known as '''Rock Cave'''. | |||
==Items== | ==Items== | ||
| Line 26: | Line 30: | ||
{{Itemlist|Repel|1F, in the northeast of the room at the north entrance|FR=yes|LG=yes|LP=yes|LE=yes}} | {{Itemlist|Repel|1F, in the northeast of the room at the north entrance|FR=yes|LG=yes|LP=yes|LE=yes}} | ||
{{Itemlist|Escape Rope|1F, in the southeast corner of the northeast section|FR=yes|LG=yes|LP=yes|LE=yes}} | {{Itemlist|Escape Rope|1F, in the southeast corner of the northeast section|FR=yes|LG=yes|LP=yes|LE=yes}} | ||
{{Itemlist|Pearl|1F, northwest of {{tc|Picnicker}} Ariana|FR=yes|LG=yes|display={{i|Pearl}}}} | |||
{{Itemlist|Super Potion|1F, north of the rock formation in the southeast corner|LP=yes|LE=yes}} | {{Itemlist|Super Potion|1F, north of the rock formation in the southeast corner|LP=yes|LE=yes}} | ||
{{Itemlist|Poké Ball|1F, from a man in the southeast near the ladder to B1F, if the player has less than 10 {{i|Poké Ball}}s (repeatable)|LP=yes|LE=yes|display={{i|Poké Ball}}}} | {{Itemlist|Poké Ball|1F, from a man in the southeast near the ladder to B1F, if the {{player}} has less than 10 {{i|Poké Ball}}s (repeatable)|LP=yes|LE=yes|display={{i|Poké Ball}}}} | ||
{{Itemlist|Stardust|1F, at the north end of the second-easternmost room in the southeast|LP=yes|LE=yes}} | {{Itemlist|Stardust|1F, at the north end of the second-easternmost room in the southeast|LP=yes|LE=yes}} | ||
{{Itemlist|Pearl|1F, in the southwest corner|LP=yes|LE=yes|display={{i|Pearl}}}} | {{Itemlist|Pearl|1F, in the southwest corner|LP=yes|LE=yes|display={{i|Pearl}}}} | ||
{{Itemlist|Revive|1F, on a rock on the west side of the southern entrance ''(hidden)'' (daily)|LP=yes|LE=yes}} | |||
{{Itemlist|TM Steel|1F, center platform|display={{TM|47|Steel Wing}}|G=yes|S=yes|C=yes}} | {{Itemlist|TM Steel|1F, center platform|display={{TM|47|Steel Wing}}|G=yes|S=yes|C=yes}} | ||
{{Itemlist|Elixer|1F, southwest|G=yes|S=yes|C=yes|display=[[Elixir|Elixer]]|sprite=Bag Elixir Sprite}} | {{Itemlist|Elixer|1F, southwest|G=yes|S=yes|C=yes|display=[[Elixir|Elixer]]|sprite=Bag Elixir Sprite}} | ||
| Line 44: | Line 49: | ||
{{Itemlist|Great Ball|B1F, in the northeast corner|LP=yes|LE=yes|display=[[Great Ball]] ×3}} | {{Itemlist|Great Ball|B1F, in the northeast corner|LP=yes|LE=yes|display=[[Great Ball]] ×3}} | ||
{{Itemlist|Full Heal|B1F, in the northeast corner of the northeast section|LP=yes|LE=yes}} | {{Itemlist|Full Heal|B1F, in the northeast corner of the northeast section|LP=yes|LE=yes}} | ||
{{Itemlist|Super Potion|B1F, in the southwest corner of the northeast section|LP=yes|LE=yes}} | {{Itemlist|Super Potion| | ||
*B1F, in the southwest corner of the northeast section | |||
*B1F, northeast of Black Belt Dudley, on a small rock along the eastern wall ''(hidden)'' (daily)|LP=yes|LE=yes|display=[[Super Potion]] ×2}} | |||
{{Itemlist|Max Potion|B1F, northwest of PP Up ''(hidden)''|G=yes|S=yes|C=yes}} | {{Itemlist|Max Potion|B1F, northwest of PP Up ''(hidden)''|G=yes|S=yes|C=yes}} | ||
{{Itemlist|PP Up|B1F, west|G=yes|S=yes|C=yes}} | {{Itemlist|PP Up|B1F, west|G=yes|S=yes|C=yes}} | ||
| Line 56: | Line 63: | ||
{{Itemlist|Oval Stone|B1F, far-left Rock Climb chamber (requires {{m|Rock Climb}})|HG=yes|SS=yes}} | {{Itemlist|Oval Stone|B1F, far-left Rock Climb chamber (requires {{m|Rock Climb}})|HG=yes|SS=yes}} | ||
{{itlistfoot|cave}} | {{itlistfoot|cave}} | ||
=====Rock===== | |||
{{Itlisth|cave}} | |||
{{Itemlist/3|Tiny Mushroom|Big Mushroom|Fire Stone|1F, sometimes found by the {{player}}'s {{pkmn2|walking}} {{type|Rock}} Pokémon from a crevice in a rock in the northwest section, southeast of {{tc|Camper}} Lenny | |||
(Item determined randomly)|LP=yes|LE=yes}} | |||
{{Itemlist/3|Tiny Mushroom|Big Mushroom|Thunder Stone|1F, sometimes found by the player's walking Rock-type Pokémon from a crevice in a rock near the southeast corner of the floor, near Camper Leroy | |||
(Item determined randomly)|LP=yes|LE=yes}} | |||
{{Itemlist/3|Tiny Mushroom|Big Mushroom|Water Stone|B1F, sometimes found by the player's walking Rock-type Pokémon from a crevice in a rock near the southwest corner of the floor, accessible from the northeasternmost ladder on 1F | |||
(Item determined randomly)|LP=yes|LE=yes}} | |||
{{Itlistfoot|cave}} | |||
=====Sand===== | |||
{{Itlisth|sand}} | |||
{{Itemlist/2|Stardust|Star Piece| | |||
*1F, sometimes found by the {{player}}'s {{pkmn2|walking}} {{type|Ground}} Pokémon in the sand patch south of the north entrance to the cave (Item determined randomly) | |||
*1F, sometimes found by the player's walking Ground-type Pokémon in the sand patch south of Hiker Claus (Item determined randomly) | |||
*B1F, sometimes found by the player's walking Ground-type Pokémon in the sand in southeast corner of the floor, on the northeastern patch of sand, near the ladder (Item determined randomly) | |||
*B1F, sometimes found by the player's walking Ground-type Pokémon in the sand patch on the western wall, southwest of Black Belt Steve (Item determined randomly)|LP=yes|LE=yes}} | |||
{{itlistfoot|sand}} | |||
===Rock Smash=== | ===Rock Smash=== | ||
If the rock contains an item, the game will pick one of the following: | |||
{{itlisth|cave}} | {{itlisth|cave}} | ||
{{Itemlist| | {{Itemlist|Max Ether|Found by smashing [[breakable rock]]s (25%)|HG=yes|SS=yes}} | ||
{{Itemlist| | {{Itemlist|Revive|Found by smashing [[breakable rock]]s (20%)|HG=yes|SS=yes}} | ||
{{Itemlist| | {{Itemlist/5|Red Shard|Blue Shard|Yellow Shard|Green Shard|Heart Scale|Found by smashing [[breakable rock]]s (10% each)|HG=yes|SS=yes}} | ||
{{Itemlist|Star Piece|Found by smashing [[breakable rock]]s (5%)|HG=yes|SS=yes}} | |||
{{Itemlist|Star Piece| | |||
{{itlistfoot|cave}} | {{itlistfoot|cave}} | ||
| Line 149: | Line 175: | ||
{{catch/entryfl|095|Onix|yes|yes|Cave|13, 15, 17|10%|type1=Rock|type2=Ground}} | {{catch/entryfl|095|Onix|yes|yes|Cave|13, 15, 17|10%|type1=Rock|type2=Ground}} | ||
{{Catch/div|cave|Rock Smash}} | {{Catch/div|cave|Rock Smash}} | ||
{{catch/entryfl|074|Geodude|yes|yes|Rock Smash|5-30| | {{catch/entryfl|074|Geodude|yes|yes|Rock Smash|5-30|95%|type1=Rock|type2=Ground}} | ||
{{catch/entryfl|075|Graveler|yes|yes|Rock Smash|25-40| | {{catch/entryfl|075|Graveler|yes|yes|Rock Smash|25-40|5%|type1=Rock|type2=Ground}} | ||
{{catch/footer|cave}} | {{catch/footer|cave}} | ||
| Line 156: | Line 182: | ||
====1F==== | ====1F==== | ||
{{catch/header|cave|4}} | {{catch/header|cave|4}} | ||
{{catch/entryhs|104|Cubone|yes|yes|Cave|10 | {{catch/entryhs|104|Cubone|yes|yes|Cave|10, 13|all=35%|type1=Ground}} | ||
{{catch/entryhs|074|Geodude|yes|yes|Cave|10|all=30%|type1=Rock|type2=Ground}} | {{catch/entryhs|074|Geodude|yes|yes|Cave|10|all=30%|type1=Rock|type2=Ground}} | ||
{{catch/entryhs|066|Machop|yes|yes|Cave|12|all=20%|type1=Fighting}} | {{catch/entryhs|066|Machop|yes|yes|Cave|12|all=20%|type1=Fighting}} | ||
| Line 219: | Line 245: | ||
===Generation I=== | ===Generation I=== | ||
{{Trainerheader|cave}} | {{Trainerheader|cave}} | ||
{{Trainerentry|Spr RG PokéManiac. | {{Trainerentry|Spr RG PokéManiac.png|game=1|PokéManiac||1150|2|104|Cubone||23|None|079|Slowpoke||23|None|}} | ||
{{Trainerdiv|cave}} | {{Trainerdiv|cave}} | ||
{{Trainerentry|Spr RG PokéManiac. | {{Trainerentry|Spr RG PokéManiac.png|game=1|PokéManiac||1250|1|079|Slowpoke||25|None|}} | ||
{{Trainerdiv|cave}} | {{Trainerdiv|cave}} | ||
{{Trainerentry|Spr RG Jr Trainer F. | {{Trainerentry|Spr RG Jr Trainer F.png|game=1|Jr. Trainer♀||440|2|043|Oddish||22|None|001|Bulbasaur||22|None|}} | ||
{{Trainerdiv|cave}} | {{Trainerdiv|cave}} | ||
{{Trainerentry|Spr RG PokéManiac. | {{Trainerentry|Spr RG PokéManiac.png|game=1|PokéManiac||1100|2|004|Charmander||22|None|104|Cubone||22|None|}} | ||
{{Trainerdiv|cave}} | {{Trainerdiv|cave}} | ||
{{Trainerentry|Spr RG Hiker.png|Hiker||875|1|074|Geodude||25|None|}} | {{Trainerentry|Spr RG Hiker.png|game=1|Hiker||875|1|074|Geodude||25|None|}} | ||
{{Trainerdiv|cave}} | {{Trainerdiv|cave}} | ||
{{Trainerentry|Spr RG Hiker.png|Hiker||700|2|066|Machop||20|None|095|Onix||20|None|}} | {{Trainerentry|Spr RG Hiker.png|game=1|Hiker||700|2|066|Machop||20|None|095|Onix||20|None|}} | ||
{{Trainerdiv|cave}} | {{Trainerdiv|cave}} | ||
{{Trainerentry|Spr RG Hiker.png|Hiker||665|4|074|Geodude||19|None|066|Machop||19|None|074|Geodude||19|None|074|Geodude||19|None|}} | {{Trainerentry|Spr RG Hiker.png|game=1|Hiker||665|4|074|Geodude||19|None|066|Machop||19|None|074|Geodude||19|None|074|Geodude||19|None|}} | ||
{{Trainerdiv|cave}} | {{Trainerdiv|cave}} | ||
{{Trainerentry|Spr RG Hiker.png|Hiker||700|3|095|Onix||20|None|095|Onix||20|None|074|Geodude||20|None|}} | {{Trainerentry|Spr RG Hiker.png|game=1|Hiker||700|3|095|Onix||20|None|095|Onix||20|None|074|Geodude||20|None|}} | ||
{{Trainerdiv|cave}} | {{Trainerdiv|cave}} | ||
{{Trainerentry|Spr RG Hiker.png|Hiker||735|2|074|Geodude||21|None|075|Graveler||21|None|}} | {{Trainerentry|Spr RG Hiker.png|game=1|Hiker||735|2|074|Geodude||21|None|075|Graveler||21|None|}} | ||
{{Trainerdiv|cave}} | {{Trainerdiv|cave}} | ||
{{Trainerentry|Spr RG Jr Trainer F.png|Jr. Trainer♀||420|3|039|Jigglypuff||21|None|016|Pidgey||21|None|052|Meowth||21|None|}} | {{Trainerentry|Spr RG Jr Trainer F.png|game=1|Jr. Trainer♀||420|3|039|Jigglypuff||21|None|016|Pidgey||21|None|052|Meowth||21|None|}} | ||
{{Trainerdiv|cave}} | {{Trainerdiv|cave}} | ||
{{Trainerentry|Spr RG Hiker. | {{Trainerentry|Spr RG Hiker.png|game=1|Hiker||735|3|074|Geodude||21|None|074|Geodude||21|None|075|Graveler||21|None|}} | ||
{{Trainerdiv|cave}} | {{Trainerdiv|cave}} | ||
{{Trainerentry|Spr RG PokéManiac. | {{Trainerentry|Spr RG PokéManiac.png|game=1|PokéManiac||1000|3|079|Slowpoke||20|None|079|Slowpoke||20|None|079|Slowpoke||20|None|079|Slowpoke||20|None|}} | ||
{{Trainerdiv|cave}} | {{Trainerdiv|cave}} | ||
{{Trainerentry|Spr RG Jr Trainer F.png|Jr. Trainer♀||440|2|069|Bellsprout||22|None|035|Clefairy||22|None|}} | {{Trainerentry|Spr RG Jr Trainer F.png|game=1|Jr. Trainer♀||440|2|069|Bellsprout||22|None|035|Clefairy||22|None|}} | ||
{{Trainerdiv|cave}} | {{Trainerdiv|cave}} | ||
{{Trainerentry|Spr RG Jr Trainer F.png|Jr. Trainer♀||380|4|016|Pidgey||19|None|019|Rattata||19|None|019|Rattata||19|None|069|Bellsprout||19|None|}} | {{Trainerentry|Spr RG Jr Trainer F.png|game=1|Jr. Trainer♀||380|4|016|Pidgey||19|None|019|Rattata||19|None|019|Rattata||19|None|069|Bellsprout||19|None|}} | ||
{{Trainerdiv|cave}} | {{Trainerdiv|cave}} | ||
{{Trainerentry|Spr RG Jr Trainer F.png|Jr. Trainer♀||400|3|052|Meowth||20|None|043|Oddish||20|None|016|Pidgey||20|None|}} | {{Trainerentry|Spr RG Jr Trainer F.png|game=1|Jr. Trainer♀||400|3|052|Meowth||20|None|043|Oddish||20|None|016|Pidgey||20|None|}} | ||
{{Trainerfooter|cave|1}} | {{Trainerfooter|cave|1}} | ||
===Generation III=== | ===Generation III=== | ||
{{Trainerheader|cave}} | {{Trainerheader|cave}} | ||
{{Trainerentry|Spr FRLG PokéManiac. | {{Trainerentry|Spr FRLG PokéManiac.png|PokéManiac|Ashton|1104|2|104|Cubone|♂|23|None|079|Slowpoke|♂|23|None|36=サチオ|37=Sachio}} | ||
{{Trainerdiv|cave}} | {{Trainerdiv|cave}} | ||
{{Trainerentry|Spr FRLG PokéManiac. | {{Trainerentry|Spr FRLG PokéManiac.png|PokéManiac|Winston|1200|1|079|Slowpoke|♂|25|None|36=ミツグ|37=Mitsugu}} | ||
{{Trainerdiv|cave}} | {{Trainerdiv|cave}} | ||
{{Trainerentry|Spr FRLG Picnicker. | {{Trainerentry|Spr FRLG Picnicker.png|Picnicker|Martha|440|2|043|Oddish|♀|22|None|001|Bulbasaur|♂|22|None|36=トモコ|37=Tomoko}} | ||
{{Trainerdiv|cave}} | {{Trainerdiv|cave}} | ||
{{Trainerentry|Spr FRLG PokéManiac. | {{Trainerentry|Spr FRLG PokéManiac.png|PokéManiac|Steve|1056|2|004|Charmander|♂|22|None|104|Cubone|♂|22|None|36=トシオ|37=Toshio}} | ||
{{Trainerdiv|cave}} | {{Trainerdiv|cave}} | ||
{{Trainerentry|Spr FRLG Hiker.png|Hiker|Allen|900|1|074|Geodude|♂|25|None|36=イサム|37=Isamu}} | {{Trainerentry|Spr FRLG Hiker.png|Hiker|Allen|900|1|074|Geodude|♂|25|None|36=イサム|37=Isamu}} | ||
| Line 272: | Line 298: | ||
{{Trainerentry|Spr FRLG Picnicker.png|Picnicker|Sofia|420|3|039|Jigglypuff|♀|21|None|016|Pidgey|♀|21|None|052|Meowth|♀|21|None|36=ミノリ|37=Minori}} | {{Trainerentry|Spr FRLG Picnicker.png|Picnicker|Sofia|420|3|039|Jigglypuff|♀|21|None|016|Pidgey|♀|21|None|052|Meowth|♀|21|None|36=ミノリ|37=Minori}} | ||
{{Trainerdiv|cave}} | {{Trainerdiv|cave}} | ||
{{Trainerentry|Spr FRLG Hiker. | {{Trainerentry|Spr FRLG Hiker.png|Hiker|Dudley|756|3|074|Geodude|♂|21|None|074|Geodude|♂|21|None|075|Graveler|♂|21|None|36=トクオ|37=Tokuo}} | ||
{{Trainerdiv|cave}} | {{Trainerdiv|cave}} | ||
{{Trainerentry|Spr FRLG PokéManiac. | {{Trainerentry|Spr FRLG PokéManiac.png|PokéManiac|Cooper|960|3|079|Slowpoke|♂|20|None|079|Slowpoke|♂|20|None|079|Slowpoke|♂|20|None|36=キヨハル|37=Kiyoharu}} | ||
{{Trainerdiv|cave}} | {{Trainerdiv|cave}} | ||
{{Trainerentry|Spr FRLG Picnicker.png|Picnicker|Leah|440|2|069|Bellsprout|♀|22|None|035|Clefairy|♀|22|None|36=エミ|37=Emi}} | {{Trainerentry|Spr FRLG Picnicker.png|Picnicker|Leah|440|2|069|Bellsprout|♀|22|None|035|Clefairy|♀|22|None|36=エミ|37=Emi}} | ||
| Line 285: | Line 311: | ||
===Generation VII=== | ===Generation VII=== | ||
{{trainerheader|cave}} | {{trainerheader|cave}} | ||
{{Trainerentry|VSPoké Maniac PE.png{{!}}90px|Poké Maniac|Ashton|1,104<br/>3 {{i|Poké Ball}}s|1|079|Slowpoke|♂|23|None|36=サチオ|37=Sachio}} | {{Trainerentry|VSPoké Maniac PE.png{{!}}90px|game=PE|Poké Maniac|Ashton|1,104<br/>3 {{i|Poké Ball}}s|1|079|Slowpoke|♂|23|None|36=サチオ|37=Sachio}} | ||
{{trainerdiv|cave}} | {{trainerdiv|cave}} | ||
{{Trainerentry|VSPoké Maniac PE.png{{!}}90px|Poké Maniac|Winston|1,104<br/>3 {{i|Poké Ball}}s|1|115|Kangaskhan|♀|23|None|36=ミツグ|37=Mitsugu}} | {{Trainerentry|VSPoké Maniac PE.png{{!}}90px|game=PE|Poké Maniac|Winston|1,104<br/>3 {{i|Poké Ball}}s|1|115|Kangaskhan|♀|23|None|36=ミツグ|37=Mitsugu}} | ||
{{trainerdiv|cave}} | {{trainerdiv|cave}} | ||
{{Trainerentry|VSBlack Belt PE.png{{!}}90px|Black Belt|Dudley|672<br/>3 {{i|Poké Ball}}s|1|095|Onix|♂|24|None|36=トクオ|37=Tokuo}} | {{Trainerentry|VSBlack Belt PE.png{{!}}90px|game=PE|Black Belt|Dudley|672<br/>3 {{i|Poké Ball}}s|1|095|Onix|♂|24|None|36=トクオ|37=Tokuo}} | ||
{{trainerdiv|cave}} | {{trainerdiv|cave}} | ||
{{Trainerentry|VSHiker PE.png{{!}}90px|Hiker|Allen|920<br/>3 {{i|Poké Ball}}s|3|074|Geodude|♂|23|None|095|Onix|♂|23|None|075|Graveler|♂|23|None|36=イサム|37=Isamu}} | {{Trainerentry|VSHiker PE.png{{!}}90px|game=PE|Hiker|Allen|920<br/>3 {{i|Poké Ball}}s|3|074|Geodude|♂|23|None|095|Onix|♂|23|None|075|Graveler|♂|23|None|36=イサム|37=Isamu}} | ||
{{trainerdiv|cave}} | {{trainerdiv|cave}} | ||
{{Trainerentry|VSBlack Belt PE.png{{!}}90px|Black Belt|Eric|672<br/>3 {{i|Poké Ball}}s|2|056|Mankey|♂|24|None|061|Poliwhirl|♂|24|None|36=ダイチ|37=Daichi}} | {{Trainerentry|VSBlack Belt PE.png{{!}}90px|game=PE|Black Belt|Eric|672<br/>3 {{i|Poké Ball}}s|2|056|Mankey|♂|24|None|061|Poliwhirl|♂|24|None|36=ダイチ|37=Daichi}} | ||
{{trainerdiv|cave}} | {{trainerdiv|cave}} | ||
{{Trainerentry|VSCamper PE.png{{!}}90px|Camper|Lenny|440<br/>2 [[Great Ball]]s|1|058|Growlithe|♂|22|None|36=カツヒト|37=Katsuhito}} | {{Trainerentry|VSCamper PE.png{{!}}90px|game=PE|Camper|Lenny|440<br/>2 [[Great Ball]]s|1|058|Growlithe|♂|22|None|36=カツヒト|37=Katsuhito}} | ||
{{trainerdiv|cave}} | {{trainerdiv|cave}} | ||
{{Trainerentry|VSHiker PE.png{{!}}90px|Hiker|Oliver|920<br/>3 {{i|Poké Ball}}s|2|095|Onix|♂|23|None|028|Sandslash|♂|23|None|36=コダマ|37=Kodama}} | {{Trainerentry|VSHiker PE.png{{!}}90px|Hiker|game=PE|Oliver|920<br/>3 {{i|Poké Ball}}s|2|095|Onix|♂|23|None|028|Sandslash|♂|23|None|36=コダマ|37=Kodama}} | ||
{{trainerdiv|cave}} | {{trainerdiv|cave}} | ||
{{Trainerentry|VSHiker PE.png{{!}}90px|Hiker|Claus|920<br/>3 {{i|Poké Ball}}s|2|066|Machop|♂|23|None|111|Rhyhorn|♂|23|None|36=サブロウ|37=Saburō}} | {{Trainerentry|VSHiker PE.png{{!}}90px|Hiker|game=PE|Claus|920<br/>3 {{i|Poké Ball}}s|2|066|Machop|♂|23|None|111|Rhyhorn|♂|23|None|36=サブロウ|37=Saburō}} | ||
{{trainerdiv|cave}} | {{trainerdiv|cave}} | ||
{{Trainerentry|VSPoké Maniac PE.png{{!}}90px|Poké Maniac|Cooper|1,104<br/>3 {{i|Poké Ball}}s|1|002|Ivysaur|♂|23|None|36=キヨハル|37=Kiyoharu}} | {{Trainerentry|VSPoké Maniac PE.png{{!}}90px|game=PE|Poké Maniac|Cooper|1,104<br/>3 {{i|Poké Ball}}s|1|002|Ivysaur|♂|23|None|36=キヨハル|37=Kiyoharu}} | ||
{{trainerdiv|cave}} | {{trainerdiv|cave}} | ||
{{Trainerentry|VSAce Trainer F PE.png{{!}}90px|Ace Trainer|Sofia|2,500<br/>5 [[Ultra Ball]]s|2|037|Vulpix|♀|24|None|064|Kadabra|♂|25|None|36=ミノリ|37=Minori}} | {{Trainerentry|VSAce Trainer F PE.png{{!}}90px|game=PE|Ace Trainer|Sofia|2,500<br/>5 [[Ultra Ball]]s|2|037|Vulpix|♀|24|None|064|Kadabra|♂|25|None|36=ミノリ|37=Minori}} | ||
{{trainerdiv|cave}} | {{trainerdiv|cave}} | ||
{{Trainerentry|VSAce Trainer M PE.png{{!}}90px|Ace Trainer|Charlie|2,500<br/>5 [[Ultra Ball]]s|2|050|Diglett|♂|24|None|136|Flareon|♂|25|None|36=マナブ|37=Manabu}} | {{Trainerentry|VSAce Trainer M PE.png{{!}}90px|game=PE|Ace Trainer|Charlie|2,500<br/>5 [[Ultra Ball]]s|2|050|Diglett|♂|24|None|136|Flareon|♂|25|None|36=マナブ|37=Manabu}} | ||
{{trainerdiv|cave}} | {{trainerdiv|cave}} | ||
{{Trainerentry|VSBlack Belt PE.png{{!}}90px|Black Belt|Steve|672<br/>3 {{i|Poké Ball}}s|2|066|Machop|♂|24|None|066|Machop|♂|24|None|36=トシオ|37=Toshio}} | {{Trainerentry|VSBlack Belt PE.png{{!}}90px|game=PE|Black Belt|Steve|672<br/>3 {{i|Poké Ball}}s|2|066|Machop|♂|24|None|066|Machop|♂|24|None|36=トシオ|37=Toshio}} | ||
{{trainerdiv|cave}} | {{trainerdiv|cave}} | ||
{{Trainerentry|VSPicnicker PE.png{{!}}90px|Picnicker|Leah|440<br/>2 [[Great Ball]]s|1|030|Nidorina|♀|22|None|36=エミ|37=Emi}} | {{Trainerentry|VSPicnicker PE.png{{!}}90px|game=PE|Picnicker|Leah|440<br/>2 [[Great Ball]]s|1|030|Nidorina|♀|22|None|36=エミ|37=Emi}} | ||
{{trainerdiv|cave}} | {{trainerdiv|cave}} | ||
{{Trainerentry|VSCamper PE.png{{!}}90px|Camper|Leroy|440<br/>2 [[Great Ball]]s|1|033|Nidorino|♂|22|None|36=マコト|37=Makoto}} | {{Trainerentry|VSCamper PE.png{{!}}90px|game=PE|Camper|Leroy|440<br/>2 [[Great Ball]]s|1|033|Nidorino|♂|22|None|36=マコト|37=Makoto}} | ||
{{trainerdiv|cave}} | {{trainerdiv|cave}} | ||
{{Trainerentry|VSPicnicker PE.png{{!}}90px|Picnicker|Dana|440<br/>2 [[Great Ball]]s|2|052|Meowth|♀|22|None|037|Vulpix|♀|22|None|36=ミユキ|37=Miyuki}} | {{Trainerentry|VSPicnicker PE.png{{!}}90px|game=PE|Picnicker|Dana|440<br/>2 [[Great Ball]]s|2|052|Meowth|♀|22|None|037|Vulpix|♀|22|None|36=ミユキ|37=Miyuki}} | ||
{{trainerdiv|cave|After becoming Champion}} | {{trainerdiv|cave|After becoming Champion}} | ||
{{Trainerentry/master|VSHiker Master PE.png{{!}}90px|Hiker|Irwin|074|Geodude|♂|65|Normal|Bide|Fighting|Brick Break|36=ヨシヒロ|37=Yoshihiro}} | {{Trainerentry/master|VSHiker Master PE.png{{!}}90px|Hiker|Irwin|074|Geodude|♂|65|Normal|Bide|Fighting|Brick Break|36=ヨシヒロ|37=Yoshihiro}} | ||
| Line 359: | Line 385: | ||
==In the spin-off games== | ==In the spin-off games== | ||
=== | ===Pokémon Pinball=== | ||
In {{g|Pinball}}, Rock Tunnel appears on the Red and Blue tables; catchable {{OBP|Pokémon|species}} include {{p|Ekans}}, {{p|Diglett}}, {{p|Machop}}, {{p|Geodude}}, {{p|Slowpoke}}, {{p|Onix}}, {{p|Voltorb}} and {{p|Mr. Mime}}. | In {{g|Pinball}}, Rock Tunnel appears on the Red and Blue tables; catchable {{OBP|Pokémon|species}} include {{p|Ekans}}, {{p|Diglett}}, {{p|Machop}}, {{p|Geodude}}, {{p|Slowpoke}}, {{p|Onix}}, {{p|Voltorb}} and {{p|Mr. Mime}}. | ||
| Line 371: | Line 397: | ||
==In the anime== | ==In the anime== | ||
[[File:Rock Tunnel anime.png|thumb|left|250px|Rock Tunnel in the {{pkmn|anime}}]] | |||
===Main series=== | |||
[[File:Rock Tunnel PO.png|thumb|250px|Rock Tunnel in [[Pokémon Origins]]]] | [[File:Rock Tunnel PO.png|thumb|250px|Rock Tunnel in [[Pokémon Origins]]]] | ||
=== | The Rock Tunnel first appeared in ''[[JN051|Trials of a Budding Master!]]'', after [[Goh]] told {{Ash}} about a [[mass outbreak]] of {{p|Geodude}} in the area. Soon after arriving there, Goh managed to find and {{pkmn2|caught|catch}} himself a {{DL|List of Goh's Pokémon|Geodude}}, after which Ash was challenged to a [[World Coronation Series]] {{pkmn|battle}} by [[Dozer]] and his {{p|Gurdurr}}. Using his {{AP|Farfetch'd}}, Ash emerged victorious after a tough battle, increasing his World Coronation Series rank. However, Ash was then challenged by [[Rinto]], whose {{p|Gallade}} easily dodged all of Farfetch'd's attacks before defeating it with {{m|False Swipe}}. | ||
Rock Tunnel | |||
Rock Tunnel reappeared in ''[[JN061|Searching for Service with a Smile!]]'', where Ash and Goh helped [[Devi and Multa|Multa]] to retrieve a {{pkmn|Trainer}}'s {{p|Tauros}} from the tunnel. | |||
===Pokémon Origins=== | |||
Rock Tunnel appeared in ''[[PO02|File 2: Cubone]]'', where {{OBP|Red|Origins}} exited it on his way to [[Lavender Town]]. | |||
{{-}} | {{-}} | ||
==Trivia== | ==Trivia== | ||
* {{tc|Hiker}}{{sup/1|RBY}}{{sup/3|FRLG}}/{{tc|Black Belt}}{{sup/7|PE}} Dudley makes a reference to the song ''{{wp|Hit Me with Your Best Shot}}'' by {{wp|Pat Benatar}}, saying "Hit me with your best shot!" prior to battle, and "Fired away!" after being defeated. | * {{tc|Hiker}}{{sup/1|RBY}}{{sup/3|FRLG}}/{{tc|Black Belt}}{{sup/7|PE}} Dudley makes a [[List of references to popular culture in Pokémon|reference]] to the song ''{{wp|Hit Me with Your Best Shot}}'' by {{wp|Pat Benatar}}, saying "Hit me with your best shot!" prior to battle, and "Fired away!" after being defeated. | ||
* One of the {{tc|Poké Maniac}}s in the tunnel makes a reference to ''{{wp|Mobile Fighter G Gundam}}'', saying "Pokémon Fight! Ready, Go!" prior to battle. Official Gundam Fights in the series began with both participants declaring "Gundam Fight! Ready, Go!" | * One of the {{tc|Poké Maniac}}s in the tunnel makes a reference to ''{{wp|Mobile Fighter G Gundam}}'', saying "Pokémon Fight! Ready, Go!" prior to battle. Official Gundam Fights in the series began with both participants declaring "Gundam Fight! Ready, Go!" | ||
* Rock Tunnel is the only one of Kanto's caves to appear in each of the first four [[generation]]s with the same background music. | * Rock Tunnel is the only one of Kanto's caves to appear in each of the first four [[generation]]s with the same background music. | ||
* Hornblende biotite granite is present here, as revealed in {{ | * {{wp|Hornblende}} biotite {{wp|granite}} is present here, as revealed in {{Steven}}'s house in [[Mossdeep City]] in [[Pokémon Omega Ruby and Alpha Sapphire]]. | ||
==In other languages== | ==In other languages== | ||
| Line 386: | Line 418: | ||
|zh_yue=岩山隧道 ''{{tt|Ngàahmsāan Seuihdouh|Rock Mountain Tunnel}}'' | |zh_yue=岩山隧道 ''{{tt|Ngàahmsāan Seuihdouh|Rock Mountain Tunnel}}'' | ||
|zh_cmn=岩山隧道 ''{{tt|Yánshān Suìdào|Rock Mountain Tunnel}}'' | |zh_cmn=岩山隧道 ''{{tt|Yánshān Suìdào|Rock Mountain Tunnel}}'' | ||
|cs=Kamenný tunel | |||
|fi=Kivitunneli | |||
|fr=Grotte Sombre ({{gen|VII}})<br>Grotte ({{gen|I}}-{{gen|IV}}) | |fr=Grotte Sombre ({{gen|VII}})<br>Grotte ({{gen|I}}-{{gen|IV}}) | ||
|de=Felstunnel | |de=Felstunnel | ||
|it=Tunnel Roccioso | |it=Tunnel Roccioso | ||
|ko=돌산터널 ''{{tt|Dolsan Tunnel|Rock Mountain Tunnel}}'' | |ko=돌산터널 ''{{tt|Dolsan Tunnel|Rock Mountain Tunnel}}'' | ||
|pl=Skalisty Tunel | |||
|pt_br=Túnel de Rocha | |||
|es=Túnel Roca | |es=Túnel Roca | ||
|tr=Kaya Tünel | |||
}} | }} | ||
{{Kanto}}<br/> | {{Kanto}}<br/> | ||
{{Project Locations notice}} | {{Project Locations notice}} | ||
Latest revision as of 13:48, 23 April 2024
If you were looking for the Mystery Dungeons whose Japanese names are Rock Tunnel, see Rock Path (Red and Blue Rescue Team) and Rock Path (Explorers of Time, Darkness, and Sky)
| ||||
| ||||
| Map description: | A naturally formed underground tunnel. Because it has not been developed, it is inky dark inside. A light is needed to get through.FRLG A dark tunnel that begins in Lavender Town and comes out in Cerulean City.HGSS A large natural tunnel. It's pitch black, so a light source is required.PE | |||
|---|---|---|---|---|
| Location: | Route 10 | |||
| Region: | Kanto | |||
| Generations: | I, II, III, IV, VII | |||
 Location of Rock Tunnel in Kanto. | ||||
| Pokémon world locations | ||||

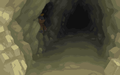
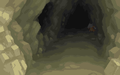
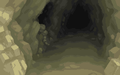
The Rock Tunnel (Japanese: イワヤマトンネル Rock Mountain Tunnel) is a naturally formed underground tunnel. Since it has not been developed, it is pitch black inside. A light of some sort is needed for travelers to find their way, so it is recommended that Pokémon Trainers bring along a Pokémon that can use Flash outside of battle.
Rock Tunnel is the only alternative route to Lavender Town, as the two other routes have been rendered inaccessible by a slumbering Snorlax and the Saffron City gatekeepers. The cave has two separate floors, both of which are roughly the same size. There are many Trainers within the cave, there for the fun of exploring, training, or are simply lost in the darkness.
Route 10 leads from Cerulean City to Rock Tunnel. At the northern entrance of the cave is a convenient Pokémon Center. The roof of the Kanto Power Plant can also be seen from here (excluding Generation III). The southern entrance exits onto the remainder of Route 10, leading to Lavender Town.
In Pokémon FireRed and LeafGreen, there is a Move Tutor who will teach the move Rock Slide to a Pokémon.
Terminology
The name Rock Mountain (Japanese: イワヤマ Iwayama) has been sometimes used to refer to the mountain where the tunnel is located, as well as its surroundings. It appears as one of the areas in Pokémon Pinball and is used in Pocket Monsters Encyclopedia to refer jointly to Route 9 and the northern part of Route 10. In Pokémon Adventures, a three-chapter storyline spanning from Can't Catch Caterpie! to The Primeape Directive is stated to be set in a place called the Vast Plains of Rock Mountain (Japanese: イワヤマの荒野 Iwayama Wasteland) by the Adventure Map at the end of the volume.
In Nintendo Power #125 (page 111), this is known as Rock Cave.
Items
| Item | Location | Games | |
|---|---|---|---|
| Repel | 1F, in the northeast of the room at the north entrance | FR LG P E | |
| Escape Rope | 1F, in the southeast corner of the northeast section | FR LG P E | |
| Pearl | 1F, northwest of Picnicker Ariana | FR LG | |
| Super Potion | 1F, north of the rock formation in the southeast corner | P E | |
| Poké Ball | 1F, from a man in the southeast near the ladder to B1F, if the player has less than 10 Poké Balls (repeatable) | P E | |
| Stardust | 1F, at the north end of the second-easternmost room in the southeast | P E | |
| Pearl | 1F, in the southwest corner | P E | |
| Revive | 1F, on a rock on the west side of the southern entrance (hidden) (daily) | P E | |
| TM47 (Steel Wing) | 1F, center platform | G S C | |
| Elixer | 1F, southwest | G S C | |
| X Defend | 1F, east of TM47 (hidden) | G S C | |
| X Accuracy | 1F, northeast (hidden) | G S C | |
| X Accuracy | 1F, on a stalagmite east of the north-west ladder (hidden) | HG SS | |
| Elixir | 1F, north of south-west ladder | HG SS | |
| X Defend | 1F, on a stalagmite north-east of the southern entrance (hidden) | HG SS | |
| TM56 (Fling) | 1F, on second raised area north of southern entrance | HG SS | |
| Revive | B1F, near the southwest corner of the floor, accessible from the northeasternmost ladder on 1F | FR LG P E | |
| Max Ether | B1F, northeast of Hiker Dudley, accessible from the ladder northwest of the center of 1F | FR LG | |
| Dire Hit | B1F, northeast of Black Belt Dudley, in the middle of the floor | P E | |
| Great Ball ×3 | B1F, in the northeast corner | P E | |
| Full Heal | B1F, in the northeast corner of the northeast section | P E | |
| Super Potion ×2 |
|
P E | |
| Max Potion | B1F, northwest of PP Up (hidden) | G S C | |
| PP Up | B1F, west | G S C | |
| Revive | B1F, north | G S C | |
| Iron | B1F, south | G S C | |
| Max Potion | B1F, near south-east corner (requires Rock Smash) (hidden) | HG SS | |
| PP Up | B1F, southwest of ladder from northern entrance | HG SS | |
| Revive | B1F, east of the northwest ladder | HG SS | |
| Iron | B1F, far-right Rock Climb chamber (requires Rock Climb) | HG SS | |
| HP Up | B1F, second-to-the-left Rock Climb chamber (requires Rock Climb) (hidden) | HG SS | |
| Oval Stone | B1F, far-left Rock Climb chamber (requires Rock Climb) | HG SS | |
Rock
| Item | Location | Games | |
|---|---|---|---|
| Tiny Mushroom | 1F, sometimes found by the player's walking Rock-type Pokémon from a crevice in a rock in the northwest section, southeast of Camper Lenny
(Item determined randomly) |
P E | |
| Big Mushroom | |||
| Fire Stone | |||
| Tiny Mushroom | 1F, sometimes found by the player's walking Rock-type Pokémon from a crevice in a rock near the southeast corner of the floor, near Camper Leroy
(Item determined randomly) |
P E | |
| Big Mushroom | |||
| Thunder Stone | |||
| Tiny Mushroom | B1F, sometimes found by the player's walking Rock-type Pokémon from a crevice in a rock near the southwest corner of the floor, accessible from the northeasternmost ladder on 1F
(Item determined randomly) |
P E | |
| Big Mushroom | |||
| Water Stone | |||
Sand
| Item | Location | Games | |
|---|---|---|---|
| Stardust |
|
P E | |
| Star Piece | |||
Rock Smash
If the rock contains an item, the game will pick one of the following:
| Item | Location | Games | |
|---|---|---|---|
| Max Ether | Found by smashing breakable rocks (25%) | HG SS | |
| Revive | Found by smashing breakable rocks (20%) | HG SS | |
| Red Shard | Found by smashing breakable rocks (10% each) | HG SS | |
| Blue Shard | |||
| Yellow Shard | |||
| Green Shard | |||
| Heart Scale | |||
| Star Piece | Found by smashing breakable rocks (5%) | HG SS | |
Pokémon
Generation I
1F
| Pokémon | Games | Location | Levels | Rate | |||||||||||
|---|---|---|---|---|---|---|---|---|---|---|---|---|---|---|---|
|
R | B | Y |
|
15-18 | 55% | |||||||||
|
R | B | Y |
|
15, 17, 19, 21 | 55% | |||||||||
|
R | B | Y |
|
16-17 | 25% | |||||||||
|
R | B | Y |
|
16, 18, 20 | 35% | |||||||||
|
R | B | Y |
|
15, 17 | 15% | |||||||||
|
R | B | Y |
|
17, 19, 21 | 10% | |||||||||
|
R | B | Y |
|
13, 15 | 5% | |||||||||
| A colored background means that the Pokémon can be found in this location in the specified game. A white background with a colored letter means that the Pokémon cannot be found here. | |||||||||||||||
B1F
| Pokémon | Games | Location | Levels | Rate | |||||||||||
|---|---|---|---|---|---|---|---|---|---|---|---|---|---|---|---|
|
R | B | Y |
|
16-18 | 50% | |||||||||
|
R | B | Y |
|
20-22 | 45% | |||||||||
|
R | B | Y |
|
15, 17 | 15% | |||||||||
|
R | B | Y |
|
18, 20 | 20% | |||||||||
|
R | B | Y |
|
16-18 | 26% | |||||||||
|
R | B | Y |
|
17, 21 | 25% | |||||||||
|
R | B | Y |
|
13, 17 | 9% | |||||||||
|
R | B | Y |
|
14, 18, 22 | 10% | |||||||||
| A colored background means that the Pokémon can be found in this location in the specified game. A white background with a colored letter means that the Pokémon cannot be found here. | |||||||||||||||
Generation II
1F
| Pokémon | Games | Location | Levels | Rate | |||||||||||
|---|---|---|---|---|---|---|---|---|---|---|---|---|---|---|---|
|
G | S | C |
|
8 | 10% | |||||||||
|
G | S | C |
|
12 | 10% | 10% | 0% | |||||||
|
G | S | C |
|
12-15 | 0% | 0% | 40% | |||||||
|
G | S | C |
|
12 | 20% | |||||||||
|
G | S | C |
|
12 | 20% | 20% | 0% | |||||||
|
G | S | C |
|
14 | 5% | |||||||||
|
G | S | C |
|
15 | 5% | 5% | 0% | |||||||
|
G | S | C |
|
10 | 30% | |||||||||
|
G | S | C |
|
11 | 30% | 30% | 0% | |||||||
|
G | S | C |
|
11-12 | 0% | 0% | 50% | |||||||
|
G | S | C |
|
17 | 0% | 0% | 10% | |||||||
|
G | S | C |
|
10-13 | 35% | |||||||||
|
G | S | C |
|
10 | 30% | 30% | 0% | |||||||
|
G | S | C |
|
12 | 5% | 5% | 0% | |||||||
| A colored background means that the Pokémon can be found in this location in the specified game. A white background with a colored letter means that the Pokémon cannot be found here. | |||||||||||||||
B1F
| Pokémon | Games | Location | Levels | Rate | |||||||||||
|---|---|---|---|---|---|---|---|---|---|---|---|---|---|---|---|
|
G | S | C |
|
12 | 30% | |||||||||
|
G | S | C |
|
14 | 30% | |||||||||
|
G | S | C |
|
12 | 30% | |||||||||
|
G | S | C |
|
12 | 30% | 30% | 0% | |||||||
|
G | S | C |
|
16 | 20% | |||||||||
|
G | S | C |
|
10 | 10% | |||||||||
|
G | S | C |
|
12 | 10% | 10% | 0% | |||||||
|
G | S | C |
|
12-15 | 0% | 0% | 40% | |||||||
|
G | S | C |
|
15 | 0% | 0% | 5% | |||||||
|
G | S | C |
|
15 | 0% | 0% | 5% | |||||||
|
G | S | C |
|
14 | 5% | |||||||||
|
G | S | C |
|
15 | 5% | 5% | 0% | |||||||
|
G | S | C |
|
14 | 5% | |||||||||
|
G | S | C |
|
15 | 5% | 5% | 0% | |||||||
| A colored background means that the Pokémon can be found in this location in the specified game. A white background with a colored letter means that the Pokémon cannot be found here. | |||||||||||||||
Generation III
1F
| Pokémon | Games | Location | Levels | Rate | |||||||||||
|---|---|---|---|---|---|---|---|---|---|---|---|---|---|---|---|
|
FR | LG |
|
15-17 | 35% | ||||||||||
|
FR | LG |
|
15-16 | 30% | ||||||||||
|
FR | LG |
|
16-17 | 15% | ||||||||||
|
FR | LG |
|
16-17 | 15% | ||||||||||
|
FR | LG |
|
13, 15 | 5% | ||||||||||
| A colored background means that the Pokémon can be found in this location in the specified game. A white background with a colored letter means that the Pokémon cannot be found here. | |||||||||||||||
B1F
| Pokémon | Games | Location | Levels | Rate | |||||||||||
|---|---|---|---|---|---|---|---|---|---|---|---|---|---|---|---|
|
FR | LG |
|
15-17 | 35% | ||||||||||
|
FR | LG |
|
15-16 | 30% | ||||||||||
|
FR | LG |
|
16-17 | 15% | ||||||||||
|
FR | LG |
|
17 | 10% | ||||||||||
|
FR | LG |
|
13, 15, 17 | 10% | ||||||||||
| Rock Smash | |||||||||||||||
|
FR | LG |
|
5-30 | 95% | ||||||||||
|
FR | LG |
|
25-40 | 5% | ||||||||||
| A colored background means that the Pokémon can be found in this location in the specified game. A white background with a colored letter means that the Pokémon cannot be found here. | |||||||||||||||
Generation IV
1F
| Pokémon | Games | Location | Levels | Rate | |||||||||||
|---|---|---|---|---|---|---|---|---|---|---|---|---|---|---|---|
|
HG | SS |
|
10, 13 | 35% | ||||||||||
|
HG | SS |
|
10 | 30% | ||||||||||
|
HG | SS |
|
12 | 20% | ||||||||||
|
HG | SS |
|
8 | 10% | ||||||||||
|
HG | SS |
|
14 | 5% | ||||||||||
| Special Pokémon | |||||||||||||||
|
HG | SS |
|
12 | 20% | ||||||||||
|
HG | SS |
|
10 | 20% | ||||||||||
|
HG | SS |
|
12 | 20% | ||||||||||
|
HG | SS |
|
10 | 20% | ||||||||||
| A colored background means that the Pokémon can be found in this location in the specified game. A white background with a colored letter means that the Pokémon cannot be found here. | |||||||||||||||
B1F
| Pokémon | Games | Location | Levels | Rate | |||||||||||
|---|---|---|---|---|---|---|---|---|---|---|---|---|---|---|---|
|
HG | SS |
|
12 | 30% | ||||||||||
|
HG | SS |
|
12 | 30% | ||||||||||
|
HG | SS |
|
16 | 20% | ||||||||||
|
HG | SS |
|
10 | 10% | ||||||||||
|
HG | SS |
|
14 | 5% | ||||||||||
|
HG | SS |
|
14 | 5% | ||||||||||
| Rock Smash | |||||||||||||||
|
HG | SS |
|
12-21 | 100% | ||||||||||
| Special Pokémon | |||||||||||||||
|
HG | SS |
|
16 | 20% | ||||||||||
|
HG | SS |
|
12 | 20% | ||||||||||
|
HG | SS |
|
16 | 20% | ||||||||||
|
HG | SS |
|
12 | 20% | ||||||||||
| A colored background means that the Pokémon can be found in this location in the specified game. A white background with a colored letter means that the Pokémon cannot be found here. | |||||||||||||||
Generation VII
1F
| Pokémon | Games | Location | Levels | Rate | |||||||||||
|---|---|---|---|---|---|---|---|---|---|---|---|---|---|---|---|
|
P | E |
|
18-23 | 10% | ||||||||||
|
P | E |
|
18-23 | 20% | ||||||||||
|
P | E |
|
18-23 | 10% | ||||||||||
|
P | E |
|
18-23 | 10% | ||||||||||
|
P | E |
|
18-23 | 20% | ||||||||||
|
P | E |
|
18-23 | 10% | ||||||||||
|
P | E |
|
18-23 | 9% | ||||||||||
|
P | E |
|
18-23 | 10% | ||||||||||
|
P | E |
|
18-23 | 1% | ||||||||||
| Rare Spawns | |||||||||||||||
|
P | E |
|
18-23 | - | ||||||||||
| A colored background means that the Pokémon can be found in this location in the specified game. A white background with a colored letter means that the Pokémon cannot be found here. | |||||||||||||||


B1F
| Pokémon | Games | Location | Levels | Rate | |||||||||||
|---|---|---|---|---|---|---|---|---|---|---|---|---|---|---|---|
|
P | E |
|
18-23 | 20% | ||||||||||
|
P | E |
|
18-23 | 10% | ||||||||||
|
P | E |
|
18-23 | 10% | ||||||||||
|
P | E |
|
18-23 | 20% | ||||||||||
|
P | E |
|
18-23 | 10% | ||||||||||
|
P | E |
|
18-23 | 10% | ||||||||||
|
P | E |
|
18-23 | 9% | ||||||||||
|
P | E |
|
18-23 | 10% | ||||||||||
|
P | E |
|
18-23 | 1% | ||||||||||
| Rare Spawns | |||||||||||||||
|
P | E |
|
18-23 | - | ||||||||||
| A colored background means that the Pokémon can be found in this location in the specified game. A white background with a colored letter means that the Pokémon cannot be found here. | |||||||||||||||
Trainers
Generation I
| Trainer | Pokémon | |||||||||
|---|---|---|---|---|---|---|---|---|---|---|
|
| |||||||||
| ||||||||||
|
| |||||||||
|
| |||||||||
| ||||||||||
|
| |||||||||
| ||||||||||
|
| |||||||||
|
| |||||||||
| ||||||||||
|
| |||||||||
| ||||||||||
| ||||||||||
| ||||||||||
|
| |||||||||
| ||||||||||
| ||||||||||
|
| |||||||||
| ||||||||||
|
| |||||||||
| ||||||||||
| ||||||||||
|
| |||||||||
| ||||||||||
| ||||||||||
|
| |||||||||
| ||||||||||
| ||||||||||
|
| |||||||||
| ||||||||||
|
| |||||||||
| ||||||||||
| ||||||||||
| ||||||||||
|
| |||||||||
| ||||||||||
| ||||||||||


Generation III
| Trainer | Pokémon | |||||||||||
|---|---|---|---|---|---|---|---|---|---|---|---|---|
|
| |||||||||||
| ||||||||||||
|
| |||||||||||
|
| |||||||||||
| ||||||||||||
|
| |||||||||||
| ||||||||||||
|
| |||||||||||
|
| |||||||||||
| ||||||||||||
|
| |||||||||||
| ||||||||||||
| ||||||||||||
| ||||||||||||
|
| |||||||||||
| ||||||||||||
| ||||||||||||
|
| |||||||||||
| ||||||||||||
|
| |||||||||||
| ||||||||||||
| ||||||||||||
|
| |||||||||||
| ||||||||||||
| ||||||||||||
|
| |||||||||||
| ||||||||||||
| ||||||||||||
|
| |||||||||||
| ||||||||||||
|
| |||||||||||
| ||||||||||||
| ||||||||||||
| ||||||||||||
|
| |||||||||||
| ||||||||||||
| ||||||||||||
| Trainers with a Vs. Seeker by their names, when alerted for a rematch using the item, may use higher-level Pokémon. | ||||||||||||


Generation VII
| Trainer | Pokémon | |||||||||||||||
|---|---|---|---|---|---|---|---|---|---|---|---|---|---|---|---|---|
|
| |||||||||||||||
|
| |||||||||||||||
|
| |||||||||||||||
|
| |||||||||||||||
| ||||||||||||||||
| ||||||||||||||||
|
| |||||||||||||||
| ||||||||||||||||
|
| |||||||||||||||
|
| |||||||||||||||
| ||||||||||||||||
|
| |||||||||||||||
| ||||||||||||||||
|
| |||||||||||||||
|
| |||||||||||||||
| ||||||||||||||||
|
| |||||||||||||||
| ||||||||||||||||
|
| |||||||||||||||
| ||||||||||||||||
|
| |||||||||||||||
|
| |||||||||||||||
|
| |||||||||||||||
| ||||||||||||||||
| After becoming Champion | ||||||||||||||||
|
| |||||||||||||||
|
| |||||||||||||||


Layout
| Version | 1F | B1F |
|---|---|---|
| Red | 
|

|
| Blue | ||
| Yellow | ||
| Gold | 
|

|
| Silver | ||
| Crystal | ||
| FireRed | 
|

|
| LeafGreen | ||
| HeartGold | 
|

|
| SoulSilver | ||
In the spin-off games
Pokémon Pinball
In Pokémon Pinball, Rock Tunnel appears on the Red and Blue tables; catchable Pokémon include Ekans, Diglett, Machop, Geodude, Slowpoke, Onix, Voltorb and Mr. Mime.
Preview
Morning (Kangaskhan)
Day/Evening (Marowak)
Night (Onix)

FRLG


In the anime

Main series

The Rock Tunnel first appeared in Trials of a Budding Master!, after Goh told Ash about a mass outbreak of Geodude in the area. Soon after arriving there, Goh managed to find and catch himself a Geodude, after which Ash was challenged to a World Coronation Series battle by Dozer and his Gurdurr. Using his Farfetch'd, Ash emerged victorious after a tough battle, increasing his World Coronation Series rank. However, Ash was then challenged by Rinto, whose Gallade easily dodged all of Farfetch'd's attacks before defeating it with False Swipe.
Rock Tunnel reappeared in Searching for Service with a Smile!, where Ash and Goh helped Multa to retrieve a Trainer's Tauros from the tunnel.
Pokémon Origins
Rock Tunnel appeared in File 2: Cubone, where Red exited it on his way to Lavender Town.
Trivia
- HikerRBYFRLG/Black BeltPE Dudley makes a reference to the song Hit Me with Your Best Shot by Pat Benatar, saying "Hit me with your best shot!" prior to battle, and "Fired away!" after being defeated.
- One of the Poké Maniacs in the tunnel makes a reference to Mobile Fighter G Gundam, saying "Pokémon Fight! Ready, Go!" prior to battle. Official Gundam Fights in the series began with both participants declaring "Gundam Fight! Ready, Go!"
- Rock Tunnel is the only one of Kanto's caves to appear in each of the first four generations with the same background music.
- Hornblende biotite granite is present here, as revealed in Steven's house in Mossdeep City in Pokémon Omega Ruby and Alpha Sapphire.
In other languages
| |||||||||||||||||||||||||||||||||||||||||
| Kanto | ||||||||
|---|---|---|---|---|---|---|---|---|
|
| ||||||||
|
| This article is part of Project Locations, a Bulbapedia project that aims to write comprehensive articles on every location in the Pokémon world. |