Attraction (PokéPark): Difference between revisions
m (→Flight of Fancy: One more thing.) |
m (→Rotom's Spooky Shoot-'em-Up: Link to forms uses the template and goes to Rotom's form data section now.) |
||
| (30 intermediate revisions by 20 users not shown) | |||
| Line 1: | Line 1: | ||
'''Attractions''' (Japanese:'''アトラクション''' ''Attraction'') are games hosted by various {{OBP|Pokémon|species}} found in [[PokéPark Wii: Pikachu's Adventure]] and [[PokéPark 2: Wonders Beyond]]. | {{samename|online games played on the [[Pokémon Global Link]]|PokéMileage Club}} | ||
'''Attractions''' (Japanese: '''アトラクション''' ''Attraction'') are games hosted by various {{OBP|Pokémon|species}} found in [[PokéPark Wii: Pikachu's Adventure]] and [[PokéPark 2: Wonders Beyond]]. They are held as entertainment for guests to the {{ga|PokéPark}} and challenge each guest to play against one another in a contest of various skills, such as speed, stamina, and strength. Each Pokémon has an expected goal, and when they achieve that goal, will earn a bonus prize. | |||
==PokéPark Wii: Pikachu's Adventure== | ==PokéPark Wii: Pikachu's Adventure== | ||
| Line 5: | Line 7: | ||
===Bulbasaur's Daring Dash=== | ===Bulbasaur's Daring Dash=== | ||
[[ | [[File:Bulbasaurs Daring Dash.png|thumb|250px|right|Mew races other Pokémon in Bulbasaur's Daring Dash.]] | ||
In Bulbasaur's Daring Dash (Japanese: '''フシギダネのふりふりダッシュ''' ''Fushigidane's Foot Race''), players move the Wii remote up and down to run as fast as they can. {{p|Mew}} is the best at this attraction and is unlocked automatically after clearing the Sky Pavilion. | In Bulbasaur's Daring Dash (Japanese: '''フシギダネのふりふりダッシュ''' ''Fushigidane's Foot Race''), players move the Wii remote up and down to run as fast as they can. {{p|Mew}} is the best at this attraction and is unlocked automatically after clearing the [[Sky Pavilion]]. | ||
{| class="roundy" | {| class="roundy" style="margin:auto; text-align:center; background: #{{water color dark}}; border: 5px solid #{{Water color}}" | ||
|- | |- | ||
| align="center" style="background:#{{grass color}}; {{roundy|5px}} color: #000" colspan=" | | align="center" style="background:#{{grass color}}; {{roundy|5px}} color: #000" colspan="4" | '''Bulbasaur's Daring Dash'''<br>''"A fast and frantic foot race!"'' | ||
|- | |- | ||
| align="center" style="background:#{{grass color}}; {{roundy|5px}} color: #000" colspan=" | | align="center" style="background:#{{grass color}}; {{roundy|5px}} color: #000" colspan="2" | '''Zone: {{color2|000000|Meadow Zone}}''' | ||
| align="center" style="background:#{{grass color}}; {{roundy|5px}} color: #000" colspan=" | | align="center" style="background:#{{grass color}}; {{roundy|5px}} color: #000" colspan="2" | '''Cost: 5 Berries''' | ||
|- | |- | ||
! style="background:#{{grass color}}; {{roundytl|5px}} color: #000" colspan=" | ! style="background:#{{grass color}}; {{roundytl|5px}} color: #000" colspan="1" | Pokémon | ||
! style="background:#{{grass color}}; {{roundytr|5px}} color: #000" colspan="1" | Time for Bonus | ! style="background:#{{grass color}}; {{roundytr|5px}} color: #000" colspan="1" | Time for Bonus | ||
|- style="background:#fff" | |- style="background:#fff" | ||
|- style="background:#fff" | |- style="background:#fff" | ||
| | | [[File:PPW025.png]]<br>{{p|Pikachu}} | ||
| 00:09.70 seconds | | 00:09.70 seconds | ||
| | | [[File:PPW010.png]]<br>{{p|Caterpie}} | ||
| 00:13.70 seconds | | 00:13.70 seconds | ||
|- style="background:#fff" | |- style="background:#fff" | ||
| | | [[File:PPW390.png]]<br>{{p|Chimchar}} | ||
| 00:09.80 seconds | | 00:09.80 seconds | ||
| | | [[File:PPW129.png]]<br>{{p|Magikarp}} | ||
| 00:14.50 seconds | | 00:14.50 seconds | ||
|- style="background:#fff" | |- style="background:#fff" | ||
| | | [[File:PPW252.png]]<br>{{p|Treecko}} | ||
| 00:10.00 seconds | | 00:10.00 seconds | ||
| | | [[File:PPW135.png]]<br>{{p|Jolteon}} | ||
| 00:06.10 seconds | | 00:06.10 seconds | ||
|- style="background:#fff" | |- style="background:#fff" | ||
| | | [[File:PPW400.png]]<br>{{p|Bibarel}} | ||
| 00:10.10 seconds | | 00:10.10 seconds | ||
| | | [[File:PPW059.png]]<br>{{p|Arcanine}} | ||
| 00:06.30 seconds | | 00:06.30 seconds | ||
|- style="background:#fff" | |- style="background:#fff" | ||
| | | [[File:PPW387.png]]<br>{{p|Turtwig}} | ||
| 00:10.50 seconds | | 00:10.50 seconds | ||
| | | [[File:PPW470.png]]<br>{{p|Leafeon}} | ||
| 00:06.50 seconds | | 00:06.50 seconds | ||
|- style="background:#fff" | |- style="background:#fff" | ||
| | | [[File:PPW001.png]]<br>{{p|Bulbasaur}} | ||
| 00:10.80 seconds | | 00:10.80 seconds | ||
| | | [[File:PPW123.png]]<br>{{p|Scyther}} | ||
| 00:06.80 seconds | | 00:06.80 seconds | ||
|- style="background:#fff" | |- style="background:#fff" | ||
| | | [[File:PPW399.png]]<br>{{p|Bidoof}} | ||
| 00:10.90 seconds | | 00:10.90 seconds | ||
| | | [[File:PPW077.png]]<br>{{p|Ponyta}} | ||
| 00:07.10 seconds | | 00:07.10 seconds | ||
|- style="background:#fff" | |- style="background:#fff" | ||
| | | [[File:PPW043.png]]<br>{{p|Oddish}} | ||
| 00:11.10 seconds | | 00:11.10 seconds | ||
| | | [[File:PPW403.png]]<br>{{p|Shinx}} | ||
| 00:07.40 seconds | | 00:07.40 seconds | ||
|- style="background:#fff" | |- style="background:#fff" | ||
| | | [[File:PPW285.png]]<br>{{p|Shroomish}} | ||
| 00:11.30 seconds | | 00:11.30 seconds | ||
| | | [[File:PPW133.png]]<br>{{p|Eevee}} | ||
| 00:07.70 seconds | | 00:07.70 seconds | ||
|- style="background:#fff" | |- style="background:#fff" | ||
| | | [[File:PPW446.png]]<br>{{p|Munchlax}} | ||
| 00:11.60 seconds | | 00:11.60 seconds | ||
| | | [[File:PPW417.png]]<br>{{p|Pachirisu}} | ||
| 00:08.10 seconds | | 00:08.10 seconds | ||
|- style="background:#fff" | |- style="background:#fff" | ||
| | | [[File:PPW438.png]]<br>{{p|Bonsly}} | ||
| 00:11.90 seconds | | 00:11.90 seconds | ||
| | | [[File:PPW427.png]]<br>{{p|Buneary}} | ||
| 00:08.70 seconds | | 00:08.70 seconds | ||
|- style="background:#fff" | |- style="background:#fff" | ||
| | | [[File:PPW270.png]]<br>{{p|Lotad}} | ||
| 00:12.40 seconds | | 00:12.40 seconds | ||
| | | [[File:PPW453.png]]<br>{{p|Croagunk}} | ||
| 00:09.20 seconds | | 00:09.20 seconds | ||
|- | |- style="background:#fff" | ||
| [[File:PPW013.png]]<br>{{p|Weedle}} | |||
| | | 00:13.10 seconds | ||
| [[File:PPW151.png]]<br>{{p|Mew}} | |||
| | | 00:05:20 seconds | ||
|} | |} | ||
===Venusaur's Vine Swing=== | ===Venusaur's Vine Swing=== | ||
[[ | [[File:Venusaurs Vine Swing.png|thumb|250px|right|Jirachi plays Venusaur's Vine Swing.]] | ||
In Venusaur's Vine Swing (Japanese: '''フシギバナのスイングロープ''' ''Fushigibana's Rope Swinging''), players swing the Wii remote to swing the vine. Pressing 2 releases the Pokémon, and how far it goes depends on the angle of release and the momentum of the swing. {{p|Jirachi}} is the best at this attraction. | In Venusaur's Vine Swing (Japanese: '''フシギバナのスイングロープ''' ''Fushigibana's Rope Swinging''), players swing the Wii remote to swing the vine. Pressing 2 releases the Pokémon, and how far it goes depends on the angle of release and the momentum of the swing. {{p|Jirachi}} is the best at this attraction. | ||
{| class="roundy" | {| class="roundy" style="margin:auto; text-align:center; background: #{{water color dark}}; border: 5px solid #{{Water color}}" | ||
|- | |- | ||
| align="center" style="background:#{{grass color}}; {{roundy|5px}} color: #000" colspan=" | | align="center" style="background:#{{grass color}}; {{roundy|5px}} color: #000" colspan="4" | '''Venusaur's Vine Swing'''<br>''"Swing to and fro, then let go!"'' | ||
|- | |- | ||
| align="center" style="background:#{{grass color}}; {{roundy|5px}} color: #000" colspan=" | | align="center" style="background:#{{grass color}}; {{roundy|5px}} color: #000" colspan="2" | '''Zone: {{color2|000000|Meadow Zone}}''' | ||
| align="center" style="background:#{{grass color}}; {{roundy|5px}} color: #000" colspan=" | | align="center" style="background:#{{grass color}}; {{roundy|5px}} color: #000" colspan="2" | '''Cost: 5 Berries''' | ||
|- | |- | ||
! style="background:#{{grass color}}; {{roundytl|5px}} color: #000" colspan=" | ! style="background:#{{grass color}}; {{roundytl|5px}} color: #000" colspan="1" | Pokémon | ||
! style="background:#{{grass color}}; {{roundytr|5px}} color: #000" colspan="1" | Distance for Bonus | ! style="background:#{{grass color}}; {{roundytr|5px}} color: #000" colspan="1" | Distance for Bonus | ||
|- style="background:#fff" | |- style="background:#fff" | ||
| | | [[File:PPW025.png]]<br>{{p|Pikachu}} | ||
| 131.20 ft. | |||
| [[File:PPW417.png]]<br>{{p|Pachirisu}} | |||
| | | 144.32 ft. | ||
|- style="background:#fff" | |- style="background:#fff" | ||
| | | [[File:PPW446.png]]<br>{{p|Munchlax}} | ||
| 124.64 ft. | |||
| [[File:PPW424.png]]<br>{{p|Ambipom}} | |||
| | | 236.16 ft. | ||
|- style="background:#fff" | |- style="background:#fff" | ||
| | | [[File:PPW453.png]]<br>{{p|Croagunk}} | ||
| 219.76 ft. | |||
| [[File:PPW257.png]]<br>{{p|Blaziken}} | |||
| | | 285.36 ft. | ||
|- style="background:#fff" | |- style="background:#fff" | ||
| | | [[File:PPW129.png]]<br>{{p|Magikarp}} | ||
| 72.16 ft. | |||
| [[File:PPW392.png]]<br>{{p|Infernape}} | |||
| | | 275.52 ft. | ||
|- style="background:#fff" | |- style="background:#fff" | ||
| | | [[File:PPW056.png]]<br>{{p|Mankey}} | ||
| 203.36 ft. | |||
| [[File:PPW448.png]]<br>{{p|Lucario}} | |||
| | | 265.68 ft. | ||
|- style="background:#fff" | |- style="background:#fff" | ||
| | | [[File:PPW190.png]]<br>{{p|Aipom}} | ||
| 190.24 ft. | |||
| [[File:PPW057.png]]<br>{{p|Primeape}} | |||
| | | 255.84 ft. | ||
|- style="background:#fff" | |- style="background:#fff" | ||
| | | [[File:PPW390.png]]<br>{{p|Chimchar}} | ||
| 173.84 ft. | |||
| [[File:PPW465.png]]<br>{{p|Tangrowth}} | |||
| | | 246.00 ft. | ||
|- style="background:#fff" | |||
| [[File:PPW252.png]]<br>{{p|Treecko}} | |||
|- | | 160.72 ft. | ||
| [[File:PPW385.png]]<br>{{p|Jirachi}} | |||
| | | 328.08 ft. | ||
| | |||
|} | |} | ||
===Pelipper's Circle Circuit=== | ===Pelipper's Circle Circuit=== | ||
[[ | [[File:Pelippers Circle Circuit.png|thumb|right|200px|Latias flies through Pelipper's Circle Circuit.]] | ||
In Pelipper's Circle Circuit, players tilt the Wii remote to make the Pokémon move around the screen. They must fly through rings to get points: gold is worth 100, red is worth 300, and rainbow is worth | In Pelipper's Circle Circuit (Japanese: '''ペリッパーのはばたきスカイレース''' ''Pelipper's Sky Flap Race''), players tilt the Wii remote to make the Pokémon move around the screen. They must fly through rings to get points: gold is worth 100, red is worth 300, and rainbow is worth 1,000. After each possible Pokémon (excluding Pikachu) has received a bonus for their performance, {{p|Latias}} is unlocked. She is the best choice when playing this attraction, being able to score over 30,000 points. | ||
{| class="roundy" style="margin:auto; text-align:center; background: #{{water color dark}}; border: 5px solid #{{Water color}}" | |||
{| class="roundy" | |||
|- | |- | ||
| align="center" style="background:#{{grass color}}; {{roundy|5px}} color: #000" colspan=" | | align="center" style="background:#{{grass color}}; {{roundy|5px}} color: #000" colspan="4" | '''Pelipper's Circle Circuit'''<br>''"Aim at the Circles as you fly!"'' | ||
|- | |- | ||
| align="center" style="background:#{{grass color}}; {{roundy|5px}} color: #000" colspan=" | | align="center" style="background:#{{grass color}}; {{roundy|5px}} color: #000" colspan="2" | '''Zone: {{color2|000000|Beach Zone}}''' | ||
| align="center" style="background:#{{grass color}}; {{roundy|5px}} color: #000" colspan=" | | align="center" style="background:#{{grass color}}; {{roundy|5px}} color: #000" colspan="2" | '''Cost: 10 Berries''' | ||
|- | |- | ||
! style="background:#{{grass color}}; {{roundytl|5px}} color: #000" colspan=" | ! style="background:#{{grass color}}; {{roundytl|5px}} color: #000" colspan="1" | Pokémon | ||
! style="background:#{{grass color}}; {{roundytr|5px}} color: #000" colspan="1" | Points for Bonus | ! style="background:#{{grass color}}; {{roundytr|5px}} color: #000" colspan="1" | Points for Bonus | ||
|- style="background:#fff" | |- style="background:#fff" | ||
| | | [[File:PPW025.png]]<br>{{p|Pikachu}}{{tt|*|Requires Balloons}} | ||
| 8,500 | |||
| [[File:PPW017.png]]<br>{{p|Pidgeotto}} | |||
| | | 12,000 | ||
|- style="background:#fff" | |- style="background:#fff" | ||
| | | [[File:PPW198.png]]<br>{{p|Murkrow}} | ||
| 9,600 | |||
| [[File:PPW012.png]]<br>{{p|Butterfree}} | |||
| | | 11,000 | ||
|- style="background:#fff" | |- style="background:#fff" | ||
| | | [[File:PPW276.png]]<br>{{p|Taillow}} | ||
| 9,300 | |||
| [[File:PPW279.png]]<br>{{p|Pelipper}} | |||
| | | 14,000 | ||
|- style="background:#fff" | |- style="background:#fff" | ||
| | | [[File:PPW021.png]]<br>{{p|Spearow}} | ||
| 9,000 | |||
| [[File:PPW472.png]]<br>{{p|Gliscor}} | |||
| | | 15,000 | ||
|- style="background:#fff" | |- style="background:#fff" | ||
| | | [[File:PPW396.png]]<br>{{p|Starly}} | ||
| {{p| | | 8,800 | ||
| | | [[File:PPW430.png]]<br>{{p|Honchkrow}} | ||
| | | 16,000 | ||
| {{p| | |- style="background:#fff;" | ||
| | | [[File:PPW278.png]]<br>{{p|Wingull}} | ||
| 8,600 | |||
| [[File:PPW468.png]]<br>{{p|Togekiss}} | |||
| 17,000 | |||
|- style="background:#fff;" | |- style="background:#fff;" | ||
| | | [[File:PPW397.png]]<br>{{p|Staravia}} | ||
| 13,000 | |||
| | | [[File:PPW398.png]]<br>{{p|Staraptor}} | ||
| 18,000 | |||
| {{p| | |||
| | |||
|- style="background:#fff;" | |- style="background:#fff;" | ||
| | | [[File:PPW357.png]]<br>{{p|Tropius}} | ||
| 10,000 | |||
| [[File:PPW380.png]]<br>{{p|Latias}} | |||
| 30,000 | |||
| | |||
|} | |} | ||
===Gyarados's Aqua Dash=== | ===Gyarados's Aqua Dash=== | ||
[[ | [[File:Gyarados Aqua Dash.png|thumb|200px|right|Manaphy surfs through Gyarados's Aqua Dash.]] | ||
In Gyarados's Aqua Dash (Japanese: '''ギャラドスのマリンスライダー''' ''Gyarados's Marine Slider''), players hold 2 to propel the Pokémon forwards, while tilting the Wii remote to turn. Hitting Carvanha or Sharpedo will slow them down, while hitting a speed boost will make them faster. After each possible Pokémon (excluding Pikachu) has received a bonus for their performance, {{p|Manaphy}} is unlocked. | In Gyarados's Aqua Dash (Japanese: '''ギャラドスのマリンスライダー''' ''Gyarados's Marine Slider''), players hold 2 to propel the Pokémon forwards, while tilting the Wii remote to turn. Hitting Carvanha or Sharpedo will slow them down, while hitting a speed boost will make them faster. After each possible Pokémon (excluding Pikachu) has received a bonus for their performance, {{p|Manaphy}} is unlocked. It is the best choice when playing this attraction, being able to score less than 0:18.50 seconds. | ||
{| class="roundy" | {| class="roundy" style="margin:auto; text-align:center; background: #{{water color dark}}; border: 5px solid #{{Water color}}" | ||
|- | |- | ||
| align="center" style="background:#{{grass color}}; {{roundy|5px}} color: #000" colspan=" | | align="center" style="background:#{{grass color}}; {{roundy|5px}} color: #000" colspan="4" | '''Gyarados's Aqua Dash'''<br>''"Surf and splash!"'' | ||
|- | |- | ||
| align="center" style="background:#{{grass color}}; {{roundy|5px}} color: #000" colspan=" | | align="center" style="background:#{{grass color}}; {{roundy|5px}} color: #000" colspan="2" | '''Zone: {{color2|000000|Beach Zone}}''' | ||
| align="center" style="background:#{{grass color}}; {{roundy|5px}} color: #000" colspan=" | | align="center" style="background:#{{grass color}}; {{roundy|5px}} color: #000" colspan="2" | '''Cost: 10 Berries''' | ||
|- | |- | ||
! style="background:#{{grass color}}; {{roundytl|5px}} color: #000" colspan=" | ! style="background:#{{grass color}}; {{roundytl|5px}} color: #000" colspan="1" | Pokémon | ||
! style="background:#{{grass color}}; {{roundytr|5px}} color: #000" colspan="1" | Time for Bonus | ! style="background:#{{grass color}}; {{roundytr|5px}} color: #000" colspan="1" | Time for Bonus | ||
|- style="background:#fff" | |- style="background:#fff" | ||
| | | [[File:PPW025.png]]<br>{{p|Pikachu}}{{tt|*|Requires Surfboard}} | ||
| 0:29.50 seconds | | 0:29.50 seconds | ||
| | | [[File:PPW134.png]]<br>{{p|Vaporeon}} | ||
| 0:24.50 seconds | | 0:24.50 seconds | ||
|- style="background:#fff" | |- style="background:#fff" | ||
| | | [[File:PPW054.png]]<br>{{p|Psyduck}} | ||
| 0:32.00 seconds | |||
| | | [[File:PPW394.png]]<br>{{p|Prinplup}} | ||
| | |||
| 0:25.00 seconds | | 0:25.00 seconds | ||
|- style="background:#fff" | |- style="background:#fff" | ||
| | | [[File:PPW298.png]]<br>{{p|Azurill}} | ||
| 0:34.00 seconds | | 0:34.00 seconds | ||
| | | [[File:PPW400.png]]<br>{{p|Bibarel}} | ||
| 0:25.50 seconds | | 0:25.50 seconds | ||
|- style="background:#fff" | |- style="background:#fff" | ||
| | | [[File:PPW079.png]]<br>{{p|Slowpoke}} | ||
| 0:36.00 seconds | | 0:36.00 seconds | ||
| | | [[File:PPW418.png]]<br>{{p|Buizel}} | ||
| 0:26.00 seconds | | 0:26.00 seconds | ||
|- style="background:#fff" | |- style="background:#fff" | ||
| | | [[File:PPW395.png]]<br>{{p|Empoleon}} | ||
| 0:22.50 seconds | | 0:22.50 seconds | ||
| | | [[File:PPW222.png]]<br>{{p|Corsola}} | ||
| 0:27.00 seconds | | 0:27.00 seconds | ||
|- style="background:#fff" | |- style="background:#fff" | ||
| | | [[File:PPW419.png]]<br>{{p|Floatzel}} | ||
| 0:23.00 seconds | | 0:23.00 seconds | ||
| | | [[File:PPW393.png]]<br>{{p|Piplup}} | ||
| 0:28.00 seconds | | 0:28.00 seconds | ||
|- style="background:#fff" | |- style="background:#fff" | ||
| | | [[File:PPW160.png]]<br>{{p|Feraligatr}} | ||
| 0:23.50 seconds | | 0:23.50 seconds | ||
| | | [[File:PPW270.png]]<br>{{p|Lotad}} | ||
| 0:29.00 seconds | | 0:29.00 seconds | ||
|- | |- style="background:#fff" | ||
| [[File:PPW055.png]]<br>{{p|Golduck}} | |||
| | | 0:24.00 seconds | ||
| [[File:PPW490.png]]<br>{{p|Manaphy}} | |||
| | | 0:18.50 seconds | ||
| | |||
|} | |} | ||
===Empoleon's Snow Slide=== | ===Empoleon's Snow Slide=== | ||
[[ | [[File:Empoleons Snow Slide.png|thumb|right|200px|Suicune slides down Empoleon's Snow Slide.]] | ||
In Empoleon's Snow Slide (Japanese: '''エンペルトのスノースライダー''' ''Emperte's Snow Slider''), players must guide the Pokémon around a course of snow, tilting the Wii remote to turn. There are speed boosts which may help the player, but they can also make it difficult to get around corners. The Pokémon will slow down if it hits a wall or obstacle. The fastest Pokémon in this attraction is {{p|Suicune}}. | In Empoleon's Snow Slide (Japanese: '''エンペルトのスノースライダー''' ''Emperte's Snow Slider''), players must guide the Pokémon around a course of snow, tilting the Wii remote to turn. There are speed boosts which may help the player, but they can also make it difficult to get around corners. The Pokémon will slow down if it hits a wall or an obstacle. The fastest Pokémon in this attraction is {{p|Suicune}}. | ||
{| class="roundy" | {| class="roundy" style="margin:auto; text-align:center; background: #{{water color dark}}; border: 5px solid #{{Water color}}" | ||
|- | |- | ||
| align="center" style="background:#{{grass color}}; {{roundy|5px}} color: #000" colspan=" | | align="center" style="background:#{{grass color}}; {{roundy|5px}} color: #000" colspan="4" | '''Empoleon's Snow Slide'''<br>''"Speed down a snowy mountain!"'' | ||
|- | |- | ||
| align="center" style="background:#{{grass color}}; {{roundy|5px}} color: #000" colspan=" | | align="center" style="background:#{{grass color}}; {{roundy|5px}} color: #000" colspan="2" | '''Zone: {{color2|000000|Iceberg Zone}}''' | ||
| align="center" style="background:#{{grass color}}; {{roundy|5px}} color: #000" colspan=" | | align="center" style="background:#{{grass color}}; {{roundy|5px}} color: #000" colspan="2" | '''Cost: 10 Berries''' | ||
|- | |- | ||
! style="background:#{{grass color}}; {{roundytl|5px}} color: #000" colspan=" | ! style="background:#{{grass color}}; {{roundytl|5px}} color: #000" colspan="1" | Pokémon | ||
! style="background:#{{grass color}}; {{roundytr|5px}} color: #000" colspan="1" | Time for Bonus | ! style="background:#{{grass color}}; {{roundytr|5px}} color: #000" colspan="1" | Time for Bonus | ||
! style="background:#{{grass color}}; {{roundytl|5px}} color: #000" colspan=" | ! style="background:#{{grass color}}; {{roundytl|5px}} color: #000" colspan="1" | Pokémon | ||
! style="background:#{{grass color}}; {{roundytr|5px}} color: #000" colspan="1" | Time for Bonus | ! style="background:#{{grass color}}; {{roundytr|5px}} color: #000" colspan="1" | Time for Bonus | ||
|- style="background:#fff" | |- style="background:#fff" | ||
| | | [[File:PPW025.png]]<br>{{p|Pikachu}}{{tt|*|Requires Snowboard}} | ||
| 0:58.00 seconds | | 0:58.00 seconds | ||
| | | [[File:PPW225.png]]<br>{{p|Delibird}} | ||
| 0:50.00 seconds | | 0:50.00 seconds | ||
|- style="background:#fff" | |- style="background:#fff" | ||
| | | [[File:PPW216.png]]<br>{{p|Teddiursa}} | ||
| 0:59.00 seconds | |||
| | | [[File:PPW221.png]]<br>{{p|Piloswine}} | ||
| | |||
| 0:51.00 seconds | | 0:51.00 seconds | ||
|- style="background:#fff" | |- style="background:#fff" | ||
| | | [[File:PPW129.png]]<br>{{p|Magikarp}} | ||
| 1:00.00 seconds | | 1:00.00 seconds | ||
| | | [[File:PPW394.png]]<br>{{p|Prinplup}} | ||
| 0:52.00 seconds | | 0:52.00 seconds | ||
|- style="background:#fff" | |- style="background:#fff" | ||
| | | [[File:PPW395.png]]<br>{{p|Empoleon}} | ||
| 0:45.00 seconds | | 0:45.00 seconds | ||
| | | [[File:PPW007.png]]<br>{{p|Squirtle}} | ||
| 0:53.00 seconds | | 0:53.00 seconds | ||
|- style="background:#fff" | |- style="background:#fff" | ||
| | | [[File:PPW471.png]]<br>{{p|Glaceon}} | ||
| 0:46.00 seconds | | 0:46.00 seconds | ||
| | | [[File:PPW393.png]]<br>{{p|Piplup}} | ||
| 0:54.00 seconds | | 0:54.00 seconds | ||
|- style="background:#fff" | |- style="background:#fff" | ||
| | | [[File:PPW009.png]]<br>{{p|Blastoise}} | ||
| 0:47.00 seconds | | 0:47.00 seconds | ||
| | | [[File:PPW195.png]]<br>{{p|Quagsire}} | ||
| 0:55.50 seconds | | 0:55.50 seconds | ||
|- style="background:#fff" | |- style="background:#fff" | ||
| | | [[File:PPW362.png]]<br>{{p|Glalie}} | ||
| 0:48.00 seconds | | 0:48.00 seconds | ||
| | | [[File:PPW363.png]]<br>{{p|Spheal}} | ||
| 0:57.00 seconds | | 0:57.00 seconds | ||
|- | |- style="background:#fff" | ||
| [[File:PPW131.png]]<br>{{p|Lapras}} | |||
| | | 0:49.00 seconds | ||
| [[File:PPW245.png]]<br>{{p|Suicune}} | |||
| | | 0:40.00 seconds | ||
|} | |} | ||
===Bastiodon's Block Barrage=== | ===Bastiodon's Block Barrage=== | ||
[[ | [[File:Bastiodons Block Barrage.png|thumb|right|200px|Metagross smashes through Bastiodon's Block Barrage.]] | ||
In Bastiodon's Block Barrage (Japanese: '''トリデプスのパネルクラッシュ''' '' | In Bastiodon's Block Barrage (Japanese: '''トリデプスのパネルクラッシュ''' ''Trideps' Panel Crash''), players move the Pokémon across the bottom of the screen by using the directional buttons on the Wii remote to stop the ball from getting past. To get points, the ball must hit wooden panels with numbers on them. Pressing the 2 button to hit the ball gives it power, which means it can get past {{p|Bastiodon}}, who moves side to side in front of the panels, and the many {{p|Dugtrio}} who pop up on the field. If an unpowered ball hits a Dugtrio from the front, it will be deflected back towards the player. If it hits from behind, the Dugtrio may go underground and let the ball pass, or it might deflect the ball back to the panels to score more points. If a powered up ball (power shot) hits Bastiodon, he will become dizzy and will temporarily be disabled. If the player shoots the ball normally, the points will equal 100 times the number on the panel. If the player uses a power shot, the points will equal 200 times the number on the wooden panel. For example, hitting a 2 gets 200 points and hitting a 4 with a power shot gets 800 points. Hitting two panels at once will not get a bonus, it will just get both the scores. The highest possible score in this game is 99,999 and the best Pokémon to play as is {{p|Metagross}}. | ||
{| class="roundy" | {| class="roundy" style="margin:auto; text-align:center; background: #{{water color dark}}; border: 5px solid #{{Water color}}" | ||
|- | |- | ||
| align="center" style="background:#{{grass color}}; {{roundy|5px}} color: #000" colspan=" | | align="center" style="background:#{{grass color}}; {{roundy|5px}} color: #000" colspan="4" | '''Bastiodon's Block Barrage'''<br>''"Shoot the ball, smash the blocks!"'' | ||
|- | |- | ||
| align="center" style="background:#{{grass color}}; {{roundy|5px}} color: #000" colspan=" | | align="center" style="background:#{{grass color}}; {{roundy|5px}} color: #000" colspan="2" | '''Zone: {{color2|000000|Cavern Zone}}''' | ||
| align="center" style="background:#{{grass color}}; {{roundy|5px}} color: #000" colspan=" | | align="center" style="background:#{{grass color}}; {{roundy|5px}} color: #000" colspan="2" | '''Cost: 20 Berries''' | ||
|- | |- | ||
! style="background:#{{grass color}}; {{roundytl|5px}} color: #000" colspan=" | ! style="background:#{{grass color}}; {{roundytl|5px}} color: #000" colspan="1" | Pokémon | ||
! style="background:#{{grass color}}; {{roundytl|5px}} color: #000" colspan="1" | Points for Bonus | ! style="background:#{{grass color}}; {{roundytl|5px}} color: #000" colspan="1" | Points for Bonus | ||
|- style="background:#fff" | |- style="background:#fff" | ||
| | | [[File:PPW255.png]]<br>{{p|Torchic}} | ||
| 1,000 | |||
| [[File:PPW185.png]]<br>{{p|Sudowoodo}} | |||
| | | 8,000 | ||
|- style="background:#fff" | |- style="background:#fff" | ||
| | | [[File:PPW052.png]]<br>{{p|Meowth}} | ||
| 1,500 | |||
| [[File:PPW026.png]]<br>{{p|Raichu}} | |||
| | | 9,000 | ||
|- style="background:#fff" | |- style="background:#fff" | ||
| | | [[File:PPW302.png]]<br>{{p|Sableye}} | ||
| 2,000 | |||
| [[File:PPW122.png]]<br>{{p|Mr. Mime}} | |||
| | | 12,000 | ||
|- style="background:#fff" | |- style="background:#fff" | ||
| | | [[File:PPW025.png]]<br>{{p|Pikachu}} | ||
| 2,500 | |||
| [[File:PPW217.png]]<br>{{p|Ursaring}} | |||
| | | 15,000 | ||
|- style="background:#fff" | |- style="background:#fff" | ||
| | | [[File:PPW240.png]]<br>{{p|Magby}} | ||
| 3,500 | |||
| [[File:PPW106.png]]<br>{{p|Hitmonlee}} | |||
| | | 18,000 | ||
|- style="background:#fff" | |- style="background:#fff" | ||
| | | [[File:PPW390.png]]<br>{{p|Chimchar}} | ||
| 4,000 | |||
| [[File:PPW467.png]]<br>{{p|Magmortar}} | |||
| | | 20,000 | ||
|- style="background:#fff" | |- style="background:#fff" | ||
| | | [[File:PPW443.png]]<br>{{p|Gible}} | ||
| 4,500 | |||
| [[File:PPW466.png]]<br>{{p|Electivire}} | |||
| | | 24,000 | ||
|- style="background:#fff" | |||
| [[File:PPW004.png]]<br>{{p|Charmander}} | |||
|- | | 5,500 | ||
| [[File:PPW376.png]]<br>{{p|Metagross}} | |||
| | | 99,000 | ||
| | |||
|} | |} | ||
===Rhyperior's Bumper Burn=== | ===Rhyperior's Bumper Burn=== | ||
[[ | [[File:Rhyperiors Bumper Burn.png|thumb|right|200px|Heatran spins through Rhyperior's Bumper Burn.]] | ||
In Rhyperior's Bumper Burn (Japanese: '''ドサイドンのおしだしヒートアップ''' '' | In Rhyperior's Bumper Burn (Japanese: '''ドサイドンのおしだしヒートアップ''' ''Dosaidon's Heat Up Fight''), the player must tilt the Wii remote to bump as many Pokémon out of a circular stadium as possible in the given time limit to earn points. These are awarded for bumping other Pokémon out of the stadium and deducted for befriended Pokémon being bumped out of the stadium. Pokémon can unleash a special attack by pressing the 2 button after collecting a power-boost. Some attacks will cause the Pokémon to spin rapidly; others will cause them to explode or unleash an elemental attack. The best Pokémon to play as in this attraction is {{p|Heatran}}. | ||
{| class="roundy" | {| class="roundy" style="margin:auto; text-align:center; background: #{{water color dark}}; border: 5px solid #{{Water color}}" | ||
|- | |- | ||
| align="center" style="background:#{{grass color}}; {{roundy|5px}} color: #000" colspan=" | | align="center" style="background:#{{grass color}}; {{roundy|5px}} color: #000" colspan="4" | '''Rhyperior's Bumper Burn'''<br>''"Spin around! Bump others out!"'' | ||
|- | |- | ||
| align="center" style="background:#{{grass color}}; {{roundy|5px}} color: #000" colspan=" | | align="center" style="background:#{{grass color}}; {{roundy|5px}} color: #000" colspan="2" | '''Zone: {{color2|000000|Lava Zone}}''' | ||
| align="center" style="background:#{{grass color}}; {{roundy|5px}} color: #000" colspan=" | | align="center" style="background:#{{grass color}}; {{roundy|5px}} color: #000" colspan="2" | '''Cost: 20 Berries''' | ||
|- | |- | ||
! style="background:#{{grass color}}; {{roundytl|5px}} color: #000" colspan=" | ! style="background:#{{grass color}}; {{roundytl|5px}} color: #000" colspan="1" | Pokémon | ||
! style="background:#{{grass color}}; {{roundytr|5px}} color: #000" colspan="1" | Points for Bonus | ! style="background:#{{grass color}}; {{roundytr|5px}} color: #000" colspan="1" | Points for Bonus | ||
|- style="background:#fff" | |- style="background:#fff" | ||
| | | [[File:PPW081.png]]<br>{{p|Magnemite}} | ||
| {{p| | | 1,000 | ||
| | | [[File:PPW389.png]]<br>{{p|Torterra}} | ||
| | | 14,000 | ||
| {{p| | |- style="background:#fff" | ||
| | | [[File:PPW025.png]]<br>{{p|Pikachu}} | ||
| 3,000 | |||
| [[File:PPW143.png]]<br>{{p|Snorlax}} | |||
| 16,000 | |||
|- style="background:#fff" | |- style="background:#fff" | ||
| | | [[File:PPW438.png]]<br>{{p|Bonsly}} | ||
| 4,000 | |||
| | | [[File:PPW003.png]]<br>{{p|Venusaur}} | ||
| | | 18,000 | ||
| | |||
|- style="background:#fff" | |- style="background:#fff" | ||
| | | [[File:PPW343.png]]<br>{{p|Baltoy}} | ||
| 5,000 | |||
| | | [[File:PPW136.png]]<br>{{p|Flareon}} | ||
| | | 25,000 | ||
| | |||
|- style="background:#fff" | |- style="background:#fff" | ||
| | | [[File:PPW324.png]]<br>{{p|Torkoal}} | ||
| 6,000 | |||
| | | [[File:PPW237.png]]<br>{{p|Hitmontop}} | ||
| | | 30,000 | ||
| | |||
|- style="background:#fff" | |- style="background:#fff" | ||
| | | [[File:PPW156.png]]<br>{{p|Quilava}} | ||
| 8,000 | |||
| | | [[File:PPW248.png]]<br>{{p|Tyranitar}} | ||
| | | 40,000 | ||
| | |||
|- style="background:#fff" | |- style="background:#fff" | ||
| | | [[File:PPW344.png]]<br>{{p|Claydol}} | ||
| 10,000 | |||
| | | [[File:PPW464.png]]<br>{{p|Rhyperior}} | ||
| | | 50,000 | ||
| | |||
|- style="background:#fff" | |- style="background:#fff" | ||
| | | [[File:PPW462.png]]<br>{{p|Magnezone}} | ||
| 13,000 | |||
| [[File:PPW485.png]]<br>{{p|Heatran}} | |||
| 70,000 | |||
| | |||
|} | |} | ||
===Blaziken's Boulder Bash=== | ===Blaziken's Boulder Bash=== | ||
[[ | [[File:Blazikens Boulder Bash.png|thumb|right|200px|Groudon smashes boulders in Blaziken's Boulder Bash.]] | ||
In Blaziken's Boulder Bash (Japanese: '''バシャーモのパンチングロックス''' ''Bursyamo's Punching Rock''), players must swing the Wii remote to smash or deflect the rocks shot at them, depending on the timing of the swing. The rocks fly faster as the game progresses and are shot by a giant machine which appears to be controlled by {{p|Blaziken}} (unless the player is playing as this Pokémon) and {{p|Golem}}. If the Pokémon is hit by a rock, the player must shake the Wii remote for it to recover. Points are awarded for the timing of the attack and the number of times the Pokémon destroys a rock in a row. 100 points are awarded if the blow is not completely in time; 300 points are awarded for excellent timing. The points are multiplied by the number of times the Pokémon hits a rock in a row (once is worth 100 or 300 points, twice in a row is worth 200 or 600, three times is worth 300 or 900, etc). The maximum score is 48,000 and the best Pokémon to play as is {{p|Groudon}}. | In Blaziken's Boulder Bash (Japanese: '''バシャーモのパンチングロックス''' ''Bursyamo's Punching Rock''), players must swing the Wii remote to smash or deflect the rocks shot at them, depending on the timing of the swing. The rocks fly faster as the game progresses and are shot by a giant machine which appears to be controlled by {{p|Blaziken}} (unless the player is playing as this Pokémon) and {{p|Golem}}. If the Pokémon is hit by a rock, the player must shake the Wii remote for it to recover. Points are awarded for the timing of the attack and the number of times the Pokémon destroys a rock in a row. 100 points are awarded if the blow is not completely in time; 300 points are awarded for excellent timing. The points are multiplied by the number of times the Pokémon hits a rock in a row (once is worth 100 or 300 points, twice in a row is worth 200 or 600, three times is worth 300 or 900, etc.). The maximum score is 48,000 and the best Pokémon to play as is {{p|Groudon}}. | ||
{| class="roundy" | {| class="roundy" style="margin:auto; text-align:center; background: #{{water color dark}}; border: 5px solid #{{Water color}}" | ||
|- | |- | ||
| align="center" style="background:#{{grass color}}; {{roundy|5px}} color: #000" colspan=" | | align="center" style="background:#{{grass color}}; {{roundy|5px}} color: #000" colspan="4" | '''Blaziken's Boulder Bash'''<br>''"Break the flying boulders!"'' | ||
|- | |- | ||
| align="center" style="background:#{{grass color}}; {{roundy|5px}} color: #000" colspan=" | | align="center" style="background:#{{grass color}}; {{roundy|5px}} color: #000" colspan="2" | '''Zone: {{color2|000000|Lava Zone}}''' | ||
| align="center" style="background:#{{grass color}}; {{roundy|5px}} color: #000" colspan=" | | align="center" style="background:#{{grass color}}; {{roundy|5px}} color: #000" colspan="2" | '''Cost: 20 Berries''' | ||
|- | |- | ||
! style="background:#{{grass color}}; {{roundytl|5px}} color: #000" colspan=" | ! style="background:#{{grass color}}; {{roundytl|5px}} color: #000" colspan="1" | Pokémon | ||
! style="background:#{{grass color}}; {{roundytr|5px}} color: #000" colspan="1" | Points for Bonus | ! style="background:#{{grass color}}; {{roundytr|5px}} color: #000" colspan="1" | Points for Bonus | ||
! style="background:#{{grass color}}; {{roundytl|5px}} color: #000" colspan=" | ! style="background:#{{grass color}}; {{roundytl|5px}} color: #000" colspan="1" | Pokémon | ||
! style="background:#{{grass color}}; {{roundytr|5px}} color: #000" colspan="1" | Points for Bonus | ! style="background:#{{grass color}}; {{roundytr|5px}} color: #000" colspan="1" | Points for Bonus | ||
|- style="background:#fff" | |- style="background:#fff" | ||
| | | [[File:PPW025.png]]<br>{{p|Pikachu}} | ||
| 6,000 | |||
| [[File:PPW068.png]]<br>{{p|Machamp}} | |||
| | | 20,000 | ||
|- style="background:#fff" | |- style="background:#fff" | ||
| | | [[File:PPW074.png]]<br>{{p|Geodude}} | ||
| 5,000 | |||
| [[File:PPW105.png]]<br>{{p|Marowak}} | |||
| | | 18,000 | ||
|- style="background:#fff" | |- style="background:#fff" | ||
| | | [[File:PPW231.png]]<br>{{p|Phanpy}} | ||
| 3,000 | |||
| [[File:PPW083.png]]<br>{{p|Farfetch'd}} | |||
| | | 16,000 | ||
|- style="background:#fff" | |- style="background:#fff" | ||
| | | [[File:PPW257.png]]<br>{{p|Blaziken}} | ||
| 30,000 | |||
| [[File:PPW408.png]]<br>{{p|Cranidos}} | |||
| | | 13,000 | ||
|- style="background:#fff" | |- style="background:#fff" | ||
| | | [[File:PPW445.png]]<br>{{p|Garchomp}} | ||
| 28,000 | |||
| [[File:PPW323.png]]<br>{{p|Camerupt}} | |||
| | | 10,000 | ||
|- style="background:#fff" | |- style="background:#fff" | ||
| | | [[File:PPW212.png]]<br>{{p|Scizor}} | ||
| 26,000 | |||
| [[File:PPW411.png]]<br>{{p|Bastiodon}} | |||
| | | 8,000 | ||
|- style="background:#fff" | |- style="background:#fff" | ||
| | | [[File:PPW467.png]]<br>{{p|Magmortar}} | ||
| 24,000 | |||
| [[File:PPW303.png]]<br>{{p|Mawile}} | |||
| | | 7,000 | ||
|- style="background:#fff" | |||
| [[File:PPW107.png]]<br>{{p|Hitmonchan}} | |||
|- | | 22,000 | ||
| [[File:PPW383.png]]<br>{{p|Groudon}} | |||
| | | 40,000 | ||
| | |||
|} | |} | ||
===Tangrowth's Swing-Along=== | ===Tangrowth's Swing-Along=== | ||
[[ | [[File:Tangrowths Swing Along.png|thumb|right|200px|Celebi swings to Tangrowth's Swing-Along.]] | ||
In Tangrowth's Swing-Along, a series of ropes are set up along the bridge at the entrance of the mansion. The player must swing from rope to rope by swinging the Wii remote back and forth, then pressing B to jump to the next rope without falling and within the time limit. If they fall, they will be placed at the beginning of the bridge. {{p|Celebi}} is the best Pokémon for this attraction. | In Tangrowth's Swing-Along (Japanese: '''モジャンボのスイングレース''' ''Mojumbo's Swing Race''), a series of ropes are set up along the bridge at the entrance of the mansion. The player must swing from rope to rope by swinging the Wii remote back and forth, then pressing B to jump to the next rope without falling and within the time limit. If they fall, they will be placed at the beginning of the bridge. {{p|Celebi}} is the best Pokémon for this attraction. | ||
{| class="roundy" | {| class="roundy" style="margin:auto; text-align:center; background: #{{water color dark}}; border: 5px solid #{{Water color}}" | ||
|- | |- | ||
| align="center" style="background:#{{grass color}}; {{roundy|5px}} color: #000" colspan=" | | align="center" style="background:#{{grass color}}; {{roundy|5px}} color: #000" colspan="4" | '''Tangrowth's Swing-Along'''<br>''"Ricochet from rope to rope!"'' | ||
|- | |- | ||
| align="center" style="background:#{{grass color}}; {{roundy|5px}} color: #000" colspan=" | | align="center" style="background:#{{grass color}}; {{roundy|5px}} color: #000" colspan="2" | '''Zone: {{color2|000000|Haunted Zone}}''' | ||
| align="center" style="background:#{{grass color}}; {{roundy|5px}} color: #000" colspan=" | | align="center" style="background:#{{grass color}}; {{roundy|5px}} color: #000" colspan="2" | '''Cost: 30 Berries''' | ||
|- | |- | ||
! style="background:#{{grass color}}; {{roundytl|5px}} color: #000" colspan=" | ! style="background:#{{grass color}}; {{roundytl|5px}} color: #000" colspan="1" | Pokémon | ||
! style="background:#{{grass color}}; {{roundytr|5px}} color: #000" colspan="1" | Time for Bonus | ! style="background:#{{grass color}}; {{roundytr|5px}} color: #000" colspan="1" | Time for Bonus | ||
|- style="background:#fff" | |- style="background:#fff" | ||
| | | [[File:PPW025.png]]<br>{{p|Pikachu}} | ||
| 0:30.20 seconds | | 0:30.20 seconds | ||
| | | [[File:PPW026.png]]<br>{{p|Raichu}} | ||
| 0:28.80 seconds | | 0:28.80 seconds | ||
|- style="background:#fff" | |- style="background:#fff" | ||
| | | [[File:PPW052.png]]<br>{{p|Meowth}} | ||
| 0:30.40 seconds | | 0:30.40 seconds | ||
| | | [[File:PPW424.png]]<br>{{p|Ambipom}} | ||
| 0:29.00 seconds | | 0:29.00 seconds | ||
|- style="background:#fff" | |- style="background:#fff" | ||
| | | [[File:PPW172.png]]<br>{{p|Pichu}} | ||
| 0:30.60 seconds | | 0:30.60 seconds | ||
| | | [[File:PPW057.png]]<br>{{p|Primeape}} | ||
| 0:29.20 seconds | | 0:29.20 seconds | ||
|- style="background:#fff" | |- style="background:#fff" | ||
| | | [[File:PPW448.png]]<br>{{p|Lucario}} | ||
| 0:27.80 seconds | | 0:27.80 seconds | ||
| | | [[File:PPW190.png]]<br>{{p|Aipom}} | ||
| 0:29.40 seconds | | 0:29.40 seconds | ||
|- style="background:#fff" | |- style="background:#fff" | ||
| | | [[File:PPW392.png]]<br>{{p|Infernape}} | ||
| 0:28.00 seconds | | 0:28.00 seconds | ||
| | | [[File:PPW125.png]]<br>{{p|Electabuzz}} | ||
| 0:29.60 seconds | | 0:29.60 seconds | ||
|- style="background:#fff" | |- style="background:#fff" | ||
| | | [[File:PPW257.png]]<br>{{p|Blaziken}} | ||
| 0:28.20 seconds | | 0:28.20 seconds | ||
| | | [[File:PPW390.png]]<br>{{p|Chimchar}} | ||
| 0:29.80 seconds | | 0:29.80 seconds | ||
|- style="background:#fff" | |- style="background:#fff" | ||
| | | [[File:PPW447.png]]<br>{{p|Riolu}} | ||
| 0:28.40 seconds | | 0:28.40 seconds | ||
| | | [[File:PPW453.png]]<br>{{p|Croagunk}} | ||
| 0:30.00 seconds | | 0:30.00 seconds | ||
|- | |- style="background:#fff" | ||
| [[File:PPW215.png]]<br>{{p|Sneasel}} | |||
| | | 0:28.60 seconds | ||
| [[File:PPW251.png]]<br>{{p|Celebi}} | |||
| | | 0:19.00 seconds | ||
|} | |} | ||
===Dusknoir's Speed Slam=== | ===Dusknoir's Speed Slam=== | ||
[[ | [[File:Dusknoirs Speed Slam.png|thumb|right|200px|Darkrai smashes through Dusknoir's Speed Slam.]] | ||
Dusknoir's Speed Slam (Japanese: '''ヨノワールのクラッシュランニング''' ''Yonoir's Running Crash'') uses the same aim as Bulbasaur's Daring Dash: to reach the end as fast as possible by shaking the Wii remote. However, the view of this six Pokémon race is different from Bulbasaur's attraction and there are obstacles that slow the Pokémon down when it hits them. There are two types of obstacles: stone walls, which will already be there at the start, and {{p|Spinarak}}, which come down in front of players. The player must hit these obstacles unless they use certain Ghost-type Pokémon such as {{p|Gengar}} which just pass through. The best Pokémon to play as in this attraction is {{p|Darkrai}}, who can only be befriended after every Pokémon has gotten a bonus. | Dusknoir's Speed Slam (Japanese: '''ヨノワールのクラッシュランニング''' ''Yonoir's Running Crash'') uses the same aim as Bulbasaur's Daring Dash: to reach the end as fast as possible by shaking the Wii remote. However, the view of this six Pokémon race is different from {{p|Bulbasaur}}'s attraction and there are obstacles that slow the Pokémon down when it hits them. There are two types of obstacles: stone walls, which will already be there at the start, and {{p|Spinarak}}, which come down in front of players. The player must hit these obstacles unless they use certain Ghost-type Pokémon such as {{p|Gengar}} which just pass through. The best Pokémon to play as in this attraction is {{p|Darkrai}}, who can only be befriended after every Pokémon has gotten a bonus. | ||
{| class="roundy" | {| class="roundy" style="margin:auto; text-align:center; background: #{{water color dark}}; border: 5px solid #{{Water color}}" | ||
|- | |- | ||
| align="center" style="background:#{{grass color}}; {{roundy|5px}} color: #000" colspan=" | | align="center" style="background:#{{grass color}}; {{roundy|5px}} color: #000" colspan="4" | '''Dusknoir's Speed Slam'''<br>''"A rip-roaring riot of a race!"'' | ||
|- | |- | ||
| align="center" style="background:#{{grass color}}; {{roundy|5px}} color: #000" colspan=" | | align="center" style="background:#{{grass color}}; {{roundy|5px}} color: #000" colspan="2" | '''Zone: {{color2|000000|Haunted Zone}}''' | ||
| align="center" style="background:#{{grass color}}; {{roundy|5px}} color: #000" colspan=" | | align="center" style="background:#{{grass color}}; {{roundy|5px}} color: #000" colspan="2" | '''Cost: 30 Berries''' | ||
|- | |- | ||
! style="background:#{{grass color}}; {{roundytl|5px}} color: #000" colspan=" | ! style="background:#{{grass color}}; {{roundytl|5px}} color: #000" colspan="1" | Pokémon | ||
! style="background:#{{grass color}}; {{roundytr|5px}} color: #000" colspan="1" | Time for Bonus | ! style="background:#{{grass color}}; {{roundytr|5px}} color: #000" colspan="1" | Time for Bonus | ||
! style="background:#{{grass color}}; {{roundytl|5px}} color: #000" colspan=" | ! style="background:#{{grass color}}; {{roundytl|5px}} color: #000" colspan="1" | Pokémon | ||
! style="background:#{{grass color}}; {{roundytr|5px}} color: #000" colspan="1" | Time for Bonus | ! style="background:#{{grass color}}; {{roundytr|5px}} color: #000" colspan="1" | Time for Bonus | ||
|- style="background:#fff" | |- style="background:#fff" | ||
| | | [[File:PPW025.png]]<br>{{p|Pikachu}} | ||
| 0:15.50 seconds | | 0:15.50 seconds | ||
| | | [[File:PPW408.png]]<br>{{p|Cranidos}} | ||
| 0:12.00 seconds | | 0:12.00 seconds | ||
|- style="background:#fff" | |- style="background:#fff" | ||
| | | [[File:PPW434.png]]<br>{{p|Stunky}} | ||
| 0:16.00 seconds | | 0:16.00 seconds | ||
| | | [[File:PPW435.png]]<br>{{p|Skuntank}} | ||
| 0:12.50 seconds | | 0:12.50 seconds | ||
|- style="background:#fff" | |- style="background:#fff" | ||
| | | [[File:PPW094.png]]<br>{{p|Gengar}} | ||
| 0:09.00 seconds | | 0:09.00 seconds | ||
| | | [[File:PPW100.png]]<br>{{p|Voltorb}} | ||
| 0:13.00 seconds | | 0:13.00 seconds | ||
|- style="background:#fff" | |- style="background:#fff" | ||
| | | [[File:PPW429.png]]<br>{{p|Mismagius}} | ||
| 0:09.50 seconds | | 0:09.50 seconds | ||
| | | [[File:PPW092.png]]<br>{{p|Gastly}} | ||
| 0:13.50 seconds | | 0:13.50 seconds | ||
|- style="background:#fff" | |- style="background:#fff" | ||
| | | [[File:PPW212.png]]<br>{{p|Scizor}} | ||
| 0:10.00 seconds | | 0:10.00 seconds | ||
| | | [[File:PPW355.png]]<br>{{p|Duskull}} | ||
| 0:14.00 seconds | | 0:14.00 seconds | ||
|- style="background:#fff" | |- style="background:#fff" | ||
| | | [[File:PPW196.png]]<br>{{p|Espeon}} | ||
| 0:10.50 seconds | | 0:10.50 seconds | ||
| | | [[File:PPW200.png]]<br>{{p|Misdreavus}} | ||
| 0:14.50 seconds | | 0:14.50 seconds | ||
|- style="background:#fff" | |- style="background:#fff" | ||
| | | [[File:PPW477.png]]<br>{{p|Dusknoir}} | ||
| 0:11.00 seconds | | 0:11.00 seconds | ||
| | | [[File:PPW098.png]]<br>{{p|Krabby}} | ||
| 0:15.00 seconds | | 0:15.00 seconds | ||
|- | |- style="background:#fff" | ||
| [[File:PPW197.png]]<br>{{p|Umbreon}} | |||
| | | 0:11.50 seconds | ||
| [[File:PPW491.png]]<br>{{p|Darkrai}} | |||
| | | 0:08.00 seconds | ||
|} | |} | ||
===Rotom's Spooky Shoot-'em-Up=== | ===Rotom's Spooky Shoot-'em-Up=== | ||
[[ | [[File:Rotoms Spooky Shoot-em-up.png|thumb|right|200px|Rotom sharp shoots in Rotom's Spooky Shoot-'em-Up.]] | ||
In Rotom's Spooky Shoot-'em Up, the player must defend themselves from an onslaught of {{p|Gastly}}, {{p|Haunter}} and occasionally one of the {{p|Rotom}} | In Rotom's Spooky Shoot-'em Up (Japanese: '''ロトムのどきどきシューティング''' ''Rotom's Pulse Shoot System''), the player must defend themselves from an onslaught of {{p|Gastly}}, {{p|Haunter}} and occasionally one of the {{p|Rotom}} {{fd|Rotom|forms}}. The player points the Wii remote towards the screen and uses the on-screen crosshair to aim their attack at the attacking Pokémon, then press A to launch their attack. A radar at the bottom right corner of the screen will give the player a view of what is behind them. {{p|Rotom}} is the best Pokémon for this attraction. | ||
{| class="roundy" | {| class="roundy" style="margin:auto; text-align:center; background: #{{water color dark}}; border: 5px solid #{{Water color}}" | ||
|- | |- | ||
| align="center" style="background:#{{grass color}}; {{roundy|5px}} color: #000" colspan=" | | align="center" style="background:#{{grass color}}; {{roundy|5px}} color: #000" colspan="4" | '''Rotom's Spooky Shoot-'em-Up'''<br>''"Keep up the zaps and you won't get trapped!"'' | ||
|- | |- | ||
| align="center" style="background:#{{grass color}}; {{roundy|5px}} color: #000" colspan=" | | align="center" style="background:#{{grass color}}; {{roundy|5px}} color: #000" colspan="2" | '''Zone: {{color2|000000|Haunted Zone}}''' | ||
| align="center" style="background:#{{grass color}}; {{roundy|5px}} color: #000" colspan=" | | align="center" style="background:#{{grass color}}; {{roundy|5px}} color: #000" colspan="2" | '''Cost: 30 Berries''' | ||
|- | |- | ||
! style="background:#{{grass color}}; {{roundytl|5px}} color: #000" colspan=" | ! style="background:#{{grass color}}; {{roundytl|5px}} color: #000" colspan="1" | Pokémon | ||
! style="background:#{{grass color}}; {{roundytr|5px}} color: #000" colspan="1" | Score for Bonus | ! style="background:#{{grass color}}; {{roundytr|5px}} color: #000" colspan="1" | Score for Bonus | ||
|- style="background:#fff" | |- style="background:#fff" | ||
| | | [[File:PPW025.png]]<br>{{p|Pikachu}} | ||
| 2,000 | |||
| [[File:PPW344.png]]<br>{{p|Claydol}} | |||
| | | 6,500 | ||
|- style="background:#fff" | |- style="background:#fff" | ||
| | | [[File:PPW081.png]]<br>{{p|Magnemite}} | ||
| 1,000 | |||
| [[File:PPW125.png]]<br>{{p|Electabuzz}} | |||
| | | 6,000 | ||
|- style="background:#fff" | |- style="background:#fff" | ||
| | | [[File:PPW474.png]]<br>{{p|Porygon-Z}} | ||
| 11,000 | |||
| [[File:PPW093.png]]<br>{{p|Haunter}} | |||
| | | 5,500 | ||
|- style="background:#fff" | |- style="background:#fff" | ||
| | | [[File:PPW462.png]]<br>{{p|Magnezone}} | ||
| 10,000 | |||
| [[File:PPW063.png]]<br>{{p|Abra}} | |||
| | | 5,000 | ||
|- style="background:#fff" | |- style="background:#fff" | ||
| | | [[File:PPW094.png]]<br>{{p|Gengar}} | ||
| 9,000 | |||
| [[File:PPW239.png]]<br>{{p|Elekid}} | |||
| | | 4,000 | ||
|- style="background:#fff" | |- style="background:#fff" | ||
| | | [[File:PPW467.png]]<br>{{p|Magmortar}} | ||
| 8,500 | |||
| [[File:PPW122.png]]<br>{{p|Mr. Mime}} | |||
| | | 3,500 | ||
|- style="background:#fff" | |- style="background:#fff" | ||
| | | [[File:PPW466.png]]<br>{{p|Electivire}} | ||
| 8,000 | |||
| [[File:PPW343.png]]<br>{{p|Baltoy}} | |||
| | | 3,000 | ||
|- style="background:#fff" | |||
| [[File:PPW429.png]]<br>{{p|Mismagius}} | |||
|- | | 7,500 | ||
| [[File:PPW479.png]]<br>{{p|Rotom}} | |||
| | | 24,000 | ||
| | |||
|} | |} | ||
===Absol's Hurdle Bounce=== | ===Absol's Hurdle Bounce=== | ||
[[ | [[File:Absols Hurdle Bounce.png|thumb|right|200px|Shaymin leaps its way through Absol's Hurdle Bounce.]] | ||
Absol's Hurdle Bounce (Japanese: '''アブソルのつぎつぎハードル''' ''Absol's Hurdle Succession'') uses the same aim as Bulbasaur's Daring Dash. However, the view of this attraction is different from that of Bulbasaur's and there are hurdles that the player must jump over by pressing the 2 button. If the Pokémon hits the hurdle or trips on it while jumping, it will cause the Pokémon to slow down. The best Pokémon to play as in this attraction is {{p|Shaymin}}, who will start off in its Land Forme but transforms into Sky Forme before it starts running. | Absol's Hurdle Bounce (Japanese: '''アブソルのつぎつぎハードル''' ''Absol's Hurdle Succession'') uses the same aim as Bulbasaur's Daring Dash. However, the view of this attraction is different from that of Bulbasaur's and there are hurdles that the player must jump over by pressing the 2 button. If the Pokémon hits the hurdle or trips on it while jumping, it will cause the Pokémon to slow down. The best Pokémon to play as in this attraction is {{p|Shaymin}}, who will start off in its Land Forme but then transforms into its Sky Forme before it starts running. | ||
{| class="roundy" | {| class="roundy" style="margin:auto; text-align:center; background: #{{water color dark}}; border: 5px solid #{{Water color}}" | ||
|- | |- | ||
| align="center" style="background:#{{grass color}}; {{roundy|5px}} color: #000" colspan=" | | align="center" style="background:#{{grass color}}; {{roundy|5px}} color: #000" colspan="4" | '''Absol's Hurdle Bounce'''<br>''"Leap the hurdles! Race for the line!"'' | ||
|- | |- | ||
| align="center" style="background:#{{grass color}}; {{roundy|5px}} color: #000" colspan=" | | align="center" style="background:#{{grass color}}; {{roundy|5px}} color: #000" colspan="2" | '''Zone: {{color2|000000|Granite Zone}}''' | ||
| align="center" style="background:#{{grass color}}; {{roundy|5px}} color: #000" colspan=" | | align="center" style="background:#{{grass color}}; {{roundy|5px}} color: #000" colspan="2" | '''Cost: 40 Berries''' | ||
|- | |- | ||
! style="background:#{{grass color}}; {{roundytl|5px}} color: #000" colspan=" | ! style="background:#{{grass color}}; {{roundytl|5px}} color: #000" colspan="1" | Pokémon | ||
! style="background:#{{grass color}}; {{roundytr|5px}} color: #000" colspan="1" | Time for Bonus | ! style="background:#{{grass color}}; {{roundytr|5px}} color: #000" colspan="1" | Time for Bonus | ||
|- style="background:#fff" | |- style="background:#fff" | ||
|- style="background:#fff" | |- style="background:#fff" | ||
| | | [[File:PPW025.png]]<br>{{p|Pikachu}} | ||
| 0:18.50 seconds | | 0:18.50 seconds | ||
| | | [[File:PPW392.png]]<br>{{p|Infernape}} | ||
| 0:14.50 seconds | | 0:14.50 seconds | ||
|- style="background:#fff" | |- style="background:#fff" | ||
| | | [[File:PPW152.png]]<br>{{p|Chikorita}} | ||
| 0:19.00 seconds | |||
| | | [[File:PPW286.png]]<br>{{p|Breloom}} | ||
| | |||
| 0:15.00 seconds | | 0:15.00 seconds | ||
|- style="background:#fff" | |- style="background:#fff" | ||
| | | [[File:PPW359.png]]<br>{{p|Absol}} | ||
| 0:11.90 seconds | | 0:11.90 seconds | ||
| | | [[File:PPW447.png]]<br>{{p|Riolu}} | ||
| 0:15.50 seconds | | 0:15.50 seconds | ||
|- style="background:#fff" | |- style="background:#fff" | ||
| | | [[File:PPW448.png]]<br>{{p|Lucario}} | ||
| 0:12.30 seconds | | 0:12.30 seconds | ||
| | | [[File:PPW162.png]]<br>{{p|Furret}} | ||
| 0:16.00 seconds | | 0:16.00 seconds | ||
|- style="background:#fff" | |- style="background:#fff" | ||
| | | [[File:PPW077.png]]<br>{{p|Ponyta}} | ||
| 0:12.70 seconds | | 0:12.70 seconds | ||
| | | [[File:PPW179.png]]<br>{{p|Mareep}} | ||
| 0:16.50 seconds | | 0:16.50 seconds | ||
|- style="background:#fff" | |- style="background:#fff" | ||
| | | [[File:PPW038.png]]<br>{{p|Ninetales}} | ||
| 0:13.10 seconds | | 0:13.10 seconds | ||
| | | [[File:PPW133.png]]<br>{{p|Eevee}} | ||
| 0:17.50 seconds | | 0:17.50 seconds | ||
|- style="background:#fff" | |- style="background:#fff" | ||
| | | [[File:PPW428.png]]<br>{{p|Lopunny}} | ||
| 0:13.50 seconds | | 0:13.50 seconds | ||
| | | [[File:PPW037.png]]<br>{{p|Vulpix}} | ||
| 0:18.00 seconds | | 0:18.00 seconds | ||
|- | |- style="background:#fff" | ||
| [[File:PPW196.png]]<br>{{p|Espeon}} | |||
| | | 0:14.00 seconds | ||
| [[File:PPW492.png]]<br>{{p|Shaymin}} | |||
| | | 0:11.00 seconds | ||
| | |||
|} | |} | ||
===Salamence's Air Ace=== | ===Salamence's Air Ace=== | ||
[[ | [[File:Salamences Air Ace.png|thumb|200px|right|Latios blasts through targets in Salamence's Air Ace.]] | ||
Salamence's Air Ace (Japanese: '''ボーマンダのスーパースカイレース''' ''Bohmander's Super Sky Race''), the player must fly through the air by tilting the Wii remote and destroy targets with a projectile attack fired with the 2 button. Once every Pokémon has achieved their bonus, {{p|Latios}} will be unlocked. | In Salamence's Air Ace (Japanese: '''ボーマンダのスーパースカイレース''' ''Bohmander's Super Sky Race''), the player must fly through the air by tilting the Wii remote and destroy targets with a projectile attack fired with the 2 button. Once every Pokémon has achieved their bonus, {{p|Latios}} will be unlocked. He is the best choice when playing this attraction, being able to score over 25,000 points. | ||
{| class="roundy" | {| class="roundy" style="margin:auto; text-align:center; background: #{{water color dark}}; border: 5px solid #{{Water color}}" | ||
|- | |- | ||
| align="center" style="background:#{{grass color}}; {{roundy|5px}} color: #000" colspan=" | | align="center" style="background:#{{grass color}}; {{roundy|5px}} color: #000" colspan="4" | '''Salamence's Air Ace'''<br>''"Hit the Targets any way you can!"'' | ||
|- | |- | ||
| align="center" style="background:#{{grass color}}; {{roundy|5px}} color: #000" colspan=" | | align="center" style="background:#{{grass color}}; {{roundy|5px}} color: #000" colspan="2" | '''Zone: {{color2|000000|Granite Zone}}''' | ||
| align="center" style="background:#{{grass color}}; {{roundy|5px}} color: #000" colspan=" | | align="center" style="background:#{{grass color}}; {{roundy|5px}} color: #000" colspan="2" | '''Cost: 40 Berries''' | ||
|- | |- | ||
! style="background:#{{grass color}}; {{roundytl|5px}} color: #000" colspan=" | ! style="background:#{{grass color}}; {{roundytl|5px}} color: #000" colspan="1" | Pokémon | ||
! style="background:#{{grass color}}; {{roundytr|5px}} color: #000" colspan="1" | Points for Bonus | ! style="background:#{{grass color}}; {{roundytr|5px}} color: #000" colspan="1" | Points for Bonus | ||
|- style="background:#fff" | |- style="background:#fff" | ||
|- style="background:#fff" | |- style="background:#fff" | ||
| | | [[File:PPW025.png]]<br>{{p|Pikachu}}{{tt|*|Requires Balloons}} | ||
| 5,000 | |||
| | | [[File:PPW041.png]]<br>{{p|Zubat}} | ||
| | | 6,000 | ||
| {{p| | |- style="background:#fff" | ||
| | | [[File:PPW198.png]]<br>{{p|Murkrow}} | ||
| 7,000 | |||
| [[File:PPW276.png]]<br>{{p|Taillow}} | |||
| 8,000 | |||
|- style="background:#fff" | |- style="background:#fff" | ||
| | | [[File:PPW042.png]]<br>{{p|Golbat}} | ||
| 9,000 | |||
| | | [[File:PPW468.png]]<br>{{p|Togekiss}} | ||
| | | 10,000 | ||
| | |||
|- style="background:#fff" | |- style="background:#fff" | ||
| | | [[File:PPW017.png]]<br>{{p|Pidgeotto}} | ||
| 10,500 | |||
| | | [[File:PPW472.png]]<br>{{p|Gliscor}} | ||
| 12,000 | |||
| {{p| | |||
| | |||
|- style="background:#fff" | |- style="background:#fff" | ||
| | | [[File:PPW430.png]]<br>{{p|Honchkrow}} | ||
| 13,000 | |||
| | | [[File:PPW398.png]]<br>{{p|Staraptor}} | ||
| | | 14,000 | ||
| | |||
|- style="background:#fff" | |- style="background:#fff" | ||
| | | [[File:PPW142.png]]<br>{{p|Aerodactyl}} | ||
| 15,000 | |||
| | | [[File:PPW330.png]]<br>{{p|Flygon}} | ||
| | | 16,000 | ||
| | |||
|- style="background:#fff" | |- style="background:#fff" | ||
| | | [[File:PPW149.png]]<br>{{p|Dragonite}} | ||
| 17,000 | |||
| | | [[File:PPW006.png]]<br>{{p|Charizard}} | ||
| | | 18,000 | ||
| | |||
|- style="background:#fff" | |- style="background:#fff" | ||
| | | [[File:PPW373.png]]<br>{{p|Salamence}} | ||
| 20,000 | |||
| [[File:PPW381.png]]<br>{{p|Latios}} | |||
| 25,000 | |||
| | |||
| | |||
| | |||
|} | |} | ||
===Rayquaza's Balloon Panic=== | ===Rayquaza's Balloon Panic=== | ||
[[ | [[File:Rayquazas Balloon Panic 1.png|thumb|200px|right|Deoxys makes its way down the balloon in Rayquaza's Balloon Panic.]] | ||
[[ | [[File:Rayquazas Balloon Panic 2.png|thumb|200px|right|Deoxys shoots away targets in Rayquaza's Balloon Panic.]] | ||
In Rayquaza's Balloon Panic, the player runs across a Rayquaza shaped balloon passing through rings to gain points. At the same time, the player must dodge {{p|Electrode}} and {{p|Voltorb}} as well as avoid falling off the balloon itself. Once the player has reached the other end of the balloon the view will be aimed towards the back of the player and Drifloon, Drifblim, and Rayquaza will fly across the screen holding targets the player must destroy. Occasionally one will have a large X on it which will take away 300 points. During the first half, the player maneuvers by tilting the Wii remote and jumps with 2, while the second half has the player point the Wii remote towards the screen and fire projectiles with A. The best Pokémon for this attraction is {{p|Deoxys}}. | In Rayquaza's Balloon Panic (Japanese: '''レックウザのパニックバルーン''' ''Rayquaza's Balloon Panic''), the player runs across a {{p|Rayquaza}}-shaped balloon passing through rings to gain points. At the same time, the player must dodge {{p|Electrode}} and {{p|Voltorb}}, as well as avoid falling off the balloon itself. Once the player has reached the other end of the balloon, the view will be aimed towards the back of the player and {{p|Drifloon}}, {{p|Drifblim}}, and Rayquaza will fly across the screen, holding targets the player must destroy. Occasionally, one will have a large X on it which will take away 300 points. During the first half, the player maneuvers by tilting the Wii remote and jumps with 2, while the second half has the player point the Wii remote towards the screen and fire projectiles with A. The best Pokémon for this attraction is {{p|Deoxys}}. | ||
{| class="roundy" | {| class="roundy" style="margin:auto; text-align:center; background: #{{water color dark}}; border: 5px solid #{{Water color}}" | ||
|- | |- | ||
| align="center" style="background:#{{grass color}}; {{roundy|5px}} color: #000" colspan=" | | align="center" style="background:#{{grass color}}; {{roundy|5px}} color: #000" colspan="4" | '''Rayquaza's Balloon Panic'''<br>''"Frantic fun in the air!"'' | ||
|- | |- | ||
| align="center" style="background:#{{grass color}}; {{roundy|5px}} color: #000" colspan=" | | align="center" style="background:#{{grass color}}; {{roundy|5px}} color: #000" colspan="2" | '''Zone: {{color2|000000|Flower Zone}}''' | ||
| align="center" style="background:#{{grass color}}; {{roundy|5px}} color: #000" colspan=" | | align="center" style="background:#{{grass color}}; {{roundy|5px}} color: #000" colspan="2" | '''Cost: 40 Berries''' | ||
|- | |- | ||
! style="background:#{{grass color}}; {{roundytl|5px}} color: #000" colspan=" | ! style="background:#{{grass color}}; {{roundytl|5px}} color: #000" colspan="1" | Pokémon | ||
! style="background:#{{grass color}}; {{roundytr|5px}} color: #000" colspan="1" | Points for Bonus | ! style="background:#{{grass color}}; {{roundytr|5px}} color: #000" colspan="1" | Points for Bonus | ||
! style="background:#{{grass color}}; {{roundytl|5px}} color: #000" colspan=" | ! style="background:#{{grass color}}; {{roundytl|5px}} color: #000" colspan="1" | Pokémon | ||
! style="background:#{{grass color}}; {{roundytr|5px}} color: #000" colspan="1" | Points for Bonus | ! style="background:#{{grass color}}; {{roundytr|5px}} color: #000" colspan="1" | Points for Bonus | ||
|- style="background:#fff" | |- style="background:#fff" | ||
|- style="background:#fff" | |- style="background:#fff" | ||
| | | [[File:PPW025.png]]<br>{{p|Pikachu}} | ||
| 15,000 | |||
| [[File:PPW472.png]]<br>{{p|Gliscor}} | |||
| | | 12,000 | ||
|- style="background:#fff" | |- style="background:#fff" | ||
| | | [[File:PPW386.png]]<br>{{p|Deoxys}} | ||
| 54,000 | |||
| | | [[File:PPW464.png]]<br>{{p|Rhyperior}} | ||
| | | 29,000 | ||
|- style="background:#fff" | |- style="background:#fff" | ||
| | | [[File:PPW448.png]]<br>{{p|Lucario}} | ||
| 45,000 | |||
| | | [[File:PPW359.png]]<br>{{p|Absol}} | ||
| | | 28,000 | ||
|- style="background:#fff" | |- style="background:#fff" | ||
| | | [[File:PPW471.png]]<br>{{p|Glaceon}} | ||
| 42,000 | |||
| [[File:PPW286.png]]<br>{{p|Breloom}} | |||
| | | 27,000 | ||
|- style="background:#fff" | |- style="background:#fff" | ||
| | | [[File:PPW405.png]]<br>{{p|Luxray}} | ||
| 40,000 | |||
| [[File:PPW179.png]]<br>{{p|Mareep}} | |||
| | | 24,000 | ||
|- style="background:#fff" | |- style="background:#fff" | ||
| | | [[File:PPW330.png]]<br>{{p|Flygon}} | ||
| 16,000 | |||
| [[File:PPW155.png]]<br>{{p|Cyndaquil}} | |||
| | | 23,000 | ||
|- style="background:#fff" | |- style="background:#fff" | ||
| | | [[File:PPW473.png]]<br>{{p|Mamoswine}} | ||
| 34,000 | |||
| [[File:PPW158.png]]<br>{{p|Totodile}} | |||
| | | 22,000 | ||
|- style="background:#fff" | |- style="background:#fff" | ||
| | | [[File:PPW392.png]]<br>{{p|Infernape}} | ||
| 33,000 | |||
| [[File:PPW152.png]]<br>{{p|Chikorita}} | |||
| | | 20,000 | ||
|- style="background:#fff" | |||
| [[File:PPW419.png]]<br>{{p|Floatzel}} | |||
|- | | 32,000 | ||
| [[File:PPW439.png]]<br>{{p|Mime Jr.}} | |||
| | | 17,000 | ||
| | |||
|} | |} | ||
==PokéPark 2: Wonders Beyond== | ==PokéPark 2: Wonders Beyond== | ||
[[File:Dance Inferno Multiplayer.png|thumb|250px|right|Pikachu, Snivy, Tepig, and Oshawott engaging in | [[File:Dance Inferno Multiplayer.png|thumb|250px|right|Pikachu, Snivy, Tepig, and Oshawott engaging in Dance Inferno's multiplayer mode.]] | ||
[[PokéPark 2: Wonders Beyond]] has four known Attractions | [[PokéPark 2: Wonders Beyond]] has four known Attractions, each of which can accommodate 1 to 4 players. Additionally, the only Pokémon that can participate in the attractions are {{p|Pikachu}}, {{p|Snivy}}, {{p|Tepig}}, and {{p|Oshawott}}. | ||
During the story, the attractions are used to brainwash the guests of [[Wish Park]] and, as such, the Pokémon will exhibit behavior pertaining to the attraction in their area whilst brainwashed, such as exaggerated cake cravings or aggressive behavior. | |||
===Cake Contraption=== | ===Cake Contraption=== | ||
| Line 1,086: | Line 849: | ||
In '''Cake Contraption''' (Japanese: '''スイーツファクトリー''' ''Sweets Factory''), players point the Wii Remote at the screen and fire at various types of confectioneries. | In '''Cake Contraption''' (Japanese: '''スイーツファクトリー''' ''Sweets Factory''), players point the Wii Remote at the screen and fire at various types of confectioneries. | ||
The first half of the game is similar to {{wp|Whac-A-Mole}} where {{p|Patrat}} will appear out of a number of holes in a panel, holding {{wp|pistachio}}-like nuts which the player fires at. | The first half of the game is similar to {{wp|Whac-A-Mole}} where {{p|Patrat}} will appear out of a number of holes in a panel, holding {{wp|pistachio}}-like nuts which the player fires at. A {{p|Watchog}} will occasionally appear with a spotted nut worth bonus points. The second half has two {{p|Audino}} tossing lobes of dough into the air which then come falling down to the ground. The player must shoot the lobes, turning them into a cake on the first shot, then decorating them on the second shot. {{p|Yamask}}, {{p|Vanillite}}, and {{p|Cottonee}} occasionally fly by with gold dough worth bonus points. | ||
===Dance Inferno=== | ===Dance Inferno=== | ||
:''"Dance like Lopunny! Dance well, and you'll get everybody's attention!"'' | :''"Dance like Lopunny! Dance well, and you'll get everybody's attention!"'' | ||
In Dance Inferno (Japanese: '''ゴージャスダンシング''' ''Gorgeous Dancing''), players move the Wii remote in the motion the icons at the bottom require them to move. With better accuracy and timing comes a better score. The | In '''Dance Inferno''' (Japanese: '''ゴージャスダンシング''' ''Gorgeous Dancing''), players move the Wii remote in the motion the icons at the bottom require them to move. With better accuracy and timing comes a better score. The target score is 25,000 points. | ||
===Power Bash=== | ===Power Bash=== | ||
:''"Have a showdown with approaching Pokémon! Defeat as many Pokémon to get a high score!"'' | :''"Have a showdown with approaching Pokémon! Defeat as many Pokémon to get a high score!"'' | ||
In Power Bash (Japanese: '''スラッシュファイト''' ''Slash Fight''), players must knock out Pokémon by swinging the Wii remote, while avoiding bombs by pressing A. If the player accidentally performs the wrong action at the wrong time, they will be penalized. The target score is 10,000 points. | In '''Power Bash''' (Japanese: '''スラッシュファイト''' ''Slash Fight''), players must knock out Pokémon by swinging the Wii remote, while avoiding bombs by pressing A. If the player accidentally performs the wrong action at the wrong time, they will be penalized. The target score is 10,000 points. | ||
===Flight of Fancy=== | ===Flight of Fancy=== | ||
:''"Fly through the sky, and collect lots of gems along the way!"'' | :''"Fly through the sky, and collect lots of gems along the way!"'' | ||
In Flight of Fancy (Japanese: '''ワンダーフライト''' ''Wonder Flight''), players tilt the Wii remote in the direction they want to move to collect gems in the sky. The | In '''Flight of Fancy''' (Japanese: '''ワンダーフライト''' ''Wonder Flight''), players tilt the Wii remote in the direction they want to move to collect gems in the sky. The target score is 15,000 points. | ||
===Gallery=== | ===Gallery=== | ||
| Line 1,108: | Line 871: | ||
==Trivia== | ==Trivia== | ||
* | *Flight of Fancy bears a striking resemblance to being launched from a {{Smw|Launch Star}} in {{Smw|Super Mario Galaxy}} and one planet also bears a striking resemblance to a planet from the game. | ||
| Line 1,116: | Line 879: | ||
[[Category:PokéPark Wii: Pikachu's Adventure]] | [[Category:PokéPark Wii: Pikachu's Adventure]] | ||
[[Category:Minigames]] | [[Category:Minigames]] | ||
[[fr:Attraction (PokéPark)]] | |||
[[it:Attrazione (PokéPark)]] | |||
Latest revision as of 15:25, 28 February 2024
- If you were looking for the online games played on the Pokémon Global Link, see PokéMileage Club.
Attractions (Japanese: アトラクション Attraction) are games hosted by various Pokémon found in PokéPark Wii: Pikachu's Adventure and PokéPark 2: Wonders Beyond. They are held as entertainment for guests to the PokéPark and challenge each guest to play against one another in a contest of various skills, such as speed, stamina, and strength. Each Pokémon has an expected goal, and when they achieve that goal, will earn a bonus prize.
PokéPark Wii: Pikachu's Adventure
PokéPark Wii: Pikachu's Adventure has a total of fourteen different Attractions throughout the eight Zones.
Bulbasaur's Daring Dash

In Bulbasaur's Daring Dash (Japanese: フシギダネのふりふりダッシュ Fushigidane's Foot Race), players move the Wii remote up and down to run as fast as they can. Mew is the best at this attraction and is unlocked automatically after clearing the Sky Pavilion.
| Bulbasaur's Daring Dash "A fast and frantic foot race!" | |||
| Zone: Meadow Zone | Cost: 5 Berries | ||
| Pokémon | Time for Bonus | Pokémon | Time for Bonus |
|---|---|---|---|
 Pikachu |
00:09.70 seconds |  Caterpie |
00:13.70 seconds |
 Chimchar |
00:09.80 seconds |  Magikarp |
00:14.50 seconds |
 Treecko |
00:10.00 seconds |  Jolteon |
00:06.10 seconds |
 Bibarel |
00:10.10 seconds |  Arcanine |
00:06.30 seconds |
 Turtwig |
00:10.50 seconds |  Leafeon |
00:06.50 seconds |
 Bulbasaur |
00:10.80 seconds |  Scyther |
00:06.80 seconds |
 Bidoof |
00:10.90 seconds |  Ponyta |
00:07.10 seconds |
 Oddish |
00:11.10 seconds |  Shinx |
00:07.40 seconds |
 Shroomish |
00:11.30 seconds |  Eevee |
00:07.70 seconds |
 Munchlax |
00:11.60 seconds |  Pachirisu |
00:08.10 seconds |
 Bonsly |
00:11.90 seconds |  Buneary |
00:08.70 seconds |
 Lotad |
00:12.40 seconds |  Croagunk |
00:09.20 seconds |
 Weedle |
00:13.10 seconds |  Mew |
00:05:20 seconds |
Venusaur's Vine Swing

In Venusaur's Vine Swing (Japanese: フシギバナのスイングロープ Fushigibana's Rope Swinging), players swing the Wii remote to swing the vine. Pressing 2 releases the Pokémon, and how far it goes depends on the angle of release and the momentum of the swing. Jirachi is the best at this attraction.
| Venusaur's Vine Swing "Swing to and fro, then let go!" | |||
| Zone: Meadow Zone | Cost: 5 Berries | ||
| Pokémon | Distance for Bonus | Pokémon | Distance for Bonus |
|---|---|---|---|
| Pikachu |
131.20 ft. | Pachirisu |
144.32 ft. |
| Munchlax |
124.64 ft. |  Ambipom |
236.16 ft. |
| Croagunk |
219.76 ft. |  Blaziken |
285.36 ft. |
| Magikarp |
72.16 ft. |  Infernape |
275.52 ft. |
 Mankey |
203.36 ft. |  Lucario |
265.68 ft. |
 Aipom |
190.24 ft. |  Primeape |
255.84 ft. |
| Chimchar |
173.84 ft. |  Tangrowth |
246.00 ft. |
| Treecko |
160.72 ft. |  Jirachi |
328.08 ft. |
Pelipper's Circle Circuit

In Pelipper's Circle Circuit (Japanese: ペリッパーのはばたきスカイレース Pelipper's Sky Flap Race), players tilt the Wii remote to make the Pokémon move around the screen. They must fly through rings to get points: gold is worth 100, red is worth 300, and rainbow is worth 1,000. After each possible Pokémon (excluding Pikachu) has received a bonus for their performance, Latias is unlocked. She is the best choice when playing this attraction, being able to score over 30,000 points.
| Pelipper's Circle Circuit "Aim at the Circles as you fly!" | |||
| Zone: Beach Zone | Cost: 10 Berries | ||
| Pokémon | Points for Bonus | Pokémon | Points for Bonus |
|---|---|---|---|
| Pikachu* |
8,500 |  Pidgeotto |
12,000 |
 Murkrow |
9,600 |  Butterfree |
11,000 |
 Taillow |
9,300 |  Pelipper |
14,000 |
 Spearow |
9,000 |  Gliscor |
15,000 |
 Starly |
8,800 |  Honchkrow |
16,000 |
 Wingull |
8,600 |  Togekiss |
17,000 |
 Staravia |
13,000 |  Staraptor |
18,000 |
 Tropius |
10,000 |  Latias |
30,000 |
Gyarados's Aqua Dash

In Gyarados's Aqua Dash (Japanese: ギャラドスのマリンスライダー Gyarados's Marine Slider), players hold 2 to propel the Pokémon forwards, while tilting the Wii remote to turn. Hitting Carvanha or Sharpedo will slow them down, while hitting a speed boost will make them faster. After each possible Pokémon (excluding Pikachu) has received a bonus for their performance, Manaphy is unlocked. It is the best choice when playing this attraction, being able to score less than 0:18.50 seconds.
| Gyarados's Aqua Dash "Surf and splash!" | |||
| Zone: Beach Zone | Cost: 10 Berries | ||
| Pokémon | Time for Bonus | Pokémon | Time for Bonus |
|---|---|---|---|
| Pikachu* |
0:29.50 seconds |  Vaporeon |
0:24.50 seconds |
 Psyduck |
0:32.00 seconds |  Prinplup |
0:25.00 seconds |
 Azurill |
0:34.00 seconds | Bibarel |
0:25.50 seconds |
 Slowpoke |
0:36.00 seconds |  Buizel |
0:26.00 seconds |
 Empoleon |
0:22.50 seconds |  Corsola |
0:27.00 seconds |
 Floatzel |
0:23.00 seconds |  Piplup |
0:28.00 seconds |
 Feraligatr |
0:23.50 seconds | Lotad |
0:29.00 seconds |
 Golduck |
0:24.00 seconds |  Manaphy |
0:18.50 seconds |
Empoleon's Snow Slide

In Empoleon's Snow Slide (Japanese: エンペルトのスノースライダー Emperte's Snow Slider), players must guide the Pokémon around a course of snow, tilting the Wii remote to turn. There are speed boosts which may help the player, but they can also make it difficult to get around corners. The Pokémon will slow down if it hits a wall or an obstacle. The fastest Pokémon in this attraction is Suicune.
| Empoleon's Snow Slide "Speed down a snowy mountain!" | |||
| Zone: Iceberg Zone | Cost: 10 Berries | ||
| Pokémon | Time for Bonus | Pokémon | Time for Bonus |
|---|---|---|---|
| Pikachu* |
0:58.00 seconds |  Delibird |
0:50.00 seconds |
 Teddiursa |
0:59.00 seconds |  Piloswine |
0:51.00 seconds |
| Magikarp |
1:00.00 seconds | Prinplup |
0:52.00 seconds |
| Empoleon |
0:45.00 seconds |  Squirtle |
0:53.00 seconds |
 Glaceon |
0:46.00 seconds | Piplup |
0:54.00 seconds |
 Blastoise |
0:47.00 seconds |  Quagsire |
0:55.50 seconds |
 Glalie |
0:48.00 seconds |  Spheal |
0:57.00 seconds |
 Lapras |
0:49.00 seconds |  Suicune |
0:40.00 seconds |
Bastiodon's Block Barrage

In Bastiodon's Block Barrage (Japanese: トリデプスのパネルクラッシュ Trideps' Panel Crash), players move the Pokémon across the bottom of the screen by using the directional buttons on the Wii remote to stop the ball from getting past. To get points, the ball must hit wooden panels with numbers on them. Pressing the 2 button to hit the ball gives it power, which means it can get past Bastiodon, who moves side to side in front of the panels, and the many Dugtrio who pop up on the field. If an unpowered ball hits a Dugtrio from the front, it will be deflected back towards the player. If it hits from behind, the Dugtrio may go underground and let the ball pass, or it might deflect the ball back to the panels to score more points. If a powered up ball (power shot) hits Bastiodon, he will become dizzy and will temporarily be disabled. If the player shoots the ball normally, the points will equal 100 times the number on the panel. If the player uses a power shot, the points will equal 200 times the number on the wooden panel. For example, hitting a 2 gets 200 points and hitting a 4 with a power shot gets 800 points. Hitting two panels at once will not get a bonus, it will just get both the scores. The highest possible score in this game is 99,999 and the best Pokémon to play as is Metagross.
| Bastiodon's Block Barrage "Shoot the ball, smash the blocks!" | |||
| Zone: Cavern Zone | Cost: 20 Berries | ||
| Pokémon | Points for Bonus | Pokémon | Points for Bonus |
|---|---|---|---|
 Torchic |
1,000 |  Sudowoodo |
8,000 |
 Meowth |
1,500 |  Raichu |
9,000 |
 Sableye |
2,000 |  Mr. Mime |
12,000 |
| Pikachu |
2,500 |  Ursaring |
15,000 |
 Magby |
3,500 |  Hitmonlee |
18,000 |
| Chimchar |
4,000 |  Magmortar |
20,000 |
 Gible |
4,500 |  Electivire |
24,000 |
 Charmander |
5,500 |  Metagross |
99,000 |
Rhyperior's Bumper Burn

In Rhyperior's Bumper Burn (Japanese: ドサイドンのおしだしヒートアップ Dosaidon's Heat Up Fight), the player must tilt the Wii remote to bump as many Pokémon out of a circular stadium as possible in the given time limit to earn points. These are awarded for bumping other Pokémon out of the stadium and deducted for befriended Pokémon being bumped out of the stadium. Pokémon can unleash a special attack by pressing the 2 button after collecting a power-boost. Some attacks will cause the Pokémon to spin rapidly; others will cause them to explode or unleash an elemental attack. The best Pokémon to play as in this attraction is Heatran.
| Rhyperior's Bumper Burn "Spin around! Bump others out!" | |||
| Zone: Lava Zone | Cost: 20 Berries | ||
| Pokémon | Points for Bonus | Pokémon | Points for Bonus |
|---|---|---|---|
 Magnemite |
1,000 |  Torterra |
14,000 |
| Pikachu |
3,000 |  Snorlax |
16,000 |
| Bonsly |
4,000 |  Venusaur |
18,000 |
 Baltoy |
5,000 |  Flareon |
25,000 |
 Torkoal |
6,000 |  Hitmontop |
30,000 |
 Quilava |
8,000 |  Tyranitar |
40,000 |
 Claydol |
10,000 |  Rhyperior |
50,000 |
 Magnezone |
13,000 |  Heatran |
70,000 |
Blaziken's Boulder Bash

In Blaziken's Boulder Bash (Japanese: バシャーモのパンチングロックス Bursyamo's Punching Rock), players must swing the Wii remote to smash or deflect the rocks shot at them, depending on the timing of the swing. The rocks fly faster as the game progresses and are shot by a giant machine which appears to be controlled by Blaziken (unless the player is playing as this Pokémon) and Golem. If the Pokémon is hit by a rock, the player must shake the Wii remote for it to recover. Points are awarded for the timing of the attack and the number of times the Pokémon destroys a rock in a row. 100 points are awarded if the blow is not completely in time; 300 points are awarded for excellent timing. The points are multiplied by the number of times the Pokémon hits a rock in a row (once is worth 100 or 300 points, twice in a row is worth 200 or 600, three times is worth 300 or 900, etc.). The maximum score is 48,000 and the best Pokémon to play as is Groudon.
| Blaziken's Boulder Bash "Break the flying boulders!" | |||
| Zone: Lava Zone | Cost: 20 Berries | ||
| Pokémon | Points for Bonus | Pokémon | Points for Bonus |
|---|---|---|---|
| Pikachu |
6,000 |  Machamp |
20,000 |
 Geodude |
5,000 |  Marowak |
18,000 |
 Phanpy |
3,000 |  Farfetch'd |
16,000 |
| Blaziken |
30,000 |  Cranidos |
13,000 |
 Garchomp |
28,000 |  Camerupt |
10,000 |
 Scizor |
26,000 |  Bastiodon |
8,000 |
| Magmortar |
24,000 |  Mawile |
7,000 |
 Hitmonchan |
22,000 |  Groudon |
40,000 |
Tangrowth's Swing-Along

In Tangrowth's Swing-Along (Japanese: モジャンボのスイングレース Mojumbo's Swing Race), a series of ropes are set up along the bridge at the entrance of the mansion. The player must swing from rope to rope by swinging the Wii remote back and forth, then pressing B to jump to the next rope without falling and within the time limit. If they fall, they will be placed at the beginning of the bridge. Celebi is the best Pokémon for this attraction.
| Tangrowth's Swing-Along "Ricochet from rope to rope!" | |||
| Zone: Haunted Zone | Cost: 30 Berries | ||
| Pokémon | Time for Bonus | Pokémon | Time for Bonus |
|---|---|---|---|
| Pikachu |
0:30.20 seconds | Raichu |
0:28.80 seconds |
| Meowth |
0:30.40 seconds | Ambipom |
0:29.00 seconds |
 Pichu |
0:30.60 seconds | Primeape |
0:29.20 seconds |
| Lucario |
0:27.80 seconds | Aipom |
0:29.40 seconds |
| Infernape |
0:28.00 seconds |  Electabuzz |
0:29.60 seconds |
| Blaziken |
0:28.20 seconds | Chimchar |
0:29.80 seconds |
 Riolu |
0:28.40 seconds | Croagunk |
0:30.00 seconds |
 Sneasel |
0:28.60 seconds |  Celebi |
0:19.00 seconds |
Dusknoir's Speed Slam

Dusknoir's Speed Slam (Japanese: ヨノワールのクラッシュランニング Yonoir's Running Crash) uses the same aim as Bulbasaur's Daring Dash: to reach the end as fast as possible by shaking the Wii remote. However, the view of this six Pokémon race is different from Bulbasaur's attraction and there are obstacles that slow the Pokémon down when it hits them. There are two types of obstacles: stone walls, which will already be there at the start, and Spinarak, which come down in front of players. The player must hit these obstacles unless they use certain Ghost-type Pokémon such as Gengar which just pass through. The best Pokémon to play as in this attraction is Darkrai, who can only be befriended after every Pokémon has gotten a bonus.
| Dusknoir's Speed Slam "A rip-roaring riot of a race!" | |||
| Zone: Haunted Zone | Cost: 30 Berries | ||
| Pokémon | Time for Bonus | Pokémon | Time for Bonus |
|---|---|---|---|
| Pikachu |
0:15.50 seconds | Cranidos |
0:12.00 seconds |
 Stunky |
0:16.00 seconds |  Skuntank |
0:12.50 seconds |
 Gengar |
0:09.00 seconds |  Voltorb |
0:13.00 seconds |
 Mismagius |
0:09.50 seconds |  Gastly |
0:13.50 seconds |
| Scizor |
0:10.00 seconds |  Duskull |
0:14.00 seconds |
 Espeon |
0:10.50 seconds |  Misdreavus |
0:14.50 seconds |
 Dusknoir |
0:11.00 seconds |  Krabby |
0:15.00 seconds |
 Umbreon |
0:11.50 seconds |  Darkrai |
0:08.00 seconds |
Rotom's Spooky Shoot-'em-Up

In Rotom's Spooky Shoot-'em Up (Japanese: ロトムのどきどきシューティング Rotom's Pulse Shoot System), the player must defend themselves from an onslaught of Gastly, Haunter and occasionally one of the Rotom forms. The player points the Wii remote towards the screen and uses the on-screen crosshair to aim their attack at the attacking Pokémon, then press A to launch their attack. A radar at the bottom right corner of the screen will give the player a view of what is behind them. Rotom is the best Pokémon for this attraction.
| Rotom's Spooky Shoot-'em-Up "Keep up the zaps and you won't get trapped!" | |||
| Zone: Haunted Zone | Cost: 30 Berries | ||
| Pokémon | Score for Bonus | Pokémon | Score for Bonus |
|---|---|---|---|
| Pikachu |
2,000 | Claydol |
6,500 |
| Magnemite |
1,000 | Electabuzz |
6,000 |
 Porygon-Z |
11,000 |  Haunter |
5,500 |
| Magnezone |
10,000 |  Abra |
5,000 |
| Gengar |
9,000 |  Elekid |
4,000 |
| Magmortar |
8,500 | Mr. Mime |
3,500 |
| Electivire |
8,000 | Baltoy |
3,000 |
| Mismagius |
7,500 |  Rotom |
24,000 |
Absol's Hurdle Bounce

Absol's Hurdle Bounce (Japanese: アブソルのつぎつぎハードル Absol's Hurdle Succession) uses the same aim as Bulbasaur's Daring Dash. However, the view of this attraction is different from that of Bulbasaur's and there are hurdles that the player must jump over by pressing the 2 button. If the Pokémon hits the hurdle or trips on it while jumping, it will cause the Pokémon to slow down. The best Pokémon to play as in this attraction is Shaymin, who will start off in its Land Forme but then transforms into its Sky Forme before it starts running.
| Absol's Hurdle Bounce "Leap the hurdles! Race for the line!" | |||
| Zone: Granite Zone | Cost: 40 Berries | ||
| Pokémon | Time for Bonus | Pokémon | Time for Bonus |
|---|---|---|---|
| Pikachu |
0:18.50 seconds | Infernape |
0:14.50 seconds |
 Chikorita |
0:19.00 seconds |  Breloom |
0:15.00 seconds |
 Absol |
0:11.90 seconds | Riolu |
0:15.50 seconds |
| Lucario |
0:12.30 seconds |  Furret |
0:16.00 seconds |
| Ponyta |
0:12.70 seconds |  Mareep |
0:16.50 seconds |
 Ninetales |
0:13.10 seconds | Eevee |
0:17.50 seconds |
 Lopunny |
0:13.50 seconds |  Vulpix |
0:18.00 seconds |
| Espeon |
0:14.00 seconds |  Shaymin |
0:11.00 seconds |
Salamence's Air Ace

In Salamence's Air Ace (Japanese: ボーマンダのスーパースカイレース Bohmander's Super Sky Race), the player must fly through the air by tilting the Wii remote and destroy targets with a projectile attack fired with the 2 button. Once every Pokémon has achieved their bonus, Latios will be unlocked. He is the best choice when playing this attraction, being able to score over 25,000 points.
| Salamence's Air Ace "Hit the Targets any way you can!" | |||
| Zone: Granite Zone | Cost: 40 Berries | ||
| Pokémon | Points for Bonus | Pokémon | Points for Bonus |
|---|---|---|---|
| Pikachu* |
5,000 |  Zubat |
6,000 |
| Murkrow |
7,000 | Taillow |
8,000 |
 Golbat |
9,000 | Togekiss |
10,000 |
| Pidgeotto |
10,500 | Gliscor |
12,000 |
| Honchkrow |
13,000 | Staraptor |
14,000 |
 Aerodactyl |
15,000 |  Flygon |
16,000 |
 Dragonite |
17,000 |  Charizard |
18,000 |
 Salamence |
20,000 |  Latios |
25,000 |
Rayquaza's Balloon Panic


In Rayquaza's Balloon Panic (Japanese: レックウザのパニックバルーン Rayquaza's Balloon Panic), the player runs across a Rayquaza-shaped balloon passing through rings to gain points. At the same time, the player must dodge Electrode and Voltorb, as well as avoid falling off the balloon itself. Once the player has reached the other end of the balloon, the view will be aimed towards the back of the player and Drifloon, Drifblim, and Rayquaza will fly across the screen, holding targets the player must destroy. Occasionally, one will have a large X on it which will take away 300 points. During the first half, the player maneuvers by tilting the Wii remote and jumps with 2, while the second half has the player point the Wii remote towards the screen and fire projectiles with A. The best Pokémon for this attraction is Deoxys.
| Rayquaza's Balloon Panic "Frantic fun in the air!" | |||
| Zone: Flower Zone | Cost: 40 Berries | ||
| Pokémon | Points for Bonus | Pokémon | Points for Bonus |
|---|---|---|---|
| Pikachu |
15,000 | Gliscor |
12,000 |
 Deoxys |
54,000 | Rhyperior |
29,000 |
| Lucario |
45,000 | Absol |
28,000 |
| Glaceon |
42,000 | Breloom |
27,000 |
 Luxray |
40,000 | Mareep |
24,000 |
| Flygon |
16,000 |  Cyndaquil |
23,000 |
 Mamoswine |
34,000 |  Totodile |
22,000 |
| Infernape |
33,000 | Chikorita |
20,000 |
| Floatzel |
32,000 |  Mime Jr. |
17,000 |
PokéPark 2: Wonders Beyond

PokéPark 2: Wonders Beyond has four known Attractions, each of which can accommodate 1 to 4 players. Additionally, the only Pokémon that can participate in the attractions are Pikachu, Snivy, Tepig, and Oshawott. During the story, the attractions are used to brainwash the guests of Wish Park and, as such, the Pokémon will exhibit behavior pertaining to the attraction in their area whilst brainwashed, such as exaggerated cake cravings or aggressive behavior.
Cake Contraption
- "Aim and shoot at cake ingredients, and make a lot of delicious cake!"
In Cake Contraption (Japanese: スイーツファクトリー Sweets Factory), players point the Wii Remote at the screen and fire at various types of confectioneries.
The first half of the game is similar to Whac-A-Mole where Patrat will appear out of a number of holes in a panel, holding pistachio-like nuts which the player fires at. A Watchog will occasionally appear with a spotted nut worth bonus points. The second half has two Audino tossing lobes of dough into the air which then come falling down to the ground. The player must shoot the lobes, turning them into a cake on the first shot, then decorating them on the second shot. Yamask, Vanillite, and Cottonee occasionally fly by with gold dough worth bonus points.
Dance Inferno
- "Dance like Lopunny! Dance well, and you'll get everybody's attention!"
In Dance Inferno (Japanese: ゴージャスダンシング Gorgeous Dancing), players move the Wii remote in the motion the icons at the bottom require them to move. With better accuracy and timing comes a better score. The target score is 25,000 points.
Power Bash
- "Have a showdown with approaching Pokémon! Defeat as many Pokémon to get a high score!"
In Power Bash (Japanese: スラッシュファイト Slash Fight), players must knock out Pokémon by swinging the Wii remote, while avoiding bombs by pressing A. If the player accidentally performs the wrong action at the wrong time, they will be penalized. The target score is 10,000 points.
Flight of Fancy
- "Fly through the sky, and collect lots of gems along the way!"
In Flight of Fancy (Japanese: ワンダーフライト Wonder Flight), players tilt the Wii remote in the direction they want to move to collect gems in the sky. The target score is 15,000 points.
Gallery

Cake Contraption
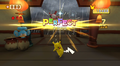
Power Bash
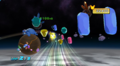
Flight of Fancy


Trivia
- Flight of Fancy bears a striking resemblance to being launched from a Launch Star in Super Mario Galaxy and one planet also bears a striking resemblance to a planet from the game.
| This article is part of Project Sidegames, a Bulbapedia project that aims to write comprehensive articles on the Pokémon Sidegames. |