Professor Oak's Laboratory: Difference between revisions
(Source?) |
Galarian Guy (talk | contribs) No edit summary |
||
| (63 intermediate revisions by 22 users not shown) | |||
| Line 1: | Line 1: | ||
{{Featured|September 2, 2009}} | {{Featured|September 2, 2009}} | ||
{{Infobox location | {{Infobox location | ||
|image= | |image=Oak's Lab Exterior LGPE.png | ||
|image_size= | |image_size=300 | ||
|type=building | |type=building | ||
|location_name=Professor Oak's Laboratory | |location_name=Professor Oak's Laboratory | ||
| Line 12: | Line 12: | ||
|map=Kanto Pallet Town Map.png | |map=Kanto Pallet Town Map.png | ||
}} | }} | ||
'''Professor Oak's Laboratory''' (Japanese: '''オーキド{{tt|研究所|けんきゅうしょ}}''' ''Okido Institute''), also called the '''Oak Pokémon Research Lab''' (Japanese: '''オーキド{{tt|博士|はかせ}}のポケモン{{tt|研究所|けんきゅうしょ}}''' ''Professor Oak's Pokémon Research Lab''), is a {{OBP|Pokémon|species}} lab located in [[Pallet Town]] that is directed by [[Professor Oak|Professor Samuel Oak]] | '''Professor Oak's Laboratory''' (Japanese: '''オーキド{{tt|研究所|けんきゅうしょ}}''' ''Okido Institute''), also called the '''Oak Pokémon Research Lab''' (Japanese: '''オーキド{{tt|博士|はかせ}}のポケモン{{tt|研究所|けんきゅうしょ}}''' ''Professor Oak's Pokémon Research Lab''), is a {{OBP|Pokémon|species}} lab located in [[Pallet Town]] that is directed by [[Professor Oak|Professor Samuel Oak]]. | ||
Its functions are to research Pokémon, unravel the mysteries surrounding them, and study their characteristics and behavior in a natural environment. Another important job is to take care of the Pokémon that belong to [[Pallet Town]]'s {{pkmn|Trainer}}s. | |||
==In the games== | The lab has many different environments for the correct development of all kinds of Pokémon. There are areas of grass, sand, rocks, and lakes to promote good interaction between the different [[type]]s of Pokémon. The laboratory has the technology to keep Pokémon healthy and to make the largest scientific investigations in the region. | ||
Professor Oak's Laboratory appears in {{game2|Red|Blue|Yellow}}, {{game2|Gold|Silver|Crystal}}, {{game|FireRed and LeafGreen|s}}, {{game|HeartGold and SoulSilver|s}}, and [[Pokémon: Let's Go, Pikachu! and Let's Go, Eevee!]]. In the [[Generation I]] games and their [[remake]]s, it is where Oak gives the {{player}} their [[ | |||
==In the core series games== | |||
Professor Oak's Laboratory appears in {{game2|Red|Blue|Yellow}}, {{game2|Gold|Silver|Crystal}}, {{game|FireRed and LeafGreen|s}}, {{game|HeartGold and SoulSilver|s}}, and [[Pokémon: Let's Go, Pikachu! and Let's Go, Eevee!]]. In the [[Generation I]] games and their [[remake]]s, it is where Oak gives the {{player}} their [[first partner Pokémon]] and a [[Pokédex]]. | |||
===Appearance=== | ===Appearance=== | ||
| Line 26: | Line 28: | ||
In {{game|Yellow}}, the lab is the same as Red and Blue, except there is only one Poké Ball on the table, and next to the table stands a trash can. | In {{game|Yellow}}, the lab is the same as Red and Blue, except there is only one Poké Ball on the table, and next to the table stands a trash can. | ||
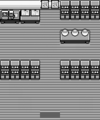
In {{game2|Gold|Silver|Crystal}}, the lab is almost unchanged except recoloring, only adding two windows, removing | In {{game2|Gold|Silver|Crystal}}, the lab is almost unchanged except recoloring, only adding two windows, removing the table that had the Pokédexes on it in the previous games, and adding another shelf to bookshelves. | ||
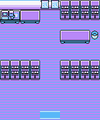
In {{game|FireRed and LeafGreen|s}}, other than the significant graphical enhancements, the laboratory also has two plants in the entrance, a mysterious machine, books on the floor, two regular machines in the corner, and a window. | In {{game|FireRed and LeafGreen|s}}, other than the significant graphical enhancements, the laboratory also has two plants in the entrance, a mysterious machine, books on the floor, two regular machines in the corner, and a window. | ||
| Line 36: | Line 38: | ||
===Items=== | ===Items=== | ||
{{itlisth|building}} | {{itlisth|building}} | ||
{{itemlist|None|Obtained from [[Professor Oak]] after obtaining the {{ga|partner Pokémon}}|LP=yes|LE=yes|display=[[Pokédex]]}} | {{itemlist|None|sprite=LGPE Pokédex|size=30px|Obtained from [[Professor Oak]] after obtaining the {{ga|partner Pokémon}}|LP=yes|LE=yes|display=[[Pokédex]]}} | ||
{{itemlist|Poké Ball|Obtained from Professor Oak after delivering him his [[Parcel]]|FR=yes|LG=yes|display={{i|Poké Ball}} ×5}} | {{itemlist|Poké Ball|Obtained from Professor Oak after delivering him his [[Parcel]]|FR=yes|LG=yes|display={{i|Poké Ball}} ×5}} | ||
{{itemlist|None|Obtained from Professor Oak after delivering him his Parcel|R=yes|B=yes|Y=yes|FR=yes|LG=yes|display=[[Pokédex]]|sprite=Kanto Pokédex III OD}} | {{itemlist|None|Obtained from Professor Oak after delivering him his Parcel|R=yes|B=yes|Y=yes|FR=yes|LG=yes|display=[[Pokédex]]|sprite=Kanto Pokédex III OD}} | ||
{{itemlist|Razz Berry|Obtained from Professor Oak after delivering him his Parcel|LP=yes|LE=yes|display=[[ | {{itemlist|Razz Berry|Obtained from Professor Oak after delivering him his Parcel|LP=yes|LE=yes|display=[[Razz Berry]] ×20}} | ||
{{itemlist|Poké Ball|Obtained from Professor Oak after defeating {{ga|Blue}} on {{rt|22|Kanto}}, if the {{player}} has no {{i|Poké Ball}}s in their [[Bag]] and has added | {{itemlist|Poké Ball|Obtained from Professor Oak after defeating {{ga|Blue}} at the optional battle on {{rt|22|Kanto}}, if the {{player}} has no regular {{i|Poké Ball}}s in their [[Bag]] and has not added any caught data to the [[Pokédex]] ([[permanently missable items|permanently missed]] if the player skips this battle by earning the {{badge|Boulder}} first, or attempts to {{DL|List of glitches (Generation I)|Professor Oak's Poké Balls glitch|receive them with a full Bag}})|R=yes|B=yes|Y=yes|display={{i|Poké Ball}} ×5}} | ||
{{itemlist|Poké Ball|Obtained from Professor Oak either after defeating {{ga|Blue}} at the optional battle on {{rt|22|Kanto}} or after battling Blue in [[Cerulean City]] (regardless of winning or losing), if the {{player}} has no regular {{i|Poké Ball}}s in their [[Bag]] and has not added any caught data to the [[List of Pokémon by Kanto Pokédex number|Kanto Pokédex]] (permanently missed if the player earns the {{badge|Earth}} first)|FR=yes|LG=yes|display={{i|Poké Ball}} ×5}} | |||
{{itemlist|Key Stone|Obtained from Blue after earning seven [[Badge]]s and meeting {{ga|Trace}} in front of the [[Viridian Gym]]|LP=yes|LE=yes}} | {{itemlist|Key Stone|Obtained from Blue after earning seven [[Badge]]s and meeting {{ga|Trace}} in front of the [[Viridian Gym]]|LP=yes|LE=yes}} | ||
{{itemlist|Venusaurite|Obtained from Blue after earning seven Badges and meeting Trace in front of the Viridian Gym|LP=yes|LE=yes}} | {{itemlist|Venusaurite|Obtained from Blue after earning seven Badges and meeting Trace in front of the Viridian Gym|LP=yes|LE=yes}} | ||
| Line 48: | Line 51: | ||
{{itemlist|None|Obtained from Professor Oak after entering the [[Hall of Fame]] and catching at least 60 {{OBP|Pokémon|species}}|FR=yes|LG=yes|display=[[National Pokédex]]|sprite=Kanto Pokédex III OD}} | {{itemlist|None|Obtained from Professor Oak after entering the [[Hall of Fame]] and catching at least 60 {{OBP|Pokémon|species}}|FR=yes|LG=yes|display=[[National Pokédex]]|sprite=Kanto Pokédex III OD}} | ||
{{itemlist|HM Normal|Reward from Professor Oak after obtaining all 16 Badges|HG=yes|SS=yes|display={{HM|08|Rock Climb}}}} | {{itemlist|HM Normal|Reward from Professor Oak after obtaining all 16 Badges|HG=yes|SS=yes|display={{HM|08|Rock Climb}}}} | ||
{{itemlist|Jade Orb|Obtained from Professor Oak after | {{itemlist|Jade Orb|Obtained from Professor Oak after showing him the {{p|Groudon}} and {{p|Kyogre}} from the [[Embedded Tower]]|HG=yes|SS=yes}} | ||
{{itlistfoot|building}} | {{itlistfoot|building}} | ||
| Line 54: | Line 57: | ||
====Generation I==== | ====Generation I==== | ||
{{Catch/header|building|no}} | {{Catch/header|building|no}} | ||
{{Catch/div|building| | {{Catch/div|building|First partner Pokémon}} | ||
{{Catch/entry1|001|Bulbasaur|yes|yes|no| | {{Catch/entry1|001|Bulbasaur|yes|yes|no|Gift|5|One|type1=Grass|type2=Poison}} | ||
{{Catch/entry1|004|Charmander|yes|yes|no| | {{Catch/entry1|004|Charmander|yes|yes|no|Gift|5|One|type1=Fire}} | ||
{{Catch/entry1|007|Squirtle|yes|yes|no| | {{Catch/entry1|007|Squirtle|yes|yes|no|Gift|5|One|type1=Water}} | ||
{{Catch/entry1|025|Pikachu|no|no|yes| | {{Catch/entry1|025|Pikachu|no|no|yes|Gift|5|One|type1=Electric}} | ||
{{Catch/footer|building}} | {{Catch/footer|building}} | ||
====Generation III==== | ====Generation III==== | ||
{{Catch/header|building|no}} | {{Catch/header|building|no}} | ||
{{Catch/div|building| | {{Catch/div|building|First partner Pokémon}} | ||
{{Catch/entryfl|001|Bulbasaur|yes|yes| | {{Catch/entryfl|001|Bulbasaur|yes|yes|Gift|5|One|type1=Grass|type2=Poison}} | ||
{{Catch/entryfl|004|Charmander|yes|yes| | {{Catch/entryfl|004|Charmander|yes|yes|Gift|5|One|type1=Fire}} | ||
{{Catch/entryfl|007|Squirtle|yes|yes| | {{Catch/entryfl|007|Squirtle|yes|yes|Gift|5|One|type1=Water}} | ||
{{Catch/footer|building|2}} | {{Catch/footer|building|2}} | ||
====Generation IV==== | ====Generation IV==== | ||
{{Catch/header|building|4}} | {{Catch/header|building|4}} | ||
{{Catch/div|building|Gift Pokémon}} | {{Catch/div|building|Gift Pokémon<br><small>After defeating {{color2|000|Red (game)|Red}}</small>}} | ||
{{Catch/entryhs|001|Bulbasaur|yes|yes|Gift|5|all= | {{Catch/entryhs|001|Bulbasaur|yes|yes|Gift|5|all=One|type1=Grass|type2=Poison}} | ||
{{Catch/entryhs|004|Charmander|yes|yes|Gift|5|all= | {{Catch/entryhs|004|Charmander|yes|yes|Gift|5|all=One|type1=Fire}} | ||
{{Catch/entryhs|007|Squirtle|yes|yes|Gift|5|all= | {{Catch/entryhs|007|Squirtle|yes|yes|Gift|5|all=One|type1=Water}} | ||
{{Catch/footer|building|2}} | {{Catch/footer|building|2}} | ||
====Generation VII==== | ====Generation VII==== | ||
{{Catch/header|building|no}} | {{Catch/header|building|no}} | ||
{{Catch/div|building| | {{Catch/div|building|First partner Pokémon}} | ||
{{Catch/entrype|025Pa|Pikachu|yes|no| | {{Catch/entrype|025Pa|Pikachu|yes|no|Gift|5|One|type1=Electric|form=Partner}} | ||
{{Catch/entrype|133Pa|Eevee|no|yes| | {{Catch/entrype|133Pa|Eevee|no|yes|Gift|5|One|form=Partner}} | ||
{{Catch/footer|building|2}} | {{Catch/footer|building|2}} | ||
===Trainers=== | ===Trainers=== | ||
In every game where the player gets their | In every game where the player gets their first partner Pokémon at Oak's, they will also have their first Trainer battle at the Laboratory against their [[rival]]. | ||
====Generation I==== | ====Generation I==== | ||
=====Pokémon Red and Blue===== | =====Pokémon Red and Blue===== | ||
{{ | {{MSP/3|001|Bulbasaur}} If the {{player}} chose {{p|Bulbasaur}}: | ||
{{Party/Single | {{Party/Single | ||
|color={{blue color}} | |color={{blue color}} | ||
| Line 110: | Line 113: | ||
{{Party/Footer}} | {{Party/Footer}} | ||
{{ | {{MSP/3|004|Charmander}} If the {{player}} chose {{p|Charmander}}: | ||
{{Party/Single | {{Party/Single | ||
|color={{blue color}} | |color={{blue color}} | ||
| Line 131: | Line 134: | ||
{{Party/Footer}} | {{Party/Footer}} | ||
{{ | {{MSP/3|007|Squirtle}} If the {{player}} chose {{p|Squirtle}}: | ||
{{Party/Single | {{Party/Single | ||
|color={{blue color}} | |color={{blue color}} | ||
| Line 177: | Line 180: | ||
====Generation III==== | ====Generation III==== | ||
{{ | {{MSP/3|001|Bulbasaur}} If the {{player}} chose {{p|Bulbasaur}}: | ||
{{Party/Single | {{Party/Single | ||
|color={{blue color}} | |color={{blue color}} | ||
| Line 202: | Line 205: | ||
{{Party/Footer}} | {{Party/Footer}} | ||
{{ | {{MSP/3|004|Charmander}} If the {{player}} chose {{p|Charmander}}: | ||
{{Party/Single | {{Party/Single | ||
|color={{blue color}} | |color={{blue color}} | ||
| Line 227: | Line 230: | ||
{{Party/Footer}} | {{Party/Footer}} | ||
{{ | {{MSP/3|007|Squirtle}} If the {{player}} chose {{p|Squirtle}}: | ||
{{Party/Single | {{Party/Single | ||
|color={{blue color}} | |color={{blue color}} | ||
| Line 253: | Line 256: | ||
====Generation VII==== | ====Generation VII==== | ||
{{MSP|025Pa|Pikachu}} In [[Pokémon: Let's Go, Pikachu! and Let's Go, Eevee!|Let's Go, Pikachu!]]: | {{MSP/PE|025Pa|Pikachu}} In [[Pokémon: Let's Go, Pikachu! and Let's Go, Eevee!|Let's Go, Pikachu!]]: | ||
{{Party/Single | {{Party/Single | ||
|color={{green color}} | |color={{green color}} | ||
| Line 267: | Line 270: | ||
|location=Professor Oak's Laboratory | |location=Professor Oak's Laboratory | ||
|pokemon=1}} | |pokemon=1}} | ||
| style="margin:auto" |{{Pokémon/7 | | style="margin:auto" |{{Pokémon/7/LG | ||
|ndex=133 | |ndex=133 | ||
|pokemon=Eevee | |pokemon=Eevee | ||
| Line 277: | Line 280: | ||
{{Party/Footer}} | {{Party/Footer}} | ||
{{MSP|133Pa|Eevee}} In [[Pokémon: Let's Go, Pikachu! and Let's Go, Eevee!|Let's Go, Eevee!]]: | {{MSP/PE|133Pa|Eevee}} In [[Pokémon: Let's Go, Pikachu! and Let's Go, Eevee!|Let's Go, Eevee!]]: | ||
{{Party/Single | {{Party/Single | ||
|color={{green color}} | |color={{green color}} | ||
| Line 291: | Line 294: | ||
|location=Professor Oak's Laboratory | |location=Professor Oak's Laboratory | ||
|pokemon=1}} | |pokemon=1}} | ||
| style="margin:auto" |{{Pokémon/7 | | style="margin:auto" |{{Pokémon/7/LG | ||
|ndex=025 | |ndex=025 | ||
|pokemon=Pikachu | |pokemon=Pikachu | ||
| Line 310: | Line 313: | ||
File:Professor Oak Lab FRLG.png|FireRed and LeafGreen | File:Professor Oak Lab FRLG.png|FireRed and LeafGreen | ||
File:Professor Oak Lab HGSS.png|HeartGold and SoulSilver | File:Professor Oak Lab HGSS.png|HeartGold and SoulSilver | ||
File:Oak's Lab Exterior LGPE.png|Let's Go, Pikachu! and Let's Go, Eevee! | |||
</gallery> | </gallery> | ||
| Line 319: | Line 323: | ||
File:Professor Oak Lab inside FRLG.png|FireRed and LeafGreen | File:Professor Oak Lab inside FRLG.png|FireRed and LeafGreen | ||
File:Professor Oak Lab inside HGSS.png|HeartGold and SoulSilver | File:Professor Oak Lab inside HGSS.png|HeartGold and SoulSilver | ||
File:Oak's Lab Entrance LGPE.png|Let's Go, Pikachu! and Let's Go, Eevee! | |||
</gallery> | </gallery> | ||
==In spin-off games== | ==In the side series games== | ||
===Pokémon Stadium=== | |||
{{main|Pokémon Lab (Stadium)}} | |||
Professor Oak's Laboratory, known as the "Pokémon Lab", also appears in {{eng|Pokémon Stadium}}. In it, the player can interact with a copy of {{game|Red and Blue|s|Pokémon Red, Blue}}, or {{v2|Yellow}} inserted into the [[Transfer Pak]], allowing them to view their {{OBP|Pokédex|Stadium}}, organize the [[item]]s in their [[PC]], access their [[Pokémon Storage System|Box]], [[trade]] Pokémon, and send prize Pokémon received at the [[Gym Leader Castle]] into the inserted game. | |||
Oak has another Lab in [[White City]] in [[Pokémon Stadium 2]], which has the same basic functionality expanded to support {{game2|Gold|Silver|Crystal}}. | |||
==In the spin-off games== | |||
===Pokémon Puzzle League=== | ===Pokémon Puzzle League=== | ||
In [[Pokémon Puzzle League]] for the [[Nintendo 64]], an area called "Prof. Oak's Labs" acts as tutorial area. Professor Oak will teach the player how to play the game. | In [[Pokémon Puzzle League]] for the [[Nintendo 64]], an area called "Prof. Oak's Labs" acts as tutorial area. Professor Oak will teach the player how to play the game. | ||
===Pokémon Snap=== | ===Pokémon Snap=== | ||
Professor Oak's Laboratory also appears in [[Pokémon Snap]], shown as the background of the main menu of the game. [[Todd Snap]] reports back here regularly to show his photos to Professor Oak. Presumably, the professor keeps information like the | [[File:Snap Professor Oak.png|thumb|200px|The lab in Pokémon Snap]] | ||
Professor Oak's Laboratory also appears in [[Pokémon Snap]], shown as the background of the main menu of the game. [[Todd Snap]] reports back here regularly to show his photos to Professor Oak. Presumably, the professor keeps information like the [[Pokémon Report]], [[Pokémon Album]], and all information on [[Pokémon sign]]s in his laboratory. It appears the same way in this game that it does in the {{pkmn|anime}}. | |||
===Pokémon | ===[[Pokémon Masters EX]]=== | ||
Professor Oak's Laboratory | Artwork of various depictions of Professor Oak's Laboratory is seen in {{mas|Professor Oak}} and {{mas|Ash}}'s mindscapes. | ||
{| style="background: #7B30B2; {{roundy}}; border: #7B30B2;" | |||
| | |||
{| style="background: #AB60E2; {{roundy}}; border: #AB60E2;" | |||
|- style="text-align:center" | |||
| | |||
{| style="background: #{{psychic color light}}; {{roundy}}; border: #{{psychic color light}}; padding: 0px 5px 5px 5px" | |||
|- | |||
|<big>'''{{color2|000|Professor_Oak (Masters)#Mew (Pre-Sync Move → Post-Sync Move)|Professor Oak & Mew}}'''</big> | |||
|- | |||
| [[File:Professor Oak Mindscape.png|200px]] | |||
|} | |||
| | |||
{| style="background: #{{electric color light}}; {{roundy}}; border: #{{electric color light}}; padding: 0px 5px 5px 5px" | |||
|- | |||
|<big>'''{{color2|000|Ash (Masters)#Pikachu|Ash & Pikachu}}'''</big> | |||
|- | |||
| [[File:Ash Mindscape.png|200px]] | |||
|} | |||
|} | |||
|} | |||
==In the anime== | ==In the anime== | ||
=== | [[File:Professor Oaks Laboratory.png|thumb|250px|left|Professor Oak's Laboratory as it appears in the anime]] | ||
[[File:Oak Lobby. | ===Main series=== | ||
[[File:Oak Lobby.png|thumb|250px|Ash and his friends talking in the lobby]] | |||
The laboratory debuted in the first episode, ''[[EP001|Pokémon - I Choose You!]]'', when {{Ash}} received his {{AP|Pikachu}}. Since then, it has been seen in many episodes, mostly in the start and ending of Ash's {{pkmn|journey}} through a [[region]], but also in [[Pokémon Chronicles]] and in the {{pkmn|movie}}s. The building stands out in [[Pallet Town]] for its wind turbine. | The laboratory debuted in the first episode, ''[[EP001|Pokémon - I Choose You!]]'', when {{Ash}} received his {{AP|Pikachu}}. Since then, it has been seen in many episodes, mostly in the start and ending of Ash's {{pkmn|journey}} through a [[region]], but also in [[Pokémon Chronicles]] and in the {{pkmn|movie}}s. The building stands out in [[Pallet Town]] for its wind turbine. | ||
Every time Ash {{pkmn2|caught|catches}} a {{OBP|Pokémon|species}} when he has already a full [[party]], the new Pokémon is automatically transported here. Ash also has a habit of leaving {{cat|Ash's Pokémon|all of his Pokémon}} besides Pikachu here each time he leaves for a new region, starting with [[Hoenn]]. | Every time Ash {{pkmn2|caught|catches}} a {{OBP|Pokémon|species}} when he has already a full [[party]], the new Pokémon is automatically transported here. Ash also has a habit of leaving {{cat|Ash's Pokémon|all of his Pokémon}} besides Pikachu here each time he leaves for a new region, starting with [[Hoenn]]. | ||
Since ''[[EP116|The Rivalry Revival]]'', | Since ''[[EP116|The Rivalry Revival]]'', {{Tracey}} has been working at the lab as an [[Professors' aides|assistant]] to {{an|Professor Oak}}. In ''[[JN147|The Rainbow and the Pokémon Master!]]'', Ash briefly filled in for Tracey while he traveled for a few days. | ||
====Structure==== | ====Structure==== | ||
=====Infrastructure===== | =====Infrastructure===== | ||
[[File:Oak storage room. | [[File:Oak storage room.png|thumb|left|250px|[[Butch]] and [[Cassidy]] find the storage room]] | ||
The lab is composed of two floors. Inside the entrance door is a hallway with several doors, and to the left is a chest of drawers and the stairway to the second floor. | The lab is composed of two floors. Inside the entrance door is a hallway with several doors, and to the left is a chest of drawers and the stairway to the second floor. | ||
| Line 356: | Line 388: | ||
{{-}} | {{-}} | ||
[[File:Oaks Lab - Research Room.png|thumb|center|450px|A full view of the research floor]] | [[File:Oaks Lab - Research Room.png|thumb|center|450px|A full view of the research floor]] | ||
=====Superstructure===== | =====Superstructure===== | ||
| Line 362: | Line 393: | ||
[[File:Oak Corral.png|thumb|center|500px|A panoramic view to the Oak Corral]] | [[File:Oak Corral.png|thumb|center|500px|A panoramic view to the Oak Corral]] | ||
=== | =====Trainer's Pokémon residing at the Lab===== | ||
{| width="100%" | |||
|- | |||
| {{InactivePoké|Gary|Krabby|Gary Krabby.png|water|link=Gary Oak#Krabby}} | |||
| {{InactivePoké|Ash|Kingler|Ash Kingler.png|water|fir=Krabby}} | |||
| {{InactivePoké|Ash|Muk|Ash Muk.png|poison}} | |||
| {{InactivePoké|Ash|Tauros|Ash Tauros.png|normal|disp=Tauros (×30)|size=217px}} ♂ | |||
|- | |||
| {{InactivePoké|Gary|Dodrio|Gary Dodrio.png|normal|flying|fir=Doduo|link=Gary Oak#Dodrio}} | |||
| {{InactivePoké|Ash|Snorlax|Ash Snorlax.png|normal|size=200px}} | |||
| {{InactivePoké|Ash|Heracross|Ash Heracross.png|bug|fighting|size=200px}} ♂ | |||
| {{InactivePoké|Ash|Noctowl|Ash Noctowl.png|normal|flying|size=200px}} {{shinystar}} | |||
|- | |||
| {{InactivePoké|Ash|Bayleef|Ash Bayleef.png|grass|size=200px}} ♀ | |||
| {{InactivePoké|Ash|Bulbasaur|Ash Bulbasaur.png|grass|poison|size=200px}} | |||
| {{InactivePoké|Ash|Quilava|Ash Quilava.png|fire|fir=Cyndaquil|size=200px}} | |||
| {{InactivePoké|Ash|Totodile|Ash Totodile.png|water|size=200px}} ♂ | |||
|- | |||
| {{InactivePoké|Ash|Donphan|Ash Donphan.png|ground|fir=Phanpy|size=200px}} | |||
| {{InactivePoké|Gary|Nidoking|Gary Nidoking.png|poison|ground|link=Gary Oak#Nidoking|size=160px}} ♂ | |||
| {{InactivePoké|Gary|Nidoqueen|Gary Nidoqueen.png|poison|ground|link=Gary Oak#Nidoqueen}} ♀ | |||
| {{InactivePoké|Gary|Magmar|Gary Magmar.png|fire|link=Gary Oak#Magmar}} | |||
|- | |||
| {{InactivePoké|Gary|Scizor|Gary Scizor.png|bug|steel|link=Gary Oak#Scizor}} | |||
| {{InactivePoké|Gary|Golem|Gary Golem.png|rock|ground|link=Gary Oak#Golem}} | |||
| {{InactivePoké|Gary|Pinsir|Gary Unseen Silver Conference Pokémon.png|bug|link=Pinsir (Pokémon)}} | |||
| {{InactivePoké|Gary|Houndoom|Gary Unseen Silver Conference Pokémon.png|dark|fire|link=Houndoom (Pokémon)}} | |||
|- | |||
| {{InactivePoké|Gary|Fearow|Gary Unseen Silver Conference Pokémon.png|normal|flying|link=Fearow (Pokémon)}} | |||
| {{InactivePoké|Gary|Alakazam|Gary Unseen Silver Conference Pokémon.png|psychic|link=Alakazam (Pokémon)}} | |||
| {{InactivePoké|Gary|Skarmory|Gary Johto Pokémon.png|steel|flying|link=Skarmory (Pokémon)}} | |||
| {{InactivePoké|Gary|Kingdra|Gary Johto Pokémon.png|water|dragon|link=Kingdra (Pokémon)}} | |||
|- | |||
| {{InactivePoké|Ash|Torkoal|Ash Torkoal.png|fire|size=200px}} | |||
| {{InactivePoké|Ash|Glalie|Ash Glalie.png|ice|size=156px}} | |||
| {{InactivePoké|Ash|Swellow|Ash Swellow.png|normal|flying|size=200px}} | |||
| {{InactivePoké|Ash|Sceptile|Ash Sceptile.png|grass|size=200px}} | |||
|- | |||
| {{InactivePoké|Ash|Corphish|Ash Corphish.png|water|size=200px}} ♂ | |||
| {{InactivePoké|Ash|Staraptor|Ash Staraptor.png|normal|flying|size=200px}} | |||
| {{InactivePoké|Ash|Torterra|Ash Torterra.png|grass|ground|size=200px}} ♂ | |||
| {{InactivePoké|Ash|Infernape|Ash Infernape.png|fire|fighting|size=200px}} ♂ | |||
|- | |||
| {{InactivePoké|Ash|Buizel|Ash Buizel.png|water|size=200px}} ♂ | |||
| {{InactivePoké|Ash|Gible|Ash Gible.png|dragon|ground|size=200px}} ♂ | |||
| {{InactivePoké|Ash|Gliscor|Ash Gliscor.png|ground|flying|size=200px}} | |||
| {{InactivePoké|Ash|Unfezant|Ash Unfezant.png|normal|flying|size=200px}} ♀ | |||
|- | |||
| {{InactivePoké|Ash|Leavanny|Ash Leavanny.png|bug|grass|size=200px}} ♂ | |||
| {{InactivePoké|Ash|Palpitoad|Ash Palpitoad.png|water|ground|size=200px}} ♂ | |||
| {{InactivePoké|Ash|Boldore|Ash Boldore.png|rock|size=200px}} | |||
| {{InactivePoké|Ash|Krookodile|Ash Krookodile.png|ground|dark|size=200px}} ♂ | |||
|- | |||
| {{InactivePoké|Ash|Charizard|Ash Charizard.png|fire|flying|size=200px}} ♂ | |||
| {{InactivePoké|Ash|Oshawott|Ash Oshawott.png|water|size=200px}} ♂ | |||
| {{InactivePoké|Ash|Pignite|Ash Pignite.png|fire|fighting|size=200px}} ♂ | |||
| {{InactivePoké|Ash|Snivy|Ash Snivy.png|grass|grass|size=200px}} ♀ | |||
|- | |||
| {{InactivePoké|Ash|Scraggy|Ash Scraggy.png|dark|fighting|size=200px}} ♂ | |||
| {{InactivePoké|Ash|Talonflame|Ash Talonflame.png|fire|flying|size=200px}} | |||
| {{InactivePoké|Ash|Hawlucha|Ash Hawlucha.png|fighting|flying|size=200px}} ♂ | |||
| {{InactivePoké|Ash|Noivern|Ash Noivern.png|flying|dragon|size=200px}} ♂ | |||
|- | |||
| {{InactivePoké|Ash|Dragonite|Ash Dragonite.png|dragon|flying|size=200px}} | |||
| {{InactivePoké|Ash|Gengar|Ash Gengar.png|ghost|poison|size=200px}} | |||
| {{InactivePoké|Ash|Lucario|Ash Lucario.png|fighting|steel|size=200px}} | |||
| {{InactivePoké|Ash|Sirfetch'd|Ash Sirfetch'd.png|fighting|size=200px}} | |||
|- | |||
| {{InactivePoké|Ash|Dracovish|Ash Dracovish.png|water|dragon|size=200px}} | |||
| {{InactivePoké|Ash|Pidgeot|Ash Pidgeot.png|normal|flying|size=200px}} | |||
|} | |||
=====Other===== | |||
There are various Pokémon that live on the Oak Corral. Only a handful have been seen but there are various kinds of different Pokémon. People like Professor Oak and {{Tracey}} care for them. Other Trainers' Pokémon reside here such as {{Gary}}'s. | |||
{| width="100%" | |||
|- | |||
| {{InactivePoké|Professor Oak|Squirtle|Professor Oak Laboratory Squirtle Horsea Goldeen Seadra.png|water|link=no}} | |||
| {{InactivePoké|Professor Oak|Caterpie|Professor Oak Laboratory Caterpie.png|bug|link=no}} | |||
| {{InactivePoké|Professor Oak|Butterfree|Professor Oak Laboratory Various SM042.png|bug|flying|link=no}} | |||
| {{InactivePoké|Professor Oak|Kakuna|Professor Oak Laboratory Kakuna.png|bug|poison|link=no|size=115px}} | |||
| {{InactivePoké|Professor Oak|Beedrill|Professor Oak Laboratory Beedrill.png|bug|poison|link=no|size=115px}} | |||
| {{InactivePoké|Professor Oak|Pidgey|Professor Oak Laboratory Pidgey.png|normal|flying|link=no}} | |||
|- | |||
| {{InactivePoké|Professor Oak|Pidgeotto|Professor Oak Laboratory Pidgeotto Spearow.png|normal|flying|link=no|size=115px}} | |||
| {{InactivePoké|Professor Oak|Rattata|Professor Oak Laboratory various 1.png|normal|link=no|size=115px}} | |||
| {{InactivePoké|Professor Oak|Raticate|Professor Oak Laboratory various 1.png|normal|link=no|size=115px}} | |||
| {{InactivePoké|Professor Oak|Spearow|Professor Oak Laboratory Pidgeotto Spearow.png|normal|flying|link=no|size=115px}} | |||
| {{InactivePoké|Professor Oak|Raichu|Professor Oak Laboratory Raichu.png|electric|link=no}} | |||
| {{InactivePoké|Professor Oak|Sandshrew|Professor Oak Laboratory Sandshrew.png|ground|link=no|size=115px}} | |||
|- | |||
| {{InactivePoké|Professor Oak|Sandslash|Professor Oak Laboratory Sandslash.png|ground|link=no|size=115px}} | |||
| {{InactivePoké|Professor Oak|Nidoran♀|Professor Oak Laboratory various 1.png|poison|link=no|size=115px}} | |||
| {{InactivePoké|Professor Oak|Nidoran♂|Professor Oak Laboratory various 1.png|poison|link=no|size=115px}} | |||
| {{InactivePoké|Professor Oak|Ninetales|Ninetales SM042.png|fire|link=no}} | |||
| {{InactivePoké|Professor Oak|Oddish|Professor Oak Laboratory Bellsprout Oddish Exeggcute Tangela.png|grass|poison|link=no}} | |||
| {{InactivePoké|Professor Oak|Gloom|Professor Oak Laboratory Gloom Vileplume.png|grass|poison|link=no}} | |||
|- | |||
| {{InactivePoké|Professor Oak|Vileplume|Professor Oak Laboratory Gloom Vileplume.png|grass|poison|link=no}} | |||
| {{InactivePoké|Professor Oak|Paras|Professor Oak Laboratory Various SM042.png|bug|grass|link=no}} | |||
| {{InactivePoké|Professor Oak|Parasect|Professor Oak Laboratory various 1.png|bug|grass|link=no|size=115px}} | |||
| {{InactivePoké|Professor Oak|Dugtrio|Dugtrio anime.png|ground|link=no}} | |||
| {{InactivePoké|Professor Oak|Dugtrio|Dugtrio anime.png|ground|steel|disp=Alolan Dugtrio|link=no}} | |||
| {{InactivePoké|Professor Oak|Psyduck|Professor Oak Laboratory Seel Magikarp Goldeen Psyduck.png|water|link=no}} | |||
|- | |||
| {{InactivePoké|Professor Oak|Mankey|Mankey Primeape banana.png|fighting|link=no|size=115px}} | |||
| {{InactivePoké|Professor Oak|Primeape|Mankey Primeape banana.png|fighting|link=no|size=115px}} | |||
| {{InactivePoké|Professor Oak|Growlithe|Professor Oak Laboratory various 1.png|fire|link=no|size=115px}} | |||
| {{InactivePoké|Professor Oak|Poliwag|Professor Oak Laboratory Poliwag Poliwhirl Goldeen Magikarp.png|water|link=no}} | |||
| {{InactivePoké|Professor Oak|Poliwhirl|Professor Oak Laboratory Poliwhirl Goldeen Magikarp.png|water|link=no}} | |||
| {{InactivePoké|Professor Oak|Bellsprout|Professor Oak Laboratory Bellsprout Oddish Exeggcute Tangela.png|grass|poison|link=no}} | |||
|- | |||
| {{InactivePoké|Professor Oak|Weepinbell|Professor Oak Laboratory Bellsprout Weepinbell Victreebel.png|grass|poison|link=no}} | |||
| {{InactivePoké|Professor Oak|Victreebel|Professor Oak Laboratory Bellsprout Weepinbell Victreebel.png|grass|poison|link=no}} | |||
| {{InactivePoké|Professor Oak|Tentacool|Professor Oak Laboratory Slowpoke Magikarp Corsola Tentacool Seaking.png|water|poison|link=no}} | |||
| {{InactivePoké|Professor Oak|Tentacruel|Professor Oak Laboratory Slowpoke Magikarp Corsola Tentacool Seaking.png|water|poison|link=no}} | |||
| {{InactivePoké|Professor Oak|Geodude|Professor Oak Laboratory Geodude.png|rock|ground|link=no|size=115px}} | |||
| {{InactivePoké|Professor Oak|Geodude|Geodude anime.png|rock|electric|disp=Alolan Geodude|link=no}} | |||
|- | |||
| {{InactivePoké|Professor Oak|Ponyta|Professor Oak Laboratory Ponyta Rapidash.png|fire|link=no|size=115px}} | |||
| {{InactivePoké|Professor Oak|Rapidash|Rapidash anime.png|fire|link=no}} | |||
| {{InactivePoké|Professor Oak|Slowpoke|Professor Oak Laboratory Slowpoke Magikarp Corsola Tentacool Seaking.png|water|psychic|link=no}} | |||
| {{InactivePoké|Professor Oak|Dodrio|Professor Oak Laboratory Dodrio.png|Normal|Flying|link=no|size=115px}} | |||
| {{InactivePoké|Professor Oak|Seel|Professor Oak Laboratory Seel Magikarp Goldeen Psyduck.png|water|link=no}} | |||
| {{InactivePoké|Professor Oak|Dewgong|Dewgong anime.png|water|ice|link=no}} | |||
|- | |||
| {{InactivePoké|Professor Oak|Muk|Muk and Alolan Muk anime.png|poison|dark|disp=Alolan Muk|link=no}} | |||
| {{InactivePoké|Professor Oak|Onix|Professor Oak Laboratory Onix.png|rock|ground|link=no}} | |||
| {{InactivePoké|Professor Oak|Krabby|Professor Oak Laboratory Krabby Staryu Corsola.png|water|link=no}} | |||
| {{InactivePoké|Professor Oak|Voltorb|Professor Oak Laboratory Voltorb Electrode.png|electric|link=no|size=115px}} | |||
| {{InactivePoké|Professor Oak|Electrode|Professor Oak Laboratory Voltorb Electrode.png|electric|link=no|size=115px}} | |||
| {{InactivePoké|Professor Oak|Exeggcute|Professor Oak Laboratory Bellsprout Oddish Exeggcute Tangela.png|grass|psychic|link=no}} | |||
|- | |||
| {{InactivePoké|Professor Oak|Exeggutor|Exeggutor anime.png|grass|psychic|link=no}} | |||
| {{InactivePoké|Professor Oak|Exeggutor|Exeggutor anime.png|grass|dragon|disp=Alolan Exeggutor|link=no}} | |||
| {{InactivePoké|Professor Oak|Marowak|Professor Oak Lab Marowak.png|ground|link=no}} | |||
| {{InactivePoké|Professor Oak|Rhyhorn|Professor Oak Laboratory Onix Exeggute Rhyhorn Rhydon.png|ground|rock|link=no|size=115px}} | |||
| {{InactivePoké|Professor Oak|Rhydon|Professor Oak Laboratory Onix Exeggute Rhyhorn Rhydon.png|ground|rock|link=no|size=115px}} | |||
| {{InactivePoké|Professor Oak|Tangela|Professor Oak Laboratory Bellsprout Oddish Exeggcute Tangela.png|grass|link=no}} | |||
|- | |||
| {{InactivePoké|Professor Oak|Horsea|Professor Oak Laboratory Horsea.png|water|link=no}} | |||
| {{InactivePoké|Professor Oak|Seadra|Professor Oak Laboratory Squirtle Horsea Goldeen Seadra.png|water|link=no}} | |||
| {{InactivePoké|Professor Oak|Goldeen|Professor Oak Laboratory Poliwhirl Goldeen Magikarp.png|water|link=no}} | |||
| {{InactivePoké|Professor Oak|Seaking|Professor Oak Laboratory Slowpoke Magikarp Corsola Tentacool Seaking.png|water|link=no}} | |||
| {{InactivePoké|Professor Oak|Staryu|Professor Oak Laboratory Krabby Staryu Corsola.png|water|link=no}} | |||
| {{InactivePoké|Professor Oak|Starmie|Professor Oak Laboratory Starmie.png|water|psychic|link=no}} | |||
|- | |||
| {{InactivePoké|Professor Oak|Magikarp|Professor Oak Laboratory Poliwhirl Goldeen Magikarp.png|water|link=no}} | |||
| {{InactivePoké|Professor Oak|Gyarados|Professor Oak Laboratory Gyarados.png|water|flying|link=no}} | |||
| {{InactivePoké|Professor Oak|Snorlax|Professor Oak Laboratory Snorlax.png|normal|link=no|size=115px}} | |||
| {{InactivePoké|Professor Oak|Hoothoot|Professor Oak Laboratory Hoothoot.png|normal|flying|link=no}} | |||
| {{InactivePoké|Professor Oak|Quagsire|Professor Oak Laboratory various 3.png|water|ground|link=no|size=115px}} | |||
| {{InactivePoké|Professor Oak|Hoppip|Professor Oak Laboratory various 3.png|grass|flying|link=no|size=115px}} | |||
|- | |||
| {{InactivePoké|Professor Oak|Skiploom|Professor Oak Laboratory various 3.png|grass|flying|link=no|size=115px}} | |||
| {{InactivePoké|Professor Oak|Jumpluff|Professor Oak Laboratory Jumpluff.png|grass|flying|link=no|size=115px}} | |||
| {{InactivePoké|Professor Oak|Bellossom|Professor Oak Laboratory Bellossom.png|grass|link=no}} | |||
| {{InactivePoké|Professor Oak|Corsola|Professor Oak Laboratory Slowpoke Magikarp Corsola Tentacool Seaking.png|water|rock|link=no}} | |||
| {{InactivePoké|Professor Oak|Taillow|Professor Oak Laboratory Taillow.png|normal|flying|link=no}} | |||
| {{InactivePoké|Professor Oak|Starly|Professor Oak Laboratory Starly.png|normal|flying|link=no}} | |||
|- | |||
| {{InactivePoké|Professor Oak|Pidove|Professor Oak Laboratory Pidove.png|normal|flying|link=no}} | |||
|} | |||
=====Previously resided at the Lab===== | |||
{| width="100%" | |||
|- | |||
| {{InactivePoké|Gary|Arcanine|Gary Arcanine.png|fire|size=200px}} | |||
| {{InactivePoké|Gary|Umbreon|Gary Umbreon.png|dark|size=200px}} | |||
| {{InactivePoké|May|Venusaur|May Bulbasaur.png|grass|poison|disp=Bulbasaur}} ♀ | |||
| {{InactivePoké|Dawn|Ambipom|Ash Aipom.png|normal|disp=Aipom}} ♀ | |||
|} | |||
===Pokémon Origins=== | |||
[[File:Professor Oak Laboratory PO.png|thumb|250px|Professor Oak's Laboratory in [[Pokémon Origins]]]] | [[File:Professor Oak Laboratory PO.png|thumb|250px|Professor Oak's Laboratory in [[Pokémon Origins]]]] | ||
Professor Oak's Laboratory first appeared in ''[[PO01|File 1: Red]]'', where {{OBP|Red|Origins}} and {{OBP|Blue|Origins}} got their first Pokémon and Pokédexes from Professor Oak. In ''[[PO04|File 4: Charizard]]'', Red returned to the lab after having {{pkmn2|caught}} all 149 known Pokémon. Later, after Red had successfully caught {{p|Mewtwo}} in [[Cerulean Cave]], Professor Oak held a minor celebration at the laboratory to congratulate Red and Blue on completing of the Pokédex, although Red soon realized that {{p|Mew}} still remained uncaught. | Professor Oak's Laboratory first appeared in ''[[PO01|File 1: Red]]'', where {{OBP|Red|Origins}} and {{OBP|Blue|Origins}} got their first Pokémon and Pokédexes from Professor Oak. In ''[[PO04|File 4: Charizard]]'', Red returned to the lab after having {{pkmn2|caught}} all 149 known Pokémon. Later, after Red had successfully caught {{p|Mewtwo}} in [[Cerulean Cave]], Professor Oak held a minor celebration at the laboratory to congratulate Red and Blue on completing of the Pokédex, although Red soon realized that {{p|Mew}} still remained uncaught. | ||
{{-}} | {{-}} | ||
=== | ===I Choose You!=== | ||
[[File:Professor Oak Laboratory M20.png|thumb|250px|Professor Oak's Laboratory in ''[[M20|I Choose You!]]'']] | [[File:Professor Oak Laboratory M20.png|thumb|250px|Professor Oak's Laboratory in ''[[M20|I Choose You!]]'']] | ||
Professor Oak's Laboratory appeared at the beginning of ''[[M20|I Choose You!]]''. It was where {{OBP|Ash Ketchum|M20|Ash}} obtained {{OBP|Ash's Pikachu|M20|his Pikachu}}. | Professor Oak's Laboratory appeared at the beginning of ''[[M20|I Choose You!]]''. It was where {{OBP|Ash Ketchum|M20|Ash}} obtained {{OBP|Ash's Pikachu|M20|his Pikachu}}. | ||
{{-}} | |||
===Pokémon Evolutions=== | |||
[[File:Professor Oak's Laboratory Evolutions.png|thumb|250px|Professor Oak's Laboratory in [[Pokémon Evolutions]]]] | |||
Professor Oak's Laboratory appeared in ''[[PE08|The Discovery]]''. {{ga|Green}} met [[Professor Oak]] there, apologizing for having failed to complete the [[Pokédex]]. Professor Oak, however, revealed that other [[Pallet Town]] Trainers had been taking on the same project as well, and thanks to them, the Pokédex was now complete. Just then, he received a call from [[Professor Willow|a colleague of his]], who informed him of {{p|Meltan|a new Pokémon made entirely of metal}}. However, when Professor Oak turned around to share the news with Green, {{ga|Elaine}}, and {{ga|Trace}}, he was surprised to see them having already left. | |||
{{-}} | {{-}} | ||
==In the manga== | ==In the manga== | ||
=== | ===Pokémon Adventures=== | ||
[[File:Professor Oak Laboratory Adventures.png|thumb|200px|Professor Oak's Laboratory in Pokémon Adventures]] | ===={{MangaArc|Red, Green & Blue}}==== | ||
[[File:Professor Oak Laboratory Adventures.png|thumb|200px|Professor Oak's Laboratory in [[Pokémon Adventures]]]] | |||
The laboratory first appeared in ''[[PS001|A Glimpse of the Glow]]'', where {{adv|Red}} went to see {{adv|Professor Oak}}. The first view of the inside of the lab was seen in ''[[PS002|Bulbasaur, Come Home!]]'', and was shown to have machines, tables, bookshelves, a glass container full of water and a [[Poké Ball]] storage area. Red accidentally let all the Pokémon in the laboratory out of their Poké Balls, with some even escaping the building altogether, forcing Red and Professor Oak to chase them. | The laboratory first appeared in ''[[PS001|A Glimpse of the Glow]]'', where {{adv|Red}} went to see {{adv|Professor Oak}}. The first view of the inside of the lab was seen in ''[[PS002|Bulbasaur, Come Home!]]'', and was shown to have machines, tables, bookshelves, a glass container full of water and a [[Poké Ball]] storage area. Red accidentally let all the Pokémon in the laboratory out of their Poké Balls, with some even escaping the building altogether, forcing Red and Professor Oak to chase them. | ||
In ''[[PS027|Kalling Kadabra]]'', [[Sabrina's Kadabra]] disguised itself as Professor Oak, rampaging around the place in front of Red. [[Sabrina]] herself also briefly appeared, giving Red a message to come to [[Saffron City]]. {{adv|Blue}} then arrived with his {{TP|Blue|Charizard}}, showing Red a picture of Saffron City, which had been taken over by [[Team Rocket]] and was where they kept the citizens of Pallet Town they had imprisoned. | In ''[[PS027|Kalling Kadabra]]'', [[Sabrina's Kadabra]] disguised itself as Professor Oak, rampaging around the place in front of Red. [[Sabrina]] herself also briefly appeared, giving Red a message to come to [[Saffron City]]. {{adv|Blue}} then arrived with his {{TP|Blue|Charizard}}, showing Red a picture of Saffron City, which had been taken over by [[Team Rocket]] and was where they kept the citizens of Pallet Town they had imprisoned. | ||
===={{MangaArc|FireRed & LeafGreen}}==== | |||
The laboratory was once again seen in ''[[PS269|Return to Pallet Town]]'', when Red and Blue received messages from Professor Oak to return their [[Pokédex]]es. This was later revealed to be a trap set by Team Rocket, intending to force Professor Oak to create them their own version of the Pokédex in preparation to capture {{adv|Deoxys}}. | The laboratory was once again seen in ''[[PS269|Return to Pallet Town]]'', when Red and Blue received messages from Professor Oak to return their [[Pokédex]]es. This was later revealed to be a trap set by Team Rocket, intending to force Professor Oak to create them their own version of the Pokédex in preparation to capture {{adv|Deoxys}}. | ||
===={{MangaArc|Emerald}}==== | |||
{{adv|Crystal}} started working as Professor Oak's assistant at the lab. She was seen in the lab while she supplied {{adv|Emerald}} with Pokémon for use in the {{gdis|Battle Frontier|III}} challenge. | |||
[[File:Professor Oak Laboratory PM.png|thumb|left|220px|Professor Oak's Laboratory in [[Pokémon Pocket Monsters]]]] | |||
[[File:Professor Oak Laboratory Zensho.png|thumb|180px|Professor Oak's Laboratory in [[Pokémon Zensho]]]] | |||
===Pokémon Pocket Monsters=== | |||
{{OBP|Professor Oak|Pocket Monsters}}'s lab debuted in ''[[PM001|Introducing the Pokémon Clefairy!!]]''. This was where {{OBP|Red|Pocket Monsters}} chose {{TP|Red|Clefairy}} and {{OBP|Green|Pocket Monsters}} chose {{TP|Green|Charmander}}. Unlike other media, Professor Oak has different laboratories in various regions. Similar to many of the buildings in the series, they would often get destroyed or burnt by Clefairy's antics. | |||
=== | |||
{{OBP|Professor Oak|Pocket Monsters}}'s lab debuted in ''[[PM001|Introducing the Pokémon Clefairy!!]]'' | |||
=== | ===Pokémon Zensho=== | ||
The lab appeared in ''[[PZ01|Prologue: Pallet Town]]'' where {{Zensho|Satoshi}} chose his {{TP|Satoshi|Charmander|Charmander (Zensho)}} and {{Zensho|Shigeru}} chose {{p|Squirtle}}. Satoshi had his first battle there with Shigeru and emerged victorious. | The lab appeared in ''[[PZ01|Prologue: Pallet Town]]'' where {{Zensho|Satoshi}} chose his {{TP|Satoshi|Charmander|Charmander (Zensho)}} and {{Zensho|Shigeru}} chose {{p|Squirtle}}. Satoshi had his first battle there with Shigeru and emerged victorious. | ||
{{-}} | {{-}} | ||
==Trivia== | ==Trivia== | ||
* In [[Generation I]] | * In [[Generation I]], there is a moment when it is possible to stop the game. This happens if the {{player}} holds the A button after choosing their first partner Pokémon, which will stop the {{ga|Blue|rival}} from choosing his own first partner Pokémon until the player releases the button. This happens in all Generation I games, but is easier to perform in {{v2|Yellow}}.<ref>[https://www.youtube.com/watch?v=3dYWCKeTDXM ""Freeze" the game in Oak's Lab", discovered and uploaded by LanceAndMissingNo.]</ref> | ||
* If the player's Pokémon takes damage in | * In all Western Generation I games, when Professor Oak gives the player five {{i|Poké Ball}}s, his dialogue contains some errors that do not exist in the original Japanese versions: | ||
** In {{game|Red and Blue|s|Pokémon Red, Blue}}, and Yellow, part of the text overlaps the previous line as opposed to inserting a new line and scrolling the text box accordingly. | |||
*** In English Yellow only, this was fixed. However, a word is now misspelled. | |||
*** Specifically in the Italian versions, another error was made; one of the words is rendered on top of the textbox's right border instead of appearing in a new line. | |||
* If the player's Pokémon takes damage in their first battle against their rival in {{2v2|FireRed|LeafGreen}}, their Pokémon will be healed after the battle. | |||
* Professor Oak's lab's iconic theme is not played in [[Generation IV]], with the background music instead being Pallet Town's theme. The only way to hear the lab theme is to listen to the [[Pokégear]] radio. | * Professor Oak's lab's iconic theme is not played in [[Generation IV]], with the background music instead being Pallet Town's theme. The only way to hear the lab theme is to listen to the [[Pokégear]] radio. | ||
* In Pokémon Yellow, there is a trash can on the right side of the table | * In Pokémon Yellow only, there is a trash can on the right side of the table that Oak places the first partner Pokémon on. This blocks the player from walking to the other side of the table to collect Eevee in a spot where the rival cannot push them. | ||
* In [[Pokémon: Let's Go, Pikachu! and Let's Go, Eevee!]], [[Sam]]'s sketchbook from ''[[M04|Celebi: The Voice of the Forest]]'' can be seen on the top of a bookshelf at the back of the laboratory. | * In [[Pokémon: Let's Go, Pikachu! and Let's Go, Eevee!]], [[Sam]]'s sketchbook from ''[[M04|Celebi: The Voice of the Forest]]'' can be seen on the top of a bookshelf at the back of the laboratory. | ||
** The same bookshelf also contains poems written by Professor Oak, [[List of cross-canon references|referencing]] his habit of [[Professor Oak's Pokémon Lecture|making senryūs]] in the {{pkmn|anime}}. | |||
==In other languages== | ==In other languages== | ||
| Line 408: | Line 625: | ||
|da=Professor Oaks laboratorium | |da=Professor Oaks laboratorium | ||
|fi=Professori Oakin laboratorio | |fi=Professori Oakin laboratorio | ||
|hi=प्रोफेसर ओक का प्रयोगशाला / पोकिमोन प्रयोगशाला (Professor Oak Ka Prayogshala / Pokémon Prayogshala) | |||
|nl=Lab van Professor Oak | |nl=Lab van Professor Oak | ||
|ko=오박사 연구소 ''O-baksa Yeonguso'' | |ko=오박사 연구소 ''O-baksa Yeonguso'' | ||
| Line 415: | Line 633: | ||
|sv=Professor Oaks laboratorium{{tt|*|EP065}}<br>Professor Oaks Pokémonlaboratorium{{tt|*|EP013}}<br>Professor Oaks lab{{tt|*|Pokémon TV description of EP001}} | |sv=Professor Oaks laboratorium{{tt|*|EP065}}<br>Professor Oaks Pokémonlaboratorium{{tt|*|EP013}}<br>Professor Oaks lab{{tt|*|Pokémon TV description of EP001}} | ||
|vi=Viện nghiên cứu Okido | |vi=Viện nghiên cứu Okido | ||
|ur=پوکیمون پرائوگشالا | |||
}} | }} | ||
| | | | ||
| Line 430: | Line 649: | ||
|} | |} | ||
== | ==See also== | ||
* [[Professor Oak]] | * [[Professor Oak]] | ||
* [[Pallet Town]] | * [[Pallet Town]] | ||
Latest revision as of 02:38, 10 April 2024
| This article is a featured article. This means that it has been identified as one of the best articles produced on Bulbapedia. |
| ||||
| ||||
| Location: | Pallet Town | |||
|---|---|---|---|---|
| Region: | Kanto | |||
| Generations: | I, II, III, IV, VII | |||
 Location of Professor Oak's Laboratory in Kanto. | ||||
| Pokémon world locations | ||||

Professor Oak's Laboratory (Japanese: オーキド研究所 Okido Institute), also called the Oak Pokémon Research Lab (Japanese: オーキド博士のポケモン研究所 Professor Oak's Pokémon Research Lab), is a Pokémon lab located in Pallet Town that is directed by Professor Samuel Oak.
Its functions are to research Pokémon, unravel the mysteries surrounding them, and study their characteristics and behavior in a natural environment. Another important job is to take care of the Pokémon that belong to Pallet Town's Trainers.
The lab has many different environments for the correct development of all kinds of Pokémon. There are areas of grass, sand, rocks, and lakes to promote good interaction between the different types of Pokémon. The laboratory has the technology to keep Pokémon healthy and to make the largest scientific investigations in the region.
In the core series games
Professor Oak's Laboratory appears in Pokémon Red, Blue, and Yellow, Pokémon Gold, Silver, and Crystal, Pokémon FireRed and LeafGreen, Pokémon HeartGold and SoulSilver, and Pokémon: Let's Go, Pikachu! and Let's Go, Eevee!. In the Generation I games and their remakes, it is where Oak gives the player their first partner Pokémon and a Pokédex.
Appearance
The lab is a small building near the player's house that has been slightly modified in every game.
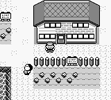
In Pokémon Red and Blue, the sign says "Oak Pokémon Research Lab" ("Here is the Institute of Dr. Okido." in Japanese). Inside are three of Professor Oak's aides, two men and one woman, a couple of shelves full of books, a table with three Poké Balls, a computer, two blank Pokédexes, and two tips for the player.
In Pokémon Yellow, the lab is the same as Red and Blue, except there is only one Poké Ball on the table, and next to the table stands a trash can.
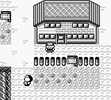
In Pokémon Gold, Silver, and Crystal, the lab is almost unchanged except recoloring, only adding two windows, removing the table that had the Pokédexes on it in the previous games, and adding another shelf to bookshelves.
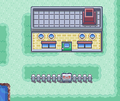
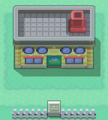
In Pokémon FireRed and LeafGreen, other than the significant graphical enhancements, the laboratory also has two plants in the entrance, a mysterious machine, books on the floor, two regular machines in the corner, and a window.
In Pokémon HeartGold and SoulSilver, the building is modified to look 3D, but still has the overall design from Pokémon FireRed and LeafGreen.
In Pokémon: Let's Go, Pikachu! and Let's Go, Eevee!, the laboratory also mostly retains its overall design from Generation III. However, in these games, the content of one of the Poké Balls on the table is never revealed.
Items
| Item | Location | Games | |
|---|---|---|---|
| Pokédex | Obtained from Professor Oak after obtaining the partner Pokémon | P E | |
| Poké Ball ×5 | Obtained from Professor Oak after delivering him his Parcel | FR LG | |
| Pokédex | Obtained from Professor Oak after delivering him his Parcel | R B Y FR LG | |
| Razz Berry ×20 | Obtained from Professor Oak after delivering him his Parcel | P E | |
| Poké Ball ×5 | Obtained from Professor Oak after defeating Blue at the optional battle on Route 22, if the player has no regular Poké Balls in their Bag and has not added any caught data to the Pokédex (permanently missed if the player skips this battle by earning the Boulder Badge first, or attempts to receive them with a full Bag) | R B Y | |
| Poké Ball ×5 | Obtained from Professor Oak either after defeating Blue at the optional battle on Route 22 or after battling Blue in Cerulean City (regardless of winning or losing), if the player has no regular Poké Balls in their Bag and has not added any caught data to the Kanto Pokédex (permanently missed if the player earns the Earth Badge first) | FR LG | |
| Key Stone | Obtained from Blue after earning seven Badges and meeting Trace in front of the Viridian Gym | P E | |
| Venusaurite | Obtained from Blue after earning seven Badges and meeting Trace in front of the Viridian Gym | P E | |
| Charizardite X | Obtained from Blue after earning seven Badges and meeting Trace in front of the Viridian Gym | P E | |
| Charizardite Y | Obtained from Blue after earning seven Badges and meeting Trace in front of the Viridian Gym | P E | |
| Blastoisinite | Obtained from Blue after earning seven Badges and meeting Trace in front of the Viridian Gym | P E | |
| National Pokédex | Obtained from Professor Oak after entering the Hall of Fame and catching at least 60 Pokémon | FR LG | |
| HM08 (Rock Climb) | Reward from Professor Oak after obtaining all 16 Badges | HG SS | |
| Jade Orb | Obtained from Professor Oak after showing him the Groudon and Kyogre from the Embedded Tower | HG SS | |
Pokémon
Generation I
| Pokémon | Games | Location | Levels | Rate | |||||||||||
|---|---|---|---|---|---|---|---|---|---|---|---|---|---|---|---|
| First partner Pokémon | |||||||||||||||
|
R | B | Y |
|
5 | One | |||||||||
|
R | B | Y |
|
5 | One | |||||||||
|
R | B | Y |
|
5 | One | |||||||||
|
R | B | Y |
|
5 | One | |||||||||
| A colored background means that the Pokémon can be found in this location in the specified game. A white background with a colored letter means that the Pokémon cannot be found here. | |||||||||||||||
Generation III
| Pokémon | Games | Location | Levels | Rate | |||||||||||
|---|---|---|---|---|---|---|---|---|---|---|---|---|---|---|---|
| First partner Pokémon | |||||||||||||||
|
FR | LG |
|
5 | One | ||||||||||
|
FR | LG |
|
5 | One | ||||||||||
|
FR | LG |
|
5 | One | ||||||||||
| A colored background means that the Pokémon can be found in this location in the specified game. A white background with a colored letter means that the Pokémon cannot be found here. | |||||||||||||||
Generation IV
| Pokémon | Games | Location | Levels | Rate | |||||||||||
|---|---|---|---|---|---|---|---|---|---|---|---|---|---|---|---|
| Gift Pokémon After defeating Red | |||||||||||||||
|
HG | SS |
|
5 | One | ||||||||||
|
HG | SS |
|
5 | One | ||||||||||
|
HG | SS |
|
5 | One | ||||||||||
| A colored background means that the Pokémon can be found in this location in the specified game. A white background with a colored letter means that the Pokémon cannot be found here. | |||||||||||||||
Generation VII
| Pokémon | Games | Location | Levels | Rate | |||||||||||
|---|---|---|---|---|---|---|---|---|---|---|---|---|---|---|---|
| First partner Pokémon | |||||||||||||||
|
P | E |
|
5 | One | ||||||||||
|
P | E |
|
5 | One | ||||||||||
| A colored background means that the Pokémon can be found in this location in the specified game. A white background with a colored letter means that the Pokémon cannot be found here. | |||||||||||||||

Trainers
In every game where the player gets their first partner Pokémon at Oak's, they will also have their first Trainer battle at the Laboratory against their rival.
Generation I
Pokémon Red and Blue
![]() If the player chose Bulbasaur:
If the player chose Bulbasaur:
|
||||||||||||||||||||||||||||
| ||||||||||||||||||||||||||||


![]() If the player chose Charmander:
If the player chose Charmander:
|
||||||||||||||||||||||||||||
| ||||||||||||||||||||||||||||

|
||||||||||||||||||||||||||||||
| ||||||||||||||||||||||||||||||

Pokémon Yellow
|
||||||||||||||||||||||||||||
| ||||||||||||||||||||||||||||


Generation III
![]() If the player chose Bulbasaur:
If the player chose Bulbasaur:
|
||||||||||||||||||||||||||||||||
| ||||||||||||||||||||||||||||||||


![]() If the player chose Charmander:
If the player chose Charmander:
|
||||||||||||||||||||||||||||||||
| ||||||||||||||||||||||||||||||||

|
||||||||||||||||||||||||||||||||||
| ||||||||||||||||||||||||||||||||||

Generation VII
|
||||||||||||||||||||||||||||||||
| ||||||||||||||||||||||||||||||||


 In Let's Go, Eevee!:
|
||||||||||||||||||||||||||||||||
| ||||||||||||||||||||||||||||||||

Appearance
Outside
Red and Green (Japanese)
Red and Blue (International) and Blue (Japanese)

Yellow

Gold, Silver and Crystal
FireRed and LeafGreen
HeartGold and SoulSilver
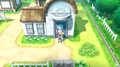
Let's Go, Pikachu! and Let's Go, Eevee!


Inside
Red and Blue
Yellow

Gold, Silver, and Crystal

FireRed and LeafGreen

HeartGold and SoulSilver
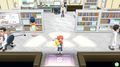
Let's Go, Pikachu! and Let's Go, Eevee!


In the side series games
Pokémon Stadium
- Main article: Pokémon Lab (Stadium)
Professor Oak's Laboratory, known as the "Pokémon Lab", also appears in Pokémon Stadium. In it, the player can interact with a copy of Pokémon Red, Blue, or Yellow inserted into the Transfer Pak, allowing them to view their Pokédex, organize the items in their PC, access their Box, trade Pokémon, and send prize Pokémon received at the Gym Leader Castle into the inserted game.
Oak has another Lab in White City in Pokémon Stadium 2, which has the same basic functionality expanded to support Pokémon Gold, Silver, and Crystal.
In the spin-off games
Pokémon Puzzle League
In Pokémon Puzzle League for the Nintendo 64, an area called "Prof. Oak's Labs" acts as tutorial area. Professor Oak will teach the player how to play the game.
Pokémon Snap

Professor Oak's Laboratory also appears in Pokémon Snap, shown as the background of the main menu of the game. Todd Snap reports back here regularly to show his photos to Professor Oak. Presumably, the professor keeps information like the Pokémon Report, Pokémon Album, and all information on Pokémon signs in his laboratory. It appears the same way in this game that it does in the anime.
Pokémon Masters EX
Artwork of various depictions of Professor Oak's Laboratory is seen in Professor Oak and Ash's mindscapes.
|


In the anime

Main series

The laboratory debuted in the first episode, Pokémon - I Choose You!, when Ash received his Pikachu. Since then, it has been seen in many episodes, mostly in the start and ending of Ash's journey through a region, but also in Pokémon Chronicles and in the movies. The building stands out in Pallet Town for its wind turbine.
Every time Ash catches a Pokémon when he has already a full party, the new Pokémon is automatically transported here. Ash also has a habit of leaving all of his Pokémon besides Pikachu here each time he leaves for a new region, starting with Hoenn.
Since The Rivalry Revival, Tracey has been working at the lab as an assistant to Professor Oak. In The Rainbow and the Pokémon Master!, Ash briefly filled in for Tracey while he traveled for a few days.
Structure
Infrastructure

The lab is composed of two floors. Inside the entrance door is a hallway with several doors, and to the left is a chest of drawers and the stairway to the second floor.
The living room is the space where Professor Oak hosts, eats, relaxes, and presumably studies. On a pink carpet (sometimes shown as green) are two couches and a table. To the side are a computer and bookshelves. This is where many scenes in the lab take place. There are also two science rooms full of various machines.
The Poké Ball Storage Room stores the extra Pokémon of every Trainer born in Pallet Town. This treasure of hundreds of Pokémon has been the target of attempted robberies by Team Rocket. In addition, the lab has a library, composed of two rooms. One is a study room with a large bookshelf and a pair of windows. The other, in the back, is a storage room full of books, including Oak's old sketchbook.

Upstairs is the research floor. Here are all the technological pieces, the heart of the laboratory. It includes several machines used for Pokémon testing and a table with various chemicals on it. Nearby is a blue chair. In front of it are the status screen, which shows the health and power of a Pokémon, and Professor Oak's computer, where he records his research. This computer doubles as a videophone, which he uses to communicate with other professors or Trainers. Beside the computer is the Poké Ball Transfer machine, for the transportation of Pokémon to their Trainers in a Pokémon Center. The room also includes a bookshelf, a desk with a lamp, a brown couch, and a drawing board. A few machines are connected to a glass container full of water, possibly to study aquatic Pokémon. Hanging from the ceiling is a large lamp.
The stairs lead up to an inner balcony, which has a door and the three large windows seen in most outside views of the lab.

Superstructure
The Oak Corral is a natural environment for Pokémon development. It is divided into regions according to type; there are areas that are perfect for Rock Pokémon, desert areas for Ground and Fire types, grassy regions, and several lakes. Sometimes the Pokémon don't get along; for this reason, some Pokémon, such as Ash's Bulbasaur, act as mediators between quarreling Pokémon.

Trainer's Pokémon residing at the Lab


Other
There are various Pokémon that live on the Oak Corral. Only a handful have been seen but there are various kinds of different Pokémon. People like Professor Oak and Tracey care for them. Other Trainers' Pokémon reside here such as Gary's.


Previously resided at the Lab
 Arcanine |
 Umbreon |
 Bulbasaur ♀ |
 Aipom ♀ |
Pokémon Origins

Professor Oak's Laboratory first appeared in File 1: Red, where Red and Blue got their first Pokémon and Pokédexes from Professor Oak. In File 4: Charizard, Red returned to the lab after having caught all 149 known Pokémon. Later, after Red had successfully caught Mewtwo in Cerulean Cave, Professor Oak held a minor celebration at the laboratory to congratulate Red and Blue on completing of the Pokédex, although Red soon realized that Mew still remained uncaught.
I Choose You!

Professor Oak's Laboratory appeared at the beginning of I Choose You!. It was where Ash obtained his Pikachu.
Pokémon Evolutions

Professor Oak's Laboratory appeared in The Discovery. Green met Professor Oak there, apologizing for having failed to complete the Pokédex. Professor Oak, however, revealed that other Pallet Town Trainers had been taking on the same project as well, and thanks to them, the Pokédex was now complete. Just then, he received a call from a colleague of his, who informed him of a new Pokémon made entirely of metal. However, when Professor Oak turned around to share the news with Green, Elaine, and Trace, he was surprised to see them having already left.
In the manga
Pokémon Adventures
Red, Green & Blue arc

The laboratory first appeared in A Glimpse of the Glow, where Red went to see Professor Oak. The first view of the inside of the lab was seen in Bulbasaur, Come Home!, and was shown to have machines, tables, bookshelves, a glass container full of water and a Poké Ball storage area. Red accidentally let all the Pokémon in the laboratory out of their Poké Balls, with some even escaping the building altogether, forcing Red and Professor Oak to chase them.
In Kalling Kadabra, Sabrina's Kadabra disguised itself as Professor Oak, rampaging around the place in front of Red. Sabrina herself also briefly appeared, giving Red a message to come to Saffron City. Blue then arrived with his Charizard, showing Red a picture of Saffron City, which had been taken over by Team Rocket and was where they kept the citizens of Pallet Town they had imprisoned.
FireRed & LeafGreen arc
The laboratory was once again seen in Return to Pallet Town, when Red and Blue received messages from Professor Oak to return their Pokédexes. This was later revealed to be a trap set by Team Rocket, intending to force Professor Oak to create them their own version of the Pokédex in preparation to capture Deoxys.
Emerald arc
Crystal started working as Professor Oak's assistant at the lab. She was seen in the lab while she supplied Emerald with Pokémon for use in the Battle Frontier challenge.


Pokémon Pocket Monsters
Professor Oak's lab debuted in Introducing the Pokémon Clefairy!!. This was where Red chose Clefairy and Green chose Charmander. Unlike other media, Professor Oak has different laboratories in various regions. Similar to many of the buildings in the series, they would often get destroyed or burnt by Clefairy's antics.
Pokémon Zensho
The lab appeared in Prologue: Pallet Town where Satoshi chose his Charmander and Shigeru chose Squirtle. Satoshi had his first battle there with Shigeru and emerged victorious.
Trivia
- In Generation I, there is a moment when it is possible to stop the game. This happens if the player holds the A button after choosing their first partner Pokémon, which will stop the rival from choosing his own first partner Pokémon until the player releases the button. This happens in all Generation I games, but is easier to perform in Yellow.[1]
- In all Western Generation I games, when Professor Oak gives the player five Poké Balls, his dialogue contains some errors that do not exist in the original Japanese versions:
- In Pokémon Red, Blue, and Yellow, part of the text overlaps the previous line as opposed to inserting a new line and scrolling the text box accordingly.
- In English Yellow only, this was fixed. However, a word is now misspelled.
- Specifically in the Italian versions, another error was made; one of the words is rendered on top of the textbox's right border instead of appearing in a new line.
- In Pokémon Red, Blue, and Yellow, part of the text overlaps the previous line as opposed to inserting a new line and scrolling the text box accordingly.
- If the player's Pokémon takes damage in their first battle against their rival in FireRed and LeafGreen, their Pokémon will be healed after the battle.
- Professor Oak's lab's iconic theme is not played in Generation IV, with the background music instead being Pallet Town's theme. The only way to hear the lab theme is to listen to the Pokégear radio.
- In Pokémon Yellow only, there is a trash can on the right side of the table that Oak places the first partner Pokémon on. This blocks the player from walking to the other side of the table to collect Eevee in a spot where the rival cannot push them.
- In Pokémon: Let's Go, Pikachu! and Let's Go, Eevee!, Sam's sketchbook from Celebi: The Voice of the Forest can be seen on the top of a bookshelf at the back of the laboratory.
- The same bookshelf also contains poems written by Professor Oak, referencing his habit of making senryūs in the anime.
In other languages
|
Professor Oak's Laboratory
|
Oak Pokémon Research Lab
| ||||||||||||||||||||||||||||||||||||||||||||||||||||||||||||||||||||||||||
See also
References
| Kanto | ||||||||
|---|---|---|---|---|---|---|---|---|
|
| ||||||||
|
| This article is part of Project Locations, a Bulbapedia project that aims to write comprehensive articles on every location in the Pokémon world. |