PML Arc

|
This article is incomplete. Please feel free to edit this article to add missing information and complete it. Reason: Plot for Chapter 28 onwards, area info for non-battle areas, current battle and completion rewards |

The PML Arc (Japanese: WPM編) is the first accessible storyline in Pokémon Masters EX as part of its Main Story (Japanese: メインストーリー Main Story). The arc consists of 30 chapters with seven interludes and follows on from the game's introduction, where Scottie/Bettie is introduced to the world of Pasio and the Pokémon Masters League (PML), a tournament featuring Pasio's unique three-on-three battles.
Each chapter is unlocked once the previous one is completed. Battles are available in Normal and Hard difficulties, with the Hard mode unlocked after completing Chapter 4 of the PML Arc. Hard difficulty battles were introduced in Version 1.8.0 and are only available for select battles. Battles do not require the use of stamina (stamina was required between updates 1.12.0 and 2.1.0). All Normal difficulty battles provide 30 Gems as a First-Time Reward, while Hard difficulty battles reward the player with 100 Gems upon defeating the stage for the first time.
Certain battles in the PML Arc are available in Co-op mode, after the player has completed Interlude 1.
The script for the PML Arc can be found here.
Chapter 1: New Adventure, New Goal
Brock, Misty, and the player head to Centra City to find Trainers to join their PML team. After hearing some commotion, Brock spots Rosa and Cynthia. When they approach the scene, a Punk Girl and Street Thug are trying to force Cynthia to battle them. Rosa is defending Cynthia, who is not willing to battle because she would like her Pokémon to rest. Brock and Misty try to stop the argument and end up battling them alongside the player.
After losing the battle, the Punk Girl and Street Thug leave the scene. Brock then introduces the player to Rosa. Cynthia greets them and thanks them for their help. She remarks that she senses a great deal of potential in the player, then leaves. Brock and Misty commend the player's performance in their battle before asking Rosa to join their team. The player then battles Rosa to convince her to join their PML team.
After the player wins the battle against Rosa, she decides to join the team. She wants to introduce the team to her new friend Barry, so she offers to take them to the beach to meet him.
Battles
| Name | Difficulty | Trainer | Pokémon | Completion Rewards | Battle Rewards | ||
|---|---|---|---|---|---|---|---|
| Left | Middle | Right | |||||
| Public Nuisance | Normal |  Punk Girl Ellen |
 Zubat Weakness: |
 Litwick Weakness: |
 Pidgey Weakness: |
40 coins Buff Blend / Tech Tonic / Aid Ade |
|
 Street Thug Micah |
 Geodude Weakness: Attack Type: |
 Drifloon Weakness: Attack Type: |
 Marill Weakness: Attack Type: | ||||
| Challenge Rosa | Normal |  Rosa |
Drifloon Weakness: Attack Type: |
 Snivy Weakness: Attack Type: |
 Fletchling Weakness: Attack Type: |
50 coins Training Machine Buff Blend / Tech Tonic / Aid Ade |
|
| Hard | 150 coins Training Machine Buff Blend / Tech Tonic / Aid Ade |
Buff Blend / Tech Tonic / Aid Ade | |||||
Chapter 2: New Friends, New Foes
The team heads to the beach to find Barry. On the way, they battle Team Break, who attempt to steal their partner Pokémon, and win.
Barry then appears and mistakes the player's team for Team Break, challenging them to a battle. The player ends up battling Barry and wins. After the battle, Barry finally recognizes Rosa and then apologizes for his mistake. She then introduces him to the player and asks him to join their team. Barry struggles to choose between joining the team and pursuing Team Break, but the player offers to help him take Team Break down. He agrees to join after Team Break is defeated, leading the player to a nearby cave hideout.
When the player's team gets to the cave, they find and battle more members of Team Break. They soon meet Paulo, who has also come to defeat Team Break. After defeating more groups of Team Break members, Barry asks Paulo to join their PML team. Paulo declines the offer as he plans to form his own team. He informs them that the volcano area is a popular location for Trainers and might be a good place to recruit more Trainers.
The player then enters the Pokémon Center and encounters Blue, Red, and Professor Oak. Professor Oak tells the player that he will be competing in the PML thanks to them and Blue, then offers to head out alongside the player. Blue expresses his excitement to battle Professor Oak and the player, then leaves with Red. Professor Oak states that the player reminds him of Red and Blue when they first started their Pokémon journeys, then leaves with the player.
Battles
| Name | Difficulty | Trainer | Pokémon | Completion Rewards | Battle Rewards | ||
|---|---|---|---|---|---|---|---|
| Left | Middle | Right | |||||
| Masked Challengers | Normal |  Swimmer Howard |
 Basculin Weakness: |
 Mareanie Weakness: |
Basculin Weakness: |
60 coins Training Machine Buff Blend / Tech Tonic / Aid Ade |
Training Machine Buff Blend / Tech Tonic / Aid Ade |
 Masked Man |
Marill Weakness: |
 Bibarel Weakness: |
Marill Weakness: | ||||
| Challenge Barry | Normal |  Barry |
 Spheal Weakness: |
 Piplup Weakness: |
Spheal Weakness: |
64 coins Training Machine Buff Blend / Tech Tonic / Aid Ade |
Training Machine Buff Blend / Tech Tonic / Aid Ade |
| Hard | 180 coins Training Machine Buff Blend / Tech Tonic / Aid Ade |
Training Machine Super Training Machine Buff Blend / Tech Tonic / Aid Ade Great Buff Blend / Tech Tonic / Aid Ade | |||||
| Challenge in the Cave: Team Break | Normal |  Masked Man |
 Phanpy Weakness: |
 Nosepass Weakness: ↓  Staravia Weakness: |
 Palpitoad Weakness: |
68 coins Training Machine Buff Blend / Tech Tonic / Aid Ade |
Training Machine Buff Blend / Tech Tonic / Aid Ade |
 Masked Man |
Zubat Weakness: |
 Trapinch Weakness: |
Zubat Weakness: | ||||
| Challenge in the Cave: Team Break, Part 2 | Normal |  Masked Man |
Geodude Weakness: |
Phanpy Weakness: ↓  Floatzel Weakness: |
Geodude Weakness: |
71 coins Training Machine Buff Blend / Tech Tonic / Aid Ade |
Training Machine Buff Blend / Tech Tonic / Aid Ade |
 Masked Woman |
 Frillish Weakness: |
Spheal Weakness: |
Palpitoad Weakness: | ||||
| Challenge in the Cave: Team Break, Part 3 | Normal | Masked Man |
Basculin Weakness: ↓ Mareanie Weakness: |
Bibarel Weakness: ↓  Seismitoad Weakness: |
Basculin Weakness: ↓ Mareanie Weakness: |
75 coins Training Machine Buff Blend / Tech Tonic / Aid Ade |
Training Machine Buff Blend / Tech Tonic / Aid Ade |
| Hard | 200 coins Training Machine Buff Blend / Tech Tonic / Aid Ade |
Training Machine Super Training Machine Buff Blend / Tech Tonic / Aid Ade Great Buff Blend / Tech Tonic / Aid Ade Skill Capsule | |||||
Chapter 3: Rise beyond the Flames
The player enters the Pokémon Center and runs into Lear, Rachel, and Sawyer for the first time. Lear insults the player's hat, calling it shoddy and an eyesore. After Brock defends the player, Lear insults the rest of their team and states they do not belong on an island owned by him. He introduces himself as the creator of Pasio and the founder of the PML, then declares he will be the PML champion. Rachel and Sawyer introduce themselves to the player as well before leaving with Lear. Brock encourages the player to not let the insults get to them and continue towards competing in the PML.
Later, the team arrives at a volcano and meet Flannery and Blaine, who are in the midst of training. Barry asks Flannery to join their team, but she declines, telling him that she wants to focus on getting stronger. Blaine requests the player to battle their way up the volcano to find and battle Flannery at the peak.
After several battles, Blaine meets the player and explains that he asked this favor of them so that Flannery could learn to depend on others through team battles. He then leaves, telling the player that he will be watching their battle from the shadows. Brock draws the conclusion that Blaine is worried about Flannery.
At the summit, the player battles Flannery and wins. Blaine remarks that although Flannery is a powerful Trainer, she has tunnel vision due to her status as a Gym Leader and that she needs friends she can trust. Blaine then challenges Flannery to join the player's team and participate in the PML, and Flannery accepts. To her surprise, Blaine states he will be making his own PML team.
The team heads off to find Erika to earn their first Badge.
Battles
| Name | Difficulty | Trainer | Pokémon | Completion Rewards | Battle Rewards | ||
|---|---|---|---|---|---|---|---|
| Left | Middle | Right | |||||
| Challenge on the Volcano | Normal |  Camper Anton |
Geodude Weakness: |
 Slugma Weakness: ↓ Litwick Weakness: |
Geodude Weakness: |
120 coins Training Machine Buff Blend / Tech Tonic / Aid Ade 1★ Level-Up Manual |
Training Machine Buff Blend / Tech Tonic / Aid Ade |
 Black Belt Gordon |
 Numel Weakness: |
 Ponyta Weakness: |
Slugma Weakness: | ||||
| Challenge on the Volcano: Part 2 | Normal |  Hiker Jared |
Litwick Weakness: |
Ponyta Weakness: |
Fletchling Weakness: |
128 coins Training Machine Buff Blend / Tech Tonic / Aid Ade 1★ Level-Up Manual |
Training Machine Buff Blend / Tech Tonic / Aid Ade |
 Scientist Xavier |
 Turtonator Weakness: |
Slugma Weakness: ↓ Litwick Weakness: |
Numel Weakness: | ||||
| Challenge Flannery | Normal |  Flannery |
Fletchling Weakness: ↓ Turtonator Weakness: |
 Torkoal Weakness: |
Ponyta Weakness: ↓ Slugma Weakness: |
100 coins Training Machine Buff Blend / Tech Tonic / Aid Ade 1★ Level-Up Manual |
Training Machine Buff Blend / Tech Tonic / Aid Ade |
| Hard | 225 coins Training Machine Buff Blend / Tech Tonic / Aid Ade |
Training Machine Super Training Machine Buff Blend / Tech Tonic / Aid Ade Great Buff Blend / Tech Tonic / Aid Ade Skill Capsule | |||||
Chapter 4: From Bud to Blossom
The team heads to the forest, where they find Erika and many of her admirers. They are stopped by a Pokémon Ranger who attempts to block other Trainers from bothering Erika. After battling the Ranger, she realizes they are friends of Erika and apologizes.
The team finds Erika dozing in the deep parts of the forest. They battle her to earn the Tranquility Badge. Despite being a PML Leader, Erika joins the player's team, stating that Leaders are free to participate in any way they like and that there are other Leaders in charge of giving out the same Badge.
Battles
| Name | Difficulty | Trainer | Pokémon | Completion Rewards | Battle Rewards | ||
|---|---|---|---|---|---|---|---|
| Left | Middle | Right | |||||
| Challenge on the Boulevard | Normal |  Lass Alyssa |
 Hoppip Weakness: |
 Nuzleaf Weakness: ↓ Staravia Weakness: |
 Bellsprout Weakness: |
100 coins Training Machine Buff Blend / Tech Tonic / Aid Ade 1★ Level-Up Manual |
Training Machine Buff Blend / Tech Tonic / Aid Ade |
 Beauty Amelia |
 Starly Weakness: |
 Roserade Weakness: |
Hoppip Weakness: | ||||
| Erika Defense Force | Normal |  Pokémon Ranger Victoria |
Bellsprout Weakness: ↓ Fletchling Weakness: |
 Cottonee Weakness: ↓  Toucannon Weakness: |
 Exeggcute Weakness: ↓ Starly Weakness: |
106 coins Training Machine Buff Blend / Tech Tonic / Aid Ade 1★ Level-Up Manual |
Training Machine Buff Blend / Tech Tonic / Aid Ade |
| Hard | 225 coins Training Machine Buff Blend / Tech Tonic / Aid Ade ×2 |
Training Machine Super Training Machine Buff Blend / Tech Tonic / Aid Ade Great Buff Blend / Tech Tonic / Aid Ade Skill Capsule | |||||
| Erika Defense Force: Part 2 | Normal | Punk Girl Violet |
Bellsprout Weakness: |
 Sealeo Weakness: |
 Pumpkaboo Weakness: |
113 coins Training Machine Buff Blend / Tech Tonic / Aid Ade 1★ Level-Up Manual |
Training Machine Buff Blend / Tech Tonic / Aid Ade |
Black Belt Tad |
Pidgey Weakness: |
 Weepinbell Weakness: |
Zubat Weakness: | ||||
| Challenge Erika | Normal |  Erika |
Roserade Weakness: ↓ Bibarel Weakness: |
 Vileplume Weakness: |
 Skiploom Weakness: ↓  Pelipper Weakness: |
125 coins Training Machine Buff Blend / Tech Tonic / Aid Ade 1★ Level-Up Manual |
Training Machine Buff Blend / Tech Tonic / Aid Ade |
| Hard | 250 coins Training Machine Buff Blend / Tech Tonic / Aid Ade ×2 |
Training Machine Super Training Machine Buff Blend / Tech Tonic / Aid Ade Great Buff Blend / Tech Tonic / Aid Ade Skill Capsule | |||||
Chapter 5: The High-Flying Girl
The team heads to a mountain to find Skyla. Once they locate Skyla, they find that Lear has beaten Skyla to earn a Badge. Lear ridicules Skyla for commending her Pokémon despite her loss, stating that Pokémon are tools rather than friends. When Skyla tells Lear that she and her Swanna had fun, he remarks that battles are all about winning rather than about having fun.
When the player approaches Lear, he is exasperated to find out that they are entering the PML. He uses his Krookodile for a one-on-one battle against the player and wins. He taunts the player for losing, with Sawyer and Rachel praising him for winning.
After Lear leaves, the player has a quick break before battling Skyla. After winning, Skyla gives them the Freedom Badge and decides to join the player's team.
Battles
| Name | Difficulty | Trainer | Pokémon | Completion Rewards | Battle Rewards | ||
|---|---|---|---|---|---|---|---|
| Left | Middle | Right | |||||
| Challenge in the Mountains | Normal | Pokémon Ranger Bella |
Marill Weakness: |
Fletchling Weakness: ↓ Phanpy Weakness: |
Starly Weakness: |
135 coins Training Machine Buff Blend / Tech Tonic / Aid Ade 1★ Level-Up Manual |
Training Machine Buff Blend / Tech Tonic / Aid Ade |
 Poké Fan Malcolm |
Pidgey Weakness: |
Nosepass Weakness: |
Zubat Weakness: | ||||
| Challenge in the Mountains: Part 2 | Normal | Punk Girl Aaliyah |
Marill Weakness: |
 Sigilyph Weakness: ↓  Solrock Weakness: |
 Roggenrola Weakness: |
140 coins Training Machine Buff Blend / Tech Tonic / Aid Ade 1★ Level-Up Manual |
Training Machine Buff Blend / Tech Tonic / Aid Ade |
Black Belt Jacob |
Starly Weakness: |
 Delibird Weakness: |
Skiploom Weakness: | ||||
| Challenge in the Mountains: Part 3 | Normal | Hiker Adam |
Skiploom Weakness: |
Drifloon Weakness: ↓  Boldore Weakness: |
Nosepass Weakness: |
144 coins Training Machine Buff Blend / Tech Tonic / Aid Ade 1★ Level-Up Manual |
Training Machine Buff Blend / Tech Tonic / Aid Ade |
Pokémon Ranger Nancy |
 Lunatone Weakness: |
 Honchkrow Weakness: |
Solrock Weakness: | ||||
| Challenge Skyla | Normal |  Skyla |
Boldore Weakness: ↓ Honchkrow Weakness: |
 Swanna Weakness: |
Phanpy Weakness: ↓  Beautifly Weakness: |
150 coins Training Machine Buff Blend / Tech Tonic / Aid Ade 1★ Level-Up Manual |
Training Machine Buff Blend / Tech Tonic / Aid Ade |
| Hard | 275 coins Training Machine Buff Blend / Tech Tonic / Aid Ade ×2 1★ Level-Up Manual |
Training Machine Super Training Machine Buff Blend / Tech Tonic / Aid Ade Great Buff Blend / Tech Tonic / Aid Ade Skill Capsule | |||||
Chapter 6: A Telling Aura
Rosa is preoccupied by Lear and is determined to get stronger. With Skyla's recommendation, the team sets off to visit the Evolution fighter for further training. The team later spots Korrina training with her Lucario. She overhears them and approaches them, then agrees to train with them.
After a few battles, Korrina's Lucario seems to have taken a liking of the team due to their strong bond with their Pokémon. They also meet Brendan, who wants to train alongside them as well.
They end the training session with a battle against Korrina. Korrina joins the player's team after the battle.
Battles
| Name | Difficulty | Trainer | Pokémon | Completion Rewards | Battle Rewards | ||
|---|---|---|---|---|---|---|---|
| Left | Middle | Right | |||||
| Challenge on the Boulevard | Normal |  Rising Star Madeleine |
 Makuhita Weakness: |
 Machop Weakness: ↓ Weepinbell Weakness: |
Makuhita Weakness: |
158 coins Training Machine Buff Blend ×5 Great Buff Blend 1★ Level-Up Manual |
Training Machine Super Training Machine Buff Blend Great Buff Blend Skill Capsule |
Camper Oliver |
 Magnemite Weakness: |
 Stufful Weakness: |
 Meditite Weakness: | ||||
| Challenge on the Boulevard: Part 2 | Normal | Poké Fan Seymour |
Makuhita Weakness: ↓  Klink Weakness: |
Nuzleaf Weakness: ↓  Medicham Weakness: |
Meditite Weakness: ↓ Skiploom Weakness: |
163 coins Training Machine Buff Blend ×5 Great Buff Blend 1★ Level-Up Manual |
Training Machine Super Training Machine Buff Blend Great Buff Blend Skill Capsule |
| Hard | 315 coins Training Machine ×2 Buff Blend ×7 Great Buff Blend ×2 |
Training Machine Super Training Machine Buff Blend Great Buff Blend Skill Capsule | |||||
| Challenge in the Village | Normal | Pokémon Ranger Penelope |
Nuzleaf Weakness: |
Machop Weakness: ↓  Jumpluff Weakness: |
Stufful Weakness: |
168 coins Training Machine Buff Blend ×5 Great Buff Blend 1★ Level-Up Manual |
Training Machine Super Training Machine Buff Blend Great Buff Blend Skill Capsule |
 Ace Trainer Yolanda |
Makuhita Weakness: |
 Bewear Weakness: ↓ Weepinbell Weakness: |
Nuzleaf Weakness: | ||||
| Challenge Korrina | Normal |  Korrina |
 Throh Weakness: ↓  Dustox Weakness: |
 Lucario Weakness: |
 Sawk Weakness: ↓ Beautifly Weakness: |
330 coins Training Machine Buff Blend ×5 Great Buff Blend 1★ Level-Up Manual |
Training Machine Super Training Machine Buff Blend Great Buff Blend Skill Capsule |
| Hard | 350 coins Training Machine ×2 Buff Blend ×7 Great Buff Blend ×2 |
Training Machine Super Training Machine Buff Blend Great Buff Blend Skill Capsule | |||||
Chapter 7: Bravery Is Half the Victory
Brendan wants to introduce the team to his father, Norman, who is camped out in the mountains. On the way, they battle Team Break, who try to steal their Pokémon again.
At the summit, they find Paulo, who has just lost to Norman. The team meets Norman and wins a battle against him. Paulo is frustrated that he is falling behind, although Norman disagrees, stating that Paulo has true skills and pushed him during the battle.
Norman is about to give the player the badge when they spot Team Break making a commotion outside a cave. They decide to go and stop them.
As they enter the cave, Team Break blocks off the entrance and leaves. Norman and the player's team find another way out and battle multiple groups of Team Break on the way.
As they exit, Team Break reappears and explains their intention was to get rid of Norman, as he would be a barrier to their plans in sabotaging the PML.
After defeating Team Break one more time, Norman gives the player the Patience Badge and also hands one to Paulo as he showed mental aptitude in face of fearsome opposition. Norman decides to join the player's team.
Battles
| Name | Difficulty | Trainer | Pokémon | Completion Rewards | Battle Rewards | ||
|---|---|---|---|---|---|---|---|
| Left | Middle | Right | |||||
| Challenge on the Boulevard | Normal | Beauty Sophia |
Roggenrola Weakness: |
Stufful Weakness: |
 Geodude Alolan form Weakness: |
180 coins Training Machine Tech Tonic ×5 Great Tech Tonic 1★ Level-Up Manual |
Training Machine Super Training Machine Tech Tonic Great Tech Tonic Skill Capsule |
 Collector Landrey |
Geodude Weakness: |
Ponyta Weakness: ↓ Boldore Weakness: |
 Shieldon Weakness: | ||||
| Challenge on the Trail: Team Break | Normal |  Masked Man |
Roggenrola Weakness: ↓ Ponyta Weakness: |
Magnemite Weakness: ↓ Slugma Weakness: |
Geodude Weakness: ↓ Nosepass Weakness: |
184 coins Training Machine Tech Tonic ×5 Great Tech Tonic 1★ Level-Up Manual |
Training Machine Super Training Machine Tech Tonic Great Tech Tonic Skill Capsule |
| Hard | 360 coins Training Machine ×2 Tech Tonic ×7 Great Tech Tonic ×2 |
Training Machine Super Training Machine Tech Tonic Great Tech Tonic Skill Capsule | |||||
| Challenge on the Trail: Team Break, Part 2 | Normal |  Masked Woman |
Shieldon Weakness: |
Nuzleaf Weakness: ↓ Litwick Weakness: |
Boldore Weakness: |
188 coins Training Machine Tech Tonic ×5 Great Tech Tonic 1★ Level-Up Manual |
Training Machine Super Training Machine Tech Tonic Great Tech Tonic Skill Capsule |
Hiker Monroe |
Phanpy Weakness: |
Stufful Weakness: |
Stufful Weakness: | ||||
| Challenge Norman | Normal |  Norman |
Slugma Weakness: ↓ Shieldon Weakness: |
 Slaking Weakness: |
Shieldon Weakness: ↓ Numel Weakness: |
192 coins Training Machine Tech Tonic ×5 Great Tech Tonic 1★ Level-Up Manual |
Training Machine Super Training Machine Tech Tonic Great Tech Tonic Skill Capsule |
| Hard | 380 coins Training Machine ×2 Tech Tonic ×7 Great Tech Tonic ×2 |
Training Machine Super Training Machine Tech Tonic Great Tech Tonic Skill Capsule | |||||
| Challenge in the Cave: Team Break | Normal |  Masked Man |
Slugma Weakness: |
Numel Weakness: ↓  Graveler Alolan form Weakness: |
Nosepass Weakness: |
196 coins Training Machine Tech Tonic ×5 Great Tech Tonic 1★ Level-Up Manual |
Training Machine Super Training Machine Tech Tonic Great Tech Tonic Skill Capsule |
Masked Man |
Stufful Weakness: |
Bewear Weakness: |
Ponyta Weakness: | ||||
| Challenge in the Cave: Team Break, Part 2 | Normal | Masked Man |
Shieldon Weakness: ↓ Slugma Weakness: |
Bewear Weakness: |
Ponyta Weakness: ↓ Graveler Alolan form Weakness: |
200 coins Training Machine Tech Tonic ×5 Great Tech Tonic 1★ Level-Up Manual |
Training Machine Super Training Machine Tech Tonic Great Tech Tonic Skill Capsule |
| Hard | 400 coins Training Machine ×2 Tech Tonic ×7 Great Tech Tonic ×2 |
Training Machine Super Training Machine Tech Tonic Great Tech Tonic Skill Capsule | |||||
Chapter 8: A Cold, Harsh Winter
At a glacier, the team meets Pryce, a PML Leader. Barry and Flannery bicker about which one of them should battle him.
Despite their win against Pryce, he refuses to hand over the Badge as the team is missing something. Norman agrees and asks the team to think of the answer before battling Pryce again.
After some thinking, Barry apologizes to Flannery for rushing for no reason and for thinking he could do it all himself. Flannery also apologizes for panicking as she was trying to live up to her title as Gym Leader. The two realize they were out of sync during the battle and decide to work together.
They battle Pryce and this time, he is pleased at their teamwork. He hands them the Harmony Badge and decides to join the team.
Battles
| Name | Difficulty | Trainer | Pokémon | Completion Rewards | Battle Rewards | ||
|---|---|---|---|---|---|---|---|
| Left | Middle | Right | |||||
| Challenge at the Glacier | Normal | Hiker Bradley |
Spheal Weakness: |
 Amaura Weakness: |
Spheal Weakness: |
203 coins Training Machine Aid Ade ×5 Great Aid Ade 1★ Level-Up Manual |
Training Machine Super Training Machine Aid Ade Great Aid Ade Skill Capsule |
Swimmer Stanley |
Pelipper Weakness: |
Spheal Weakness: |
Spheal Weakness: | ||||
| Challenge Pryce | Normal |  Pryce |
Spheal Weakness: |
 Seel Weakness: |
 Snorunt Weakness: |
209 coins Training Machine Aid Ade ×5 Great Aid Ade 1★ Level-Up Manual |
Training Machine Super Training Machine Aid Ade Great Aid Ade Skill Capsule |
| Hard | 405 coins Training Machine ×2 Aid Ade ×7 Great Aid Ade ×2 |
Training Machine Super Training Machine Aid Ade Great Aid Ade Skill Capsule | |||||
| Challenge at the Glacier: Part 2 | Normal |  Preschooler Clementine |
Spheal Weakness: |
Delibird Weakness: |
Snorunt Weakness: |
216 coins Training Machine Aid Ade ×5 Great Aid Ade 1★ Level-Up Manual |
Training Machine Super Training Machine Aid Ade Great Aid Ade Skill Capsule |
Scientist Vaughn |
Amaura Weakness: |
Mareanie Weakness: ↓  Abomasnow Weakness: |
Mareanie Weakness: | ||||
| Challenge Pryce: Part 2 | Normal | Pryce |
Amaura Weakness: ↓ Mareanie Weakness: |
Seel Weakness: |
Spheal Weakness: ↓ Snorunt Weakness: |
225 coins Training Machine Aid Ade ×5 Great Aid Ade 1★ Level-Up Manual |
Training Machine Super Training Machine Aid Ade Great Aid Ade Skill Capsule |
| Hard | 450 coins Training Machine ×2 Aid Ade ×7 Great Aid Ade ×2 |
Training Machine Super Training Machine Aid Ade Great Aid Ade Skill Capsule | |||||
Chapter 9: The Beauty of Friendship
At Centra City, Rosa introduces Iris to the team. They spot Team Break, who are claiming the city as theirs. The player's team fight the Team Break members away.
Lear comes after hearing news of Team Break and is disappointed to find that it was only a bunch of amateurs fighting against them. Lear insults the player, calling them pathetic, then Iris defends them. Iris and Lear eventually battle. Despite the support of Rachel and Sawyer, Lear states they are mere retainers, not friends. While the battle is neck and neck, Lear leaves without finishing the battle.
Iris then battles the player to try out the new three-on-three battle system and ends up joining the team afterwards.
Battles
| Name | Difficulty | Trainer | Pokémon | Completion Rewards | Battle Rewards | ||
|---|---|---|---|---|---|---|---|
| Left | Middle | Right | |||||
| Team Break Assault | Normal | Masked Woman |
 Dratini Weakness: |
 Axew Weakness: ↓  Deino Weakness: |
 Goomy Weakness: |
225 coins Training Machine Buff Blend ×6 Great Buff Blend 1★ Level-Up Manual |
Training Machine Super Training Machine Buff Blend Great Buff Blend Skill Capsule |
 Masked Man |
 Bagon Weakness: |
 Gible Weakness: |
Shieldon Weakness: | ||||
| Team Break Assault: Part 2 | Normal | Masked Man |
Gible Weakness: ↓ Shieldon Weakness: |
 Carnivine Weakness: |
Axew Weakness: ↓ Deino Weakness: |
230 coins Training Machine Buff Blend ×6 Great Buff Blend 1★ Level-Up Manual |
Training Machine Super Training Machine Buff Blend Great Buff Blend Skill Capsule |
| Hard | 450 coins Training Machine ×2 Buff Blend ×8 Great Buff Blend ×2 |
Training Machine Super Training Machine Buff Blend Great Buff Blend Skill Capsule | |||||
| Team Break Assault: Part 3 | Normal | Masked Woman |
Goomy Weakness: |
Gible Weakness: ↓ Shieldon Weakness: |
Bagon Weakness: |
479 coins Training Machine Buff Blend ×6 Great Buff Blend 1★ Level-Up Manual |
Training Machine Super Training Machine Buff Blend Great Buff Blend Skill Capsule |
Masked Man |
Dratini Weakness: |
Axew Weakness: |
Shieldon Weakness: | ||||
| Team Break Assault: Part 4 | Normal | Pokémon Ranger Natalie |
Shieldon Weakness: |
Bagon Weakness: |
Gible Weakness: |
490 coins Training Machine Buff Blend ×6 Great Buff Blend 1★ Level-Up Manual |
Training Machine Super Training Machine Buff Blend Great Buff Blend Skill Capsule |
 Masked Woman |
Axew Weakness: |
Gible Weakness: ↓ Deino Weakness: |
Goomy Weakness: | ||||
| Team Break Assault: Part 5 | Normal | Masked Man |
Amaura Weakness: ↓ Bagon Weakness: |
 Vibrava Weakness: |
Deino Weakness: ↓ Axew Weakness: |
245 coins Training Machine Buff Blend ×6 Great Buff Blend 1★ Level-Up Manual |
Training Machine Super Training Machine Buff Blend Great Buff Blend Skill Capsule |
| Hard | 475 coins Training Machine ×2 Buff Blend ×8 Great Buff Blend ×2 |
Training Machine Super Training Machine Buff Blend Great Buff Blend Skill Capsule | |||||
| Challenge Iris | Normal |  Iris |
Deino Weakness: ↓ Bagon Weakness: |
 Haxorus Weakness: |
Amaura Weakness: ↓ Dratini Weakness: |
250 coins Training Machine Buff Blend ×6 Great Buff Blend 1★ Level-Up Manual |
Training Machine Super Training Machine Buff Blend Great Buff Blend Skill Capsule |
| Hard | 500 coins Training Machine ×2 Buff Blend ×8 Great Buff Blend ×2 |
Training Machine Super Training Machine Buff Blend Great Buff Blend Skill Capsule | |||||
Chapter 10: A Matter of Pride
The team set off to earn their last badge. They meet Hapu and Paulo, who has just lost a battle to her. Hapu reassures Paulo that he has real strength, but tells him that he needs more self-confidence.
The team asks Hapu for a battle, but she declines, stating that her Pokémon is tired from the previous battle.
Team Break appear and claim that more associates are on the way. Paulo runs ahead to scope out the area and the player chases after him. They eventually find Paulo, who has lost another battle to Team Break. After the player's team defeats Team Break, Hapu admonishes Paulo for rashly running ahead on his own, but commends the player for defending Paulo when his pride was insulted.
The team rests while Hapu heads off to prepare for the battle. Paulo leaves and ruminates about Hapu's suggestion of self-confidence.
The team meets up with Hapu, who hands them the Pride Badge before the battle even begins, remarking that she has seen enough to know the player is worthy of the Badge. After the battle, Hapu decides to join the team.
Brock states that the player reminds him of Red and Blue, then heads off on his own to clear his mind.
Battles
| Name | Difficulty | Trainer | Pokémon | Completion Rewards | Battle Rewards | ||
|---|---|---|---|---|---|---|---|
| Left | Middle | Right | |||||
| Challenge in the Mountains | Normal | Ace Trainer Emily |
Geodude Weakness: |
Gible Weakness: ↓ Palpitoad Weakness: |
Goomy Weakness: |
248 coins Training Machine Tech Tonic ×6 Great Tech Tonic 1★ Level-Up Manual |
Training Machine Super Training Machine Tech Tonic Great Tech Tonic Skill Capsule |
 Ace Trainer Tyson |
Dratini Weakness: |
 Palossand Weakness: |
Palpitoad Weakness: | ||||
| Challenge in the Mountains: Team Break | Normal | Masked Woman |
Trapinch Weakness: ↓ Gible Weakness: |
Bagon Weakness: ↓ Seismitoad Weakness: |
Axew Weakness: ↓ Phanpy Weakness: |
253 coins Training Machine Tech Tonic ×6 Great Tech Tonic 1★ Level-Up Manual |
Training Machine Super Training Machine Tech Tonic Great Tech Tonic Skill Capsule |
| Hard | 630 coins Training Machine ×2 Tech Tonic ×8 Great Tech Tonic ×2 |
Training Machine Super Training Machine Tech Tonic Great Tech Tonic Skill Capsule | |||||
| Challenge in the Mountains: Team Break, Part 2 | Normal |  Masked Woman |
Bagon Weakness: |
Goomy Weakness: ↓  Graveler Weakness: |
Palpitoad Weakness: |
259 coins Training Machine Tech Tonic ×6 Great Tech Tonic 1★ Level-Up Manual |
Training Machine Super Training Machine Tech Tonic Great Tech Tonic Skill Capsule |
Masked Man |
Trapinch Weakness: |
Turtonator Weakness: |
Phanpy Weakness: | ||||
| Challenge in the Mountains: Team Break, Part 3 | Normal | Masked Man |
Graveler Weakness: |
 Salamence Weakness: |
Palpitoad Weakness: |
264 coins Training Machine Tech Tonic ×6 Great Tech Tonic 1★ Level-Up Manual |
Training Machine Super Training Machine Tech Tonic Great Tech Tonic Skill Capsule |
| Hard | 665 coins Training Machine ×2 Tech Tonic ×8 Great Tech Tonic ×2 |
Training Machine Super Training Machine Tech Tonic Great Tech Tonic Skill Capsule | |||||
| Challenge on the Boulevard | Normal | Black Belt Octavio |
Gible Weakness: |
Axew Weakness: ↓ Seismitoad Weakness: |
Trapinch Weakness: |
270 coins Training Machine Tech Tonic ×6 Great Tech Tonic 1★ Level-Up Manual |
Training Machine Super Training Machine Tech Tonic Great Tech Tonic Skill Capsule |
Street Thug Ridley |
Palpitoad Weakness: |
Graveler Weakness: |
Goomy Weakness: | ||||
| Challenge Hapu | Normal |  Hapu |
Turtonator Weakness: ↓ Palpitoad Weakness: |
 Mudsdale Weakness: |
Axew Weakness: ↓ Seismitoad Weakness: |
275 coins Training Machine Tech Tonic ×6 Great Tech Tonic 1★ Level-Up Manual |
Training Machine Super Training Machine Tech Tonic Great Tech Tonic Skill Capsule |
| Hard | 700 coins Training Machine ×2 Tech Tonic ×8 Great Tech Tonic ×2 |
Training Machine Super Training Machine Tech Tonic Great Tech Tonic Skill Capsule | |||||
Interlude 1: Brock's Grit
Back at Centra City, they meet Brock, who has changed into his sygna suit. Brock states that while he has been a mentor for the player so far, the player has grown so much that he now wants to be part of the team as a proper teammate. The player battles Brock and his new partner Pokémon, Tyranitar.
At the stadium, Lear hosts the opening ceremony to the PML tournament. After the ceremony, Lear approaches the team and ridicules them again. Lear admits he is crankier than usual as he saw Red at the ceremony and seeks to defeat him.
After Lear leaves, the Rosa spots Paulo, who has also grown much stronger and successfully earned five Badges to get into PML tournament.
Battle
| Name | Difficulty | Trainer | Pokémon | Completion Rewards | Battle Rewards | ||
|---|---|---|---|---|---|---|---|
| Left | Middle | Right | |||||
| Challenge Sygna Suit Brock | Normal |  Brock Sygna Suit |
Roggenrola Weakness: |
 Tyranitar Weakness: |
Nosepass Weakness: |
300 coins Training Machine ×2 Aid Ade ×5 Great Tech Tonic 1★ Level-Up Manual |
Super Training Machine Aid Ade Great Aide Ade Skill Capsule |
| Hard | 1000 coins Training Machine ×2 Aid Ade ×8 Great Tech Tonic ×2 |
Training Machine Super Training Machine Aid Ade Great Aide Ade Skill Capsule Gym Leader Notes | |||||
Chapter 11: Alola's Rising Stars
The player's first opponents in the PML tournament are Sophocles and Hau.
After defeating Sophocles and Hau, Hau strives to become stronger. Sophocles then suggests that Hau could get stronger by joining the player's team. Hau agrees and does so.
Battle
| Name | Difficulty | Trainer | Pokémon | Completion Rewards | Battle Rewards | |||
|---|---|---|---|---|---|---|---|---|
| Left | Middle | Right | ||||||
| Challenge Hau & Sophocles | Normal |  Sophocles |
 Hau |
 Togedemaru Weakness: |
 Raichu Alolan form Weakness: |
Geodude Alolan form Weakness: |
350 coins Training Machine ×2 Buff Blend / Tech Tonic / Aid Ade ×6 1★ Level-Up Manual |
Training Machine Super Training Machine Buff Blend / Tech Tonic / Aid Ade Great Buff Blend / Tech Tonic / Aid Ade Skill Capsule |
| Hard | 1,100 coins Training Machine ×2 Buff Blend / Tech Tonic / Aid Ade ×3 |
Training Machine Super Training Machine Buff Blend / Tech Tonic / Aid Ade Great Buff Blend / Tech Tonic / Aid Ade Ultra Buff Blend / Tech Tonic / Aid Ade Skill Capsule | ||||||
Chapter 12: Candle and Flame
Flint has been left without a team as Blaine has left. He overhears Shauntal reading from a book and realizes she is also looking to join a team. The two agree to form a team.
The player meets their second pair of opponents, Flint and Shauntal, at the stadium. Flint comments that he has heard much about this new and upcoming Trainer.
After the battle, Shauntal asks the player if Flint could join their PML team so that his inner flame could keep on burning. Flint joins the team while Shauntal states she will take a step back to write her book.
Battle
| Name | Difficulty | Trainer | Pokémon | Completion Rewards | Battle Rewards | |||
|---|---|---|---|---|---|---|---|---|
| Left | Middle | Right | ||||||
| Challenge Flint & Shauntal | Normal |  Flint |
 Shauntal |
Ponyta Weakness: |
 Infernape Weakness: |
 Chandelure Weakness: |
400 coins Training Machine ×2 Buff Blend ×7 Great Buff Blend ×2 1★ Level-Up Manual |
Training Machine Super Training Machine Buff Blend Great Buff Blend Skill Capsule |
| Hard | 1,200 coins Training Machine ×2 Buff Blend ×10 Great Buff Blend ×3 Ultra Buff Blend |
Training Machine Super Training Machine Buff Blend Great Buff Blend Ultra Buff Blend Skill Capsule Gym Leader Notes | ||||||
Chapter 13: Cold Confidence
Clair tries to convince Iris to join her team along with Lorelei. However, Iris declines, preferring to stay with her current team with the player. Clair and Lorelei, down one team member, decide to train rather than use their time to complete their team.
The player then meets Clair and Lorelei at the stadium. After defeating the pair, Clair decides to join the player's team to continue bringing her energy into the competition.
Battle
| Name | Difficulty | Trainer | Pokémon | Completion Rewards | Battle Rewards | |||
|---|---|---|---|---|---|---|---|---|
| Left | Middle | Right | ||||||
| Challenge Clair & Lorelei | Normal |  Lorelei |
 Clair |
 Lapras Weakness: |
 Kingdra Weakness: |
Dratini Weakness: |
810 coins Training Machine ×2 Tech Tonic ×7 Great Tech Tonic ×2 1★ Level-Up Manual |
Training Machine Super Training Machine Tech Tonic Great Tech Tonic Skill Capsule |
| Hard | 1,300 coins Training Machine ×2 Tech Tonic ×10 Great Tech Tonic ×3 Ultra Tech Tonic |
Training Machine Super Training Machine Tech Tonic Great Tech Tonic Ultra Tech Tonic Skill Capsule Gym Leader Notes | ||||||
Chapter 14: Bug Experts
As Viola takes pictures of Bugsy and Beedrill, Bugsy asks when they can start training for the battle tomorrow. Viola finally takes a photo she is happy with and they start training so they can show how strong Bug-type Pokémon are.
The player meets Viola and Bugsy at the PML tournament. Viola takes a photo of the player and Bugsy apologizes for her eagerness to take a photo without permission.
After the battle, Bugsy commemorates the battle by having a photo taken with the player. Viola joins the player's team to take more photos of smiling Trainers and Pokémon, while Bugsy is keen to train with other Bug-type Trainers in Pasio.
Battle
| Name | Difficulty | Trainer | Pokémon | Completion Rewards | Battle Rewards | |||
|---|---|---|---|---|---|---|---|---|
| Left | Middle | Right | ||||||
| Challenge Viola & Bugsy | Normal |  Bugsy |
 Viola |
 Beedrill Weakness: |
 Surskit Weakness: |
 Snover Weakness: |
500 coins Training Machine ×2 Aid Ade ×7 Great Aid Ade ×2 1★ Level-Up Manual |
Training Machine Super Training Machine Aid Ade Great Aid Ade Skill Capsule |
| Hard | 1,400 coins Training Machine ×2 Aid Ade ×10 Great Aid Ade ×3 Ultra Aid Ade |
Training Machine Super Training Machine Aid Ade Great Aid Ade Ultra Aid Ade Skill Capsule Gym Leader Notes | ||||||
Chapter 15: Dubious Duo
As Dark-type Trainers, Nanu and Grimsley have so far advanced through the tournament with cheap tricks and bluffs. However, Grimsley remarks that this is unlikely to work this time as these Trainers are sincere and earnest.
After the battle, Nanu asks if the player has run into Team Break and asks to join the team. After player leaves, Nanu tells Grimsley that he thinks Team Break is up to something and wants to find out what it is. Nanu recommends Grimsley to form another team with Trainers of other types, and invites him to the Sushi High Roller in Alola.
Battle
| Name | Difficulty | Trainer | Pokémon | Completion Rewards | Battle Rewards | |||
|---|---|---|---|---|---|---|---|---|
| Left | Middle | Right | ||||||
| Challenge Nanu & Grimsley | Normal |  Nanu |
 Grimsley |
Sealeo Weakness: |
 Persian Alolan form Weakness: |
 Liepard Weakness: |
600 coins Training Machine ×2 Buff Blend / Tech Tonic / Aid Ade ×3 1★ Level-Up Manual |
Training Machine Super Training Machine Buff Blend / Tech Tonic / Aid Ade Great Buff Blend / Tech Tonic / Aid Ade Skill Capsule |
| Hard | 1,450 coins Training Machine ×2 Buff Blend / Tech Tonic / Aid Ade ×3 |
Training Machine Super Training Machine Buff Blend / Tech Tonic / Aid Ade Great Buff Blend / Tech Tonic / Aid Ade Ultra Buff Blend / Tech Tonic / Aid Ade Skill Capsule Gym Leader Notes | ||||||
Chapter 16: Ninja Kin
When the player meets Koga and Janine, Koga claims to have mastered the ninja art of espionage and has already found out everything about player.
After the battle, Janine blames herself for the loss. Koga reassures that they are equals on the team and that they both share the loss. Janine decides to go on a journey to get stronger and leaves. Koga decides to join player's team to ensure that Janine isn't stronger than he is when she returns.
Battle
| Name | Difficulty | Trainer | Pokémon | Completion Rewards | Battle Rewards | |||
|---|---|---|---|---|---|---|---|---|
| Left | Middle | Right | ||||||
| Challenge Koga & Janine | Normal |  Janine |
 Koga |
 Ariados Weakness: |
 Crobat Weakness: |
 Nidoqueen Weakness: |
700 coins Training Machine ×2 Buff Blend ×8 Great Buff Blend ×2 1★ Level-Up Manual |
Training Machine Super Training Machine Buff Blend Great Buff Blend Skill Capsule |
| Hard | 1,500 coins Training Machine ×3 Buff Blend ×13 Great Buff Blend ×4 Ultra Buff Blend ×2 |
Training Machine Super Training Machine Buff Blend Great Buff Blend Ultra Buff Blend Skill Capsule Gym Leader Notes | ||||||
Chapter 17: Ghostly Trio
Before the battle, Agatha prepares the team for the battle. Acerola is confident as they are all Elite Four, but Agatha scolds her, telling her that individual titles don't matter in team battles.
The player meets Acerola, Agatha, and Phoebe, who want to show how strong Ghost-type Pokémon are.
Both Acerola and Phoebe are upset after losing the battle, and Agatha requests if Acerola and Phoebe could join the player's team to experience more battles and meet new friends. Agatha remarks that she will start from scratch and sit back to watch the tournament and learn more about team battles. Acerola decides to join the player's team while Phoebe states she wants to join Agatha to learn more about team battles.
Battle
| Name | Difficulty | Trainer | Pokémon | Completion Rewards | Battle Rewards | ||||
|---|---|---|---|---|---|---|---|---|---|
| Left | Middle | Right | |||||||
| Challenge Acerola & Phoebe & Agatha | Normal |  Phoebe |
 Acerola |
 Agatha |
 Dusknoir Weakness: |
Palossand Weakness: |
 Gengar Weakness: |
800 coins Training Machine ×2 Tech Tonic ×8 Great Tech Tonic ×2 1★ Level-Up Manual |
Training Machine Super Training Machine Tech Tonic Great Tech Tonic Skill Capsule |
| Hard | 1,550 coins Training Machine ×3 Tech Tonic ×13 Great Tech Tonic ×4 Ultra Tech Tonic ×2 |
Training Machine Super Training Machine Tech Tonic Great Tech Tonic Ultra Tech Tonic Skill Capsule Gym Leader Notes | |||||||
Chapter 18: Team Unova
Cheren and Hilbert reflect that despite their strong team, they will now face Champion level trainers in the tournament. Cheren remarks that they need to battle while helping each other. Hilbert laughs and comments that Cheren has grown much since the start of his journey around Unova. Hilbert asks if Hilda could join their team as they have all had similar journeys across Unova, which might help them get in sync as a team.
After the battle with the player, Cheren thanks the player for battle. Both Hilbert and Hilda realize that Cheren wants to join the player's team, and Cheren eventually joins the player's team.
Battle
| Name | Difficulty | Trainer | Pokémon | Completion Rewards | Battle Rewards | ||||
|---|---|---|---|---|---|---|---|---|---|
| Left | Middle | Right | |||||||
| Challenge Cheren & Hilbert & Hilda | Normal |  Hilda |
 Cheren |
 Hilbert |
 Emboar Weakness: |
 Stoutland Weakness: |
 Samurott Weakness: |
900 coins Training Machine ×2 Aid Ade ×8 Great Aid Ade ×2 1★ Level-Up Manual |
Training Machine Super Training Machine Aid Ade Great Aid Ade Skill Capsule |
| Hard | 1,650 coins Training Machine ×3 Aid Ade ×13 Great Aid Ade ×4 Ultra Aid Ade ×2 |
Training Machine Super Training Machine Aid Ade Great Aid Ade Ultra Aid Ade Skill Capsule Gym Leader Notes | |||||||
Interlude 2: A Stubborn Obstacle
With the first half of the tournament over, Misty and Brock are confident of winning. Lear interjects and states that they have been lucky so far. He cannot understand how working in a team can lead them to victory and remarks that the only way to true strength is to train hard by yourself without relying on others. Lear then challenges them to a battle. If they refuse or lose, he will revoke their right to compete in the tournament.
Chapter 19: Rematch vs. Lear!
Lear, Sawyer and Rachel come to battle the player. Lear will battle with Staraptor and has replaced his Krookodile as it was too weak to defeat Iris's Haxorus.
After Lear loses the battle, he remains in denial that he is stronger and reflects that this is his second loss (the first being his defeat to Red). Brock agrees that Lear is strong but that the player has capacity to have fun in battle, have real friendship, and have a real bond with Pokémon. Cheren notices that Lear is unable to use sync moves as he has no bond with his Pokémon.
Rachel and Sawyer defend Lear, stating that he is strong enough to win without sync moves. In response, Rosa points out that all Rachel and Sawyer do in their current position is watch from the sidelines rather than support Lear, calling it sad. As Rachel starts to agree that it does make her feel lonely, Lear cuts everyone off and states that he founded the PML to prove that the power of one man is stronger than bonds. However, Lear seems to have his mind on something and the player's team leaves to give him space.
After they leave, Rachel and Sawyer attempt to cheer Lear up. Sawyer reassures Lear that the king promised to name him the heir to the throne if the PML was a success. At that moment, Sawyer receives a phone call alerting him that some thieves have entered the royal manor and stolen "it".
Battle
| Name | Difficulty | Trainer | Pokémon | Completion Rewards | Battle Rewards | ||||
|---|---|---|---|---|---|---|---|---|---|
| Left | Middle | Right | |||||||
| Challenge Lear | Normal |  Sawyer |
 Lear |
 Rachel |
Honchkrow Weakness: |
 Staraptor Weakness: |
 Umbreon Weakness: |
1,000 coins Training Machine ×2 Buff Blend ×8 Great Buff Blend ×3 1★ Level-Up Manual |
Training Machine Super Training Machine Buff Blend Great Buff Blend Skill Capsule |
| Hard | 1,750 coins Training Machine ×3 Buff Blend ×14 Great Buff Blend ×5 Ultra Buff Blend ×2 |
Training Machine Super Training Machine Buff Blend Great Buff Blend Ultra Buff Blend Skill Capsule Gym Leader Notes | |||||||
Chapter 20: Shifting Shadows
As people await the PML finals, the player has become recognizable in Centra City. Calem also recognizes the player as Cynthia has told him much about the player and asks for a battle.
After the battle, Calem informs the player that Team Break have been stealing Pokémon again. He had planned to infiltrate their hideout when Cynthia recommended to ask the player for assistance.
They head to Team Break's hideout and battle groups of Team Break. The player eventually catches up with Calem, who again runs ahead on his own. Misty is concerned that Team Break appears to be getting stronger.
Once they find Calem again, the player helps him defeat Team Break. Team Break states that they can now call up strong Pokémon to battle whenever they want. After defeating the thugs, Team Break remarks that the player has fallen into their trap. However, when the Masked Man gives a signal, no Team Break members come. Cynthia walks in and says she has apprehended all the other members. Calem then decides to join the team.
The chapter ends with the player helping out Rising Star Stella in finding her Torchic. Along the way, Stella gains confidence in battling and eventually asks the player to raise a second Torchic that she has on hand.
Battles
| Name | Difficulty | Trainer | Pokémon | Completion Rewards | Battle Rewards | ||
|---|---|---|---|---|---|---|---|
| Left | Middle | Right | |||||
| Challenge in the City | Normal | Lass Gloria |
 Spoink Weakness: |
Hoppip Weakness: |
Marill Weakness: |
990 coins Training Machine ×2 Tech Tonic ×8 Great Tech Tonic ×3 1★ Level-Up Manual |
Training Machine Super Training Machine Tech Tonic Great Tech Tonic Skill Capsule |
Camper Galvin |
Drifloon Weakness: |
Nuzleaf Weakness: |
 Swirlix Weakness: | ||||
| Challenge Calem | Normal |  Calem |
Solrock Weakness: |
 Espurr Weakness: |
Ponyta Weakness: |
1,012 coins Training Machine ×2 Tech Tonic ×8 Great Tech Tonic ×3 1★ Level-Up Manual |
Training Machine Super Training Machine Tech Tonic Great Tech Tonic Skill Capsule |
| Hard | 1,665 coins Training Machine ×3 Tech Tonic ×14 Great Tech Tonic ×5 Ultra Tech Tonic ×5 |
Training Machine Super Training Machine Tech Tonic Great Tech Tonic Ultra Tech Tonic Skill Capsule Gym Leader Notes | |||||
| Challenge in Team Break's Hideout | Normal | Masked Man |
Litwick Weakness: |
 Flabébé Weakness: |
Hoppip Weakness: |
1,034 coins Training Machine ×2 Tech Tonic ×8 Great Tech Tonic ×3 1★ Level-Up Manual |
Training Machine Super Training Machine Tech Tonic Great Tech Tonic Skill Capsule |
Masked Man |
 Haunter Weakness: |
Carnivine Weakness: ↓  Granbull Weakness: |
Skiploom Weakness: ↓ Exeggcute Weakness: | ||||
| Challenge in Team Break's Hideout: Part 2 | Normal | Masked Man |
 Dusclops Weakness: |
 Lombre Weakness: |
Snover Weakness: |
1,067 coins Training Machine ×2 Tech Tonic ×8 Great Tech Tonic ×3 1★ Level-Up Manual |
Training Machine Super Training Machine Tech Tonic Great Tech Tonic Skill Capsule |
| Hard | 1,758 coins Training Machine ×3 Tech Tonic ×14 Great Tech Tonic ×5 Ultra Tech Tonic ×2 |
Training Machine Super Training Machine Tech Tonic Great Tech Tonic Ultra Tech Tonic Skill Capsule Gym Leader Notes | |||||
| Challenge in Team Break's Hideout: Part 3 | Normal | Masked Man |
Sigilyph Weakness: |
Frillish Weakness: |
 Masquerain Weakness: |
1,100 coins Training Machine ×2 Tech Tonic ×8 Great Tech Tonic ×3 1★ Level-Up Manual |
Training Machine Super Training Machine Tech Tonic Great Tech Tonic Skill Capsule |
| Hard | 1,850 coins Training Machine ×3 Tech Tonic ×14 Great Tech Tonic ×5 Ultra Tech Tonic ×2 |
Training Machine Super Training Machine Tech Tonic Great Tech Tonic Ultra Tech Tonic Skill Capsule Gym Leader Notes | |||||
| A Rising Star | Normal | Street Thug Fraser |
Shieldon Weakness: |
 Carracosta Weakness: |
Starly Weakness: |
1,100 coins Training Machine ×2 Tech Tonic ×8 Great Tech Tonic ×3 |
Training Machine Super Training Machine Tech Tonic Great Tech Tonic Skill Capsule |
Rising Star Stella |
Mareanie Weakness: |
 Torchic Weakness: |
Bibarel Weakness: | ||||
Chapter 21: Face the Fight!
The player's team has made it to the opening ceremony just in time. Before the ceremony, they notice that Paulo has also made it to the finals.
Sawyer runs the opening ceremony to the PML finals. Brock and Rosa wonder why Lear is not present, but decide to focus on their first team of opponents.
The chapter showcases how Marshal initially formed the PML team. He had come to Pasio to take martial arts to new heights, but was disappointed that nothing had changed. He recognized Bruno's voice from afar and joined him in training. Brawly then walked in after a surf and noticed that while Marshal and Bruno's upper body muscles were refined, they could train their lower body more. Brawly recommended surfing, although Bruno thought surfing was too extreme. However, Marshal had a new idea and decided to form a team for the PML.
At the PML tournament, the player defeats the martial arts team in battle. Brock and Rosa are surprised to have been matched up with them so early in the tournament. When the next opponents are announced, they are all shocked by who they are up against.
Battle
| Name | Difficulty | Trainer | Pokémon | Completion Rewards | Battle Rewards | ||||
|---|---|---|---|---|---|---|---|---|---|
| Left | Middle | Right | |||||||
| Challenge Marshal & Bruno & Brawly | Normal |  Brawly |
 Marshal |
 Bruno |
 Hariyama Weakness: |
 Conkeldurr Weakness: |
 Machamp Weakness: |
1,200 coins Training Machine ×2 Aid Ade ×8 Great Aid Ade ×3 1★ Level-Up Manual |
Training Machine Super Training Machine Aid Ade Great Aid Ade Skill Capsule |
| Hard | 2,150 coins Training Machine ×3 Aid Ade ×14 Great Aid Ade ×5 Ultra Aid Ade ×2 |
Training Machine Super Training Machine Aid Ade Great Aid Ade Ultra Aid Ade Skill Capsule Gym Leader Notes | |||||||
Interlude 3: The Truth about Pasio
Rachel finds the Team Break hideout empty as it was previously cleared by Cynthia. Lear is mad that they haven't found "it" yet and had ditched the opening ceremony to find his "secret friend".
An eavesdropping Cheren is noticed by them and admits that he followed Sawyer once he realized Lear wasn't at the opening ceremony. Cheren states the rumors that some Trainers have been transported to Pasio by a mysterious ring, him being one of them. Lear admits that he has been using Hoopa to summon sync pairs, but defends himself, saying that Hoopa was willing to help after some donuts and that Trainers were sent back if they were not willing to stay. Cheren realizes that Lear will need help if Team Break now has Hoopa, but Lear is adamant that he can handle it alone.
Chapter 22: Rival Face-Off!
The chapter recaps Paulo losing to two Masked Men. The Masked Men try to force Paulo to hand over his Pokémon, but Wulfric and Wikstrom step in and defeat Team Break. Recognizing them, Paulo expresses his gratitude and reminisces on how weak he is. Paulo then asks the two to join his PML team.
At the tournament, Paulo reflects on how much he has grown with the help of Wikstrom and Wulfric and aims to surpass the player.
After the battle, Paulo is surprised at the loss. With the support of Wikstrom and Wulfric, Paulo eventually manages a smile and walks away. Outside, Paulo thanks Wikstrom and Wulfric for having joined his team. The two comment on how much stronger and confident Paulo has become and then part ways. After they leave, Paulo still tries to understand how he lost and reflects on what it would take to beat player before walking off into a cave.
Battle
| Name | Difficulty | Trainer | Pokémon | Completion Rewards | Battle Rewards | ||||
|---|---|---|---|---|---|---|---|---|---|
| Left | Middle | Right | |||||||
| Challenge Paulo & Wikstrom & Wulfric | Normal |  Wulfric |
 Paulo |
 Wikstrom |
 Avalugg Weakness: Attack Type: |
 Rockruff Weakness: Attack Type: |
 Aegislash Weakness: Attack Type: |
1,300 coins Buff Blend ×9 Great Buff Blend ×3 Training Machine ×2 1★ Level Up Manual |
Training Machine Super Training Machine Buff Blend Great Buff Blend Skill Capsule |
| Hard | 2,250 coins Buff Blend ×15 Great Buff Blend ×6 Ultra Buff Blend ×6 Training Machine ×3 |
Training Machine Super Training Machine Buff Blend Great Buff Blend Ultra Buff Blend Skill Capsule Gym Leader Notes | |||||||
Chapter 23: Hearts Connected by Fashion
Koga and Clair are downcast after a kid calls their fashion weird. Valerie walks by and recognizes Erika. Valerie, a fashion designer, comments on how Koga and Clair's fashion pairs well with their partner Pokémon. For all her compliments, Clair offers to help Valerie in any way. Valerie reveals that she wants to become a Pokémon. When Koga explains that she cannot become a Pokémon using a sync stone, Valerie then asks the team to help her find someone she would like to meet.
At that moment, fans of Elesa come and challenge Valerie to a battle in order to force her to make an outfit for Elesa. After the battle, Valerie and the player's team go and find Elesa.
In the forest, they find Elesa battling Leaf. After the battle, Elesa recognizes Valerie and asks of one request from her.
Leaf, having heard of Valerie's wish to become a Pokémon, asks the player to battle Valerie. After the battle, Valerie is surprised at how she felt one with her Sylveon when using a sync move. This makes her interested in battles in Pasio and asks Elesa for a battle. Elesa agrees and then asks Valerie to join the player's team as they will be their third round opponents.
Battles
| Name | Difficulty | Trainer | Pokémon | Completion Rewards | Battle Rewards | ||
|---|---|---|---|---|---|---|---|
| Left | Middle | Right | |||||
| Challenge on the Boulevard | Normal | Ace Trainer Stewart |
Nuzleaf Weakness: |
 Pinsir Weakness: |
Slugma Weakness: |
1,260 coins Training Machine ×2 Tech Tonic ×9 Great Tech Tonic ×3 1★ Level-Up Manual |
Training Machine Super Training Machine Tech Tonic Great Tech Tonic Skill Capsule |
Punk Girl Hazel |
Carnivine Weakness: |
 Whirlipede Weakness: |
Surskit Weakness: | ||||
| The Elesa Fan Club | Normal | Lass Sadie |
Cottonee Weakness: |
 Arcanine Weakness: |
Ponyta Weakness: |
1,307 coins Training Machine ×2 Tech Tonic ×9 Great Tech Tonic ×3 1★ Level-Up Manual |
Training Machine Super Training Machine Tech Tonic Great Tech Tonic Skill Capsule |
| Hard | 2,115 coins Training Machine ×3 Tech Tonic ×15 Great Tech Tonic ×6 Ultra Tech Tonic ×3 |
Training Machine Super Training Machine Tech Tonic Great Tech Tonic Ultra Tech Tonic Skill Capsule Gym Leader Notes | |||||
| Challenge in the Forest | Normal | Beauty Ava |
Amaura Weakness: |
Marill Weakness: |
Lombre Weakness: |
1,353 coins Training Machine ×2 Tech Tonic ×9 Great Tech Tonic ×3 1★ Level-Up Manual |
Training Machine Super Training Machine Tech Tonic Great Tech Tonic Skill Capsule |
Poké Fan Leroy |
Ariados Weakness: |
Exeggcute Weakness: |
Flabébé Weakness: | ||||
| Challenge Valerie | Normal |  Valerie |
Jumpluff Weakness: |
 Sylveon Weakness: |
Jumpluff Weakness: |
1,400 coins Training Machine ×2 Tech Tonic ×9 Great Tech Tonic ×3 1★ Level-Up Manual |
Training Machine Super Training Machine Tech Tonic Great Tech Tonic Skill Capsule |
| Hard | 2,350 coins Training Machine ×3 Tech Tonic ×15 Great Tech Tonic ×6 Ultra Tech Tonic ×3 |
Training Machine Super Training Machine Tech Tonic Great Tech Tonic Ultra Tech Tonic Skill Capsule Gym Leader Notes | |||||
Chapter 24: A Shining Spotlight
The stage is set for a match against Fantina, Sabrina, and Elesa, who reveals her new sygna suit and new Pokémon Rotom. However, before the battle could begin, the match is interrupted by numerous Team Break Masked Men and Women, who intend to stop the PML by stealing everyone's Pokémon. Despite the player's efforts, the player and team become outnumbered by Team Break. Soon, however, further reinforcements including Paulo come along to help, then urge the player to complete their battle against Elesa's team. By the time the player has defeated Elesa, the player's reinforcements have fended off Team Break.
Battles
| Name | Difficulty | Trainers | Pokémon | Completion Rewards | Battle Rewards | ||||
|---|---|---|---|---|---|---|---|---|---|
| Left | Middle | Right | |||||||
| Team Break Ambush! | Normal | Masked Man |
Haunter Weakness: |
Frillish Weakness: |
Exeggcute Weakness: |
1,350 coins Training Machine ×2 Aid Ade ×9 Great Aid Ade ×3 1★ Level-Up Manual |
Training Machine Super Training Machine Aid Ade Great Aid Ade Skill Capsule | ||
Masked Man |
Drifloon Weakness: ↓ Litwick Weakness: |
Dusclops Weakness: ↓  Xatu Weakness: |
Espurr Weakness: ↓ Haunter Weakness: | ||||||
| Challenge Sygna Suit Elesa & Team | Normal |  Sabrina |
 Elesa Sygna Suit |
 Fantina |
 Alakazam Weakness: |
 Rotom Weakness: |
 Mismagius Weakness: |
1,500 coins Training Machine ×2 Aid Ade ×9 Great Aid Ade ×3 1★ Level-Up Manual |
Training Machine Super Training Machine Aid Ade Great Aid Ade Skill Capsule |
| Hard | 2,400 coins Training Machine ×3 Aid Ade ×15 Great Aid Ade ×6 Ultra Aid Ade ×3 1★ Level-Up Manual |
Training Machine Super Training Machine Aid Ade Great Aid Ade Ultra Aid Ade Skill Capsule Gym Leader Notes | |||||||
Interlude 4: The Once-Charming Prince
Lear has cornered a Masked Man and Masked Woman at another one of Team Break's hideouts and is ready to battle them with his Donphan. Before the battle can begin, Rachel and Sawyer arrive to provide backup. Lear refuses to battle alongside them, then proceeds to defeat the thugs by himself, taunting them as they flee. He then notices Cheren approaching them from the distance, leaving Rachel and Sawyer to deal with him despite Sawyer's attempts to get through to him.
When Rachel asks Cheren why he keeps following them around, he explains that he works as a Gym Leader and teacher in Unova, then expresses concern about Hoopa being in Team Break's possession as well as Lear. Rachel tries to tell Cheren that Lear doesn't need any help, but Sawyer asks him to use his leadership skills to help Lear find his way. Sawyer explains that Lear has grown increasingly obsessed with becoming powerful ever since he lost to the player, worrying that he will get himself into trouble if he takes the throne without knowing what it means to be a true king. Sawyer then convinces Rachel to let Cheren help them get through to Lear.
Cheren, realizing that Lear's problems ran much deeper than he initially thought, asks them to tell him everything about Lear. It is revealed that Lear used to be a kind boy who loved people and Pokémon, but after the death of his mother, the queen, he was taken out of Rachel and Sawyer's care and sent to a strict school by his father, the king. Once he came back, he only had trust in himself and began to degrade other people and Pokémon. Cheren concludes that the loss of his mother and the two people he relied on the most as well as his experiences he had at school caused him to lose trust in others.
Sawyer reveals that he was the one who created the rules of the PML in an attempt to help Lear remember how it feels to trust people and Pokémon again, then laments the failures of his plan. Cheren points out that he hasn't known Lear for as long as Rachel and Sawyer have and that he is still a beginner in teaching, but believes that those factors work in his favor. He agrees to do what he can to help Lear become a worthy king. Sawyer is thankful, but Rachel is still skeptical about Cheren. Cheren promises Rachel that he will put all his effort into helping Lear, then asks for clarification about Hoopa's role in regards to Lear and the PML. Sawyer admits that he and Rachel do not understand Hoopa's involvement in the issue, stating that Lear suddenly showed up with it after they decided to create the PML and refused to explain anything about it. Cheren wants to get started on helping Lear as soon as he can, but asks for a favor from Rachel and Sawyer.
Somewhere else away from Rachel, Sawyer, and Cheren, Lear continues to taunt Team Break, calling them weaklings and insulting their team name. When the three catch up to Lear, he shows them the numerous Team Break thugs he has defeated on his own. He insists that he is better off without teamwork and other people will only hold him back, surprising Rachel and Sawyer. Cheren asks Lear what kind of king he plans to be now that he has gotten so strong. Lear tells Cheren that he will be the strongest king of all, asserting that he will become the Champion of Pasio once he grows even more powerful. Lear tells Rachel and Sawyer to follow him to another Team Break hideout to find Hoopa, but they ignore his orders. Instead, they tell him that they have given up on him and are leaving Pasio, with Sawyer expressing disappointment in his refusal to change.
After Rachel and Sawyer leave, Lear continues to insist that he never needed them. Cheren then tells Lear that he needs to change.
Chapter 25: A Glorious Gambit
The chapter features a flashback from the formation of the next opposing team. In the flashback, Grimsley's old PML teammates have grown tired of his all-or-nothing battling style. During an altercation, they all decide to leave the team. After they walk off, Grimsley states that they have misunderstood his battling style. Now that he has no teammates, he considers withdrawing from the PML and leaving Pasio. Will and Karen spot him, then try to convince him to stay on Pasio and join their team. They compliment Grimsley's battling style, then inform him that they are close to qualifying for the PML finals, but need him to join their team in order to do so. Grimsley questions their willingness to let him make risky decisions that could hurt their partner Pokémon. Will's Xatu and Karen's Umbreon are both willing to risk themselves to battle alongside Grimsley. Will asserts that his strength as a member of the Indigo League Elite Four will guarantee that Grimsley won't need to consider hurting his partner Pokémon to win. Karen also asserts that she will endure whatever it takes to win alongside her favorite Pokémon. Grimsley decides to flip a coin to decide whether or not he will join their team.
At the PML finals, the player's team is faced against Will and Karen's team. Karen notes that members of the audience were inspired to fight back against Team Break during their battle against Elesa's team during the last round, with Will pointing out that the player's attitude was what motivated the audience to fight. Nanu informs everyone that the stadium's security has been reinforced after Team Break's attempt to sabotage the PML. Will remarks that he had previously heard about Nanu's attitude from someone who he might know. Grimsley arrives in his new sygna suit with his new partner Pokémon, Sharpedo. He states that the designer of the sygna suits was inspired by the more aggressive fighting style he took on to better suit his new team and made him one of his own.
The player's team wins a battle against Grimsley, Karen, and Will. Grimsley laments that he has nothing left again after having lost to the player. Will agreed with him, but asserts that they will continue to fight until they win regardless of how many times they lose. Karen also insists on Grimsley staying with their team. The team leaves, with Grimsley telling Nanu that his visit to Alola will have to wait. As the player's team is going to check the matchups for the quarterfinals, they run into Cynthia again. She congratulates them on their victory, then reveals that she will be up against their team in the next round, surprising Misty and Brock.
Battle
| Name | Difficulty | Trainers | Pokémon | Completion Rewards | Battle Rewards | ||||
|---|---|---|---|---|---|---|---|---|---|
| Left | Middle | Right | |||||||
| Challenge Sygna Suit Grimsley & Co. | Normal |  Karen |
 Grimsley Sygna Suit |
 Will |
Umbreon Weakness: |
 Sharpedo Weakness: |
Xatu Weakness: |
1,600 coins 2★ Level-Up Manual |
|
| Hard | 2,450 coins 2★ Level-Up Manual |
||||||||
Interlude 5: What Makes a King
Rachel and Sawyer watch as Cheren and Lear enter a cave to take on Team Break. Rachel says that Cheren told them to keep their distance from Lear, but she's not sure if it's a good idea. Sawyer says they should trust Cheren's advice, but he's still worried about Lear. Rachel says that she's also worried about Lear, and the two debate over who's more worried about him.
Inside the cave, Lear expresses his disgust at Cheren continuing to follow him around, but Cheren refuses to leave him alone - especially because Team Break's Pokémon seem to be growing stronger as they go. Lear scoffs that he can handle them on his own no matter how strong they get. Three members of Team Break show up to challenge them, and Lear tells Cheren to stay out of the fight. He struggles to win a bit more than usual, but eventually triumphs over the trio. The leader of the Team Break members blames his two teammates for the loss, claiming that they didn't follow his orders and held him back, and he boasts that next time he'll take on Lear on his own and win.
After the Team Break members leave, Lear complains that they were pathetic, especially the leader who was "strutting around all high and mighty and couldn't even face up to the fact that he lost". Cheren tells Lear that that's exactly how he looks to everyone else. He also notes that although the Team Break leader blamed the loss on his teammates, they were actually doing a good job of supporting him, and that's why the battle was tougher than Lear expected. In the same way, Lear has been oblivious to how much Rachel and Sawyer have always helped him out against tough opponents, and Cheren wonders if he's finally starting to notice that now. Lear dismisses Cheren's words, claiming that he's gotten to where he is by doing everything himself and he's going to become the strongest king by himself, too. Cheren tells him that if he keeps up that attitude, he'll never be fit to be a king. This ticks off Lear, and he challenges Cheren to a battle so he can crush Cheren completely.
However, to Lear's shock and dismay, Cheren defeats him. Cheren tells him that the loss wasn't his Pokémon's fault - Lear's Donphan fought very well, but as a lone Pokémon going up against a sync pair, it didn't stand a chance. Then Cheren tells Lear about the two heroes of Unova, who had very different views of the world: one believed firmly in the bonds between Pokémon and people, and the other believed he had to change the world for Pokémon because they were his friends. But both of their beliefs were rooted in caring for people and Pokémon alike, and that allowed them both to be recognized by Legendary Pokémon and grow strong enough to defeat their region's Champion. Cheren says that to be a good king, Lear has to let go of his fixation on being the strongest and learn to care for others.
Lear considers Cheren's words, and it seems like Cheren might have finally gotten through to him. Unfortunately, they're interrupted by a Team Break leader's voice coming through a speaker. The leader proposes to Lear that they settle this once and for all, and he challenges Lear to come to a certain location alone and battle him. If Lear wins, they'll return Hoopa. Cheren says that it's obviously a trap and they won't fall for it, but the leader taunts Lear by reminding him that as long as Team Break has Hoopa, they can easily ruin the PML, and Lear needs the PML to succeed if he wants to become king. Cheren tries to talk Lear out of it, but Lear ignores him and rushes off to find Team Break, insistent that he won't need to change if he can just become king.
Chapter 26: The Future Is Now!
Rosa, Hau, Viola, and the player are discussing their upcoming battle against Cynthia. Hau is excited to battle a Trainer as strong as Cynthia, but Rosa is nervous that they're not strong enough to defeat her. Viola says that they need a plan and suggests that they battle a bunch of strong sync pairs to train their Pokémon and build up their confidence, but Rosa isn't sure how to find a bunch of strong sync pairs in such a short amount of time. Just then, Professor Bellis shows up and asks them what's going on. After Viola explains the situation, Professor Bellis says she knows some people who can help them, and she asks the group to come back to her lab with her.
Upon arriving at the lab, the group is greeted by Clemont, Sophocles, and Molayne. Molayne introduces himself to the group, and Professor Bellis says they've been helping her with her sync stone research. Clemont activates a machine called the Sync Pair Pinger that he and Sophocles invented; it was designed to detect strong sync pairs and attract them to its location. The Sync Pair Pinger reacts to something outside, and the group goes out to investigate. Three sync pairs have been summoned by the machine, so the player's team battles them.
However, after defeating the sync pairs, Rosa and Hau say that it was a fun battle, but they were hoping to fight someone stronger. Clemont assures the player that the machine will work right this next time and makes some adjustments to ensure it summons the strongest sync pair in the area. The Sync Pair Pinger activates, but instead of summoning one strong sync pair, it summons a whole mob of sync pairs.
After the player's team defeats the sync pairs, Rosa and Hau note that they were again much stronger than all of them. Molayne suggests that Sophocles and Clemont inspect the machine to figure out why it's not behaving properly, but Clemont worries that the player's team doesn't have enough time to wait for them to do the inspection. Sophocles insist that the third time's the charm, and they activate the Sync Pair Pinger again.
Unfortunately, the sync pairs summoned by the machine are once again not terribly strong. Sophocles and Clemont finally admit that the machine was a failure, and they express their regret that they weren't able to help the player's team. But Molayne encourages them, reminding them that it wasn't a complete failure because they were able to make some progress, and he tells them that they'll eventually succeed as long as they don't give up. Just then, Molayne's Dugtrio, Sophocles's Togedemaru, and Clemont's Heliolisk let themselves out of their Poké Balls. Rosa speculates that the Pokémon are responding to the Sync Pair Pinger, making Sophocles and Clemont wonder if the experiment was actually a success. Molayne suggests that they battle the player's team, and Sophocles and Clemont agree to it.
After the player defeats Molayne, Sophocles, and Clemont, the group returns to Professor Bellis's lab. Molayne admits that he doesn't think the Sync Pair Pinger ever really worked - their Pokémon only let themselves out of their Poké Balls because they really wanted to fight the player. Then, he says that he wants to join the player's team. When Rosa asks why, he says that he thinks the machine failed because it didn't have enough sync pair data, and he can help gather data by battling opponents in the PML. He also says that battling the player made him nostalgic for his island challenge days, and he wants to have more exciting battles like that. The player agrees to let Molayne join the team, and Clemont and Sophocles promise to keep working on the machine until it works properly. Just then, the Sync Pair Pinger goes off again, and the group goes outside to investigate. They find that this time, Blue and his Pidgeot have been summoned and are ready for a battle. While Molayne and Clemont are still unsure if it's the machine's doing, Professor Bellis says that this is the perfect training opportunity, and Rosa accepts Blue's challenge.
After training with Blue all night, he declares that the player's team is ready for anything. His teammate, Red, comes to pick him up, and Blue says goodbye to the player's team. Rosa is feeling a lot more confident after the training session with Blue, and she says that they have to keep winning so they can have a battle with Red and Blue's team. Meanwhile, at the arena, Cynthia has changed into her sygna suit and is eagerly awaiting the match to see how far the player has come as a Trainer.
Battle
| Name | Difficulty | Trainer | Pokémon | Completion Rewards | Battle Rewards | ||||
|---|---|---|---|---|---|---|---|---|---|
| Left | Middle | Right | |||||||
| Challenge on the Boulevard | Normal | Rising Star Gabriella |
Hoppip Weakness: |
Beedrill Weakness: |
Bellsprout Weakness: |
1,650 coins 2★ Level-Up Manual |
|||
Ace Trainer Ned |
Nuzleaf Weakness: |
Vileplume Weakness: |
Exeggcute Weakness: | ||||||
| Who's That Sync Pair?! Part 1 | Normal | Scientist Chad |
Delibird Weakness: |
Pinsir Weakness: |
Abomasnow Weakness: |
1,700 coins 2★ Level-Up Manual |
|||
| Hard | 2,470 coins 2★ Level-Up Manual |
||||||||
| Who's That Sync Pair?! Part 2 | Normal | Ace Trainer Ayesha |
 Miltank Weakness: ↓ Stufful Weakness: |
Weepinbell Weakness: ↓  Cryogonal Weakness: |
Avalugg Weakness: ↓ Whirlipede Weakness: |
1,750 coins 2★ Level-Up Manual |
|||
Camper Jagger |
 Poochyena Weakness: ↓ Nuzleaf Weakness: |
Carnivine Weakness: ↓ Ariados Weakness: |
Pumpkaboo Weakness: ↓ Snover Weakness: | ||||||
| Who's That Sync Pair?! Part 3 | Normal | Swimmer Noah |
Snorunt Weakness: |
Lapras Weakness: |
 Dewgong Weakness: |
1,800 coins 2★ Level-Up Manual |
|||
 Youngster Silvio |
Klink Weakness: |
Roserade Weakness: |
Dustox Weakness: | ||||||
| Challenge Molayne & Co. | Normal | Sophocles |
 Molayne |
 Clemont |
Togedemaru Weakness: |
 Dugtrio Alolan form Weakness: |
 Heliolisk Weakness: |
1,850 coins 2★ Level-Up Manual |
|
| Hard | 2,500 coins 2★ Level-Up Manual |
||||||||
Interlude 6: Royally Alone
Rachel and Sawyer are shocked to hear from Cheren that Lear ran off on his own to fight Team Break in order to reclaim Hoopa. The three are about to set off with their Pokémon to find him, when suddenly Team Break Grunts appear and stop them with a battle.
As Lear waits at a glacier to meet with Team Break, he continues to convince himself that becoming king will solve all of his problems, in spite of Cheren’s advice. The Team Break member who spoke to Lear over the speaker arrives at the glacier. Lear prepares to battle him for Hoopa, but it is quickly revealed to be an ambush. Lear attempts to fight off a group of Team Break grunts, but ultimately loses without the help of Rachel and Sawyer.
After Lear is knocked out by the grunts, he dreams of a memory from years ago. In the memory, a younger Lear heads to the beach by himself in tears. Overwhelmed with the pressure his father puts on him, Lear claims that he doesn’t even want to be king if it involves this much work. When the cry of a Pokémon can be heard, Lear becomes nervous. Hoopa suddenly appears in front of him, scaring him. Lear shouts at it, saying his family will come running to help him if Hoopa tries to hurt him. However, Lear stops himself and looks down at the ground. Hoopa summons a Phanpy to scare Lear, and he yells at it again. To Lear’s surprise, Hoopa then summons a beautiful stone to give to him. Lear realizes that Hoopa is not his enemy, and is about to ask it a question before the memory is cut short.
Lear wakes up in a storage room and realizes that he has been captured by Team Break. He begins to question his own strength, but his thoughts are interrupted when he hears a noise from across the room. Lear turns to see Hoopa, doubled over itself with its eyes shut.
Chapter 27: The Quarterfinals
Standing at a mountain, Caitlin and Darach wait for Cynthia to join them. Caitlin yawns out of boredom, and reveals to Darach that she is disappointed in the battles she has had so far in the PML. Darach teases her for having such high standards, but acknowledges that it is only natural after battling with someone like Cynthia. Just as they begin to talk about her, Cynthia appears, revealing that the reason she took so long was because she was changing into her sygna suit. She tells the others that she plans to battle with her Kommo-o during her match against the player in the PML, but would like to train first in a practice battle. Cynthia encourages Caitlin to give it her all against her, as she is her rival. Caitlin agrees and sends out her Reuniclus, eager to have her first win against Cynthia. Darach notes that Caitlin is losing control of her emotions, but Caitlin is not concerned.
Later at the arena, Cynthia, Darach, and Caitlin face Misty, Brock, Rosa, and the player before their match. Cynthia reveals that this is the first time she is using her Kommo-o in a battle, but Caitlin notes that it is just as strong as her Garchomp. Both teams vow to give it their all in their match.
After the player wins, everyone is frozen in shock. The player's team struggles to comprehend that they were able to defeat a Trainer as powerful as Cynthia. Cynthia congratulates them, noting that they are one of four teams left. She tells them that two of the other teams are led by Red and Lance, but she isn't quite sure who is leading the last one. Rosa attempts to ask a question, but is interrupted by a voice on a speaker. The voice announces the matchups for the semifinals, and it is revealed that the player's next opponent will be Lear. The team is excited to have a rematch against him, and they leave to prepare for the battle. The other teams begin to leave as well, but Cynthia pauses to enjoy the moment.
At night, Cynthia and Kommo-o visit the beach to reflect on their battle. They are surprised to run into Cheren, who tells Cynthia that he wants to speak to her. After she correctly assumes he wants to talk about Lear, Cheren urgently asks for her help to save him.
Battle
| Name | Difficulty | Trainers | Pokémon | Completion Rewards | Battle Rewards | ||||
|---|---|---|---|---|---|---|---|---|---|
| Left | Middle | Right | |||||||
| Challenge Sygna Suit Cynthia & Co. | Normal |  Darach |
 Cynthia Sygna Suit |
 Caitlin |
 Gallade Weakness: |
 Kommo-o Weakness: |
 Reuniclus Weakness: |
1,900 coins 2★ Level-Up Manual |
|
| Hard | 2,530 coins 2★ Level-Up Manual |
||||||||
Interlude 7: Shining Bonds
Lear remains captured by Team Break alongside Hoopa and begins to reminisce about the times he had spent with the Mischief Pokémon. Team Break then arrive unannounced, and disclose to Lear that they plan on using their captured Pokémon to take over the PML—unless Lear announces that he will cancel the PML instead. Lear is resigned to the PML being over, however Hoopa protests against this and musters its remaining strength to teleport Lear away.
Outside, Lear meets Sawyer, Rachel, and Cheren who help remind Lear of the good times that he had had with Hoopa, and what it makes to be a good king; caring for his kingdom rather than focusing on strength. Reinvigorated, Lear heads back to Team Break's hideout, where Lear, Sawyer, and Rachel team up to defeat Team Break. Team Break's leader arrives to provide reinforcement, but with Lear providing the necessary distraction, Cheren's Stoutland successfully takes Hoopa off Team Break's hands. Lear's sync stone then begins to glow, which had not glowed ever since the first time he had met Hoopa. Lear then teams up with Hoopa as a sync pair to defeat the remainder of the Team Break grunts. Cynthia, who had been enlisted by Cheren, then arrives and reveals that she has already defeated the other Team Break members who had been present at the hideout.
Later, Lear ponders about the values of friendship, trust, and bond, and thanks Sawyer and Rachel for helping him to grow. Cynthia arrives alongside two Pokémon Trainers who had been Lear's teammates in the PML. Cynthia reveals that these Trainers had not just assisted her in defeating Team Break, but had also won Lear's PML semi-final match despite his absence, advancing their team to the next round.
Battle
| Name | Difficulty | Trainer | Pokémon | Completion Rewards | Battle Rewards | ||
|---|---|---|---|---|---|---|---|
| Left | Middle | Right | |||||
| Challenge in Team Break's Hideout | Normal | Masked Man |
 Golbat Weakness: |
 Scolipede Weakness: |
 Muk Weakness: |
||
Chapter 28: Change of Heart
Battle
| Name | Difficulty | Trainer | Pokémon | Completion Rewards | Battle Rewards | ||||
|---|---|---|---|---|---|---|---|---|---|
| Left | Middle | Right | |||||||
| Team Break Ambush! | Normal | Masked Man |
Amaura Weakness: |
 Houndoom Weakness: |
Turtonator Weakness: |
1,950 coins 2★ Level-Up Manual |
|||
Carracosta Weakness: |
 Kabutops Weakness: |
Sharpedo Weakness: | |||||||
| Team Break Ambush! Part 2 | Normal | Masked Man |
Sealeo Weakness: |
 Golisopod Weakness: |
 Scyther Weakness: |
1,960 coins 2★ Level-Up Manual |
|||
| Hard | 2,560 coins 2★ Level-Up Manual |
||||||||
| Team Break Ambush! Part 3 | Normal | Masked Man |
 Growlithe Weakness: |
Houndoom Weakness: |
Ponyta Weakness: |
1,970 coins 2★ Level-Up Manual |
|||
 Salazzle Weakness: |
 Aurorus Weakness: ↓  Seaking Weakness: |
 Rapidash Weakness: ↓  Drifblim Weakness: | |||||||
| Team Break's Final Stand | Normal | Masked Woman |
 Milotic Weakness: |
 Venusaur Weakness: |
 Aerodactyl Weakness: |
2★ Level-Up Manual | |||
Chapter 29: Semifinal Showdown
Battle
| Name | Difficulty | Trainers | Pokémon | Completion Rewards | Battle Rewards | ||||
|---|---|---|---|---|---|---|---|---|---|
| Left | Middle | Right | |||||||
| Challenge Team Lear | Normal | Rachel |
Lear |
Sawyer |
Umbreon Weakness: |
 Hoopa Hoopa Confined Weakness: |
Honchkrow Weakness: |
1,980 coins 2★ Level-Up Manual |
|
| Hard | 2,590 coins 2★ Level-Up Manual |
||||||||
Chapter 30: The Road to Victory
Battle
| Name | Difficulty | Trainers | Pokémon | Completion Rewards | Battle Rewards | ||||
|---|---|---|---|---|---|---|---|---|---|
| Left | Middle | Right | |||||||
| Challenge Team Red | Normal |  Leaf Sygna Suit |
 Red Sygna Suit |
 Blue Sygna Suit |
Venusaur Weakness: |
 Charizard Weakness: |
 Blastoise Weakness: |
1,990 coins 2★ Level-Up Manual |
|
| Hard | 2,620 coins 2★ Level-Up Manual |
||||||||
Artwork
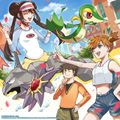
Chapter 1 artwork by May
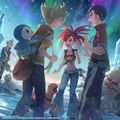
Chapter 8 artwork by NRMya

Chapter 13 artwork by Hanenbo
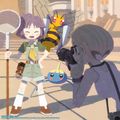
Chapter 14 artwork by HYOGONOSUKE
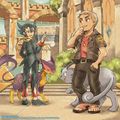
Chapter 15 artwork by Mari

Chapter 18 artwork by Kashiwa

Chapter 20 artwork by Taisa
Chapter 24 artwork by otumami

Chapter 25 artwork by Sakai
Chapter 25 artwork by K-SUWABE


| This article is part of Project Sidegames, a Bulbapedia project that aims to write comprehensive articles on the Pokémon Sidegames. |