Hoenn Route 126: Difference between revisions
m (→Trainers) |
|||
| (81 intermediate revisions by 36 users not shown) | |||
| Line 2: | Line 2: | ||
|number=126 | |number=126 | ||
|type=ocean | |type=ocean | ||
|mapdesc=Even a pro swimmer would need three entire days to circuit around the crater containing Sootopolis City. | |||
|surf=yes | |surf=yes | ||
|dive=yes | |dive=yes | ||
|image=Route 126.png | |image=Hoenn Route 126 ORAS.png | ||
|imageIII=Hoenn Route 126 RSE.png | |||
|north=Route 124 | |north=Route 124 | ||
|regionnorth=Hoenn | |regionnorth=Hoenn | ||
|east=Route 127 | |east=Route 127 | ||
|regioneast=Hoenn | |regioneast=Hoenn | ||
|south=Secret Islet | |||
|southalt=Secret Islet{{tt|*|Omega Ruby and Alpha Sapphire}} | |||
|region=Hoenn | |region=Hoenn | ||
|generation=3 | |generation=3 | ||
}} | }} | ||
'''Route 126''' (Japanese: '''{{tt|126番水道|126ばんすいどう}}''' ''Water Route 126'') is a [[water route]] in eastern [[Hoenn]], connecting {{rt|124|Hoenn}}, {{rt|127|Hoenn}}, and [[Secret Islet]]{{sup/6|ORAS}}. The route encircles [[Sootopolis City]], a city built in the interior of an inactive volcanic island{{sup/3|RSE}}/meteorite impact crater{{sup/6|ORAS}}. | |||
==Route description== | ==Route description== | ||
Heading clockwise from the northernmost point on the route, Route 126 proceeds east, meeting the southern terminus of Route 124 after a short distance. Southeast of this point, the route intersects a channel that leads to Route 127. Directly west of the middle of the channel is a {{tc|Swimmer}}, one of three on the route. To the southwest, near the base of the volcano, is the second Swimmer. The third Swimmer is in the westernmost area of the route, accessible only by utilizing the network of underwater pathways. | |||
An additional five | An additional five Trainers were added to the route in {{game|Emerald}}. | ||
In {{pkmn|Omega Ruby and Alpha Sapphire}}, the [[Mirage spot]] [[Nameless Cavern]] can be seen in the northeast of the route. | |||
===Underwater=== | ===Underwater=== | ||
Unlike Route 124, which had only small pools of deep water scattered throughout the route, most of Route 126 is deep enough to Dive into, including the area surrounding the volcano base. On the ocean floor, | Unlike Route 124, which had only small pools of deep water scattered throughout the route, most of Route 126 is deep enough to Dive into, including the area surrounding the volcano base. On the ocean floor, Trainers can pass through {{DL|Tall grass|seaweed}} to catch [[wild Pokémon]] as well as enter Sootopolis City, the entrance of which is located on the southern side of the volcano on the ocean floor. | ||
==Items== | ==Items== | ||
All [[item]]s on Route 126 can only be accessed with the use of {{m|Surf}}. | |||
{{Itlisth|ocean}} | |||
{{Itemlist|Green Shard|Northwest corner of the route, accessible through an underwater passage on {{rt|124|Hoenn}} (requires {{m|Dive}})|Ru=yes|Sa=yes|E=yes}} | |||
{{Itemlist|Green Shard|In the island in the far northwest of the route, accessed by using the northern {{m|Dive}} spot in the main underwater area and following the subsequent path to its end (requires {{m|Dive}})|OR=yes|AS=yes}} | |||
{{Itlistfoot|ocean}} | |||
===Underwater=== | |||
All items found [[underwater]] necessarily require Surf and {{m|Dive}}. | |||
{{Itlisth|ocean}} | {{Itlisth|ocean}} | ||
{{ | {{Itemlist|Ultra Ball|In the central northern dark spot ''(hidden)''|Ru=yes|Sa=yes|E=yes}} | ||
{{ | {{Itemlist|Heart Scale|In the northwest dark spot ''(hidden)''|Ru=yes|Sa=yes|E=yes}} | ||
{{ | {{Itemlist|Stardust|In the northeast dark spot ''(hidden)''|Ru=yes|Sa=yes|E=yes}} | ||
{{ | {{Itemlist|Yellow Shard|In a dark spot in the middle of a small patch of seaweed to the far west ''(hidden)''|Ru=yes|Sa=yes|E=yes}} | ||
{{ | {{Itemlist|Pearl|In a dark spot in the middle of a small patch of seaweed to the far west ''(hidden)''|Ru=yes|Sa=yes|E=yes|display={{i|Pearl}}}} | ||
{{ | {{Itemlist|Iron|In a dark spot in the middle of a small patch of seaweed to the far west ''(hidden)''|Ru=yes|Sa=yes|E=yes}} | ||
{{ | {{Itemlist|Big Pearl|In the southeast dark spot among the seaweed ''(hidden)''|Ru=yes|Sa=yes|E=yes}} | ||
{{ | {{Itemlist|Blue Shard|In the bare square among the seaweed in the very southwest ''(hidden)''|Ru=yes|Sa=yes|E=yes}} | ||
{{ | {{Itemlist|Ultra Ball|In the northern area—accessed by using the northern {{m|Dive}} spot in the main underwater area and then using the next {{m|Dive}} spot to the north to return underwater—in the western end of the area, two tiles away from the south wall and approximately midway between the walls to either side ''(hidden)''|OR=yes|AS=yes}} | ||
{{Itemlist|Heart Scale|In the northern area—accessed by using the northern {{m|Dive}} spot in the main underwater area and then using the next {{m|Dive}} spot to the north to return underwater—in the middle of the easternmost bare patch of seafloor among the seaweed ''(hidden)''|OR=yes|AS=yes}} | |||
{{Itemlist|Mind Plate|In the main area, to the southwest of the north {{m|Dive}} spot, approximately three tiles away from the west wall of the dead end and one tile south of the level of the south wall of the corridor leading into the dead end ''(hidden)''|OR=yes|AS=yes}} | |||
{{Itemlist|Big Pearl|In the main area, among the seaweed on the north side of the crater, in the middle of the westernmost bare patch of seafloor ''(hidden)''|OR=yes|AS=yes}} | |||
{{Itemlist|Blue Shard|In the main area, to the north of the west {{m|Dive}} spot, on a direct line north from the {{m|Dive}} spot's eastern edge and shortly north of where the rock outcrop starts ''(hidden)''|OR=yes|AS=yes}} | |||
{{Itemlist|Pearl|In the main area, among the small patch of seaweed on the southwest edge of the crater, in the southeast corner of the bare patch of seafloor ''(hidden)''|OR=yes|AS=yes|display={{i|Pearl}}}} | |||
{{Itemlist|Yellow Shard|In the main area, among the seaweed on the east edge of the crater, in the southwest corner of the western bare patch of seafloor ''(hidden)''|OR=yes|AS=yes}} | |||
{{Itemlist|Stardust|In the main area, in the third patch of bare seafloor west of the [[Sootopolis City]] entrance ''(hidden)''|OR=yes|AS=yes}} | |||
{{Itemlist|Iron|In the main area, in the second patch of bare seafloor east of the [[Sootopolis City]] entrance ''(hidden)''|OR=yes|AS=yes}} | |||
{{Itlistfoot|ocean}} | {{Itlistfoot|ocean}} | ||
==Pokémon== | ==Pokémon== | ||
{{ | ===Generation III=== | ||
{{ | {{Catch/header|ocean|no}} | ||
{{ | {{Catch/div|ocean|Surfing}} | ||
{{ | {{Catch/entry3|072|Tentacool|yes|yes|yes|Surf|5-35|60%|type1=Water|type2=Poison}} | ||
{{ | {{Catch/entry3|278|Wingull|yes|yes|yes|Surf|10-30|35%|type1=Water|type2=Flying}} | ||
{{ | {{Catch/entry3|279|Pelipper|yes|yes|yes|Surf|25-30|5%|type1=Water|type2=Flying}} | ||
{{ | {{Catch/div|ocean|Fishing}} | ||
{{ | {{Catch/entry3|072|Tentacool|yes|yes|yes|Fish Old|5-10|30%|type1=Water|type2=Poison}} | ||
{{ | {{Catch/entry3|129|Magikarp|yes|yes|yes|Fish Old|5-10|70%|type1=Water}} | ||
{{ | {{Catch/entry3|072|Tentacool|yes|yes|yes|Fish Good|10-30|20%|type1=Water|type2=Poison}} | ||
{{ | {{Catch/entry3|129|Magikarp|yes|yes|yes|Fish Good|10-30|60%|type1=Water}} | ||
{{ | {{Catch/entry3|320|Wailmer|yes|yes|yes|Fish Good|10-30|20%|type1=Water}} | ||
{{ | {{Catch/entry3|319|Sharpedo|yes|yes|yes|Fish Super|30-35|40%|type1=Water|type2=Dark}} | ||
{{Catch/entry3|320|Wailmer|yes|yes|yes|Fish Super|25-45|60%|type1=Water}} | |||
{{Catch/footer|ocean}} | |||
==== | ====Underwater==== | ||
{{Catch/header|underwater|no}} | {{Catch/header|underwater|no}} | ||
{{Catch/entry3|170|Chinchou|yes|yes|yes|Dive|20-30|30%|type1=Water|type2=Electric}} | |||
{{Catch/entry3|366|Clamperl|yes|yes|yes|Dive|20-35|65%|type1=Water}} | {{Catch/entry3|366|Clamperl|yes|yes|yes|Dive|20-35|65%|type1=Water}} | ||
{{Catch/entry3|369|Relicanth|yes|yes|yes|Dive|30-35|5%|type1=Water|type2=Rock}} | {{Catch/entry3|369|Relicanth|yes|yes|yes|Dive|30-35|5%|type1=Water|type2=Rock}} | ||
{{Catch/footer|underwater}} | |||
===Generation VI=== | |||
{{Catch/header|ocean|no}} | |||
{{Catch/div|ocean|Surfing}} | |||
{{Catch/entryoras|072|Tentacool|yes|yes|Surf|25|50%|type1=Water|type2=Poison}} | |||
{{Catch/entryoras|073|Tentacruel|yes|yes|Surf|30|15%|type1=Water|type2=Poison}} | |||
{{Catch/entryoras|279|Pelipper|yes|yes|Surf|25, 30, 35|35%|type1=Water|type2=Flying}} | |||
{{Catch/div|ocean|Surfing (exclusively as {{color2|000|DexNav#Hidden Pokémon|hidden Pokémon}})<br><small>After defeating or capturing {{pcolor|Groudon|000}}/{{pcolor|Kyogre|000}}</small>}} | |||
{{Catch/entryoras|456|Finneon|yes|yes|Surf|30|??%|type1=Water}} | |||
{{Catch/entryoras|592{{#ifexpr: ({{#time: H}} mod 2)=0||F}}|Frillish|yes|yes|Surf|30|??%|type1=Water|type2=Ghost}} | |||
{{Catch/entryoras|594|Alomomola|yes|yes|Surf|30|??%|type1=Water}} | |||
{{Catch/div|ocean|Fishing}} | |||
{{Catch/entryoras|072|Tentacool|yes|yes|Fish Old|5|35%|type1=Water|type2=Poison}} | |||
{{Catch/entryoras|129|Magikarp|yes|yes|Fish Old|10, 15|65%|type1=Water}} | |||
{{Catch/entryoras|072|Tentacool|yes|yes|Fish Good|25|35%|type1=Water|type2=Poison}} | |||
{{Catch/entryoras|129|Magikarp|yes|yes|Fish Good|25|60%|type1=Water}} | |||
{{Catch/entryoras|320|Wailmer|yes|yes|Fish Good|25|5%|type1=Water}} | |||
{{Catch/entryoras|320|Wailmer|yes|yes|Fish Super|30, 35, 40|100%|type1=Water}} | |||
{{Catch/footer|ocean}} | |||
====Underwater==== | |||
{{Catch/header|underwater|no}} | |||
{{Catch/entryoras|170|Chinchou|yes|yes|Seaweed|25|50%|type1=Water|type2=Electric}} | |||
{{Catch/entryoras|171|Lanturn|yes|yes|Seaweed|30|15%|type1=Water|type2=Electric}} | |||
{{Catch/entryoras|366|Clamperl|yes|yes|Seaweed|30|30%|type1=Water}} | |||
{{Catch/entryoras|369|Relicanth|yes|yes|Seaweed|30, 35|5%|type1=Water|type2=Rock}} | |||
{{Catch/footer|underwater}} | {{Catch/footer|underwater}} | ||
==Trainers== | ==Trainers== | ||
{{ | ==={{game|Ruby and Sapphire|s}}=== | ||
{{trainerheader|ocean}} | {{trainerheader|ocean}} | ||
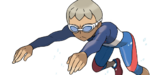
{{trainerentry| | {{trainerentry|Spr RS Swimmer M.png|Swimmer|Barry|280|1|130|Gyarados|♂|35|36=ガクジ|37=Gakuji}} | ||
{{trainerdiv|ocean}} | {{trainerdiv|ocean}} | ||
{{trainerentry| | {{trainerentry|Spr RS Swimmer M.png|Swimmer|Dean|264|3|318|Carvanha|♂|33||278|Wingull|♂|33||318|Carvanha|♂|33|36=レツジ|37=Retsuji}} | ||
{{trainerdiv|ocean}} | {{trainerdiv|ocean}} | ||
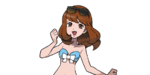
{{trainerentry| | {{trainerentry|Spr RS Swimmer F.png|Swimmer|Brenda|280|1|118|Goldeen|♀|35|36=テルミ|37=Terumi}} | ||
{{trainerdiv|ocean}} | {{trainerdiv|ocean}} | ||
{{trainerentry| | {{trainerdiv|ocean}}{{color|FFF|Requires}} {{mcolor|Dive|FFF}}{{color|FFF|}} | ||
{{trainerentry|Spr RS Swimmer F.png|Swimmer|Nikki|256|3|183|Marill|♀|32||320|Wailmer|♀|32||363|Spheal|♀|32|36=シズエ|37=Shizue}} | |||
{{trainerfooter|ocean|3}} | {{trainerfooter|ocean|3}} | ||
===Emerald=== | ==={{game|Emerald}}=== | ||
{{trainerheader|ocean}} | {{trainerheader|ocean}} | ||
{{trainerentry| | {{trainerentry|Spr RS Swimmer M.png|Swimmer|Leonardo|272<br><small>Potential [[Double Battle]] with Isobel</small>|1|318|Carvanha|♂|34|36=カズシゲ|37=Kazushige}} | ||
{{trainerentry|Spr RS Triathlete Swimmer F.png|Triathlete|Isobel|1360<br><small>Potential [[Double Battle]] with Leonardo</small>|1|120|Staryu||34|36=キヌエ|37=Kinue}} | |||
{{trainerdiv|ocean}} | {{trainerdiv|ocean}} | ||
{{trainerentry| | {{trainerentry|Spr RS Swimmer M.png|Swimmer|Dean|248|3|318|Carvanha|♂|31||278|Wingull|♂|31||318|Carvanha|♂|31|36=レツジ|37=Retsuji}} | ||
{{trainerdiv|ocean}} | {{trainerdiv|ocean}} | ||
{{trainerentry| | {{trainerentry|Spr RS Swimmer F.png|Swimmer|Nikki|264|2|183|Marill|♀|33||363|Spheal|♀|33|36=シズエ|37=Shizue}} | ||
{{trainerdiv|ocean}} | {{trainerdiv|ocean}} | ||
{{trainerentry| | {{trainerentry|Spr RS Swimmer M.png|Swimmer|Barry|272|1|130|Gyarados|♂|34|36=ガクジ|37=Gakuji}} | ||
{{trainerdiv|ocean}} | {{trainerdiv|ocean}} | ||
{{trainerentry| | {{trainerentry|Spr RS Swimmer F.png|Swimmer|Sienna|264<br><small>Potential [[Double Battle]] with Pablo</small>|2|370|Luvdisc|♀|33||370|Luvdisc|♀|33|36=イクコ|37=Ikuko}} | ||
{{trainerentry|Spr RS Triathlete Swimmer M.png|Triathlete|Pablo|1320<br><small>Potential [[Double Battle]] with Sienna</small>|2|120|Staryu||33||120|Staryu||33||38=Nav|36=ヤスヒロ|37=Yasuhiro}} | |||
{{trainerdiv|ocean}}{{color|FFF|Requires}} {{mcolor|Dive|FFF}}{{color|FFF|}} | |||
{{trainerentry|Spr RS Swimmer F.png|Swimmer|Brenda|272|1|118|Goldeen|♀|34|36=テルミ|37=Terumi}} | |||
{{trainerdiv|ocean|Rematch}} | |||
{{trainerentry|Spr RS Triathlete Swimmer M.png|Triathlete|Pablo{{tt|*|First rematch}}|1480|2|120|Staryu||37||120|Staryu||37||38=Nav|36=ヤスヒロ|37=Yasuhiro}} | |||
{{trainerentry|Spr RS Triathlete Swimmer M.png|Triathlete|Pablo{{tt|*|Second rematch}}|1560|3|278|Wingull|♂|39||120|Staryu||39||120|Staryu||39||38=Nav|36=ヤスヒロ|37=Yasuhiro}} | |||
{{trainerentry|Spr RS Triathlete Swimmer M.png|Triathlete|Pablo{{tt|*|Third rematch}}|1640|3|279|Pelipper|♂|41||120|Staryu||41||120|Staryu||41||38=Nav|36=ヤスヒロ|37=Yasuhiro}} | |||
{{trainerentry|Spr RS Triathlete Swimmer M.png|Triathlete|Pablo{{tt|*|Fourth rematch onwards}}|1720|3|279|Pelipper|♂|43||121|Starmie||43||121|Starmie||43||38=Nav|36=ヤスヒロ|37=Yasuhiro}} | |||
{{trainerfooter|ocean|3}} | |||
==={{g|Omega Ruby and Alpha Sapphire}}=== | |||
{{trainerheader|ocean}} | |||
{{trainerdiv|ocean|Requires Surf}} | |||
{{trainerentry|VSTriathlete Swimmer.png{{!}}150px|game=6|Triathlete|Denzel|1,560|1|184|Azumarill|♂|39|36=ショウト|37=Shōto}} | |||
{{trainerdiv|ocean}} | {{trainerdiv|ocean}} | ||
{{trainerentry| | {{trainerentry|VSSwimmer M VI.png{{!}}150px|game=6|Swimmer ♂|Barry|624|1|130|Gyarados|♂|39|36=ガクジ|37=Gakuji}} | ||
{{trainerdiv|ocean}} | {{trainerdiv|ocean}} | ||
{{trainerentry| | {{trainerentry|VSSwimmer F ORAS.png{{!}}150px|game=6|Swimmer ♀|Brenda|624|1|272|Ludicolo|♀|39|36=テルミ|37=Terumi}} | ||
{{trainerdiv|ocean}}{{ | {{trainerdiv|ocean}} | ||
{{trainerentry| | {{trainerentry|VSAce Trainer M ORAS.png{{!}}150px|game=6|Ace Trainer|Leopold|2,340|2|329|Vibrava|♂|39||112|Rhydon|♂|39|36=シンイチロウ|37=Shinichirō}} | ||
{{trainerdiv|ocean}} | |||
{{trainerentry|VSAce Trainer F ORAS.png{{!}}150px|game=6|Ace Trainer|Harriet|2,460|1|169|Crobat|♀|41|36=ショウコ|37=Shōko}} | |||
{{trainerdiv|ocean}} | |||
{{trainerentry|VSSwimmer M VI.png{{!}}150px|game=6|Swimmer ♂|Dean|592|3|320|Wailmer|♂|35||120|Staryu||36||055|Golduck|♂|37|36=レツジ|37=Retsuji}} | |||
{{trainerdiv|ocean|Requires Surf and Dive}} | |||
{{trainerentry|VSSwimmer F ORAS.png{{!}}150px|game=6|Swimmer ♀|Nikki|608|2|370|Luvdisc|♀|36||073|Tentacruel|♀|38|36=シズエ|37=Shizue}} | |||
{{trainerdiv|ocean}} | |||
{{trainerentry|VSScuba Diver.png{{!}}150px|game=6|Scuba Diver|Yutaka|1,560|2|279|Pelipper|♂|39||171|Lanturn|♂|39|36=ユタカ|37=Yutaka}} | |||
{{trainerdiv|underwater}} | |||
{{trainerentry|VSScuba Diver.png{{!}}150px|game=6|Scuba Diver|Tristan|1,640|1|321|Wailord|♂|41|36=トキオミ|37=Tokiomi}} | |||
{{trainerdiv|underwater}} | |||
{{trainerentry|VSFree Diver.png{{!}}150px|game=6|Free Diver|Jillian|1,640|1|184|Azumarill|♀|41|36=ヨシコ|37=Yoshiko}} | |||
{{trainerfooter|ocean|3}} | {{trainerfooter|ocean|3}} | ||
==Appearance== | |||
{| class="roundy" style="margin:auto; background: #000; border: 3px solid #{{locationcolor/dark|ocean}}" | |||
|- | |||
! style="background:#{{locationcolor/light|ocean}}; {{roundytl|5px}}" | Game | |||
! style="background:#{{locationcolor/light|ocean}}" | Surface | |||
! style="background:#{{locationcolor/light|ocean}}; {{roundytr|5px}}" | Underwater | |||
|- | |||
! style="background:#{{ruby color}}" | {{color2|fff|Pokémon Ruby and Sapphire Versions|Ruby}} | |||
| rowspan="3" | [[File:Hoenn Route 126 RSE.png|200px]] | |||
| rowspan="3" | [[File:Hoenn Route 126 underwater RSE.png|220px]] | |||
|- | |||
! style="background:#{{sapphire color}}" | {{color2|fff|Pokémon Ruby and Sapphire Versions|Sapphire}} | |||
|- | |||
! style="background:#{{emerald color}}" | {{color2|fff|Pokémon Emerald Version|Emerald}} | |||
|- | |||
! style="background:#{{omega ruby color}}" | {{color2|fff|Pokémon Omega Ruby and Alpha Sapphire|Omega Ruby}} | |||
| rowspan="2" | [[File:Hoenn Route 126 ORAS.png|200px]] | |||
| rowspan="2" | [[File:Hoenn Route 126 underwater ORAS.png|200px]] | |||
|- | |||
! style="background:#{{alpha sapphire color}}" | {{color2|fff|Pokémon Omega Ruby and Alpha Sapphire|Alpha Sapphire}} | |||
|- | |||
| colspan="3" style="background:#{{locationcolor/light|ocean}}; {{roundybottom|5px}}" | | |||
|} | |||
==See also== | ==See also== | ||
*[[Sootopolis City]] | * [[Sootopolis City]] | ||
*[[Underwater]] | * [[Underwater]] | ||
{{Hoenn}} | {{Hoenn}}<br> | ||
{{Project Routes}} | {{Project Routes notice}} | ||
[[Category:Hoenn locations|Route 126]] | [[Category:Hoenn locations|Route 126]] | ||
[[Category:Routes|Route 126]] | [[Category:Routes|Route 126]] | ||
[[Category:Ruby and Sapphire locations|Route 126]] | [[Category:Ruby and Sapphire locations|Route 126]] | ||
[[Category:Emerald locations|Route 126]] | [[Category:Emerald locations|Route 126]] | ||
[[Category:Omega Ruby and Alpha Sapphire locations|Route 126]] | |||
[[Category:Underwater locations|Route 126]] | |||
[[de:Route 126]] | [[de:Route 126 (Hoenn)]] | ||
[[es:Ruta 126]] | |||
[[fr:Chenal 126]] | [[fr:Chenal 126]] | ||
[[it:Percorso 126 (Hoenn)]] | [[it:Percorso 126 (Hoenn)]] | ||
[[ja:126ばんすいどう]] | [[ja:126ばんすいどう (ホウエン地方)]] | ||
[[zh:126号水路(丰缘)]] | |||
Latest revision as of 04:44, 26 August 2022
| |||||||||||||||
| |||||||||||||||
Map description
| |||||||||||||||
| Required for navigation
| |||||||||||||||
Connecting locations
| |||||||||||||||
Location  Location of Route 126 in Hoenn. | |||||||||||||||
Pokémon world routes
| |||||||||||||||
Route 126 (Japanese: 126番水道 Water Route 126) is a water route in eastern Hoenn, connecting Route 124, Route 127, and Secret IsletORAS. The route encircles Sootopolis City, a city built in the interior of an inactive volcanic islandRSE/meteorite impact craterORAS.
Route description
Heading clockwise from the northernmost point on the route, Route 126 proceeds east, meeting the southern terminus of Route 124 after a short distance. Southeast of this point, the route intersects a channel that leads to Route 127. Directly west of the middle of the channel is a Swimmer, one of three on the route. To the southwest, near the base of the volcano, is the second Swimmer. The third Swimmer is in the westernmost area of the route, accessible only by utilizing the network of underwater pathways.
An additional five Trainers were added to the route in Pokémon Emerald.
In Omega Ruby and Alpha Sapphire, the Mirage spot Nameless Cavern can be seen in the northeast of the route.
Underwater
Unlike Route 124, which had only small pools of deep water scattered throughout the route, most of Route 126 is deep enough to Dive into, including the area surrounding the volcano base. On the ocean floor, Trainers can pass through seaweed to catch wild Pokémon as well as enter Sootopolis City, the entrance of which is located on the southern side of the volcano on the ocean floor.
Items
All items on Route 126 can only be accessed with the use of Surf.
| Item | Location | Games | |
|---|---|---|---|
| Green Shard | Northwest corner of the route, accessible through an underwater passage on Route 124 (requires Dive) | R S E | |
| Green Shard | In the island in the far northwest of the route, accessed by using the northern Dive spot in the main underwater area and following the subsequent path to its end (requires Dive) | OR AS | |
Underwater
All items found underwater necessarily require Surf and Dive.
| Item | Location | Games | |
|---|---|---|---|
| Ultra Ball | In the central northern dark spot (hidden) | R S E | |
| Heart Scale | In the northwest dark spot (hidden) | R S E | |
| Stardust | In the northeast dark spot (hidden) | R S E | |
| Yellow Shard | In a dark spot in the middle of a small patch of seaweed to the far west (hidden) | R S E | |
| Pearl | In a dark spot in the middle of a small patch of seaweed to the far west (hidden) | R S E | |
| Iron | In a dark spot in the middle of a small patch of seaweed to the far west (hidden) | R S E | |
| Big Pearl | In the southeast dark spot among the seaweed (hidden) | R S E | |
| Blue Shard | In the bare square among the seaweed in the very southwest (hidden) | R S E | |
| Ultra Ball | In the northern area—accessed by using the northern Dive spot in the main underwater area and then using the next Dive spot to the north to return underwater—in the western end of the area, two tiles away from the south wall and approximately midway between the walls to either side (hidden) | OR AS | |
| Heart Scale | In the northern area—accessed by using the northern Dive spot in the main underwater area and then using the next Dive spot to the north to return underwater—in the middle of the easternmost bare patch of seafloor among the seaweed (hidden) | OR AS | |
| Mind Plate | In the main area, to the southwest of the north Dive spot, approximately three tiles away from the west wall of the dead end and one tile south of the level of the south wall of the corridor leading into the dead end (hidden) | OR AS | |
| Big Pearl | In the main area, among the seaweed on the north side of the crater, in the middle of the westernmost bare patch of seafloor (hidden) | OR AS | |
| Blue Shard | In the main area, to the north of the west Dive spot, on a direct line north from the Dive spot's eastern edge and shortly north of where the rock outcrop starts (hidden) | OR AS | |
| Pearl | In the main area, among the small patch of seaweed on the southwest edge of the crater, in the southeast corner of the bare patch of seafloor (hidden) | OR AS | |
| Yellow Shard | In the main area, among the seaweed on the east edge of the crater, in the southwest corner of the western bare patch of seafloor (hidden) | OR AS | |
| Stardust | In the main area, in the third patch of bare seafloor west of the Sootopolis City entrance (hidden) | OR AS | |
| Iron | In the main area, in the second patch of bare seafloor east of the Sootopolis City entrance (hidden) | OR AS | |
Pokémon
Generation III
| Pokémon | Games | Location | Levels | Rate | |||||||||||
|---|---|---|---|---|---|---|---|---|---|---|---|---|---|---|---|
| Surfing | |||||||||||||||
|
R | S | E |
|
5-35 | 60% | |||||||||
|
R | S | E |
|
10-30 | 35% | |||||||||
|
R | S | E |
|
25-30 | 5% | |||||||||
| Fishing | |||||||||||||||
|
R | S | E |
|
5-10 | 30% | |||||||||
|
R | S | E |
|
5-10 | 70% | |||||||||
|
R | S | E |
|
10-30 | 20% | |||||||||
|
R | S | E |
|
10-30 | 60% | |||||||||
|
R | S | E |
|
10-30 | 20% | |||||||||
|
R | S | E |
|
30-35 | 40% | |||||||||
|
R | S | E |
|
25-45 | 60% | |||||||||
| A colored background means that the Pokémon can be found in this location in the specified game. A white background with a colored letter means that the Pokémon cannot be found here. | |||||||||||||||
Underwater
| Pokémon | Games | Location | Levels | Rate | |||||||||||
|---|---|---|---|---|---|---|---|---|---|---|---|---|---|---|---|
|
R | S | E |
|
20-30 | 30% | |||||||||
|
R | S | E |
|
20-35 | 65% | |||||||||
|
R | S | E |
|
30-35 | 5% | |||||||||
| A colored background means that the Pokémon can be found in this location in the specified game. A white background with a colored letter means that the Pokémon cannot be found here. | |||||||||||||||
Generation VI
| Pokémon | Games | Location | Levels | Rate | ||||||||||||
|---|---|---|---|---|---|---|---|---|---|---|---|---|---|---|---|---|
| Surfing | ||||||||||||||||
|
OR | AS |
|
25 | 50% | |||||||||||
|
OR | AS |
|
30 | 15% | |||||||||||
|
OR | AS |
|
25, 30, 35 | 35% | |||||||||||
| Surfing (exclusively as hidden Pokémon) After defeating or capturing Groudon/Kyogre | ||||||||||||||||
|
OR | AS |
|
30 | ??% | |||||||||||
|
OR | AS |
|
30 | ??% | |||||||||||
|
OR | AS |
|
30 | ??% | |||||||||||
| Fishing | ||||||||||||||||
|
OR | AS |
|
5 | 35% | |||||||||||
|
OR | AS |
|
10, 15 | 65% | |||||||||||
|
OR | AS |
|
25 | 35% | |||||||||||
|
OR | AS |
|
25 | 60% | |||||||||||
|
OR | AS |
|
25 | 5% | |||||||||||
|
OR | AS |
|
30, 35, 40 | 100% | |||||||||||
| A colored background means that the Pokémon can be found in this location in the specified game. A white background with a colored letter means that the Pokémon cannot be found here. | ||||||||||||||||
Underwater
| Pokémon | Games | Location | Levels | Rate | ||||||||||||
|---|---|---|---|---|---|---|---|---|---|---|---|---|---|---|---|---|
|
OR | AS |
|
25 | 50% | |||||||||||
|
OR | AS |
|
30 | 15% | |||||||||||
|
OR | AS |
|
30 | 30% | |||||||||||
|
OR | AS |
|
30, 35 | 5% | |||||||||||
| A colored background means that the Pokémon can be found in this location in the specified game. A white background with a colored letter means that the Pokémon cannot be found here. | ||||||||||||||||
Trainers
Pokémon Ruby and Sapphire
| Trainer | Pokémon | |||||||||||
|---|---|---|---|---|---|---|---|---|---|---|---|---|
|
| |||||||||||
|
| |||||||||||
| ||||||||||||
| ||||||||||||
|
| |||||||||||
| Requires Dive | ||||||||||||
|
| |||||||||||
| ||||||||||||
| ||||||||||||
| Trainers with a PokéNav by their names will be registered in the Trainer's Eyes or Match Call function after the first battle, and may have a rematch with the player with higher-level Pokémon. | ||||||||||||


Pokémon Emerald
| Trainer | Pokémon | |||||||||||
|---|---|---|---|---|---|---|---|---|---|---|---|---|
|
| |||||||||||
|
| |||||||||||
|
| |||||||||||
| ||||||||||||
| ||||||||||||
|
| |||||||||||
| ||||||||||||
|
| |||||||||||
|
| |||||||||||
| ||||||||||||
|
| |||||||||||
| ||||||||||||
| Requires Dive | ||||||||||||
|
| |||||||||||
| Rematch | ||||||||||||
|
| |||||||||||
| ||||||||||||
|
| |||||||||||
| ||||||||||||
| ||||||||||||
|
| |||||||||||
| ||||||||||||
| ||||||||||||
|
| |||||||||||
| ||||||||||||
| ||||||||||||
| Trainers with a PokéNav by their names will be registered in the Trainer's Eyes or Match Call function after the first battle, and may have a rematch with the player with higher-level Pokémon. | ||||||||||||


Pokémon Omega Ruby and Alpha Sapphire
| Trainer | Pokémon | |||||||||||
|---|---|---|---|---|---|---|---|---|---|---|---|---|
| Requires Surf | ||||||||||||
|
| |||||||||||
|
| |||||||||||
|
| |||||||||||
|
| |||||||||||
| ||||||||||||
|
| |||||||||||
|
| |||||||||||
| ||||||||||||
| ||||||||||||
| Requires Surf and Dive | ||||||||||||
|
| |||||||||||
| ||||||||||||
|
| |||||||||||
| ||||||||||||
|
| |||||||||||
|
| |||||||||||
| Trainers with a PokéNav by their names will be registered in the Trainer's Eyes or Match Call function after the first battle, and may have a rematch with the player with higher-level Pokémon. | ||||||||||||

Appearance
| Game | Surface | Underwater |
|---|---|---|
| Ruby | 
|

|
| Sapphire | ||
| Emerald | ||
| Omega Ruby | 
|

|
| Alpha Sapphire | ||
See also
| This article is part of Project Routes, a Bulbapedia project that aims to write comprehensive articles on every route in the Pokémon world. |