Gym: Difference between revisions
(→Unofficial Gyms: - Added image for Anthony (AG)'s Gym, added the Kantionian Gym as it appeared in the anime, and resorted in chronological order) |
Apopheniac (talk | contribs) m (→Trivia) |
||
| (68 intermediate revisions by 36 users not shown) | |||
| Line 1: | Line 1: | ||
[[File:Gym Symbol.png|thumb|150px|The Gym symbol, introduced in [[Generation V]]]] | [[File:Gym Symbol.png|thumb|150px|The Gym symbol, introduced in [[Generation V]]]] | ||
A '''Gym''' (Japanese: '''ジム''' ''Gym'') is a place where [[Pokémon Trainer]]s go to {{pkmn|training|train}} their {{OBP|Pokémon|species}}. Just like real-life {{wp|gym}}nasiums, where one can go to work out and build physical strength, Pokémon Gyms are places where Trainers can go to sharpen their {{pkmn|battle|battling}} skills and where their Pokémon can go to gain [[experience]]. | A '''Gym''' (Japanese: '''ジム''' ''Gym'') (short for '''Pokémon Gym''') is a place where [[Pokémon Trainer]]s go to {{pkmn|training|train}} their {{OBP|Pokémon|species}}. Just like real-life {{wp|gym}}nasiums, where one can go to work out and build physical strength, Pokémon Gyms are places where Trainers can go to sharpen their {{pkmn|battle|battling}} skills and where their Pokémon can go to gain [[experience]]. | ||
Often specializing in a particular [[type]], Gyms create an environment which allows Trainers to test both their skills and Pokémon against those of others. The most powerful Trainer in a given Gym is called the [[Gym Leader]], who is revered by both the lower-ranking members of the Gym and local fans. Usually, Gyms are designed to follow and suit the type that the Gym specializes in, such as [[Wattson]]'s Gym that has electric gates to indicate that it is {{t|Electric}}. However, there are also Gyms that do not practice this, such as [[Viridian Gym]] or [[Cinnabar Gym]]. | Often specializing in a particular [[type]], Gyms create an environment which allows Trainers to test both their skills and Pokémon against those of others. The most powerful Trainer in a given Gym is called the [[Gym Leader]], who is revered by both the lower-ranking members of the Gym and local fans. Usually, Gyms are designed to follow and suit the type that the Gym specializes in, such as [[Wattson]]'s Gym that has electric gates to indicate that it is {{t|Electric}}. However, there are also Gyms that do not practice this, such as [[Viridian Gym]] or [[Cinnabar Gym]]. | ||
Official Gyms are certified by a [[Pokémon League]], and at least eight official Gym [[Badge]]s are requested before taking the Pokémon League challenge. Gyms are vital to a Pokémon Trainer's {{pkmn|journey}}; they may have to travel far and wide, as there can only be one Gym per city. There are also unofficial Gyms that are not certified, many of which are prestigious nonetheless. | Official Gyms are certified by a [[Pokémon League]], and at least eight official Gym [[Badge]]s are requested before taking the Pokémon League challenge. Gyms are vital to a Pokémon Trainer's {{pkmn|journey}}; they may have to travel far and wide, as there can only be one Gym per city. There are also unofficial Gyms that are not certified, many of which are prestigious nonetheless. Currently, [[Alola]] is the only region with no Gyms or Gym Leader; instead, a ceremony known as the [[island challenge]] takes its place. | ||
==In core series games== | ==In core series games== | ||
| Line 12: | Line 12: | ||
The [[Gym guide]] routinely stands at the entrance of the Gym, giving the player advice about the type advantages corresponding to the signature type of the Gym Leader. | The [[Gym guide]] routinely stands at the entrance of the Gym, giving the player advice about the type advantages corresponding to the signature type of the Gym Leader. | ||
There are generally eight known official Gyms in [[core series]] [[region]]s that include Gyms. | There are generally eight known official Gyms in [[core series]] [[region]]s that include Gyms. In [[Galar]], Gym Leaders typically are fought in Stadiums that welcome spectators and facilitate the use of [[Dynamax]] through a Power Spot. | ||
{| style=" | ====Kanto==== | ||
{| style="text-align:center; {{roundy|10px}}; background:#{{green color dark}}; border: 4px solid #{{green color light}};" cellspacing="1" cellpadding=2 | |||
! | ! style="background:#{{kanto color light}}" | Order | ||
! style="background:#{{kanto color light}}" | Gym | ! style="background:#{{kanto color light}}" | Gym | ||
! style="background:#{{kanto color light}}" | Badge | ! style="background:#{{kanto color light}}" | Badge | ||
! | ! style="background:#{{kanto color light}}" | Type | ||
! style="background:#{{kanto color light}}" | ! style="background:#{{kanto color light}}" | Leader | ||
| | |-style="background:#{{rock color light}}" | ||
| 1 | |||
| [[Pewter Gym]] | | [[Pewter Gym]] | ||
| [[File:Boulder Badge.png| | | [[File:Boulder Badge.png|x50px]]<br>{{Badge|Boulder}} | ||
| | | {{t|Rock}} | ||
| [[File:VSBrock PE.png|x64px|link=Brock]]<br>[[Brock]] | |||
|- | |-style="background:#{{water color light}}" | ||
| 2 | |||
| [[Cerulean Gym]] | | [[Cerulean Gym]] | ||
| [[File:Cascade Badge.png| | | [[File:Cascade Badge.png|x50px]]<br>{{Badge|Cascade}} | ||
| | | {{t|Water}} | ||
| [[File:VSMisty PE.png|x64px|link=Misty]]<br>[[Misty]] | |||
|- | |-style="background:#{{electric color light}}" | ||
| 3 | |||
| [[Vermilion Gym]] | | [[Vermilion Gym]] | ||
| [[File:Thunder Badge.png| | | [[File:Thunder Badge.png|x50px]]<br>{{Badge|Thunder}} | ||
| | | {{t|Electric}} | ||
| [[File:VSLt Surge PE.png|x64px|link=Lt. Surge]]<br>[[Lt. Surge]] | |||
|- | |-style="background:#{{grass color light}}" | ||
| 4 | |||
| [[Celadon Gym]] | | [[Celadon Gym]] | ||
| [[File:Rainbow Badge.png| | | [[File:Rainbow Badge.png|x50px]]<br>{{Badge|Rainbow}} | ||
| {{t|Grass}} | |||
| [[File:VSErika PE.png|x64px|link=Erika]]<br>[[Erika]] | |||
|- | |-style="background:#{{poison color light}}" | ||
| [[Fuchsia Gym]] | | rowspan=2 | 5 | ||
| [[File:Soul Badge.png| | | rowspan=2 | [[Fuchsia Gym]] | ||
| | | rowspan=2 | [[File:Soul Badge.png|x50px]]<br>{{Badge|Soul}} | ||
| rowspan=2 | {{t|Poison}} | |||
| | | [[File:VSKoga PE.png|x64px|link=Koga]]<br>[[Koga]]<br><small>(Gen. I/III/VII)</small> | ||
|- | |-style="background:#{{poison color light}}" | ||
| [[File:Spr HGSS Janine.png|link=Janine]]<br>[[Janine]]<br><small>(Gen. II/IV)</small> | |||
|-style="background:#{{psychic color light}}" | |||
| 6 | |||
| [[Saffron Gym]] | | [[Saffron Gym]] | ||
| [[File:Marsh Badge.png| | | [[File:Marsh Badge.png|x50px]]<br>{{Badge|Marsh}} | ||
| | | {{t|Psychic}} | ||
| [[File:VSSabrina PE.png|x64px|link=Sabrina]]<br>[[Sabrina]] | |||
|- | |-style="background:#{{fire color light}}" | ||
| 7 | |||
| [[Cinnabar Gym]] | | [[Cinnabar Gym]] | ||
| [[File:Volcano Badge.png| | | [[File:Volcano Badge.png|x50px]]<br>{{Badge|Volcano}} | ||
| | | {{t|Fire}} | ||
| [[File:VSBlaine PE.png|x64px|link=Blaine]]<br>[[Blaine]] | |||
|- | |-style="background:#{{ground color light}}" | ||
| rowspan= | | rowspan=2 | 8 | ||
| rowspan= | | rowspan=2 | [[Viridian Gym]] | ||
| | | rowspan=2 | [[File:Earth Badge.png|x50px]]<br>{{Badge|Earth}} | ||
| | | {{t|Ground}} | ||
| | | [[File:VSGiovanni PE.png|x64px|link=Giovanni]]<br>[[Giovanni]]<br><small>(Gen. I/III/VII)</small> | ||
| | |-style="background:#{{blue color light}}" | ||
| style="background:#{{ | | Various | ||
| style="background:#{{roundybr|10px}};" | [[File:VSBlue PE.png|x64px|link=Blue (game)]]<br>[[Blue (game)|Blue]]<br><small>(Gen. II/IV/VII)</small> | |||
|} | |||
====Johto==== | |||
{| style="text-align:center; {{roundy|10px}}; background:#{{green color dark}}; border: 4px solid #{{green color light}};" cellspacing="1" cellpadding=2 | |||
! style="background:#{{johto color light}}" | Order | |||
! style="background:#{{johto color light}}" | Gym | ! style="background:#{{johto color light}}" | Gym | ||
! style="background:#{{johto color light}}" | Badge | ! style="background:#{{johto color light}}" | Badge | ||
! | ! style="background:#{{johto color light}}" | Type | ||
! style="background:#{{johto color light}}" | ! style="background:#{{johto color light}}" | Leader | ||
| | |-style="background:#{{flying color light}}" | ||
| 1 | |||
| [[Violet Gym]] | | [[Violet Gym]] | ||
| [[File:Zephyr Badge.png| | | [[File:Zephyr Badge.png|x50px]]<br>{{Badge|Zephyr}} | ||
| | | {{t|Flying}} | ||
| [[File:VSFalkner.png|link=Falkner]]<br>[[Falkner]] | |||
|- | |-style="background:#{{bug color light}}" | ||
| 2 | |||
| [[Azalea Gym]] | | [[Azalea Gym]] | ||
| [[File:Hive Badge.png| | | [[File:Hive Badge.png|x50px]]<br>{{Badge|Hive}} | ||
| | | {{t|Bug}} | ||
| [[File:VSBugsy.png|link=Bugsy]]<br>[[Bugsy]] | |||
|- | |-style="background:#{{normal color light}}" | ||
| 3 | |||
| [[Goldenrod Gym]] | | [[Goldenrod Gym]] | ||
| [[File:Plain Badge.png| | | [[File:Plain Badge.png|x50px]]<br>{{Badge|Plain}} | ||
| | | {{t|Normal}} | ||
| [[File:VSWhitney.png|link=Whitney]]<br>[[Whitney]] | |||
|- | |-style="background:#{{ghost color light}}" | ||
| 4 | |||
| [[Ecruteak Gym]] | | [[Ecruteak Gym]] | ||
| [[File:Fog Badge.png| | | [[File:Fog Badge.png|x50px]]<br>{{Badge|Fog}} | ||
| | | {{t|Ghost}} | ||
| [[File:VSMorty.png|link=Morty]]<br>[[Morty]] | |||
|- | |-style="background:#{{fighting color light}}" | ||
| 5 | |||
| [[Cianwood Gym]] | | [[Cianwood Gym]] | ||
| [[File:Storm Badge.png| | | [[File:Storm Badge.png|x50px]]<br>{{Badge|Storm}} | ||
| | | {{t|Fighting}} | ||
| [[File:VSChuck.png|link=Chuck]]<br>[[Chuck]] | |||
|- | |-style="background:#{{steel color light}}" | ||
| 6 | |||
| [[Olivine Gym]] | | [[Olivine Gym]] | ||
| [[File:Mineral Badge.png| | | [[File:Mineral Badge.png|x50px]]<br>{{Badge|Mineral}} | ||
| | | {{t|Steel}} | ||
| [[File:VSJasmine.png|link=Jasmine]]<br>[[Jasmine]] | |||
|- | |-style="background:#{{ice color light}}" | ||
| 7 | |||
| [[Mahogany Gym]] | | [[Mahogany Gym]] | ||
| [[File:Glacier Badge.png| | | [[File:Glacier Badge.png|x50px]]<br>{{Badge|Glacier}} | ||
| {{t|Ice}} | |||
| [[File:VSPryce.png|link=Pryce]]<br>[[Pryce]] | |||
|- | |-style="background:#{{dragon color light}}" | ||
| style="background:#{{roundybl|10px}};" | 8 | |||
| [[Blackthorn Gym]] | | [[Blackthorn Gym]] | ||
| [[File:Rising Badge.png| | | [[File:Rising Badge.png|x50px]]<br>{{Badge|Rising}} | ||
| style="background:#{{ | | {{t|Dragon}} | ||
| style="background:#{{roundybr|10px}};" | [[File:VSClair.png|link=Clair]]<br>[[Clair]] | |||
| | |} | ||
| | ====Hoenn==== | ||
{| style="text-align:center; {{roundy|10px}}; background:#{{green color dark}}; border: 4px solid #{{green color light}};" cellspacing="1" cellpadding=2 | |||
! style="background:#{{hoenn color light}}" | Order | |||
! style="background:#{{hoenn color light}}" | Gym | ! style="background:#{{hoenn color light}}" | Gym | ||
! style="background:#{{hoenn color light}}" | Badge | ! style="background:#{{hoenn color light}}" | Badge | ||
! | ! style="background:#{{hoenn color light}}" | Type | ||
! style="background:#{{hoenn color light}}" | ! style="background:#{{hoenn color light}}" | Leader | ||
| | |-style="background:#{{rock color light}}" | ||
| 1 | |||
| [[Rustboro Gym]] | | [[Rustboro Gym]] | ||
| [[File:Stone Badge.png| | | [[File:Stone Badge.png|x50px]]<br>{{Badge|Stone}} | ||
| | | {{t|Rock}} | ||
| [[File:VSRoxanne.png|x64px|link=Roxanne]]<br>[[Roxanne]] | |||
|- | |-style="background:#{{fighting color light}}" | ||
| 2 | |||
| [[Dewford Gym]] | | [[Dewford Gym]] | ||
| [[File:Knuckle Badge.png| | | [[File:Knuckle Badge.png|x50px]]<br>{{Badge|Knuckle}} | ||
| | | {{t|Fighting}} | ||
| [[File:VSBrawly.png|x64px|link=Brawly]]<br>[[Brawly]] | |||
|- | |-style="background:#{{electric color light}}" | ||
| 3 | |||
| [[Mauville Gym]] | | [[Mauville Gym]] | ||
| [[File:Dynamo Badge.png| | | [[File:Dynamo Badge.png|x50px]]<br>{{Badge|Dynamo}} | ||
| | | {{t|Electric}} | ||
| [[File:VSWattson.png|x64px|link=Wattson]]<br>[[Wattson]] | |||
|- | |-style="background:#{{fire color light}}" | ||
| 4 | |||
| [[Lavaridge Gym]] | | [[Lavaridge Gym]] | ||
| [[File:Heat Badge.png| | | [[File:Heat Badge.png|x50px]]<br>{{Badge|Heat}} | ||
| | | {{t|Fire}} | ||
| [[File:VSFlannery.png|x64px|link=Flannery]]<br>[[Flannery]] | |||
|- | |-style="background:#{{normal color light}}" | ||
| 5 | |||
| [[Petalburg Gym]] | | [[Petalburg Gym]] | ||
| [[File:Balance Badge.png| | | [[File:Balance Badge.png|x50px]]<br>{{Badge|Balance}} | ||
| | | {{t|Normal}} | ||
| [[File:VSNorman.png|x64px|link=Norman]]<br>[[Norman]] | |||
|- | |-style="background:#{{flying color light}}" | ||
| 6 | |||
| [[Fortree Gym]] | | [[Fortree Gym]] | ||
| [[File:Feather Badge.png| | | [[File:Feather Badge.png|x50px]]<br>{{Badge|Feather}} | ||
| | | {{t|Flying}} | ||
| [[File:VSWinona.png|x64px|link=Winona]]<br>[[Winona]] | |||
|- | |-style="background:#{{psychic color light}}" | ||
| 7 | |||
| [[Mossdeep Gym]] | | [[Mossdeep Gym]] | ||
| [[File:Mind Badge.png| | | [[File:Mind Badge.png|x50px]]<br>{{Badge|Mind}} | ||
| | | {{t|Psychic}} | ||
| [[File:VSLiza & Tate.png|x64px|link=Tate and Liza]]<br>[[Tate and Liza|Tate and Liza]] | |||
|- | |-style="background:#{{water color light}}" | ||
| [[Sootopolis Gym]] | | rowspan=2 | 8 | ||
| [[File:Rain Badge.png| | | rowspan=2 | [[Sootopolis Gym]] | ||
| | | rowspan=2 | [[File:Rain Badge.png|x50px]]<br>{{Badge|Rain}} | ||
| rowspan=2 | {{t|Water}} | |||
| | | [[File:VSWallace.png|x64px|link=Wallace]]<br>[[Wallace]]{{sup/3|RS}}{{sup/6|ORAS}} | ||
| | |-style="background:#{{water color light}}" | ||
| style="background:#{{roundybr|10px}};" | [[File:Spr E Juan.png|x64px|link=Juan]]<br>[[Juan]]{{sup/3|E}} | |||
| | |} | ||
====Sinnoh==== | |||
{| style="text-align:center; {{roundy|10px}}; background:#{{green color dark}}; border: 4px solid #{{green color light}};" cellspacing="1" cellpadding=2 | |||
! style="background:#{{sinnoh color light}}" | Order | |||
! style="background:#{{sinnoh color light}}" | Gym | ! style="background:#{{sinnoh color light}}" | Gym | ||
! style="background:#{{sinnoh color light}}" | Badge | ! style="background:#{{sinnoh color light}}" | Badge | ||
! | ! style="background:#{{sinnoh color light}}" | Type | ||
! style="background:#{{sinnoh color light}}" | ! style="background:#{{sinnoh color light}}" | Leader | ||
| | |-style="background:#{{rock color light}}" | ||
| 1 | |||
| [[Oreburgh Gym]] | | [[Oreburgh Gym]] | ||
| [[File:Coal Badge.png| | | [[File:Coal Badge.png|x50px]]<br>{{Badge|Coal}} | ||
| {{t|Rock}} | |||
| [[File:VSRoark BDSP.png|x64px|link=Roark]]<br>[[Roark]] | |||
|- | |-style="background:#{{grass color light}}" | ||
| 2 | |||
| [[Eterna Gym]] | | [[Eterna Gym]] | ||
| [[File:Forest Badge.png| | | [[File:Forest Badge.png|x50px]]<br>{{Badge|Forest}} | ||
| {{t|Grass}} | |||
| [[File:VSGardenia BDSP.png|x64px|pxlink=Gardenia]]<br>[[Gardenia]] | |||
| | |-style="background:#{{fighting color light}}" | ||
| [[Veilstone Gym]] | | 3{{sup/4|DP}}{{sup/8|BDSP}}<br>4{{sup/4|Pt}} | ||
| [[File:Cobble Badge.png| | | [[Veilstone Gym]] | ||
| | | [[File:Cobble Badge.png|x50px]]<br>{{Badge|Cobble}} | ||
| {{t|Fighting}} | |||
| | | [[File:VSMaylene BDSP.png|x64px|link=Maylene]]<br>[[Maylene]] | ||
| [[Pastoria Gym]] | |-style="background:#{{water color light}}" | ||
| [[File:Fen Badge.png| | | 4{{sup/4|DP}}{{sup/8|BDSP}}<br>5{{sup/4|Pt}} | ||
| [[Pastoria Gym]] | |||
| [[File:Fen Badge.png|x50px]]<br>{{Badge|Fen}} | |||
| | | {{t|Water}} | ||
| [[Hearthome Gym]] | | [[File:VSCrasher Wake BDSP.png|x64px|link=Crasher Wake]]<br>[[Crasher Wake]] | ||
| [[File:Relic Badge.png| | |-style="background:#{{ghost color light}}" | ||
| 5{{sup/4|DP}}{{sup/8|BDSP}}<br>3{{sup/4|Pt}} | |||
| [[Hearthome Gym]] | |||
|- | | [[File:Relic Badge.png|x50px]]<br>{{Badge|Relic}} | ||
| {{t|Ghost}} | |||
| [[File:VSFantina BDSP.png|x64px|link=Fantina]]<br>[[Fantina]] | |||
|-style="background:#{{steel color light}}" | |||
| 6 | |||
| [[Canalave Gym]] | | [[Canalave Gym]] | ||
| [[File:Mine Badge.png| | | [[File:Mine Badge.png|x50px]]<br>{{Badge|Mine}} | ||
| {{t|Steel}} | |||
| [[File:VSByron BDSP.png|x64px|link=Byron]]<br>[[Byron]] | |||
|- | |-style="background:#{{ice color light}}" | ||
| 7 | |||
| [[Snowpoint Gym]] | | [[Snowpoint Gym]] | ||
| [[File:Icicle Badge.png| | | [[File:Icicle Badge.png|x50px]]<br>{{Badge|Icicle}} | ||
| {{t|Ice}} | |||
| [[File:VSCandice BDSP.png|x64px|link=Candice]]<br>[[Candice]] | |||
|- | |-style="background:#{{electric color light}}" | ||
| style="background:#{{roundybl|10px}};" | 8 | |||
| [[Sunyshore Gym]] | | [[Sunyshore Gym]] | ||
| [[File:Beacon Badge.png| | | [[File:Beacon Badge.png|x50px]]<br>{{Badge|Beacon}} | ||
| style="background:#{{ | | {{t|Electric}} | ||
| style="background:#{{roundybr|10px}};" | [[File:VSVolkner BDSP.png|x64px|link=Volkner]]<br>[[Volkner]] | |||
| | |} | ||
|- | ====Unova==== | ||
{| class="sortable" style="text-align:center; {{roundy|10px}}; background:#{{green color dark}}; border: 4px solid #{{green color light}};" cellspacing="1" cellpadding=2 | |||
| | ! style="background-color:#{{unova color light}}" data-sort-type="number" | Order<br>({{gameabbrev5|BW}}) | ||
! style="background:#{{unova color light}}" | Gym | ! style="background-color:#{{unova color light}}" data-sort-type="number" | Order<br>({{gameabbrev5|B2W2}}) | ||
! style="background:#{{unova color light}}" | Badge | ! style="background-color:#{{unova color light}}" class="unsortable" | Gym | ||
! | ! style="background-color:#{{unova color light}}" class="unsortable" | Badge | ||
! style="background:#{{unova color light}}" | ! style="background-color:#{{unova color light}}" class="unsortable" | Type | ||
|- | ! style="background-color:#{{unova color light}}" class="unsortable" | Leader | ||
| rowspan=" | |-style="background-color:#{{grass color light}}" | ||
| rowspan=" | | data-sort-value=1 | {{MS/3|501|Oshawott}}<br>1 | ||
| | | data-sort-value=0 | ''N/A'' | ||
| rowspan=3 style="background:#{{fire color light}}" | [[Striaton Gym]] | |||
| | | rowspan=3 style="background:#{{fire color light}}" | [[File:Trio Badge.png|x50px]]<br>{{Badge|Trio}} | ||
| | | {{t|Grass}} | ||
|- | | [[File:VSCilan.png|link=Cilan]]<br>[[Cilan]] | ||
|-style="background:#{{fire color light}}" | |||
|- | | data-sort-value=1 | {{MS/3|495|Snivy}}<br>1 | ||
| data-sort-value=0 | ''N/A'' | |||
| {{t|Fire}} | |||
| [[Nacrene Gym]] | | [[File:VSChili.png|link=Chili]]<br>[[Chili]] | ||
| rowspan= | |-style="background:#{{water color light}}" | ||
| rowspan= | | data-sort-value=1 | {{MS/3|498|Tepig}}<br>1 | ||
| data-sort-value=0 | ''N/A'' | |||
|- | | {{t|Water}} | ||
| [[Aspertia Gym]] | | [[File:VSCress.png|link=Cress]]<br>[[Cress]] | ||
|-style="background:#{{normal color light}}" | |||
| | | 2 | ||
| data-sort-value=0 | ''N/A'' | |||
| [[Nacrene Gym]] | |||
| rowspan=2 | [[File:Basic Badge.png|x50px]]<br>{{Badge|Basic}} | |||
| rowspan=2 | {{t|Normal}} | |||
| [[File:VSLenora.png|link=Lenora]]<br><small>[[Lenora]] | |||
|-style="background:#{{normal color light}}" | |||
| data-sort-value=0 | ''N/A'' | |||
| 1 | |||
| [[Aspertia Gym]] | |||
| [[File:VSCheren 2.png|link=Cheren]]<br>[[Cheren]] | |||
|-style="background:#{{poison color light}}" | |||
| data-sort-value=0 | ''N/A'' | |||
| 2 | |||
| [[Virbank Gym]] | | [[Virbank Gym]] | ||
| [[File:Toxic Badge.png| | | [[File:Toxic Badge.png|x50px]]<br>{{Badge|Toxic}} | ||
| {{t|Poison}} | |||
| [[File:VSRoxie.png|link=Roxie]]<br>[[Roxie]] | |||
| | |-style="background:#{{bug color light}}" | ||
| colspan=2 | 3 | |||
| [[Castelia Gym]] | | [[Castelia Gym]] | ||
| [[File:Insect Badge.png| | | [[File:Insect Badge.png|x50px]]<br>{{Badge|Insect}} | ||
| | | {{t|Bug}} | ||
| [[File:VSBurgh.png|link=Burgh]]<br>[[Burgh]] | |||
|- | |-style="background:#{{electric color light}}" | ||
| colspan=2 | 4 | |||
| [[Nimbasa Gym]] | | [[Nimbasa Gym]] | ||
| [[File:Bolt Badge.png| | | [[File:Bolt Badge.png|x50px]]<br>{{Badge|Bolt}} | ||
| {{t|Electric}} | |||
| [[File:VSElesa 2.png|link=Elesa]]<br>[[Elesa]] | |||
|- | |-style="background:#{{ground color light}}" | ||
| colspan=2 | 5 | |||
| [[Driftveil Gym]] | | [[Driftveil Gym]] | ||
| [[File:Quake Badge.png| | | [[File:Quake Badge.png|x50px]]<br>{{Badge|Quake}} | ||
| {{t|Ground}} | |||
| [[File:VSClay.png|link=Clay]]<br>[[Clay]] | |||
|- | |-style="background:#{{flying color light}}" | ||
| colspan=2 | 6 | |||
| [[Mistralton Gym]] | | [[Mistralton Gym]] | ||
| [[File:Jet Badge.png| | | [[File:Jet Badge.png|x50px]]<br>{{Badge|Jet}} | ||
| {{t|Flying}} | |||
| [[File:VSSkyla.png|link=Skyla]]<br>[[Skyla]] | |||
|- | |-style="background:#{{ice color light}}" | ||
| 7 | |||
| data-sort-value=0 | ''N/A'' | |||
| [[Icirrus Gym]] | | [[Icirrus Gym]] | ||
| [[File:Freeze Badge.png| | | [[File:Freeze Badge.png|x50px]]<br>{{Badge|Freeze}} | ||
| {{t|Ice}} | |||
| [[File:VSBrycen.png|link=Brycen]]<br>[[Brycen]] | |||
| | |-style="background:#{{dragon color light}}" | ||
| [[Opelucid Gym]] | | data-sort-value=8 | 8{{sup/5|B}} | ||
| [[File:Legend Badge.png| | | 7 | ||
| | | rowspan=2 | [[Opelucid Gym]] | ||
| rowspan=2 | [[File:Legend Badge.png|x50px]]<br>{{Badge|Legend}} | |||
| | | rowspan=2 | {{t|Dragon}} | ||
| | | [[File:VSDrayden.png|link=Drayden]]<br>[[Drayden]] | ||
|-style="background:#{{dragon color light}}" | |||
| data-sort-value=8 | 8{{sup/5|W}} | |||
| data-sort-value=0 | ''N/A'' | |||
| [[File:VSIris.png|link=Iris]]<br>[[Iris]] | |||
|-style="background:#{{water color light}}" | |||
| data-sort-value=0 style="background:#{{roundybl|10px}};" | ''N/A'' | |||
| 8 | |||
| [[Humilau Gym]] | | [[Humilau Gym]] | ||
| [[File:Wave Badge.png| | | [[File:Wave Badge.png|x50px]]<br>{{Badge|Wave}} | ||
| style="background:#{{ | | {{t|Water}} | ||
| style="background:#{{roundybr|10px}};" | [[File:VSMarlon.png|link=Marlon]]<br>[[Marlon]] | |||
|} | |||
| | ====Kalos==== | ||
{| style="text-align:center; {{roundy|10px}}; background:#{{green color dark}}; border: 4px solid #{{green color light}};" cellspacing="1" cellpadding=2 | |||
! style="background:#{{kalos color light}}" | Order | |||
! style="background:#{{kalos color light}}" | Gym | ! style="background:#{{kalos color light}}" | Gym | ||
! style="background:#{{kalos color light}}" | Badge | ! style="background:#{{kalos color light}}" | Badge | ||
! | ! style="background:#{{kalos color light}}" | Type | ||
! style="background:#{{kalos color light}}" | ! style="background:#{{kalos color light}}" | Leader | ||
| | |-style="background:#{{bug color light}}" | ||
| 1 | |||
| [[Santalune Gym]] | | [[Santalune Gym]] | ||
| [[File:Bug Badge.png| | | [[File:Bug Badge.png|x50px]]<br>{{Badge|Bug}} | ||
| | | {{t|Bug}} | ||
| [[File:VSViola.png|x64px|link=Viola]]<br>[[Viola]] | |||
|- | |-style="background:#{{rock color light}}" | ||
| 2 | |||
| [[Cyllage Gym]] | | [[Cyllage Gym]] | ||
| [[File:Cliff Badge.png| | | [[File:Cliff Badge.png|x50px]]<br>{{Badge|Cliff}} | ||
| | | {{t|Rock}} | ||
| [[File:VSGrant.png|x64px|link=Grant]]<br>[[Grant]] | |||
|- | |-style="background:#{{fighting color light}}" | ||
| 3 | |||
| [[Shalour Gym]] | | [[Shalour Gym]] | ||
| [[File:Rumble Badge.png| | | [[File:Rumble Badge.png|x50px]]<br>{{Badge|Rumble}} | ||
| | | {{t|Fighting}} | ||
| [[File:VSKorrina.png|x64px|link=Korrina]]<br>[[Korrina]] | |||
|- | |-style="background:#{{grass color light}}" | ||
| 4 | |||
| [[Coumarine Gym]] | | [[Coumarine Gym]] | ||
| [[File:Plant Badge.png| | | [[File:Plant Badge.png|x50px]]<br>{{Badge|Plant}} | ||
| | | {{t|Grass}} | ||
| [[File:VSRamos.png|x64px|link=Ramos]]<br>[[Ramos]] | |||
|- | |-style="background:#{{electric color light}}" | ||
| 5 | |||
| [[Lumiose Gym]] | | [[Lumiose Gym]] | ||
| [[File:Voltage Badge.png| | | [[File:Voltage Badge.png|x50px]]<br>{{Badge|Voltage}} | ||
| | | {{t|Electric}} | ||
| [[File:VSClemont.png|x64px|link=Clemont]]<br>[[Clemont]] | |||
|- | |-style="background:#{{fairy color light}}" | ||
| 6 | |||
| [[Laverre Gym]] | | [[Laverre Gym]] | ||
| [[File:Fairy Badge.png| | | [[File:Fairy Badge.png|x50px]]<br>{{Badge|Fairy}} | ||
| | | {{t|Fairy}} | ||
| [[File:VSValerie.png|x64px|link=Valerie]]<br>[[Valerie]] | |||
|- | |-style="background:#{{psychic color light}}" | ||
| 7 | |||
| [[Anistar Gym]] | | [[Anistar Gym]] | ||
| [[File:Psychic Badge.png| | | [[File:Psychic Badge.png|x50px]]<br>{{Badge|Psychic}} | ||
| {{t|Psychic}} | |||
| [[File:VSOlympia.png|x64px|link=Olympia]]<br>[[Olympia]] | |||
|- | |-style="background:#{{ice color light}}" | ||
| style="background:#{{roundybl|10px}};" | 8 | |||
| [[Snowbelle Gym]] | | [[Snowbelle Gym]] | ||
| [[File:Iceberg Badge.png| | | [[File:Iceberg Badge.png|x50px]]<br>{{Badge|Iceberg}} | ||
| style="background:#{{ | | {{t|Ice}} | ||
| style="background:#{{roundybr|10px}};" | [[File:VSWulfric.png|x64px|link=Wulfric]]<br>[[Wulfric]] | |||
| | |} | ||
| | ====Galar==== | ||
{| style="text-align:center; {{roundy|10px}}; background:#{{green color dark}}; border: 4px solid #{{green color light}};" cellspacing="1" cellpadding=2 | |||
! style="background:#{{Galar color light}}" | Order | |||
! style="background:#{{Galar color light}}" | Gym | ! style="background:#{{Galar color light}}" | Gym | ||
! style="background:#{{Galar color light}}" | Badge | ! style="background:#{{Galar color light}}" | Badge | ||
! | ! style="background:#{{Galar color light}}" | Type | ||
! style="background:#{{Galar color light}}" | ! style="background:#{{Galar color light}}" | Leader | ||
|- | |-style="background:#{{grass color light}}" | ||
| | | 1 | ||
| | | [[File:Grass Gym logo.png|x50px]]<br>[[Turffield Stadium]] | ||
| style="background:#{{ | | [[File:Grass Badge.png|x50px]]<br>{{Badge|Grass}} | ||
| | | {{t|Grass}} | ||
|- | | [[File:VSMilo.png|x64px|link=Milo]]<br>[[Milo]] | ||
| | |-style="background:#{{water color light}}" | ||
| | | 2 | ||
| style="background:#{{ | | [[File:Water Gym logo.png|x50px]]<br>[[Hulbury Stadium]] | ||
| | | [[File:Water Badge.png|x50px]]<br>{{Badge|Water}} | ||
|- | | {{t|Water}} | ||
| | | [[File:VSNessa.png|x64px|link=Nessa]]<br>[[Nessa]] | ||
| | |-style="background:#{{fire color light}}" | ||
| style="background:#{{ | | 3 | ||
| | | [[File:Fire Gym logo.png|x50px]]<br>[[Motostoke Stadium]] | ||
| | | [[File:Fire Badge.png|x50px]]<br>{{Badge|Fire}} | ||
| | | {{t|Fire}} | ||
| style="background:#{{ | | [[File:VSKabu.png|x64px|link=Kabu]]<br>[[Kabu]] | ||
|-style="background:#{{fighting color light}}" | |||
| 4{{sup/8|Sw}} | |||
| [[File:Fighting Gym logo.png|x50px]]<br>[[Stow-on-Side Stadium]] | |||
| [[File:Fighting Badge.png|x50px]]<br>{{Badge|Fighting}} | |||
| {{t|Fighting}} | |||
| [[File:VSBea.png|x64px|link=Bea]]<br><small>[[Bea]] | |||
|-style="background:#{{ghost color light}}" | |||
| 4{{sup/8|Sh}} | |||
| [[File:Ghost Gym logo.png|x50px]]<br>[[Stow-on-Side Stadium]] | |||
| [[File:Ghost Badge.png|x50px]]<br>{{Badge|Ghost}} | |||
| {{t|Ghost}} | |||
| [[File:VSAllister.png|x64px|link=Allister]]<br><small>[[Allister]] | |||
|-style="background:#{{fairy color light}}" | |||
| rowspan=2 | 5 | |||
| rowspan=2 | [[File:Fairy Gym logo.png|x50px]]<br>[[Ballonlea Stadium]] | |||
| rowspan=2 | [[File:GalarFairy Badge.png|x50px]]<br>{{Badge|GalarFairy|Fairy Badge}} | |||
| rowspan=2 | {{t|Fairy}} | |||
| [[File:VSOpal.png|x64px|link=Opal]]<br>[[Opal]]<br><small>(initial)</small> | |||
|-style="background:#{{fairy color light}}" | |||
| [[File:VSBede 2.png|x64px|link=Bede]]<br>[[Bede]]<br><small>(successor)</small> | |||
|-style="background:#{{rock color light}}" | |||
| 6{{sup/8|Sw}} | |||
| [[File:Rock Gym logo.png|x50px]]<br>[[Circhester Stadium]] | |||
| [[File:Rock Badge.png|x50px]]<br>{{Badge|Rock}} | |||
| {{t|Rock}} | |||
| [[File:VSGordie.png|x64px|link=Gordie]]<br><small>[[Gordie]] | |||
|-style="background:#{{Ice color light}}" | |||
| 6{{sup/8|Sh}} | |||
| [[File:Ice Gym logo.png|x50px]]<br>[[Circhester Stadium]] | |||
| [[File:Ice Badge.png|x50px]]<br>{{Badge|Ice}} | |||
| {{t|Ice}} | |||
| [[File:VSMelony.png|x64px|link=Melony]]<br><small>[[Melony]] | |||
|-style="background:#{{Dark color light}}" | |||
| rowspan=2 | 7 | |||
| rowspan=2 | [[File:Dark Gym logo.png|x50px]]<br>[[Spikemuth|Spikemuth Gym]] | |||
| rowspan=2 | [[File:Dark Badge.png|x50px]]<br>{{Badge|Dark}} | |||
| rowspan=2 | {{t|Dark}} | |||
| [[File:VSPiers.png|x64px|link=Piers]]<br>[[Piers]]<br><small>(initial)</small> | |||
|-style="background:#{{Dark color light}}" | |||
| [[File:VSMarnie 3.png|x64px|link=Marnie]]<br>[[Marnie]]<br><small>(successor)</small> | |||
|-style="background:#{{Dragon color light}}" | |||
| style="background:#{{roundybl|10px}};" | 8 | |||
| [[File:Dragon Gym logo.png|x50px]]<br>[[Hammerlocke Stadium]] | |||
| [[File:Dragon Badge.png|x50px]]<br>{{Badge|Dragon}} | |||
| {{t|Dragon}} | |||
| style="background:#{{roundybr|10px}};" | [[File:VSRaihan.png|x64px|link=Raihan]]<br>[[Raihan]] | |||
|} | |||
====Paldea==== | |||
{| style="text-align:center; {{roundy|10px}}; background:#{{green color dark}}; border: 4px solid #{{green color light}};" cellspacing="1" cellpadding=2 | |||
! style="background:#{{Paldea color light}}" | Order | |||
! style="background:#{{Paldea color light}}" | Gym | |||
! style="background:#{{Paldea color light}}" | Badge | |||
! style="background:#{{Paldea color light}}" | Type | |||
! style="background:#{{Paldea color light}}" | Leader | |||
|-style="background:#{{bug color light}}" | |||
| 1 | |||
| [[Cortondo Gym]] | |||
| [[File:SVbadge VictoryRoad Bug.png|x50px]]<br>{{Badge|PaldeaBug|Bug Badge}} | |||
| {{t|Bug}} | |||
| [[File:VSKaty.png|x64px|link=Katy]]<br>[[Katy]] | |||
|-style="background:#{{Grass color light}}" | |||
| 2 | |||
| [[Artazon Gym]] | |||
| [[File:SVbadge VictoryRoad Grass.png|x50px]]<br>{{Badge|PaldeaGrass|Grass Badge}} | |||
| {{t|Grass}} | |||
| [[File:VSBrassius.png|x64px|link=Brassius]]<br>[[Brassius]] | |||
|-style="background:#{{Electric color light}}" | |||
| 3 | |||
| [[Levincia Gym]] | |||
| [[File:SVbadge VictoryRoad Electric.png|x50px]]<br>{{Badge|Electric}} | |||
| {{t|Electric}} | |||
| [[File:VSIono.png|x64px|link=Iono]]<br>[[Iono]] | |||
|-style="background:#{{Water color light}}" | |||
| 4 | |||
| [[Cascarrafa Gym]] | |||
| [[File:SVbadge VictoryRoad Water.png|x50px]]<br>{{Badge|PaldeaWater|Water Badge}} | |||
| {{t|Water}} | |||
| [[File:VSKofu.png|x64px|link=Kofu]]<br>[[Kofu]] | |||
|-style="background:#{{Normal color light}}" | |||
| 5 | |||
| [[Medali Gym]] | |||
| [[File:SVbadge VictoryRoad Normal.png|x50px]]<br>{{Badge|Normal}} | |||
| {{t|Normal}} | |||
| [[File:VSLarry.png|x64px|link=Larry]]<br>[[Larry]] | |||
|-style="background:#{{Ghost color light}}" | |||
| 6 | |||
| [[Montenevera Gym]] | |||
| [[File:SVbadge VictoryRoad Ghost.png|x50px]]<br>{{Badge|PaldeaGhost|Ghost Badge}} | |||
| {{t|Ghost}} | |||
| [[File:VSRyme.png|x64px|link=Ryme]]<br>[[Ryme]] | |||
|-style="background:#{{Psychic color light}}" | |||
| 7 | |||
| [[Alfornada Gym]] | |||
| [[File:SVbadge VictoryRoad Psychic.png|x50px]]<br>{{Badge|PaldeaPsychic|Psychic Badge}} | |||
| {{t|Psychic}} | |||
| [[File:VSTulip.png|x64px|link=Tulip]]<br>[[Tulip]] | |||
|-style="background:#{{ice color light}}" | |||
| 8 | |||
| [[Glaseado Gym]] | |||
| [[File:SVbadge VictoryRoad Ice.png|x50px]]<br>{{Badge|PaldeaIce|Ice Badge}} | |||
| {{t|Ice}} | |||
| [[File:VSGrusha.png|x64px|link=Grusha]]<br>[[Grusha]] | |||
|}{{-}} | |}{{-}} | ||
====Gallery==== | ====Gallery==== | ||
{{incomplete|section|needs=HGSS pictures different colors, Generation VI pictures}} | {{incomplete|section|needs=HGSS pictures different colors, Generation VI pictures}} | ||
Generations {{gen| | [[Generation II|Generations II]], {{gen|V}}, {{gen|VI}}, and {{gen|VIII}} have a unique design for each Gym (except [[Cinnabar Gym]], which is destroyed). However, in Generation II, the only difference is the shape and color of the roof, with the exception of Saffron and Cerulean Gyms. In Generation VIII, the only differences are the color scheme and the type logo above the entrance, with the exceptions of Motostoke Stadium, Spikemuth Gym, and Hammerlocke Stadium. | ||
<gallery | <gallery> | ||
File:Gym RBGY.png|Generation I | File:Gym RBGY.png|Generation I | ||
File:Gym 2 RBGY.png|Generation I | File:Gym 2 RBGY.png|Generation I | ||
| Line 375: | Line 545: | ||
</gallery> | </gallery> | ||
=====Generation II===== | |||
<gallery | <gallery> | ||
File:Violet Gym exterior GSC.png|[[Violet Gym]] | File:Violet Gym exterior GSC.png| [[Violet Gym]] | ||
File:Azalea Gym exterior GSC.png|[[Azalea Gym]] | File:Azalea Gym exterior GSC.png| [[Azalea Gym]] | ||
File:Goldenrod Gym exterior GSC.png|[[Goldenrod Gym]] | File:Goldenrod Gym exterior GSC.png| [[Goldenrod Gym]] | ||
File:Ecruteak Gym exterior GSC.png|[[Ecruteak Gym]] | File:Ecruteak Gym exterior GSC.png| [[Ecruteak Gym]] | ||
File:Cianwood Gym exterior GSC.png|[[Cianwood Gym]] | File:Cianwood Gym exterior GSC.png| [[Cianwood Gym]] | ||
File:Olivine Gym exterior GSC.png|[[Olivine Gym]] | File:Olivine Gym exterior GSC.png| [[Olivine Gym]] | ||
File:Mahogany Gym exterior GSC.png|[[Mahogany Gym]] | File:Mahogany Gym exterior GSC.png| [[Mahogany Gym]] | ||
File:Blackthorn Gym exterior GSC.png|[[Blackthorn Gym]] | File:Blackthorn Gym exterior GSC.png| [[Blackthorn Gym]] | ||
File:Pewter Gym exterior GSC.png|[[Pewter Gym]] | File:Pewter Gym exterior GSC.png| [[Pewter Gym]] | ||
File:Cerulean Gym exterior GSC.png|[[Cerulean Gym]] | File:Cerulean Gym exterior GSC.png| [[Cerulean Gym]] | ||
File:Vermilion Gym exterior GSC.png|[[Vermilion Gym]] | File:Vermilion Gym exterior GSC.png| [[Vermilion Gym]] | ||
File:Celadon Gym exterior GSC.png|[[Celadon Gym]] | File:Celadon Gym exterior GSC.png| [[Celadon Gym]] | ||
File:Fuchsia Gym exterior GSC.png|[[Fuchsia Gym]] | File:Fuchsia Gym exterior GSC.png| [[Fuchsia Gym]] | ||
File:Saffron Gym exterior GSC.png|[[Saffron Gym]] | File:Saffron Gym exterior GSC.png| [[Saffron Gym]] | ||
File:Viridian Gym exterior GSC.png|[[Viridian Gym]] | File:Viridian Gym exterior GSC.png| [[Viridian Gym]] | ||
</gallery> | |||
=====Generation V===== | |||
<gallery> | |||
File:Striaton Gym Exterior BW.png| [[Striaton Gym]]{{sup/5|BW}} | |||
File:Nacrene Gym exterior BW.png| [[Nacrene Gym]]{{sup/5|BW}} | |||
File:Castelia Gym exterior BWB2W2.png| [[Castelia Gym]] | |||
File:Nimbasa Gym exterior BW.png| [[Nimbasa Gym]]{{sup/5|BW}} | |||
File:Nimbasa Gym exterior B2W2.png| [[Nimbasa Gym]]{{sup/5|B2W2}} | |||
File:Driftveil Gym exterior BWB2W2.png| [[Driftveil Gym]] | |||
File:Mistralton Gym exterior BWB2W2.png| [[Mistralton Gym]] | |||
File:Icirrus Gym exterior BW.png| [[Icirrus Gym]]{{sup/5|BW}} | |||
File:Opelucid Gym exterior BB2.png| [[Opelucid Gym]]{{sup/5|B}}{{sup/5|B2}} | |||
File:Opelucid Gym exterior WW2.png| [[Opelucid Gym]]{{sup/5|W}}{{sup/5|W2}} | |||
File:Aspertia Gym exterior B2W2.png| [[Aspertia Gym]]{{sup/5|B2W2}} | |||
File:Virbank Gym exterior B2W2.png| [[Virbank Gym]]{{sup/5|B2W2}} | |||
File:Humilau Gym exterior B2W2.png| [[Humilau Gym]]{{sup/5|B2W2}} | |||
</gallery> | |||
=====Generation VIII===== | |||
<gallery> | |||
File:Turffield Stadium SwSh.png| [[Turffield Stadium]] | |||
File:Hulbury Stadium SwSh.png| [[Hulbury Stadium]] | |||
File:Motostoke Stadium SwSh.png| [[Motostoke Stadium]] | |||
File:Stow-on-Side Stadium Sw.png| [[Stow-on-Side Stadium]]{{sup/8|Sw}} | |||
File:Stow-on-Side Stadium Sh.png| [[Stow-on-Side Stadium]]{{sup/8|Sh}} | |||
File:Ballonlea Stadium SwSh.png| [[Ballonlea Stadium]] | |||
File:Circhester Stadium Sw.png| [[Circhester Stadium]]{{sup/8|Sw}} | |||
File:Circhester Stadium Sh.png| [[Circhester Stadium]]{{sup/8|Sh}} | |||
File:Spikemuth Gym SwSh.png| [[Spikemuth|Spikemuth Gym]] | |||
File:Hammerlocke Stadium SwSh.png| [[Hammerlocke Stadium]] | |||
</gallery> | </gallery> | ||
=====Generation IX===== | |||
<gallery | <gallery> | ||
File: | File:Cortondo Gym SV.png| [[Cortondo Gym]] | ||
File:Artazon Gym SV.png| [[Artazon Gym]] | |||
File: | File:Levincia Gym SV.png| [[Levincia Gym]] | ||
File: | File:Cascarrafa Gym SV.png| [[Cascarrafa Gym]] | ||
File: | File:Medali Gym SV.png| [[Medali Gym]] | ||
File: | File:Montenevera Gym SV.png| [[Montenevera Gym]] | ||
File: | File:Alfornada Gym SV.png| [[Alfornada Gym]] | ||
File: | File:Glaseado Gym SV.png| [[Glaseado Gym]] | ||
File: | |||
</gallery> | </gallery> | ||
| Line 414: | Line 610: | ||
====Saffron City Dojo==== | ====Saffron City Dojo==== | ||
{{Main|Fighting Dojo}} | {{Main|Fighting Dojo}} | ||
The Trainers of this Gym specialize in {{type|Fighting}} Pokémon. It used to be an official Gym until [[Sabrina]] defeated its Leader, [[ | The Trainers of this Gym specialize in {{type|Fighting}} Pokémon. It used to be an official Gym until [[Sabrina]] defeated its Leader, [[Koichi]]. After the player defeats the Dojo's Karate Master Koichi, he will give the player either {{p|Hitmonlee}} or {{p|Hitmonchan}} as a reward. | ||
====Prestige Precept center==== | ====Prestige Precept center==== | ||
| Line 423: | Line 619: | ||
{{main|Kantonian Gym}} | {{main|Kantonian Gym}} | ||
In [[Pokémon Ultra Sun and Ultra Moon]], there is an unofficial Gym in [[Malie City]] modeled after the [[Vermilion Gym]] from Kanto. The Leader of this Gym will give the [[Surge Badge]] after the player defeats him for the first time. | In [[Pokémon Ultra Sun and Ultra Moon]], there is an unofficial Gym in [[Malie City]] modeled after the [[Vermilion Gym]] from Kanto. The Leader of this Gym will give the [[Surge Badge]] after the player defeats him for the first time. | ||
==Artwork== | |||
{| style="margin:auto; text-align:center; {{roundy|20px}} border:2px solid #{{grass color dark}}; background:#{{grass color}}; font-size:80%" | |||
|style="{{roundy|5px}} border:2px solid #{{grass color dark}}; background:#{{grass color light}}"| [[File:Gym LGPE Concept Art.jpg|x250px]] | |||
|style="{{roundy|5px}} border:2px solid #{{grass color dark}}; background:#{{grass color light}}"| [[File:Gym SwSh Concept Art.jpg|x250px]] | |||
|- | |||
|Concept art of a Kanto Gym from the<br>{{color2|000|Pokémon: Let's Go, Pikachu! & Pokémon: Let's Go, Eevee! Super Music Collection|Let's Go, Pikachu and Eevee! Super Music Collection}} | |||
|Concept art of a Gym battle in {{color2|000|Pokémon Sword and Shield}} drawn by {{color2|000|James Turner}}<ref>[https://james-turner-42.squarespace.com/pokemon/ Pokémon — James Turner]</ref> | |||
|} | |||
==In Pokémon GO== | ==In Pokémon GO== | ||
| Line 433: | Line 638: | ||
After selecting a team (which can only be done after reaching level 5), a player can battle at Gyms. At Gyms of an opposing team, players can challenge them in order to decrease the motivation of Pokémon in the Gym, causing it to leave if its motivation hits 0. If all of a Gym's Pokémon are removed, the Gym becomes free to be claimed by any team. | After selecting a team (which can only be done after reaching level 5), a player can battle at Gyms. At Gyms of an opposing team, players can challenge them in order to decrease the motivation of Pokémon in the Gym, causing it to leave if its motivation hits 0. If all of a Gym's Pokémon are removed, the Gym becomes free to be claimed by any team. | ||
{{OBP|Raid Battle|GO}}s occur exclusively at Gyms. | |||
{{-}} | {{-}} | ||
==In the anime== | ==In the anime== | ||
In the {{pkmn|anime}}, Trainers challenge Gyms in order to earn Badges, which grant them entry to that region's [[Pokémon League Conference]]. All official Gyms present in the [[core series]] games have been featured in the anime. | In the {{pkmn|anime}}, Trainers challenge Gyms in order to earn Badges, which grant them entry to that region's [[Pokémon League Conference]]. All official Gyms present in the [[core series]] prior to [[Generation VIII]] games have been featured in the anime. | ||
With the exception of the [[Orange Archipelago]], most regions seem to have at least eight Gyms which Trainers can choose to challenge, and winning Badges from any eight qualifies a Trainer for the region's Pokémon League Conference. In [[Unova]], while Ash originally intended to earn the Legend Badge, he ultimately earns the Toxic Badge from the [[Virbank Gym]] as his eighth Badge instead. | With the exception of the [[Orange Archipelago|Orange Islands]], most regions seem to have at least eight Gyms which Trainers can choose to challenge, and winning Badges from any eight qualifies a Trainer for the region's Pokémon League Conference. In [[Unova]], while Ash originally intended to earn the Legend Badge, he ultimately earns the Toxic Badge from the [[Virbank Gym]] as his eighth Badge instead. | ||
Many fellow Trainers that Ash has encountered have been shown to have Badges that do not exist in the games, such as [[Gary Oak]] earning ten Badges in Kanto. Other Badges observed in the anime which do not correspond to known Badges suggest that there are at least nine Gyms in [[Hoenn]], 11 in [[Sinnoh]], 14 in [[Unova]], and 11 in [[Kalos]]. Despite this, Ash's Badge case has frequently had indents specifically shaped for the Badges that appear in the games. | Many fellow Trainers that Ash has encountered have been shown to have Badges that do not exist in the games, such as [[Gary Oak]] earning ten Badges in Kanto. Other Badges observed in the anime which do not correspond to known Badges suggest that there are at least nine Gyms in [[Hoenn]], 11 in [[Sinnoh]], 14 in [[Unova]], and 11 in [[Kalos]]. Despite this, Ash's Badge case has frequently had indents specifically shaped for the Badges that appear in the games. | ||
| Line 446: | Line 651: | ||
In Kalos, due to {{an|Clemont}}'s perception of an ideal challenger of the [[Lumiose Gym]], he programmed the [[Clembot]]—the substitute [[Gym Leader]]—to throw out challengers who did not have four Kalos Gym Badges. As a result, when Ash attempted to challenge the Gym shortly after arriving in the Kalos region, Clembot acted according to its programming and threw him out. After Clemont [[XY009|was able to reprogram the Clembot]], he removed the Badge restriction, but Ash indicated he would still collect four Badges before challenging Clemont himself at the Gym. | In Kalos, due to {{an|Clemont}}'s perception of an ideal challenger of the [[Lumiose Gym]], he programmed the [[Clembot]]—the substitute [[Gym Leader]]—to throw out challengers who did not have four Kalos Gym Badges. As a result, when Ash attempted to challenge the Gym shortly after arriving in the Kalos region, Clembot acted according to its programming and threw him out. After Clemont [[XY009|was able to reprogram the Clembot]], he removed the Badge restriction, but Ash indicated he would still collect four Badges before challenging Clemont himself at the Gym. | ||
In Galar, Stadium battlefields are surrounded by a force field that protects the audience from Pokémon attacks, including the moves of [[Dynamax]] and [[Gigantamax]] Pokémon. | |||
Gyms are inspected by the [[Pokémon Inspection Agency]], which can shut down Gyms which are not up to standard. The Agency can also determine whether unofficial Gyms are worthy of becoming official. | Gyms are inspected by the [[Pokémon Inspection Agency]], which can shut down Gyms which are not up to standard. The Agency can also determine whether unofficial Gyms are worthy of becoming official. | ||
| Line 452: | Line 659: | ||
Most Gym battles are conducted as Single Battles, although some have been held as [[Double Battle]]s. | Most Gym battles are conducted as Single Battles, although some have been held as [[Double Battle]]s. | ||
In most cases, Gym Leaders are not permitted to [[Recall|switch]] Pokémon while challengers are; although those that Ash encountered before [[Blaine]] did switch, since {{Ash}}'s match against Blaine in ''[[EP058|Riddle Me This]]'', only [[Lenora]] has switched out a Pokémon. Challengers are usually only allowed to use the same number of Pokémon as the Gym Leader, but some Gym battles—such as with [[Roxie]] and [[Grant]]—have exceptions. In a Gym battle, a Pokémon is determined | In most cases, Gym Leaders are not permitted to [[Recall|switch]] Pokémon while challengers are; although those that Ash encountered before [[Blaine]] did switch, since {{Ash}}'s match against Blaine in ''[[EP058|Riddle Me This]]'', only [[Lenora]] has switched out a Pokémon. Challengers are usually only allowed to use the same number of Pokémon as the Gym Leader, but some Gym battles—such as with [[Roxie]] and [[Grant]]—have exceptions. In a Gym battle, a Pokémon is determined to be unable to battle when declared as such by a [[battle judge]]. | ||
Gym Leaders appear to be able to impose their own rules, in addition to the standard set of rules for Gym battles. In particular, the [[Orange League|Orange Crew]] all have entire Gym matches devoted to unconventional battling styles. | Gym Leaders appear to be able to impose their own rules, in addition to the standard set of rules for Gym battles. In particular, the [[Orange League|Orange Crew]] all have entire Gym matches devoted to unconventional battling styles. | ||
| Line 459: | Line 666: | ||
* For [[Mossdeep Gym]]'s {{badge|Mind}}, Ash battled [[Tate and Liza]] in a [[Double Battle]]. For [[Anistar Gym]]'s {{badge|Psychic}}, he battled [[Olympia]] in a Double Battle. | * For [[Mossdeep Gym]]'s {{badge|Mind}}, Ash battled [[Tate and Liza]] in a [[Double Battle]]. For [[Anistar Gym]]'s {{badge|Psychic}}, he battled [[Olympia]] in a Double Battle. | ||
* [[Juan]] of [[Sootopolis Gym]] has a unique two round system, with the first round being a Double Battle. Once the challenger wins the first round, they enter the second round, battling against three of his Pokémon in a Single Battle. Only the challenger is allowed to substitute, and can use five Pokémon. | * [[Juan]] of [[Sootopolis Gym]] has a unique two round system, with the first round being a Double Battle. Once the challenger wins the first round, they enter the second round, battling against three of his Pokémon in a Single Battle. Only the challenger is allowed to substitute, and can use five Pokémon. | ||
* When Ash challenged [[Whitney]] of the [[Goldenrod Gym]] in Johto to a rematch, he fought three-on-one in his | * When Ash challenged [[Whitney]] of the [[Goldenrod Gym]] in Johto to a rematch, he fought three-on-one in his favor, with Whitney only using her {{p|Miltank}}. | ||
* For the [[Striaton Gym]]'s {{badge|Trio}}, the challenger can choose which of the three Gym Leaders they want to battle. However, Ash challenged all three triplets, making the battle a best-two-out-of-three tournament, with Ash only earning a Badge after defeating at least two of the Gym Leaders. | * For the [[Striaton Gym]]'s {{badge|Trio}}, the challenger can choose which of the three Gym Leaders they want to battle. However, Ash challenged all three triplets, making the battle a best-two-out-of-three tournament, with Ash only earning a Badge after defeating at least two of the Gym Leaders. | ||
* For the [[Nacrene Gym]]'s {{badge|Basic}}, both the challenger and the Gym Leader use the same number of Pokémon, with both being allowed to make substitutions. | * For the [[Nacrene Gym]]'s {{badge|Basic}}, both the challenger and the Gym Leader use the same number of Pokémon, with both being allowed to make substitutions. | ||
* For the [[Mistralton Gym]]'s {{badge|Jet}}, the challenger and the Gym Leader used to engage in "Air Battles". In these, the Gym Leader first displays her three chosen Pokémon, followed with the challenger revealing their own three, then the Gym Leader decides the outcome of the battle using her own experience without even physically battling. | * For the [[Mistralton Gym]]'s {{badge|Jet}}, the challenger and the Gym Leader used to engage in "Air Battles". In these, the Gym Leader first displays her three chosen Pokémon, followed with the challenger revealing their own three, then the Gym Leader decides the outcome of the battle using her own experience without even physically battling. | ||
* For the [[Virbank Gym]]'s {{badge|Toxic}}, the battle was teams | * For the [[Virbank Gym]]'s {{badge|Toxic}}, the battle was teams of three-on-six in Ash's favor, with only him being allowed to make substitutions. | ||
* For the [[Cyllage Gym]]'s {{badge|Cliff}}, the Gym Leader uses only two Pokémon, while the challenger has access to all of theirs. | * For the [[Cyllage Gym]]'s {{badge|Cliff}}, the Gym Leader uses only two Pokémon, while the challenger has access to all of theirs. | ||
| Line 477: | Line 684: | ||
Some Gyms also require the challenger to undergo a trial or a test before they can battle the Gym Leader. | Some Gyms also require the challenger to undergo a trial or a test before they can battle the Gym Leader. | ||
* The [[Fuchsia Gym]] in Kanto was set up like a ninja house and riddled with traps, | * The [[Fuchsia Gym]] in Kanto was set up like a ninja house and riddled with traps, which the Trainers had to make their way through before they were allowed to challenge the Gym Leader. | ||
* The [[Cinnabar Gym]] (again in Kanto) was hidden, and required challengers to find it by solving the riddles given by the disguised Gym Leader, [[Blaine]]. | * The [[Cinnabar Gym]] (again in Kanto) was hidden, and required challengers to find it by solving the riddles given by the disguised Gym Leader, [[Blaine]]. Despite Ash technically being the challenger, it was [[Misty (anime)|Misty]] who ultimately solved all of the riddles. | ||
* The [[Nacrene Gym]] in Unova could only be accessed if the Trainer picks the right book in an entire library. | * The [[Nacrene Gym]] in Unova could only be accessed if the Trainer picks the single right book in an entire library. To make it easier, [[Lenora]] even reaches up and rests her fingers on the book in question as a hint, though many of her potential opponents fail to take said hint. | ||
* The [[Lumiose Gym]] in Kalos, when under the charge of the [[Clembot]], used to first require Trainers to have four Badges before they could challenge the Gym. | * The [[Lumiose Gym]] in Kalos, when under the charge of the [[Clembot]], used to first require Trainers to have four Badges before they could challenge the Gym. | ||
| Line 486: | Line 693: | ||
The [[Orange Archipelago]] also contains its own league, complete with its own Gyms: | The [[Orange Archipelago]] also contains its own league, complete with its own Gyms: | ||
{| style="float:left; text-align:center; {{roundy|10px}}; border: 4px solid #{{green color light}};" colspan="4" cellspacing="1" cellpadding="2" | {| style="float:left; text-align:center; {{roundy|10px}}; background:#{{green color dark}}; border: 4px solid #{{green color light}};" colspan="4" cellspacing="1" cellpadding="2" | ||
|- | |- | ||
! colspan="4" style="background:#{{Orange color light}}; {{roundytl|10px}}; {{roundytr|10px}};" | Orange Islands | ! colspan="4" style="background:#{{Orange color light}}; {{roundytl|10px}}; {{roundytr|10px}};" | Orange Islands | ||
| Line 492: | Line 699: | ||
! style="background:#{{orange color light}}" | Gym | ! style="background:#{{orange color light}}" | Gym | ||
! style="background:#{{orange color light}}" | Prize | ! style="background:#{{orange color light}}" | Prize | ||
! | ! style="background:#{{orange color light}}" | Challenge | ||
! style="background:#{{orange color light}}" | Leader | ! style="background:#{{orange color light}}" | Leader | ||
|- | |-style="background:#{{water color light}}" | ||
| [[Mikan Gym]] | | [[Mikan Gym]] | ||
| [[File:Coral-Eye Badge.png|20px]]<br><small>{{Badge|Coral-Eye}}</small> | | [[File:Coral-Eye Badge.png|20px]]<br><small>{{Badge|Coral-Eye}}</small> | ||
| | | Target shooting and surfing test | ||
| [[File:CissySmall.png|64px]]<br>[[Cissy]] | | [[File:CissySmall.png|64px]]<br>[[Cissy]] | ||
|- | |-style="background:#{{ground color light}}" | ||
| [[Navel Gym]] | | [[Navel Gym]] | ||
| [[File:Sea Ruby Badge.png|20px]]<br><small>{{Badge|Sea Ruby}}</small> | | [[File:Sea Ruby Badge.png|20px]]<br><small>{{Badge|Sea Ruby}}</small> | ||
| | | Sled race | ||
| [[File:DannySmall.png|64px]]<br>[[Danny]] | | [[File:DannySmall.png|64px]]<br>[[Danny]] | ||
|- | |-style="background:#{{grass color light}}" | ||
| [[Trovita Gym]] | | [[Trovita Gym]] | ||
| [[File:Spike Shell Badge.png|20px]]<br><small>{{Badge|Spike Shell}}</small> | | [[File:Spike Shell Badge.png|20px]]<br><small>{{Badge|Spike Shell}}</small> | ||
| | | Same type opponents | ||
| [[File:RudySmall.png|64px]]<br>[[Rudy]] | | [[File:RudySmall.png|64px]]<br>[[Rudy]] | ||
|- | |-style="background:#{{psychic color light}}" | ||
| [[Kumquat Gym]] | | [[Kumquat Gym]] | ||
| [[File:Jade Star Badge.png|20px]]<br><small>{{Badge|Jade Star}}</small> | | [[File:Jade Star Badge.png|20px]]<br><small>{{Badge|Jade Star}}</small> | ||
| | | [[Double Battle]] | ||
| [[File:LuanaSmall.png|64px]]<br>[[Luana]] | | [[File:LuanaSmall.png|64px]]<br>[[Luana]] | ||
|- | |-style="background:#{{dragon color light}}" | ||
| [[Pummelo Stadium]] | | [[Pummelo Stadium]] | ||
| [[File:WinnerTrophy.png|20px]]<br><small>Winner's Trophy</small> | | [[File:WinnerTrophy.png|20px]]<br><small>Winner's Trophy</small> | ||
| | | [[Full Battle]] | ||
| [[File:DrakeSmall.png|64px]]<br>{{OBP|Drake|Orange League}} | | [[File:DrakeSmall.png|64px]]<br>{{OBP|Drake|Orange League}} | ||
|- | |||
! colspan=4 style="background:#{{Orange color light}}; {{roundybottom|10px}};" height=5px | | |||
|- | |||
|}{{-}} | |}{{-}} | ||
==== | ====Pokémon Origins==== | ||
All eight Kanto Gyms featured in the games {{game|Red and Green|s}} were shown in [[Pokémon Origins]], which primarily showcased {{OBP|Red|Origins}} challenging the [[Pewter Gym]] in ''[[PO01|File 1: Red]]'' and the [[Viridian Gym]] in ''[[PO01|File 3: Giovanni]]''. | All eight Kanto Gyms featured in the games {{game|Red and Green|s}} were shown in [[Pokémon Origins]], which primarily showcased {{OBP|Red|Origins}} challenging the [[Pewter Gym]] in ''[[PO01|File 1: Red]]'' and the [[Viridian Gym]] in ''[[PO01|File 3: Giovanni]]''. | ||
Unlike the main series anime, the Gyms closely follow the system utilised in the games, where the challenger is able to use all Pokémon in their team against the [[Gym Leader]]. Gyms also have scoreboards featuring each Trainer's current Pokémon and their remaining | Unlike the main series anime, the Gyms closely follow the system utilised in the games, where the challenger is able to use all Pokémon in their team against the [[Gym Leader]]. Gyms also have scoreboards featuring each Trainer's current Pokémon and their remaining [[HP]]. Gym Leaders may also hand out a [[TM]] along with their [[Badge]], and are shown to be capable of altering their Pokémon used in battle, with [[Brock]] choosing two out of six potential Pokémon, and [[Giovanni]] using a different set of Pokémon than those used against his battle with {{OBP|Blue|Origins}}. | ||
===Unofficial Gyms=== | ===Unofficial Gyms=== | ||
| Line 531: | Line 741: | ||
====Fighting Spirit Gym==== | ====Fighting Spirit Gym==== | ||
This Gym was run by {{OBP|Anthony|EP029}}, who was training his {{p|Hitmonchan}} for the [[P1 Grand Prix]]. It did not appear to be used for actual [[Pokémon battle]]s. Instead, it had the appearance of a {{wp|gym}} used for training and exercising. | This Gym was run by {{OBP|Anthony|EP029}}, who was training his {{p|Hitmonchan}} for the [[P1 Grand Prix]]. It did not appear to be used for actual [[Pokémon battle]]s. Instead, it had the appearance of a {{wp|gym}} used for training and exercising. This Gym appears in ''[[EP029|The Punchy Pokémon]]''. | ||
====Kaz Gym==== | ====Kaz Gym==== | ||
| Line 548: | Line 758: | ||
====Powerzone Gym==== | ====Powerzone Gym==== | ||
This is an unofficial Gym run by [[Jessie]], [[James]], and {{MTR}} in ''[[DP008|Gymbaliar!]]''. They used the Gym as a method of training and building strategies, | This is an unofficial Gym run by [[Jessie]], [[James]], and {{MTR}} in ''[[DP008|Gymbaliar!]]''. They used the Gym as a method of training and building strategies; however, they were on a losing streak until a [[Brock's Croagunk|wild Croagunk]] appeared and was used as Jessie's powerhouse. | ||
====Kantonian Gym==== | ====Kantonian Gym==== | ||
The [[Kantonian Gym]] from {{g|Ultra Sun and Ultra Moon}} appeared in ''[[SM118|Aiming for the Top Floor!]]'' In the anime, it is run by [[Ryuki]], and is not themed after any Kanto Gym in particular, with its ninja theming being based on assumptions made on Kantonian culture. As a result, there are a few differences between the Kantonian Gym challenge and a typical Gym challenge in the anime. Unlike most Gyms, visitors must face the challenges of the four {{tc|Kantonian Gym|Kantonian Gym Trainers}} before advancing to the Leader. However, these challenges are not [[Pokémon battle]]s, like in the games, but a ninja-themed set of obstacles. | The [[Kantonian Gym]] from {{g|Ultra Sun and Ultra Moon}} appeared in ''[[SM118|Aiming for the Top Floor!]]''. In the anime, it is run by [[Ryuki]], and is not themed after any Kanto Gym in particular, with its ninja theming being based on assumptions made on Kantonian culture. As a result, there are a few differences between the Kantonian Gym challenge and a typical Gym challenge in the anime. Unlike most Gyms, visitors must face the challenges of the four {{tc|Kantonian Gym|Kantonian Gym Trainers}} before advancing to the Leader. However, these challenges are not [[Pokémon battle]]s, like in the games, but a ninja-themed set of obstacles. | ||
====Gallery==== | ====Gallery==== | ||
| Line 566: | Line 776: | ||
==In the manga== | ==In the manga== | ||
===Pokémon Adventures=== | |||
=== | In early chapters of [[Pokémon Adventures]], Gym buildings were likely to be seen only when a character challenged the [[Gym Leader]], as the building would host their Gym battle. | ||
In early chapters of [[Pokémon Adventures]], Gym buildings were likely to be seen only when a character challenged the [[Gym Leader]], as the building would host their Gym battle. | |||
===={{MangaArc|Red, Green & Blue}}==== | |||
{{adv|Red}} challenged some [[Gym Leader]]s in their respective Gyms. | |||
===={{MangaArc|Ruby & Sapphire}}==== | |||
Roxanne's Gym in [[Rustboro City]] appeared to be retractable, the building acting as both an examination hall and a battlefield. | |||
===={{MangaArc|Diamond & Pearl}}==== | |||
The Gyms in this chapter incorporate the interior layout and obstacles directly from the games. | |||
{{adv|Platinum}} challenged and defeated the [[Sinnoh]] [[Gym Leader]]in their respective [[Gym]]s, except she trained with [[Volkner]] and battled him outdoors, earning the {{Badge|Beacon}} without entering the [[Sunyshore Gym]]. The Sunyshore Gym itself was seen in ''[[PS404|Encountering Elekid]]''. | |||
===={{MangaArc|Black & White}}==== | |||
The Gyms in this chapter incorporate the interior layout and obstacles directly from the games. | |||
{{adv|Black}} challenged the [[Unova]] Gym Leaders, visiting seven of the eight Gyms. | |||
===={{MangaArc|X & Y}}==== | |||
Only the [[Santalune Gym]] and [[Lumiose Gym]] appeared in this chapter. {{adv|X}} had an unofficial battle with [[Viola]] at her Gym and won. | |||
===={{MangaArc|Sword & Shield}}==== | |||
The Gyms with version-exclusive Gym Leaders are shown to take turns in switching between their two types and Leaders. | |||
The Gyms | The eight Gyms of [[Galar]] appeared in this chapter, though {{Henry}} was only able to challenge six of them before the [[Galar League|Gym Challenge]] was put on hold due to the impending threat of the [[Darkest Day]]. | ||
===Pokémon Diamond and Pearl Adventure!=== | |||
[[Hareta]] visited some of Sinnoh's Gyms in [[Pokémon Diamond and Pearl Adventure!]], though he earned most of their Badges either outside of them or off-panel, and visited three of the Gyms only in a quick montage. The only Gym to receive major focus in the manga was the [[Canalave Gym]]. | |||
===Pokémon Zensho=== | |||
Seven of the eight Kanto Gyms appeared in [[Pokémon Zensho]], six of which were visited by {{Zensho|Satoshi}}. Of the Gym Leaders whom he didn't meet at their respective Gyms, he battled [[Koga]] at the {{safari|Kanto}} and received [[Sabrina]]'s Badge after saving her {{p|Lapras}} from [[Team Rocket]]. | |||
==In the TCG== | ==In the TCG== | ||
| Line 608: | Line 844: | ||
* For ''[[DP008|Gymbaliar!]]'', [[Professor Oak's Big Pokémon Encyclopedia]] is about Gyms. He writes this {{wp|senryū}} about them: 「かてるまで なんどもちょうせん ポケモンジム」 ''"Until you win, battle again and again; that is a Pokémon Gym."'' | * For ''[[DP008|Gymbaliar!]]'', [[Professor Oak's Big Pokémon Encyclopedia]] is about Gyms. He writes this {{wp|senryū}} about them: 「かてるまで なんどもちょうせん ポケモンジム」 ''"Until you win, battle again and again; that is a Pokémon Gym."'' | ||
** This is also the episode {{TRT}} set up a fake Gym, with [[Jessie]] acting as its Leader. | ** This is also the episode {{TRT}} set up a fake Gym, with [[Jessie]] acting as its Leader. | ||
* In [[Generation I]], {{DL|List of glitches | * In [[Generation I]], {{DL|List of glitches (Generation I)|fishing in statues|a glitch}} allows Trainers to [[fishing|fish]] in the statues at the front of the Gyms. | ||
* As the [[Fighting Dojo]] in Kanto was once official, every region except [[Unova]] has had a {{type|Fighting}} Gym at one time. | * As the [[Fighting Dojo]] in Kanto was once official, every region except [[Unova]] has had a {{type|Fighting}} Gym at one time. | ||
** Despite the above fact, there has been a Fighting-type specialist in every region, either as a Gym Leader or an Elite Four member. | ** Despite the above fact, there has been a Fighting-type specialist in every region, either as a Gym Leader or an Elite Four member. | ||
** A {{pkmn|Trainer}} in the [[ | ** A {{pkmn|Trainer}} in the [[Olivine Lighthouse]] also says Jasmine used to specialize in {{type|Rock}} Pokémon, meaning every region except [[Unova]] has had a {{type|Rock}} Gym at one time. | ||
* In {{game|HeartGold and SoulSilver|s}}, each Gym's frame is colored according to the type, except for the [[Viridian Gym]], which has no specialist type. The Viridian Gym's frame is green. | *** This excludes [[Alola]], which does not feature any official gyms | ||
* In {{game|HeartGold and SoulSilver|s}}, each Gym's frame is colored according to the type, except for the [[Viridian Gym]], which has no specialist type. The Viridian Gym's frame is green to reflect the Japanese name of its Gym Leader, {{ga|Blue}}. | |||
* In {{game|HeartGold and SoulSilver|s}}, [[walking Pokémon]] are not allowed in the [[Blackthorn Gym]] and [[Viridian Gym]] because the flooring is unstable. Coincidentally, both Gyms are the last of the Gyms challenged in Johto and Kanto, respectively. | * In {{game|HeartGold and SoulSilver|s}}, [[walking Pokémon]] are not allowed in the [[Blackthorn Gym]] and [[Viridian Gym]] because the flooring is unstable. Coincidentally, both Gyms are the last of the Gyms challenged in Johto and Kanto, respectively. | ||
* Eight of the eleven Unova Gyms serve dual purposes, both as a place of battle and as a service: [[Striaton Gym]] is a restaurant, [[Nacrene Gym]] is a museum and library, [[Castelia Gym]] is a gallery showcasing the paintings of [[Gym Leader]] [[Burgh]], [[Nimbasa Gym]] is a set of roller coasters to go with the Ferris Wheel in [[Nimbasa City]] in {{game|Black and White|s}} or a fashion show catwalk in [[Pokémon Black and White Versions 2|Pokémon Black 2 and White 2]], [[Driftveil Gym]] is a mining operation, [[Mistralton Gym]] is an airplane hangar, [[Aspertia Gym]] is a school, and [[Virbank Gym]] is a music club. | * Eight of the eleven Unova Gyms serve dual purposes, both as a place of battle and as a service: [[Striaton Gym]] is a restaurant, [[Nacrene Gym]] is a museum and library, [[Castelia Gym]] is a gallery showcasing the paintings of [[Gym Leader]] [[Burgh]], [[Nimbasa Gym]] is a set of roller coasters to go with the Ferris Wheel in [[Nimbasa City]] in {{game|Black and White|s}} or a fashion show catwalk in [[Pokémon Black and White Versions 2|Pokémon Black 2 and White 2]], [[Driftveil Gym]] is a mining operation, [[Mistralton Gym]] is an airplane hangar, [[Aspertia Gym]] is a school, and [[Virbank Gym]] is a music club. | ||
** In Generations V and VI, Gyms do not take on a single appearance, with their look being customized to suit the Gym Leader's specialist type. Gyms previously only had unique designs in Generation II, where the roof colors differed between Gyms. | ** In Generations V and VI, Gyms do not take on a single appearance, with their look being customized to suit the Gym Leader's specialist type. Gyms previously only had unique designs in Generation II, where the roof colors differed between Gyms. | ||
* In Pokémon Black 2 and White 2, every Gym has, with the exception of [[Aspertia Gym]], a unique remix of the usual Pokémon Gym theme music. | * In Pokémon Black 2 and White 2, every Gym has, with the exception of [[Aspertia Gym]], a unique remix of the usual Pokémon Gym theme music. | ||
* | * Alola is the only region introduced in the core series to not feature any Gyms. A similar role is fulfilled by the [[island challenge]]. | ||
==In other languages== | ==In other languages== | ||
{{langtable|color={{arceus color light}}|bordercolor={{arceus color}} | {{langtable|color={{arceus color light}}|bordercolor={{arceus color}} | ||
|zh_yue=道館 ''Dougún''{{tt|*|Games, later anime, DPA}}<br>練功場 ''Lihngūngchèuhng''{{tt|*|Adventures}}<br>體育館 ''Táiyuhkgún''{{tt|*|Early anime}}<br>競技場 ''Gihnggeihchèuhng''{{tt|*|Electric Tales of Pikachu}} | |zh_yue=道館 ''Dougún''{{tt|*|Games, later anime, DPA}}<br>練功場 ''Lihngūngchèuhng''{{tt|*|Adventures}}<br>體育館 ''Táiyuhkgún''{{tt|*|Early anime}}<br>競技場 ''Gihnggeihchèuhng''{{tt|*|Electric Tales of Pikachu}} | ||
|zh_cmn=道館 / 道馆 ''Dàoguǎn''{{tt|*|Games, Anime, Adventures (later Jilin editions)}}<br>練功場 ''Liàngōngcháng''{{tt|*|Adventures (Ching Win edition)}}<br>訓練館 / 训练馆 '' | |zh_cmn=道館 / 道馆 ''Dàoguǎn''{{tt|*|Games, Anime, Adventures (later Jilin editions)}}<br>練功場 ''Liàngōngcháng''{{tt|*|Adventures (Ching Win edition)}}<br>訓練館 / 训练馆 ''Xùnliànguǎn''{{tt|*|Adventures (early Jilin editions)}} | ||
|da=Styrkecenter (original series and ''Advanced Generation'' series)<br>Sal (''Diamond & Pearl'' series onwards) | |da=Styrkecenter (original series and ''Advanced Generation'' series)<br>Sal (''Diamond & Pearl'' series onwards) | ||
|nl=Sportschool | |nl=Sportschool | ||
| Line 633: | Line 869: | ||
|it=Palestra | |it=Palestra | ||
|ko=체육관 ''Cheyukgwan'' | |ko=체육관 ''Cheyukgwan'' | ||
|no= | |no=Treninsssenter{{tt|*|Prior to Battle Frontier}}<br>Gym | ||
|pl=Sala{{tt|*|EP051-EP059, EP064, EP103, EP109-EP111, EP135-EP144, EP151, EP182-EP185, EP199-EP200, EP224, | |pl=Sala{{tt|*|EP051-EP059, EP064, EP103, EP109-EP111, EP135-EP144, EP151, EP182-EP185, EP199-EP200, EP224, EP251-EP273, AG005-AG014, DP054-DP066, DP081-present}}<br>Sala Treningowa{{tt|*|Diamond and Pearl, DP066-DP075, DP107}}<br>Stadion{{tt|*|EP014, EP025, EP042-EP044, EP058-EP063, EP073, EP085-EP101, EP108, EP117-EP132, EP145-EP147, EP158-EP181, EP186-EP192, EP208-EP209, EP227-EP247, EP273, AG002-AG004, AG015-AG040}}<br>Klub{{tt|*|M03, Mewtwo Returns}}<br>Szkoła{{tt|*|EP007, EP021, EP026, EP032-EP042}}<br>Sala Gimnastyczna{{tt|*|EP007, EP029}} | ||
|pt_br=Ginásio<br>Academia (The Official Pokémon Handbook) | |pt_br=Ginásio<br>Academia (The Official Pokémon Handbook) | ||
|pt_eu=Ginásio | |pt_eu=Ginásio | ||
|ro=Arenă | |ro=Arenă | ||
|ru=Гим ''Gim''<br>Зал ''Zal''<br>Спортзал ''Sportzal'' | |ru=Стадион ''Stadion''<br>Гим ''Gim''<br>Зал ''Zal''<br>Спортзал ''Sportzal'' | ||
|es=Gimnasio | |es=Gimnasio | ||
|sv=Gym | |sv=Gym | ||
| Line 649: | Line 885: | ||
* {{cat|Episodes with Gym battles}} | * {{cat|Episodes with Gym battles}} | ||
* [[Island challenge]] | * [[Island challenge]] | ||
==References== | |||
<references/> | |||
{{League}}<br> | {{League}}<br> | ||
Latest revision as of 00:26, 20 November 2023
A Gym (Japanese: ジム Gym) (short for Pokémon Gym) is a place where Pokémon Trainers go to train their Pokémon. Just like real-life gymnasiums, where one can go to work out and build physical strength, Pokémon Gyms are places where Trainers can go to sharpen their battling skills and where their Pokémon can go to gain experience.

Often specializing in a particular type, Gyms create an environment which allows Trainers to test both their skills and Pokémon against those of others. The most powerful Trainer in a given Gym is called the Gym Leader, who is revered by both the lower-ranking members of the Gym and local fans. Usually, Gyms are designed to follow and suit the type that the Gym specializes in, such as Wattson's Gym that has electric gates to indicate that it is Electric. However, there are also Gyms that do not practice this, such as Viridian Gym or Cinnabar Gym.
Official Gyms are certified by a Pokémon League, and at least eight official Gym Badges are requested before taking the Pokémon League challenge. Gyms are vital to a Pokémon Trainer's journey; they may have to travel far and wide, as there can only be one Gym per city. There are also unofficial Gyms that are not certified, many of which are prestigious nonetheless. Currently, Alola is the only region with no Gyms or Gym Leader; instead, a ceremony known as the island challenge takes its place.
In core series games
Official Gyms
Most official Gyms feature a number of Trainers that the player may face before battling the Gym Leader. Their teams typically consist of the same type of Pokémon that the Gym Leader has. These Trainers cannot be battled after the Gym Leader has been defeated, with the exception of those found in Driftveil GymB2W2.
The Gym guide routinely stands at the entrance of the Gym, giving the player advice about the type advantages corresponding to the signature type of the Gym Leader.
There are generally eight known official Gyms in core series regions that include Gyms. In Galar, Gym Leaders typically are fought in Stadiums that welcome spectators and facilitate the use of Dynamax through a Power Spot.
Kanto
| Order | Gym | Badge | Type | Leader |
|---|---|---|---|---|
| 1 | Pewter Gym | Boulder Badge |
Rock |  Brock |
| 2 | Cerulean Gym | Cascade Badge |
Water |  Misty |
| 3 | Vermilion Gym | Thunder Badge |
Electric |  Lt. Surge |
| 4 | Celadon Gym | Rainbow Badge |
Grass |  Erika |
| 5 | Fuchsia Gym | Soul Badge |
Poison |  Koga (Gen. I/III/VII) |
 Janine (Gen. II/IV) | ||||
| 6 | Saffron Gym | Marsh Badge |
Psychic |  Sabrina |
| 7 | Cinnabar Gym | Volcano Badge |
Fire |  Blaine |
| 8 | Viridian Gym | Earth Badge |
Ground |  Giovanni (Gen. I/III/VII) |
| Various |  Blue (Gen. II/IV/VII) |
Johto
| Order | Gym | Badge | Type | Leader |
|---|---|---|---|---|
| 1 | Violet Gym | Zephyr Badge |
Flying |  Falkner |
| 2 | Azalea Gym | Hive Badge |
Bug |  Bugsy |
| 3 | Goldenrod Gym | Plain Badge |
Normal |  Whitney |
| 4 | Ecruteak Gym | Fog Badge |
Ghost |  Morty |
| 5 | Cianwood Gym | Storm Badge |
Fighting |  Chuck |
| 6 | Olivine Gym | Mineral Badge |
Steel |  Jasmine |
| 7 | Mahogany Gym | Glacier Badge |
Ice |  Pryce |
| 8 | Blackthorn Gym | Rising Badge |
Dragon |  Clair |
Hoenn


Sinnoh
| Order | Gym | Badge | Type | Leader |
|---|---|---|---|---|
| 1 | Oreburgh Gym | Coal Badge |
Rock |  Roark |
| 2 | Eterna Gym | Forest Badge |
Grass |  Gardenia |
| 3DPBDSP 4Pt |
Veilstone Gym | Cobble Badge |
Fighting |  Maylene |
| 4DPBDSP 5Pt |
Pastoria Gym | Fen Badge |
Water |  Crasher Wake |
| 5DPBDSP 3Pt |
Hearthome Gym | Relic Badge |
Ghost |  Fantina |
| 6 | Canalave Gym | Mine Badge |
Steel |  Byron |
| 7 | Snowpoint Gym | Icicle Badge |
Ice |  Candice |
| 8 | Sunyshore Gym | Beacon Badge |
Electric |  Volkner |
Unova
| Order (BW) |
Order (B2W2) |
Gym | Badge | Type | Leader |
|---|---|---|---|---|---|
1 |
N/A | Striaton Gym | Trio Badge |
Grass |  Cilan |
1 |
N/A | Fire |  Chili | ||
1 |
N/A | Water |  Cress | ||
| 2 | N/A | Nacrene Gym | Basic Badge |
Normal |  Lenora |
| N/A | 1 | Aspertia Gym |  Cheren | ||
| N/A | 2 | Virbank Gym | Toxic Badge |
Poison |  Roxie |
| 3 | Castelia Gym | Insect Badge |
Bug |  Burgh | |
| 4 | Nimbasa Gym | Bolt Badge |
Electric |  Elesa | |
| 5 | Driftveil Gym | Quake Badge |
Ground |  Clay | |
| 6 | Mistralton Gym | Jet Badge |
Flying |  Skyla | |
| 7 | N/A | Icirrus Gym | Freeze Badge |
Ice |  Brycen |
| 8B | 7 | Opelucid Gym | Legend Badge |
Dragon |  Drayden |
| 8W | N/A |  Iris | |||
| N/A | 8 | Humilau Gym | Wave Badge |
Water |  Marlon |
Kalos
| Order | Gym | Badge | Type | Leader |
|---|---|---|---|---|
| 1 | Santalune Gym | Bug Badge |
Bug |  Viola |
| 2 | Cyllage Gym | Cliff Badge |
Rock |  Grant |
| 3 | Shalour Gym | Rumble Badge |
Fighting |  Korrina |
| 4 | Coumarine Gym | Plant Badge |
Grass |  Ramos |
| 5 | Lumiose Gym | Voltage Badge |
Electric |  Clemont |
| 6 | Laverre Gym | Fairy Badge |
Fairy |  Valerie |
| 7 | Anistar Gym | Psychic Badge |
Psychic |  Olympia |
| 8 | Snowbelle Gym | Iceberg Badge |
Ice |  Wulfric |
Galar
| Order | Gym | Badge | Type | Leader |
|---|---|---|---|---|
| 1 | Turffield Stadium |
Grass Badge |
Grass |  Milo |
| 2 | Hulbury Stadium |
Water Badge |
Water |  Nessa |
| 3 | Motostoke Stadium |
Fire Badge |
Fire |  Kabu |
| 4Sw | Stow-on-Side Stadium |
Fighting Badge |
Fighting |  Bea |
| 4Sh | Stow-on-Side Stadium |
Ghost Badge |
Ghost |  Allister |
| 5 | Ballonlea Stadium |
Fairy Badge |
Fairy |  Opal (initial) |
 Bede (successor) | ||||
| 6Sw | Circhester Stadium |
Rock Badge |
Rock |  Gordie |
| 6Sh | Circhester Stadium |
Ice Badge |
Ice |  Melony |
| 7 | Spikemuth Gym |
Dark Badge |
Dark |  Piers (initial) |
 Marnie (successor) | ||||
| 8 | Hammerlocke Stadium |
Dragon Badge |
Dragon |  Raihan |
Paldea
| Order | Gym | Badge | Type | Leader |
|---|---|---|---|---|
| 1 | Cortondo Gym |  Bug Badge |
Bug |  Katy |
| 2 | Artazon Gym |  Grass Badge |
Grass |  Brassius |
| 3 | Levincia Gym |  Electric Badge |
Electric |  Iono |
| 4 | Cascarrafa Gym |  Water Badge |
Water |  Kofu |
| 5 | Medali Gym |  Normal Badge |
Normal |  Larry |
| 6 | Montenevera Gym |  Ghost Badge |
Ghost |  Ryme |
| 7 | Alfornada Gym |  Psychic Badge |
Psychic |  Tulip |
| 8 | Glaseado Gym |  Ice Badge |
Ice |  Grusha |
Gallery

|
This section is incomplete. Please feel free to edit this section to add missing information and complete it. Reason: HGSS pictures different colors, Generation VI pictures |
Generations II, V, VI, and VIII have a unique design for each Gym (except Cinnabar Gym, which is destroyed). However, in Generation II, the only difference is the shape and color of the roof, with the exception of Saffron and Cerulean Gyms. In Generation VIII, the only differences are the color scheme and the type logo above the entrance, with the exceptions of Motostoke Stadium, Spikemuth Gym, and Hammerlocke Stadium.

Generation I
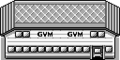
Generation I

Generation III (Hoenn)
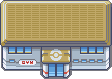
Generation III (Kanto)
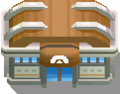
Generation IV (Sinnoh)

Generation IV (Johto)

Generation IV (Kanto)


Generation II


Generation V


Generation VIII


Generation IX


Unofficial Gyms
Saffron City Dojo
- Main article: Fighting Dojo
The Trainers of this Gym specialize in Fighting-type Pokémon. It used to be an official Gym until Sabrina defeated its Leader, Koichi. After the player defeats the Dojo's Karate Master Koichi, he will give the player either Hitmonlee or Hitmonchan as a reward.
Prestige Precept center
- Main article: Prestige Precept Center
Also known as the Pre Gym, this unofficial Gym of Phenac City doubles as an academy. In Pokémon Colosseum, its Leader, Justy, will not battle the Trainer until they have at least six Pokémon, and will give away TM27 (Return).
Kantonian Gym
- Main article: Kantonian Gym
In Pokémon Ultra Sun and Ultra Moon, there is an unofficial Gym in Malie City modeled after the Vermilion Gym from Kanto. The Leader of this Gym will give the Surge Badge after the player defeats him for the first time.
Artwork

|

|
| Concept art of a Kanto Gym from the Let's Go, Pikachu and Eevee! Super Music Collection |
Concept art of a Gym battle in Pokémon Sword and Shield drawn by James Turner[1] |
In Pokémon GO
- Main article: Gym (GO)

In Pokémon GO, Gyms are located at various locations in the real world, being depicted as large towers in the Map View.
If a Gym tower is red, yellow, or blue, that Gym is currently controlled by the team of that color; if a Gym tower is white, that Gym is currently not controlled by any team.
After selecting a team (which can only be done after reaching level 5), a player can battle at Gyms. At Gyms of an opposing team, players can challenge them in order to decrease the motivation of Pokémon in the Gym, causing it to leave if its motivation hits 0. If all of a Gym's Pokémon are removed, the Gym becomes free to be claimed by any team.
Raid Battles occur exclusively at Gyms.
In the anime
In the anime, Trainers challenge Gyms in order to earn Badges, which grant them entry to that region's Pokémon League Conference. All official Gyms present in the core series prior to Generation VIII games have been featured in the anime.
With the exception of the Orange Islands, most regions seem to have at least eight Gyms which Trainers can choose to challenge, and winning Badges from any eight qualifies a Trainer for the region's Pokémon League Conference. In Unova, while Ash originally intended to earn the Legend Badge, he ultimately earns the Toxic Badge from the Virbank Gym as his eighth Badge instead.
Many fellow Trainers that Ash has encountered have been shown to have Badges that do not exist in the games, such as Gary Oak earning ten Badges in Kanto. Other Badges observed in the anime which do not correspond to known Badges suggest that there are at least nine Gyms in Hoenn, 11 in Sinnoh, 14 in Unova, and 11 in Kalos. Despite this, Ash's Badge case has frequently had indents specifically shaped for the Badges that appear in the games.
Gyms can be battled in any order, with Ash and his friends seeming to pick out Gyms based on their current location. However, at times, a certain Gym order has been implied in the anime. In the case of Hoenn, Ash originally challenges Norman in There's No Place Like Hoenn, at which time Norman explains to Ash that he must have three Pokémon to challenge the Petalburg Gym officially. Instead, Norman points to Rustboro as the first Gym Ash should face.
In Kalos, due to Clemont's perception of an ideal challenger of the Lumiose Gym, he programmed the Clembot—the substitute Gym Leader—to throw out challengers who did not have four Kalos Gym Badges. As a result, when Ash attempted to challenge the Gym shortly after arriving in the Kalos region, Clembot acted according to its programming and threw him out. After Clemont was able to reprogram the Clembot, he removed the Badge restriction, but Ash indicated he would still collect four Badges before challenging Clemont himself at the Gym.
In Galar, Stadium battlefields are surrounded by a force field that protects the audience from Pokémon attacks, including the moves of Dynamax and Gigantamax Pokémon.
Gyms are inspected by the Pokémon Inspection Agency, which can shut down Gyms which are not up to standard. The Agency can also determine whether unofficial Gyms are worthy of becoming official.
Rules
Most Gym battles are conducted as Single Battles, although some have been held as Double Battles.
In most cases, Gym Leaders are not permitted to switch Pokémon while challengers are; although those that Ash encountered before Blaine did switch, since Ash's match against Blaine in Riddle Me This, only Lenora has switched out a Pokémon. Challengers are usually only allowed to use the same number of Pokémon as the Gym Leader, but some Gym battles—such as with Roxie and Grant—have exceptions. In a Gym battle, a Pokémon is determined to be unable to battle when declared as such by a battle judge.
Gym Leaders appear to be able to impose their own rules, in addition to the standard set of rules for Gym battles. In particular, the Orange Crew all have entire Gym matches devoted to unconventional battling styles.
Special rules
- For Mossdeep Gym's Mind Badge, Ash battled Tate and Liza in a Double Battle. For Anistar Gym's Psychic Badge, he battled Olympia in a Double Battle.
- Juan of Sootopolis Gym has a unique two round system, with the first round being a Double Battle. Once the challenger wins the first round, they enter the second round, battling against three of his Pokémon in a Single Battle. Only the challenger is allowed to substitute, and can use five Pokémon.
- When Ash challenged Whitney of the Goldenrod Gym in Johto to a rematch, he fought three-on-one in his favor, with Whitney only using her Miltank.
- For the Striaton Gym's Trio Badge, the challenger can choose which of the three Gym Leaders they want to battle. However, Ash challenged all three triplets, making the battle a best-two-out-of-three tournament, with Ash only earning a Badge after defeating at least two of the Gym Leaders.
- For the Nacrene Gym's Basic Badge, both the challenger and the Gym Leader use the same number of Pokémon, with both being allowed to make substitutions.
- For the Mistralton Gym's Jet Badge, the challenger and the Gym Leader used to engage in "Air Battles". In these, the Gym Leader first displays her three chosen Pokémon, followed with the challenger revealing their own three, then the Gym Leader decides the outcome of the battle using her own experience without even physically battling.
- For the Virbank Gym's Toxic Badge, the battle was teams of three-on-six in Ash's favor, with only him being allowed to make substitutions.
- For the Cyllage Gym's Cliff Badge, the Gym Leader uses only two Pokémon, while the challenger has access to all of theirs.
Orange League
In the anime-exclusive Orange League, the four Gym Leaders each have their own special requirements challengers must meet in order to gain their Gym Badges.
- For the Coral Eye Badge, the challenger and Gym Leader Cissy go head-to-head in three water-based physical challenges using their Water-type Pokémon.
- For the Sea Ruby Badge, the challenger must complete two of Gym Leader Danny's three challenges, though they were only qualified to do so if they could pass his pre-test, which was to climb a mountain to the peak, where the Gym is located. These challenges are to freeze a geyser with their Pokémon's ice attack, build a bobsled (or toboggan) from said geyser with the help of three of their Pokémon, and compete in a bobsled race down the side of the mountain against Danny.
- For the Spike Shell Badge, Gym Leader Rudy assigns the challenger an attack challenge in which they must use their Pokémon to knock down all the targets on a tricky water course. If they pass this pre-test, they must defeat Rudy in a three-on-three battle, with Pokémon of the same type battling each other.
- For the Jade Star Badge, the challenger must battle Gym Leader Luana in a Double Battle.
Puzzles
Some Gyms also require the challenger to undergo a trial or a test before they can battle the Gym Leader.
- The Fuchsia Gym in Kanto was set up like a ninja house and riddled with traps, which the Trainers had to make their way through before they were allowed to challenge the Gym Leader.
- The Cinnabar Gym (again in Kanto) was hidden, and required challengers to find it by solving the riddles given by the disguised Gym Leader, Blaine. Despite Ash technically being the challenger, it was Misty who ultimately solved all of the riddles.
- The Nacrene Gym in Unova could only be accessed if the Trainer picks the single right book in an entire library. To make it easier, Lenora even reaches up and rests her fingers on the book in question as a hint, though many of her potential opponents fail to take said hint.
- The Lumiose Gym in Kalos, when under the charge of the Clembot, used to first require Trainers to have four Badges before they could challenge the Gym.
Official Gyms
Orange Archipelago
The Orange Archipelago also contains its own league, complete with its own Gyms:
| Orange Islands | |||
|---|---|---|---|
| Gym | Prize | Challenge | Leader |
| Mikan Gym | Coral-Eye Badge |
Target shooting and surfing test |  Cissy |
| Navel Gym | Sea Ruby Badge |
Sled race |  Danny |
| Trovita Gym | Spike Shell Badge |
Same type opponents |  Rudy |
| Kumquat Gym | Jade Star Badge |
Double Battle |  Luana |
| Pummelo Stadium | Winner's Trophy |
Full Battle | Drake |
Pokémon Origins
All eight Kanto Gyms featured in the games Pokémon Red and Green were shown in Pokémon Origins, which primarily showcased Red challenging the Pewter Gym in File 1: Red and the Viridian Gym in File 3: Giovanni.
Unlike the main series anime, the Gyms closely follow the system utilised in the games, where the challenger is able to use all Pokémon in their team against the Gym Leader. Gyms also have scoreboards featuring each Trainer's current Pokémon and their remaining HP. Gym Leaders may also hand out a TM along with their Badge, and are shown to be capable of altering their Pokémon used in battle, with Brock choosing two out of six potential Pokémon, and Giovanni using a different set of Pokémon than those used against his battle with Blue.
Unofficial Gyms
A.J.'s Gym
This Gym is run solely by the Trainer A.J., and is notable for its rigorous training methods. It is unknown what prize if any A.J. gave to any victorious challengers, because he left it to enter the Pokémon League after he defeated 100 challengers in a row using only his Sandshrew. This Gym appears in The Path to the Pokémon League.
Fighting Spirit Gym
This Gym was run by Anthony, who was training his Hitmonchan for the P1 Grand Prix. It did not appear to be used for actual Pokémon battles. Instead, it had the appearance of a gym used for training and exercising. This Gym appears in The Punchy Pokémon.
Kaz Gym
This Gym in Dark City wanted to become an official Gym to earn money, but was rejected by the Pokémon League. It has Pokémon of various types, but its primary Pokémon is an Electabuzz. This Gym appears in Showdown at Dark City and is run by Kaz.
Yas Gym
This Gym in Dark City wanted to become an official Gym to earn money, but was rejected by the Pokémon League. The Gym Trainers specialize in Fighting-type Pokémon but the Gym Leader's Pokémon is a Scyther. This Gym appears in Showdown at Dark City and is run by Yas.
Coastline Gym
This is an unofficial Gym that appeared in Just Add Water. It is located on the outskirts of Blackthorn City. Led by Dorian, the Gym specializes in Water-type Pokémon. Unlike the other Water-type Gyms, Dorian holds his battles underwater.
Although the Gym is unofficial, Dorian is hoping that it will become more popular by word-of-mouth. In fact, after Ash and his friends visited the Gym, they promised they would tell everyone at the Silver Conference about it. However, it hasn't been mentioned since then.
Anthony's Gym
Anthony (not to be confused with the Anthony mentioned above) ran an unofficial Gym purely for bragging rights. His powerful Pelipper and its peculiar move set, including Vine Whip and Flamethrower, were eventually revealed to be a well orchestrated hoax. Anthony admitted that Pelipper carried Pokémon inside its mouth. As a result, Anthony decided to close the Gym and travel with Pelipper. This Gym appears in You Said a Mouthful!.
Powerzone Gym
This is an unofficial Gym run by Jessie, James, and Meowth in Gymbaliar!. They used the Gym as a method of training and building strategies; however, they were on a losing streak until a wild Croagunk appeared and was used as Jessie's powerhouse.
Kantonian Gym
The Kantonian Gym from Pokémon Ultra Sun and Ultra Moon appeared in Aiming for the Top Floor!. In the anime, it is run by Ryuki, and is not themed after any Kanto Gym in particular, with its ninja theming being based on assumptions made on Kantonian culture. As a result, there are a few differences between the Kantonian Gym challenge and a typical Gym challenge in the anime. Unlike most Gyms, visitors must face the challenges of the four Kantonian Gym Trainers before advancing to the Leader. However, these challenges are not Pokémon battles, like in the games, but a ninja-themed set of obstacles.
Gallery
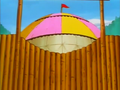
A.J.'s Gym
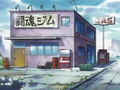
Fighting Spirit Gym
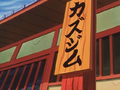
Kaz Gym
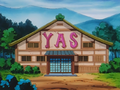
Yas Gym
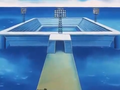
Coastline Gym
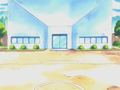
Anthony's Gym
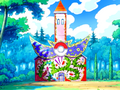
Powerzone Gym
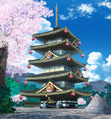
The Kantonian Gym in the anime


In the manga
Pokémon Adventures
In early chapters of Pokémon Adventures, Gym buildings were likely to be seen only when a character challenged the Gym Leader, as the building would host their Gym battle.
Red, Green & Blue arc
Red challenged some Gym Leaders in their respective Gyms.
Ruby & Sapphire arc
Roxanne's Gym in Rustboro City appeared to be retractable, the building acting as both an examination hall and a battlefield.
Diamond & Pearl arc
The Gyms in this chapter incorporate the interior layout and obstacles directly from the games.
Platinum challenged and defeated the Sinnoh Gym Leaderin their respective Gyms, except she trained with Volkner and battled him outdoors, earning the Beacon Badge without entering the Sunyshore Gym. The Sunyshore Gym itself was seen in Encountering Elekid.
Black & White arc
The Gyms in this chapter incorporate the interior layout and obstacles directly from the games.
Black challenged the Unova Gym Leaders, visiting seven of the eight Gyms.
X & Y arc
Only the Santalune Gym and Lumiose Gym appeared in this chapter. X had an unofficial battle with Viola at her Gym and won.
Sword & Shield arc
The Gyms with version-exclusive Gym Leaders are shown to take turns in switching between their two types and Leaders.
The eight Gyms of Galar appeared in this chapter, though Henry was only able to challenge six of them before the Gym Challenge was put on hold due to the impending threat of the Darkest Day.
Pokémon Diamond and Pearl Adventure!
Hareta visited some of Sinnoh's Gyms in Pokémon Diamond and Pearl Adventure!, though he earned most of their Badges either outside of them or off-panel, and visited three of the Gyms only in a quick montage. The only Gym to receive major focus in the manga was the Canalave Gym.
Pokémon Zensho
Seven of the eight Kanto Gyms appeared in Pokémon Zensho, six of which were visited by Satoshi. Of the Gym Leaders whom he didn't meet at their respective Gyms, he battled Koga at the Safari Zone and received Sabrina's Badge after saving her Lapras from Team Rocket.
In the TCG
In the Pokémon Trading Card Game, all Gyms are Stadium cards, which provide a specific effect while they are in play.
Official Gyms
This listing is of cards based on official Gyms from the Pokémon games and often focus on the type speciality of a particular Gym.
Unofficial Gyms
This listing is of cards that feature TCG-exclusive Gyms, which focus on altering a certain gameplay mechanic.
| Related cards Cards listed with a blue background are only legal to use in the current Expanded format. Cards listed with a green background are legal to use in both the current Standard and Expanded formats. | |||||||
|---|---|---|---|---|---|---|---|
| Card | Type | English Expansion |
Rarity | # | Japanese Expansion |
Rarity | # |
| No Removal Gym | T [St] | Gym Heroes | 103/132 | Leaders' Stadium | |||
| The Rocket's Training Gym | T [St] | Gym Heroes | 104/132 | Leaders' Stadium | |||
| Narrow Gym | T [St] | Gym Heroes | 124/132 | Leaders' Stadium | |||
| Chaos Gym | T [St] | Gym Challenge | 102/132 | Leaders' Stadium | |||
| Resistance Gym | T [St] | Gym Challenge | 109/132 | Leaders' Stadium | |||
| Rocket's Minefield Gym | T [St] | Gym Challenge | 119/132 | Challenge from the Darkness | |||
| Ecogym | T [St] | Neo Genesis | 84/111 | Gold, Silver, to a New World... | |||
| Broken Ground Gym | T [St] | Neo Destiny | 84/105 | Darkness, and to Light... | |||
| Rocket's Tricky Gym | T [St] | EX Team Rocket Returns | 90/109 | Rocket Gang Strikes Back | 082/085 | ||
Trivia
- For Gymbaliar!, Professor Oak's Big Pokémon Encyclopedia is about Gyms. He writes this senryū about them: 「かてるまで なんどもちょうせん ポケモンジム」 "Until you win, battle again and again; that is a Pokémon Gym."
- This is also the episode Team Rocket set up a fake Gym, with Jessie acting as its Leader.
- In Generation I, a glitch allows Trainers to fish in the statues at the front of the Gyms.
- As the Fighting Dojo in Kanto was once official, every region except Unova has had a Fighting-type Gym at one time.
- Despite the above fact, there has been a Fighting-type specialist in every region, either as a Gym Leader or an Elite Four member.
- A Trainer in the Olivine Lighthouse also says Jasmine used to specialize in Rock-type Pokémon, meaning every region except Unova has had a Rock-type Gym at one time.
- This excludes Alola, which does not feature any official gyms
- In Pokémon HeartGold and SoulSilver, each Gym's frame is colored according to the type, except for the Viridian Gym, which has no specialist type. The Viridian Gym's frame is green to reflect the Japanese name of its Gym Leader, Blue.
- In Pokémon HeartGold and SoulSilver, walking Pokémon are not allowed in the Blackthorn Gym and Viridian Gym because the flooring is unstable. Coincidentally, both Gyms are the last of the Gyms challenged in Johto and Kanto, respectively.
- Eight of the eleven Unova Gyms serve dual purposes, both as a place of battle and as a service: Striaton Gym is a restaurant, Nacrene Gym is a museum and library, Castelia Gym is a gallery showcasing the paintings of Gym Leader Burgh, Nimbasa Gym is a set of roller coasters to go with the Ferris Wheel in Nimbasa City in Pokémon Black and White or a fashion show catwalk in Pokémon Black 2 and White 2, Driftveil Gym is a mining operation, Mistralton Gym is an airplane hangar, Aspertia Gym is a school, and Virbank Gym is a music club.
- In Generations V and VI, Gyms do not take on a single appearance, with their look being customized to suit the Gym Leader's specialist type. Gyms previously only had unique designs in Generation II, where the roof colors differed between Gyms.
- In Pokémon Black 2 and White 2, every Gym has, with the exception of Aspertia Gym, a unique remix of the usual Pokémon Gym theme music.
- Alola is the only region introduced in the core series to not feature any Gyms. A similar role is fulfilled by the island challenge.
In other languages
| ||||||||||||||||||||||||||||||||||||||||||||||||||||||||||||||||||||||
See also
References

|
The Pokémon League | 
| |
|---|---|---|---|
| Participation Trainer • Battle • Gym Leaders Gyms • Badges • Referee Championship matches Elite Four • Orange League Champion League Pokémon League Conferences Indigo • Silver • Ever Grande • Lily of the Valley Vertress • Lumiose • Manalo |
Regional Pokémon Leagues Indigo • Orange* • Johto • Hoenn • Sinnoh Unova • Kalos • Alola • Galar • Paldea Areas of jurisdiction Pokémon League Reception Gate • Hall of Fame Palace of Victory • Cerulean Cave Others Pokémon Association • PIA World Coronation Series (Masters Eight Tournament) | ||
| This article is part of Project Locations, a Bulbapedia project that aims to write comprehensive articles on every location in the Pokémon world. |