Route 5 connects Paniola Ranch with Brooklet Hill to the southwest, Lush Jungle to the north, and Route 8 to the northwest. A winding route with many branches, it is quite challenging for people traveling on foot.
A colored background means that the Pokémon can be found in this location in the specified game. A white background with a colored letter means that the Pokémon cannot be found here.
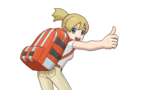
Follow the path to the northwest to meet up with Hau. He seems to have just lost a battle against an angry-looking young man who introduces himself as Gladion. His goal is to make his partner, Null, as strong as it can be, while also doing small jobs for Team Skull. He immediately challenges you to a battle.
After the battle, he talks about not being strong enough when two Team Skull Grunts approach from the north. They taunt Gladion, blaming him for their failure in stealing the Totem Pokémon from Brooklet Hill. One of the Grunts reminds him that he will never really be part of Team Skull, and the pair leaves with Gladion following in silence. Hau gives you three Revives and heads off to continue training for the next trial.
Pokémon Center
For Science
A Scientist can be found near the Café. He is investigating Brooklet Hill and the effects of water quality on Pokémon, and asks that you catch a Feebas from there. Speak with him after registering the fish in the Pokédex to receive a $3,000 reward.
Time for a Trade
A young man named Kihei is standing to the left of the front desk. He is looking for a Lillipup, and is willing to trade his Bounsweet for one. As a Grass-type Pokémon, Bounsweet will be helpful when challenging the next trial. His Pokémon arrives holding a Bright Powder.
Brooklet Hill
Brooklet Hill
Brooklet Hill is the best fishing spot in all of Alola. The cascading waterfalls make the area look like a terrace field.
A colored background means that the Pokémon can be found in this location in the specified game. A white background with a colored letter means that the Pokémon cannot be found here.
Enter the area to meet Captain Lana, who immediately asks for your help. Follow her across the first lake and pick up the Net Ball to the south, near Fisherman Ernest.
At the second lake, Lana directs your attention to some unknown creature splashing furiously. Believing a fearsome Pokémon to be the cause, she asks you to swim out to investigate and registers Lapras Paddle in your Ride Pager. While surfing on Lapras, pressing the B Button results in a speed boost. Grab the X Sp. Atk on the north side of the lake near Backpacker Mikiko before wading out into the water. Investigate the splashing to see the shadows of several fish Pokémon flee the scene; check it again to be attacked by a Wishiwashi. After the battle, Lana is surprised that such a small fish could make such big waves. She then notices another commotion farther ahead, so exit the lake to the southwest. Collect the Revive at the Photo Spot and continue southward as the storm clouds move in.
Sail across the third lake to investigate this latest disturbance. Like the previous encounter, the first interaction scares off most of the fish Pokémon, leaving only a single Wishiwashi to battle. The rainstorm begins in earnest, and Lana still seems unconvinced that the little fish could be behind all of the splashing. She then hears even more frenzied splashing, which sounds "as big as a Wailord", and runs off. Surf to the secluded southeast area to find TM55 (Scald), then follow her to the southwest. She reminds you that the falling rain boosts the power of Water-type moves before running ahead.
Captain Lana's Trial
Step inside the Captain's Gate to enter the Totem's Den and officially begin Lana's trial. She tasks you with defeating the Totem Pokémon and directs you to another disturbance out in the water. She also reminds you that wild Pokémon cannot be caught until the trial is cleared. The Totem's Water-type moves receive a power boost in the rain, but Pokémon with the Cloud Nine Ability, like Psyduck, can cancel such weather effects. Lapras trembles in fear, smaller shadows combine to form a large creature under the waves, and the Totem Pokémon attacks!
VS Totem Wishiwashi
The great fish begins with increased stats in its School Form due to its Schooling Ability, and is surrounded by an aura that further raises its Defense by one stage. With higher stats and a power boost from the rain, Water Gun can deal some serious damage. Totem Wishiwashi may be formidable in its School Form, but when its health falls below 25% it reverts to Solo Form and loses its heightened stats. If Alomomola is present, use weaker moves to chip away at Totem Wishiwashi's health then a stronger attack to knock it out. The Totem Pokémon may survive a strong attack at full health, giving Alomomola a chance to restore its health and its School Form with Heal Pulse. Use Grass- and Electric-type attacks for best results.
After the Totem Pokémon and its allies are defeated, the storm clouds disappear and you return to shore. Lana rewards you with the Waterium Z and teaches you the pose for Hydro Vortex. That's not all, as she also gives you a handmade Fishing Rod and ten Dive Balls. To use the rod, look for piles of rocks under the water and press the A Button to cast the line; press the A Button again when an exclamation point appears. Items may sometimes be reeled in instead of Pokémon. Lana offers to accompany you back to the Pokémon Center on Route 5, and directs you to Kiawe's trial next, in Wela Volcano Park.
Route 5 (South)
Outside the Pokémon Center, Lana reminds you of the pair of Sudowoodo blocking the path south from Paniola Ranch, saying that you should be able to scare them away with your new Waterium Z. Rest at the Pokémon Center if needed, then head southeast to return to the ranch.
Paniola Ranch
Continue south to meet the pair of Sudowoodo blocking the path. They run off without a fight toward the Battle Royal Dome. As thanks for clearing the road, the little boy standing nearby will give you a Mystic Water. Continue south to Route 6.
A colored background means that the Pokémon can be found in this location in the specified game. A white background with a colored letter means that the Pokémon cannot be found here.
Head south to find a Mudsdale and its Trainer, who calls for your help in chasing off two Team Skull Grunts that are harassing a Drifloon. Recognizing you from Melemele Island, the two Grunts prepare for battle. The Trainer introduces herself as Hapu and leaves one opponent to you while she takes on the other.
After defeating them, the Grunts quickly flee after Hapu's threat to let Mudsdale stomp them. She thanks you for your help, and suggests checking out the Battle Royal Dome before setting off with Mudsdale.